


Other Parts Discussed in Thread: UNIFLASH
This FAQ page is intended to serve as a guide for users evaluating and developing AR HUD (Augmented Reality Heads Up Display) solutions.
DLPC120 Automotive Control Program User Guide
Cheetah.dll Issue with DLPC120 Automotive Control Program (ACP):
When you first download the ACP you may get an error about a missing cheetah.dll.
You will need to create a Total Phase Cheetah Account and then go here and download the 32 bit version.
https://www.totalphase.com/products/cheetah-api/

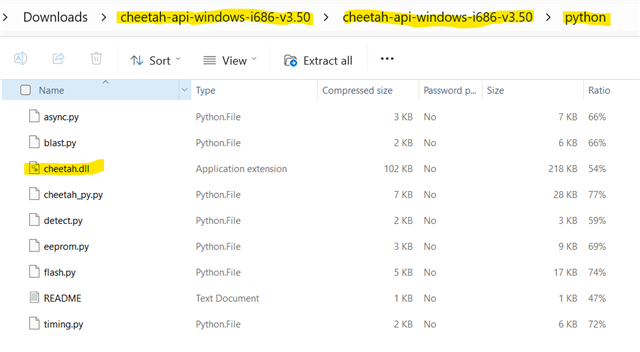
Once downloaded you can find the Cheetah.dll here:
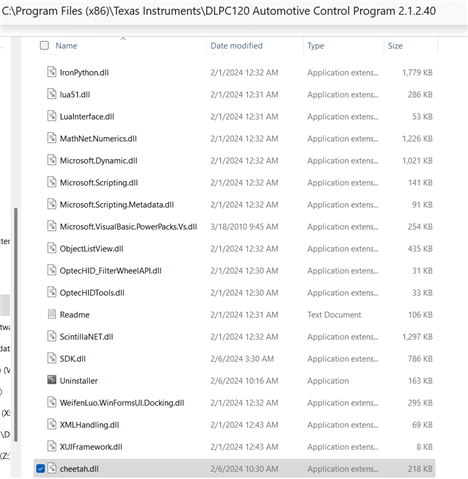
Now copy the Cheetah.dll into the ACP folder and restart ACP.
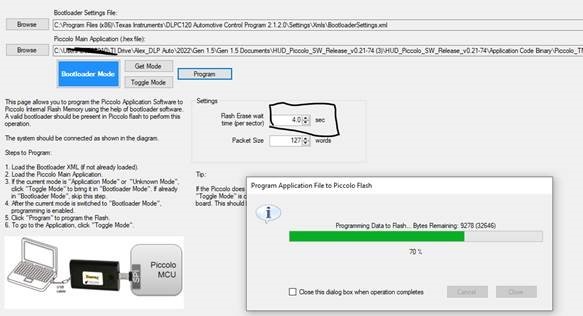
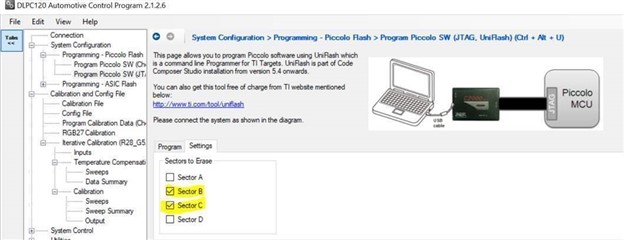
Programming the EVM:
The following video goes over a basic overview of programming both the ASIC flash and the calibration data onto the EVM. Please keep in mind if you are purchasing a complete EVM from TI, you do not need to flash the Piccolo Flash, all new EVMs should already come programmed with the latest Piccolo software. If you are creating a fresh PCB of the EVM, you will need to program the Piccolo Flash which is not discussed in this video.
Programming Main Application Flash Issue:
When programming the main application using Cheetah SPI, there may be a potential for this process to fail.
One issue is that the flash erase wait time per sector may need to be increased. Increasing this time from 2 seconds to a larger value may help resolve this issue.
Another potential work around is using the JTAG to program the main application instead of SPI.
For the .out file, there is one generated for the main application code that will be used instead of the bootloader .out file.

The target config file and uniflash.bat executable files are the same. You only need to change the Piccolo .out file.
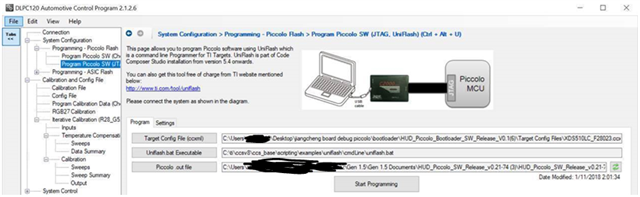
Instead of erasing all the sectors, just erase sectors B and C which contains the application code.
Adjusting the Default Startup Settings:
You can adjust the default brightness of the system in the Automotive Control Program when you load a calibration file and then click Defaults. Make the changes and then save and reprogram.
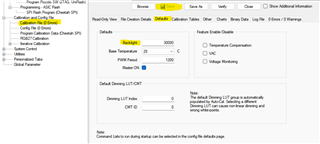
You can adjust startup command lists to run by loading the configuration file and then going to defaults. For example you can pick what splash screen or external video resolution to start up with as well as flipping the image into the correct orientation on startup. Click save and then reprogram.
Calibration:
The following material will provide useful documentation and resources on the subject of the calibration process.
Please see this comprehensive user guide.
DLPU066_Calibration_User_Guide_March2018.pdf
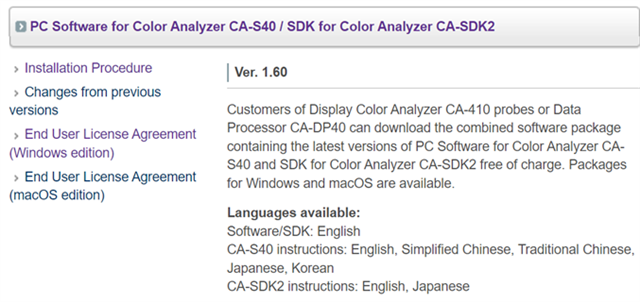
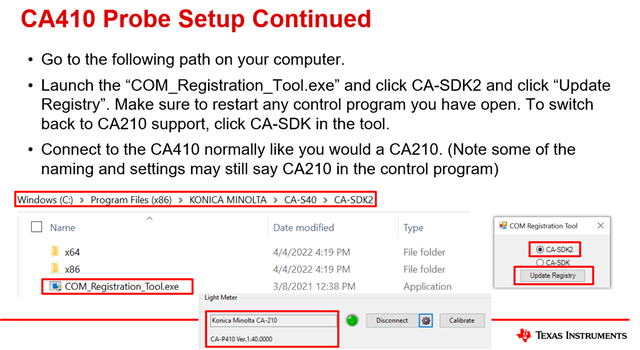
Setting Up CA410 Probe:
The following information will go over supporting the CA410 Probe for calibration. As the CA210 probe was previously used, there are extra steps and new drivers for the CA410 probe.
Please download the following SDK software from the following link. https://www.konicaminolta.com/instruments/download/software/display/index.html
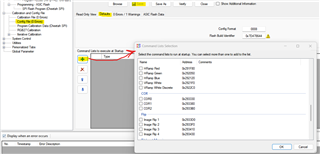
Command Line Interface:
The following PowerPoint will go over steps to run calibration from a command line interface or be called by a script. Please ensure the project and all files are located locally as the command line interface script may have issues accessing files from an external network or drive.
4375.DLPC120 Calibration Command Line Interface Guide.pptx
The user will need the following two additional files to run calibration through the command line interface.
CA210.xml - note that even if a different Konica Minolta color analyzer (e.g. CA-310 or CA-410) is used, the file name must still be "CA210.xml."
<?xml version="1.0" encoding="utf-8" standalone="yes"?>
<AdapterSettings xmlns:xsi="http://www.w3.org/2001/XMLSchema-instance">
  <AdapterName>C:\Users\a0233910\Downloads\CA210.xml</AdapterName>
</AdapterSettings>
Cheetah.xml
<?xml version="1.0" encoding="utf-8" standalone="yes"?>
<AdapterSettings xmlns:xsi="http://www.w3.org/2001/XMLSchema-instance">
  <AdapterName>C:\Users\a0233910\Downloads\Cheetah.xml</AdapterName>
  <Setting>
    <Name>BitRateKHz</Name>
    <Value>100</Value>
  </Setting>
  <Setting>
    <Name>ByteDelayns</Name>
    <Value>1000000</Value>
  </Setting>
  <Setting>
    <Name>Mode</Name>
    <Value>3</Value>
  </Setting>
</AdapterSettings>
