

The DLPDLCR230NPEVM requires the use of a Raspberry Pi to interface with the EVMs onboard controller. The setup process and use of this EVM are very different from how we interact with our newer EVMs. This guide is meant to show a stream -lined list to get your EVM running with more ease.
The required hardware for this tutorial is:
- DLPDLCR230NPEVM
- EVM ribbon cable (included with EVM)
- 5V, 3A Efficiency Level IV barrel power supply
- Raspberry Pi 4B
- USB-C cable
- 5W USB power supply
- MicroSD card
- MicroSD card adapter for PC or PC with SD card slot
- Micro-HDMI-HDMI cable (optional but recommended)
- A mouse (optional but recommended)
- A keyboard (optional but recommended)
- A monitor
- A PC
The required software for this tutorial is:
- Raspberry Pi Imager
- DLPDLCR230NPEVM Raspberry Pi Python support package
- DLPDLCR230NPEVM Firmware
- VNC Viewer
- PuTTY (optional but recommended)
This tutorial will discuss two methods that can be used to set up and interface with your Raspberry Pi as a method of controlling the 230NPEVM called the headed and headless display setups. The headed display uses the monitor, micro-HDMI-HDMI cable, and peripherals. The headless display does not need to work, though it usually the more challenging method. Either process can be used to establish connection with the Raspberry Pi though both methods require the "Flashing the firmware image" and "Controlling the 230NP EVM with the Raspberry Pi" before and after.
Flashing the firmware image
Step 1 Insert your microSD into the PC. Use an adapter if needed.
Step 2 Open Raspberry Pi Imager. Select Raspberry PI OS (32-Bit) in the Choose OS menu. Select your microSD card under Choose Storage. Select the gear icon at the bottom right of the imager. Select "Select hostname," name the Raspberry Pi, and enable SSH.
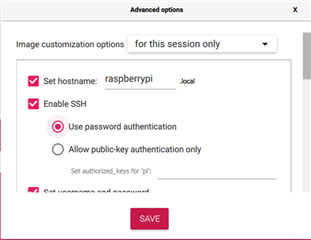
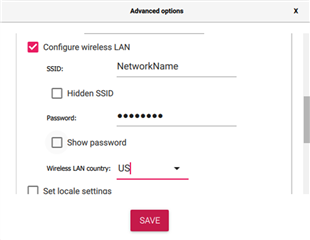
Step 3 Select "Set username and password", and fill out these fields, remembering the information for later steps. Select, "Configure wireless LAN," and enter the intended internet network credentials. Set the wireless LAN country to the code of the country of your use. Select the SAVE button at the bottom.
Step 4 Select Write. Allow the entire process to complete as the imager formats the microSD card. Ensure that the window appears confirming the successful write of the flash image. It is possible for an image to be flashed in part. If a PC is being used that has limited writing capabilities for security reasons, the configuration in the ‘Advanced options’ menu may not have written.
Step 5 Remove the microSD card and place it into the Raspberry Pi. The Pi does not yet need to be connected to the EVM. Connect the Raspberry Pi to the USB power source via the USB-C cable. Allow several minutes for the Pi to complete its initialization process before attempting to connect.
*Skip to "Interfacing with the Raspberry Pi (Headless Setup)" if this is the preferred method. Otherwise continue to "Interfacing with the Raspberry Pi (Headed Setup)."
Interfacing with the Raspberry Pi (Headed Setup)
Step 6 Remove the microSD card and place it into your Raspberry Pi. It does not need to be connected to the EVM yet. Connect the Raspberry Pi to your laptop via USB-C cable and connect it to a monitor via micro HDMI to HDMI cable. Connect a mouse and keyboard.
Step 7 Switch your monitor to the channel that the Raspberry Pi is connected to. There may be a prompt that comes up on your external monitor. Follow these prompts to start setting up the Raspberry Pi. You will set country, wireless username and password, wireless connection to your home network, and an optional update check if this was note done in steps 2 and 3.
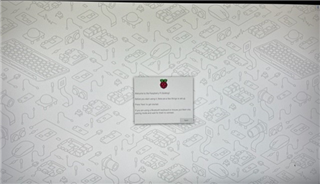
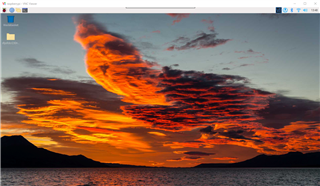
Step 8 Update the Pi if desired or needed. Once the setup is complete, a screen should appear similar to the following:
Step 9 Select the Raspberry Pi icon in the top left-hand corner of the terminal. Select preferences>Raspberry Pi Configuration> interface. Enable the SSH and VNC.
Step 10 Select OK and re-open this menu to ensure that these settings were saved. Select OK. Exit to desktop
Step 11 Hover over the Wi-Fi icon in the upper right-hand corner. A gray box should appear that shows your network information. If this does not appear with your information, check your Wi-Fi settings to connect.
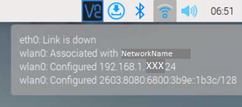
Step 12 Copy the IP address of your Pi. This address will be in the xxx.xxx.x.xxx/xx format seen above. The digits preceding the slash are the IP address. Those following are not of consequence here.
Step 13 Using the PC that flashed the firmware image, open VNC viewer and enter the IP address of the Raspberry Pi. Enter the user name and password set in steps 2 and 3. If this does not work check the following:
- ensure that SSH and VNC are enabled on the Pi
- the PC and Raspberry Pi are on the same network
- ensure that the PC is not using a VPN of any kind
- no error was committed in the process to this point
*Proceed to the section "Controlling the 230NP EVM with the Raspberry Pi" if Step 13 is successfully completed.
Interfacing with the Raspberry Pi (Headless Setup)
Step 6 Open a command prompt to ping the Raspberry Pi. The recommended commands are:
- 'ping -4 raspberrypi'
- This name may change if another option was chosen as the hostname in step 2
- or 'ping {RPI_IP_NUMBER}'
- This would need to be known beforehand
Note: If you are having issues connecting to the Pi, please try the following steps:
- Ensure that the PC attempting to connect to the Pi is on the same network and not using a VPN.
- If access is available to the Wi-Fi network, log into the network administrative control and search for an option for the devices on the router. These are all the devices currently connected to the network. If the Pi is not on this list, it is not properly connected to the network.
- Go back to step 2 to ensure that all credentials are correct.
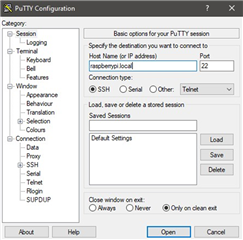
Step 7 Use PuTTY or command line to SSH into the Pi. Fill out the host name or IP address field and be sure the connection type is set to SSH. Then select "Open." There may be a screen asking if you accept the risk of logging into the device. Accept the option to continue.
Step 8 A terminal window should appear. Input the username and password created in step 3. This should appear as:
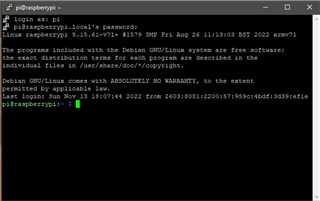
Step 9 Input the command 'sudo raspi-config'. This will allow for you to toggle some setting on the Raspberry Pi. This screen should show up when the previous command is given. Use the arrow keys to highlight Interface Options and select.
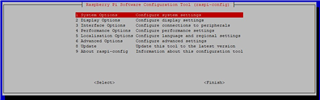
Step 10The below screen should appear. Select VNC, and follow the prompt that come up afterwards. Usually you confirm the change and the device will reset, apply the change, and bring you back to the SSH terminal. Restart the device if it does not do so automatically.
*Proceed to the section "Controlling the 230NP EVM with the Raspberry Pi" if Step 10 is successfully completed.
Controlling the 230NP EVM with the Raspberry Pi
Step 14 Remove the Raspberry Pi from power. Remove the SD card from the Raspberry Pi. Place the SD card into the PC, using an adapter if necessary.
Step 15 Go to the DLP230NP-RPi-PYTHON-AUG19 python support folder downloaded from the 230NPEVM product page. Inside of the python support folder there should is be a config file under the sample-config directory. Copy that file into the boot drive on the microSD to replace the default config.txt file.
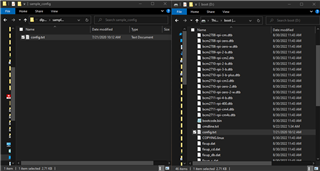
This config.txt file will adjust the video timings for the Raspberry Pi to be set for the EVM. Once this is changed these timings are changed, the Raspberry Pi will not be able to directly interface with a monitor.
Step 16 In the boot drive make another folder like 230NPEVM. Copy both firmware and python support folders into the 230NPEVM folder.

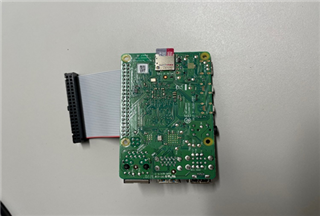
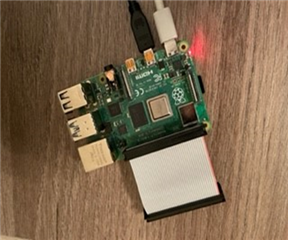
Step 17 Safely eject the microSD card and place back into the Raspberry Pi. Connect the Raspberry Pi to the DLPDLCR230NPEVM. Supply power to the Raspberry Pi. Supply power to the EVM with the barrel jack. The EVM should boot with the DLP black logo and then switch to color bars TPG, depending on the firmware currently flashed onto the EVM.
Step 18 Select the folder icon in the upper left-hand corner of the Raspberry Pi terminal. Inside of the boot folder is where you will find the folder that you made previously. Place these where you would like to make it easier to access and run the python scripts. Placing these on the desktop is recommended for ease of access.
Step 19 Select the terminal icon in the upper left-hand side of the screen. From here you can use basic UNIX commands to navigate between folders. At the start you can usually use 'cd' (change directory) when using the terminal.
Step 20 Navigate to the folder that holds the python scripts. Then try ls. This should output the list of the content in the folder. Try executing a Python script using the “python” command. This would appear as “python sample05__led.py”.
Step 21 This probably failed. Most likely the I2C bus was not set correctly. Check the /dev folder in the File Manager or the terminal. There should be an I2C file with the bus value in the title.
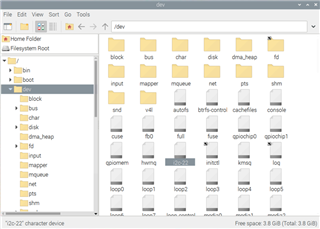
- As an alternative, use an ‘i2cdetect -y {num}’ command on the terminal. In this case, {num} will be the number of the I2C bus. Issue these commands with different numbers until the 1b field is populated. Recommended bus values to try are: 1, 7, and 22.
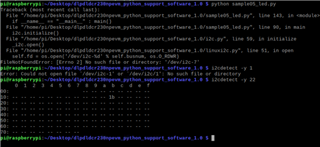
Step 22 Locate the folder with the Python scripts and open i2c.py. Alter the line "DEFAUL_I2C_BUS = {num}” to the number found in step 21. Then save this change.
Step 23 Repeat step 20 to ensure proper setup.
Step 24 Executing python init_parallel_mode.py will cause the EVM to project the Raspberry Pi desktop or command line interface. From this point the EVM can be used as a general use display for the Raspberry Pi.