This thread has been locked.

If you have a related question, please click the "Ask a related question" button in the top right corner. The newly created question will be automatically linked to this question.

DLP3010EVM-LC: DLP3010

Part Number: DLP3010EVM-LC
Other Parts Discussed in Thread: DLP3010, , DLPDLCR3010EVM-G2

In order to connect to DLP3010 via HDMI-HDMI cable, how should the setting of the cable at the PC end be?

i.e. how to project it? Do I Duplicate or extend?

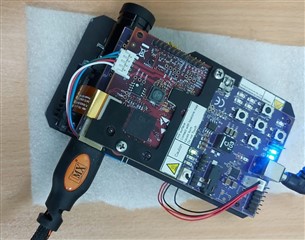
Also when I power on the device and turn the projector on, LED D3, D5 and D6 glow up, but the GUI software does not recognize the device also other LED like D7,8,9,10,11 do not glow up.

Kindly help

  • Hello Sharayu,

    For the display settings on your PC, you can use either Duplicate or Extend as you needed. 

    I have a few questions for you to clarify your questions:

    • Can you please confirm if you are using DLP3010EVM-LC or DLPDLCR3010EVM-G2?
    • Can you see a PC screen projected when you connect the EVM to the PC using the HDMI-HDMI cable?
    • What does the EVM Status show in the GUI, and do you see any error message?

    Regards,

    Lori 

  • Hello,

    I am using DLP3010EVM LC.

    I directly went to project option from bottom tool bar, which had 4 options, two of which were duplicate and extend.

    The error message is displayed.
    Get Video Information Error.
    'Read Operating Mode Select' command execution failed.
    Error details: Please make sure that the system is connected, powered on and the settings are correct.
  • Hi Sharayu,

    Can you try to reflash the EVM with the latest available version 8.0.1 here and check if this will solve your question?

    When you reflash the EVM, use a USB cable to communicate the EVM with the GUI. and it will be better to have the EVM in standby. 

    Regards,

    Lori 

  • Thank you. I will try the same. One more query.

    Can you guide regarding the connections with LED.

    Is it okay if I use a connector which joins all pins?

  • Sharayu, 

    Kindly give us more background behind your query related to the LED connections. Let us know what are you trying to do here?

    Regards,

    Mayank

  • Hello. I upgraded the firmware. The EVM is now recognised in the software. But I am unable to see any projections. In the Test Pattern section of the Display Menu, I selected the Checkerboard pattern with Black and White as Foreground and Background colours respectively. Post which I selected the Set Option and then clicked on Get.

    Are these steps sufficient to display the checkerboard pattern?

  • Just connecting to the projection system. Similar to the image below.

    Is it okay if I use a 6 pin connector to connect the LED PCBs with the cable coupler?

  • Hello Sharayu,

    Is there an issue with the current setup for the LEDs on the EVM?

    What is the reason or need for this that the default won't satisfy?

    Regards,

    John

  • Currently I am trying to project a pattern through the board but am unable to do so. I saw the wiring diagram. So I thought I would clarify.

    Also needed help in knowing what voltage level should be selected for Jumper 11.

    This is point 6 of the DLPU070B document.

    Via the GUI the EVM can be set to Video Display Mode or Light Control Modes. Refer to the GUI user's guide for further description. Note: Install Jumper J11 on the DLP3010 Light Control EVM Main Board to set Trigger IN/OUT voltage on the EVM. This jumper is required to gain access to the trigger signals. The jumper is not included by default.

  • Hello Sharayu,

    For J11, that is a choice that the user makes. If you want the device to project like a second screen then this jumper is not necessary for you. You would only need it for the LC modes. That voltage is dependent on what signal voltage you want to use.

    When you first got the EVM did it turn on and project?

    Regards,

    John

  • Sorry. I did not understand what project like a second screen means. Also kindly let mw know for the following.

    Hello. I upgraded the firmware. The EVM is now recognised in the software. But I am unable to see any projections. In the Test Pattern section of the Display Menu, I selected the Checkerboard pattern with Black and White as Foreground and Background colours respectively. Post which I selected the Set Option and then clicked on Get.

    Are these steps sufficient to display the checkerboard pattern?

  • Hi Sharayu,

    If you want the device to project like a second screen, it likes you use the device as an extended monitor.

    For your question, when you use the default firmware from ti.com, the EVM should project a default splash image when you power up the EVM with an external 19 V power supply and turn on the SW_ONOFF. You should able to project a checkerboard as these steps you mentioned above. In this case, you don't need a HDMI-HDMI cable.

    Have you ever seen the EVM to project when you fist got the EVM?

    Regards,

    Lori