This thread has been locked.

If you have a related question, please click the "Ask a related question" button in the top right corner. The newly created question will be automatically linked to this question.

TPS544B20: Schematics verification

Part Number: TPS544B20
Other Parts Discussed in Thread: PMP10555, PMP20080, TPS544C20

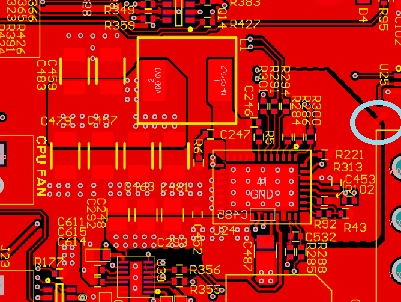
We are using TPS544B20 as regulator for core power (0.9V @ 10A) for our processor. The schematics was referenced from TI Webench online tool. All layout guidelines are followed. The regulator is enabled for sequencing uses CNTL pin of TPS544B20. We are facing issue on power up where we are not seeing the regulator turning ON. We are debugging the issue and want TI experts to check the schematics and indicate any observations. The CNTL is used to enable the regulator and this is connected to 3.3V with 10K as pull-up, which comes first then enables TPS544B20. 

Please check the schematics and let us know your observations.

-Naveen

  • Hi Naveen

        Can you please probe the BP3 and BP6 to check if the internal LDOs are coming up at power on?

    The BP3 pin needs a 100nF minimum cap close to the pin. I see a 2.2uF - can you please confirm that this is close to the IC?

    Can you check the voltage on CNTL pin close to the IC to confirm that device is getting enabled?

    Is this issue happening on one board or all the boards?

    The more scope shots that you can send us, the easy it will be to debug.

    Regards,

    Gerold

  • Gerold,

    Thanks for the reply.

    We checked the voltages at BP3 and BP6, these are 3.2V and 6.2V respectively. The voltage at CNTL pin is 3.3V. We probed at the output for VDD_0V9 for any initial voltage build up and then dropping down, we did not see any activity from input power ON. The TSNS is connected to AGND as per datasheet to disable the external temperature sensing.

    Looks like schematics, components and all voltages are as expected and still the device is not turning ON. We need to start production with this part and need support on this. We are bringing-up the board in our San Jose office. Any local FAE (in CA region) support would be greatly appreciated.

    Thanks,

    Naveen

  •  

    Looking over the design, I don't see anything that would keep the part from attempting to start-up.

    The 600uF of output capacitance is high for the combination of the internal D-CAP2 ramp and the selected 470nH inductor, which could produce a lower cross-over frequency and reduced phase margin, but that should not prevent start-up.

    AGND and PGND should not be connected externally as shown in the schematic above, the only connection between AGND and PGND should be through the AGND to AGNDSNS connection, connecting them externally could create a ground loop that can interfere with the accuracy of the current sense.  That could trigger an OC fault and latch-off fault response, but there would be some activity on the switching node prior to the fault.

    The default PMBus settings for IOUT_OC_FAULT_RESPONSE (Command Code 47h) is for Shut-down and Latch-Off, so if the part is detecting an over-current condition, it could be triggering a shutdown with without restart.  You can check the state of the SMBALERT pin (Pin 6) if the TPS544B20 has detected a fault, it will assert the ALERT pin low.

    If ALERT is pulled low, you can read STATUS_WORD at command code 79h to determine what fault has been detected.

    If ALERT is high and BP3 and BP6 are both regulating, then the next thing I would check would be making sure the CNTRL pin is properly connected.

  • James,

    Thanks for the reply. 

    Using Aardvark I2C adapter, we did read the TPS544B20 registers. Do you suggest us to reduce the capacitance to  300uF or 400uF? The layout snapshot is attached for your reference where we have kelvin connected the AGND and GND at a single point. The layout guidelines were followed as provided in the datasheet. 

    We read back the IOUT_OC_FAULT_RESPONSE register and RS[2:0] reads 000 which means that the device is not starting.

    The STATUS_WORD register is read back and returns 0x80 for higher byte and 0x43 for lower byte. This indicates that there is output voltage fault has occurred.

    When STATUS_VOUT register is read back returns 0x10 which indicates VOUT UV Fault which is output undervoltage fault.

    We need to identify what is causing this undervoltage fault.

    1. Do you see any issue with any capacitor values at output of regulator? Will this cause the voltage to drop and rise it slowly and controller sees this and flags Undervoltage fault?

    2. Are the values of resistors and capacitors connected to BOOT pins correct and fine?

    3. Do we need the snubber circuit connected from BOOT to GND? Reference designs do not have these RC components.

    Command Read back value
    0x1 0x00
    0x2 0x16
    0x3 0xFF
    0x10 0x00
    0x15 0xFF
    0x16 0xFF
    0x19 0xB0
    0x20 0x17
    0x35 0x11 0xF0 (Low byte High byte)
    0x36 0x10 0xF0
    0x39 0x00 0xE0
    0x46 0x34 0xF8
    0x47 0x07 0xD4
    0x4A 0x28 0xF8
    0x4F 0x96 0x00
    0x51 0x7D 0x00
    0x61 0x2B 0xE0
    0x78 0x43
    0x79 0x43 0x80
    0x7A 0x10
    0x7B 0x00
    0x7D 0x00
    0x7E 0x82
    0x80 0x00
    0x8B 0x01 0x00
    0x8C 0x00 0xE0
    0x8E 0xD8 0x07
    0x98 0x11
    0xD0 0x00 0x00
    0xD4 0x00 0x00
    0xD5 0x1E 0x00
    0xD6 0xE2 0xFF
    0xD7 0x00
    0xD8 0x00
    0xE5 0x04 0x00
    0xE7 0x00 0x01
    0xFC 0x43 0x01

    Thanks,

    Naveen

  •  

    The third bullet point in the Layout Guidelines says that the AGND to AGNDSNS connection should be the only connection from AGND to GND.

    The AGNDSNS pin must be kelvin connected to the AGND pin, with a low-noise, low-impedance path to ensure accurate current monitoring. This connection must be made on an internal or bottom layer. It should not segment the thermal tab copper area. This connection serves as the only connection between AGND and GND for this device.

    Since we are not seeing an over-current issue, I doubt that this is the root cause of the problem, but if the layout can be updated before sending this design into production that top layer connection should be removed.

    1. Do you see any issue with any capacitor values at output of regulator? Will this cause the voltage to drop and rise it slowly and controller sees this and flags Undervoltage fault?

    [PJM] It is possible that the loop is not properly stabilized and that the output is responding improperly during power-up, creating an undershoot condition and triggering a UV shutdown.  If that is the case, we should be able to see this on the first power-up.  The output voltage should rise close to the intended output voltage, typically overshooting slightly, then drop back to the regulated voltage as the COMP integrator adjusts the D-CAP2 reference voltage to maintain the target output voltage.

    If the loop's stability is incorrect, the output voltage could drop well below the target and trigger under voltage protection.  This is more common when a large resistor is placed in series with the Ccomp to boost the gain and improve phase margin with larger output capacitors.

    2. Are the values of resistors and capacitors connected to BOOT pins correct and fine?

    [PJM] 2-ohms and 100nF (0.1uF) are common values for the Switch to BOOT values, so they should be fine.

    3. Do we need the snubber circuit connected from BOOT to GND? Reference designs do not have these RC components.

    [PJM] The snubber circuit is from Switch to GND not BOOT to GND.  It may not be necessary, but they are there to dampen the resonance ringing of the parasitic inductance from the input capacitors and the parasitic capacitance at the switching node, which causes the SW net to ring when the high-side FET is turned on.


    The layout snipit that you provided does not show how VOUTS+ and VOUTS- (Remote Sense inputs) connect to the 0.9V output VDDSENSE and VSSSENSE, is this connected locally near the 6x 100uF ceramic capacitors, or remotely somewhere else on the board?

    Are there more output capacitors located at the input to the processor?

    If there are additional output capacitors, especially if there is some additional parasitic routing inductance, the added phase-lag from the additional L-C filter could be compromising the loop stability.  Again, if that is the case, we should see it in the output voltage during start-up.

    One final potential cause.  The TPS544B20 operates with limited on-times of the low-side FET during the first 128 switching cycles, if starting up into a no-load condition, it is possible for the converter to start-up with less than 128 switching pulses, then complete soft-start while still operating with a limited low-side FET on-time.  This leaves the converter waiting for the output voltage to decay at the end of soft-start.  A sudden load, such as the processor trying to start, while in this non-switching state after soft-start has completed can trigger a UVP as the loop is unable to respond to the sudden load increase.  This would also be visible from looking at the output voltage during start-up.


    Can you connect the output voltage to an oscilloscope monitoring VOUT and the FB pin?

    I would recommend setting the trigger on the VOUT rising to 450mV with a Single Trigger and 500us / division horizontal resolution so the 3ms soft-start takes up most of the time scale.  Adjust the VOUT and FB to use the same ground reference 2 divisions below the mid-line.  Set both VOUT and FB for 200mV / division vertical resolution so we can see what is going on.


    if we see a rise to about 0.9V on VOUT and 0.6V on FB followed by a shut-down, we'll want to take a second image triggering at 800mV on VOUT with 50us / division resolution so we can get a clearer view of what is happening at the edge of soft-start as the TPS544B20 transitions from soft-start to regulation.

  • Peter,

    We will probe and provide you updates.

    On the sense lines, The two sense lines (VOUTS+ and VOUTS-) are connected to our processor VDDSENSE and VSSSENSE pins. The lines from the processor to regulator sense pins are routed as differential lines with guard ground around.

    Our processor has additional decoupling capacitors near the processor VDD pins. There are 25nos of 0.1uF and 10 nos of 4.7uF capacitors connected between VDD and GND.

    Thanks,

    Naveen

  • Peter,

    Below are few more observations:
    1. CNTL is at 3.3V on pin 1 of regulator.
    2. Pin 13 AGNDSNS and 38 AGND are kelvin connected in Layer 6 as shown in the attached image.
    3. One thing to point is that the PGND is connected to AGND (which should not be done) in schematics. Does this affect the loop stability and result in regulator not turning ON?
    4. In PMP10555 reference design schematics, page 1 mentions text saying "AGND and GND are internally connected". This statement is not present in datasheet. Are these internally shorted?
    5. We are using TDK SPM6530T-R47M170 inductor with 470nH, Isat - 20.3A, DCR 4.2mOhm, hope this regulator is sufficient for our 10A output requirement.
    6. The switching frequency is set to 750KHz, is this creating any issue during startup?
    7. On the DC resistance measurement done on our silicon, the resistance is 8 Ohm from VDD_CORE to Ground. Does this low resistance cause any problem during startup?

     Thanks,
    Naveen

  • 1. CNTL is at 3.3V on pin 1 of regulator.

    [PJM] Yes, I saw that earlier.  3.3V on CNTL should be sufficient to enable the part.


    2. Pin 13 AGNDSNS and 38 AGND are kelvin connected in Layer 6 as shown in the attached image.

    [PJM] Yes, this is the correct way to connect AGND and AGNDSNS.


    3. One thing to point is that the PGND is connected to AGND (which should not be done) in schematics. Does this affect the loop stability and result in regulator not turning ON?

    [PJM] This external ground connection can create a ground loop.  This typically would not create a loop stability issue that would result in a failure to start, but it could result in inaccurate telemetry measurements due to the current flowing between AGNDSNS and AGND.  If this were causing an issue, I would expect the TPS544B20 to be reporting an over-current fault not an under-voltage fault.

    UVF is disabled during the soft-start process, but enabled once soft-start is complete.  For the TPS544B20 to report an under voltage fault, the 3ms soft-start needs to complete.  We need to know what is happening during those 3ms to help debug the root cause of the issue.


    4. In PMP10555 reference design schematics, page 1 mentions text saying "AGND and GND are internally connected". This statement is not present in datasheet. Are these internally shorted?

    [PJM] AGNDSNS is internally shorted to GND, there is no internal connection between AGND and GND  The TPS544B20 requires an external connection between AGND and AGNDSNS, and the internal short between AGNDSNS and GND should be the only connection between AGND and GND/PGND.


    5. We are using TDK SPM6530T-R47M170 inductor with 470nH, Isat - 20.3A, DCR 4.2mOhm, hope this regulator is sufficient for our 10A output requirement.

    [PJM] that inductor should be sufficient to meet a 10A load requirement, and it should work well with the internal ramp.


    6. The switching frequency is set to 750KHz, is this creating any issue during startup?

    [PJM] I do not believe the 750kHz switching frequency is the root cause of the issue with the start-up.


    7. On the DC resistance measurement done on our silicon, the resistance is 8 Ohm from VDD_CORE to Ground. Does this low resistance cause any problem during startup?

    [PJM] No, I do not think a 8-ohm load resistance from VDD_CORE to GND would be an issue, the TPS544B20 can easily support the 112mA load current created by an 8-ohm load on a 0.9V output.


    You mentioned earlier that the feedback sense is coming from VDDSENSE and VSSSENSE on your processor?  How are VDDSENSE and VSSSENSE connected to the power-path VDD and VSS inside the processor?  Could the sense lines be adding additional delay due to R-C or L-C filtering?  If that is possible, then we can counter that phase lag and improve stability by adding a capacitor from the power path output (VDD_0V9) to the feedback sense (VOUTS+ between the TPS544B20 IC and R285 so that the high-frequency regulation is based on the forward power path but the low frequency DC accuracy path is based on the remote sense from the VDDSENSE pins.

    With a 50-ohm series resistor, a 100nF capacitor from VDD_0V9 to VOUTS+ would create a cross-over frequency of about 32kHz between the local power path sense and the remote feedback from the processor to help stabilize the loop against any phase lag from the remote sense path.

    Alternately, if there is a possibility that the remote sense outputs are not active or connected for some reason, adding a 200-ohm resistor from VDD_0V9 to VOUTS+ to provide a closed feedback loop would be helpful.  When the feedback includes an external component, like the internal sense of the on-die voltage of a processor, or remote sense through a connector, I generally recommend customers design for a local feedback path with higher resistance to prevent the possibility of an open feedback path, which can force an overvoltage condition on the output.

  • Peter,

    Thanks for elaborate reply.

    On the VDDSENSE signal coming from processor, the core supply on the die is tapped on to a pad and is named as VDDSENSE and VSSSENSE (ground). This is the line connected to VOUTS _P/M of regulator and is routed as differential signal. We will try your suggestion on connecting VDD_0V9 to VOUTS+ with resistor.

    Thanks,
    Naveen

  •  

    Thank you for the confirmation.  I suspected that the VDDSENSE / VSSSENSE were likely hardwired on-die voltage sense lines, but it's always good to confirm before making assumptions.

    And I assume that you are running this test with the processor installed, correct?

  • Peter,

    I have confirmation that the sense lines are hardwired from die voltages. I am testing the regulator with processor installed on board.

    -Naveen

  • Peter,

    We probed the output and FB pin as per your instructions and the screen shots are attached. It seems like the voltage is raising to 600mV and then this goes down. Yellow is VOUT and Blue is FB.

     Please check what could be the issue.

    Thanks,

    Naveen

  •  

    At 200mV per division, the FB voltage (Channel 2 in blue) is barely getting over 400mV over the 3ms soft-start time.  The first 1.5ms appears to be following the correct trajectory, there there's a long off-time, and then the pulsing restarts with a lower offset, and then at 3ms when soft-start completes, the FB voltage is too low and it's triggering UV_FAULT.

    This looks like it may be hitting a current limit, and that current limit is limiting the output capacitor charging.

    There also seems to be a lot of "stair-casing" during start-up, which suggests there is too much lag between the inductor delivering energy and the output voltage reflecting that energy on the sensed output voltage, so we are getting "bursting" during start-up.  It might be useful to try adding a 47nF capacitor from the local output at the 6x 100uF output capacitor bank to the VOUTS_P pin at C532 so that the energy at the inductor is immediately reflected on VOUTS_P without having to propagate to the processor and it's sense line, then back to the TPS544B20.

  • Peter,

    We tried multiple experiments to narrow down the issue.

    1. We connected capacitor of value 47nF suggested by you from VDD_0V9 to VOUTS_P, there is no change in output.
    2. We disconnected the output load (processor) and directly wired the VDD_0V9 to VOUTS_P (through 49E9 resistor) and GND side of VDD_0V9 capacitor to VOUTS_N. Still we see the same ramping up and going down as shown in earlier scope screenshot. There seems to be some issue on regulator side.
    3. Will the inductor selected causing any issue? This is the exact same part (SPM6530T-R47M170) which is suggested by Webench tool based on our requirement. The inductor from TDK IHLP2525CZEBR47M01 is present in TI PMP20080 reference board.
    4. The output 100uF (6 nos) capacitors is CL31A107MQHNNNE from Samsung and has same characteristics as GRM32ER60J107ME20L used in TI PMP20080 reference board.
    5. We tried enabling the regulator using I2C/PMBUS after clearing the faults, however this again faults back and does not start up.
    6. Would there be any issue in the manufacturing lot of the regulator?

    Any pointers would be appreciated.

    Thanks,
    Naveen

  •  

    There are 2 elements here that concern me that something is not right with the start-up.

    1) the heavy "stair-casing" of the output voltage during start-up.  This happens when too much energy is delivered to the output, the output voltage overshoots the target, and the converter stops switching while the output voltage decays back to the reference.

    2) The change in the ramp rate of the output voltage after 1.5ms of soft-start time.

    Let's check some things:

    1) Is the SW node Bursting (groups of several On-times separated by about 100ns) or is the output voltage jumping up with a single On-time pulse?

    To check this, trigger on the rising edge of the SW node with a 5us / division time scale to see if we see groups of pulses or just 1 pulse followed by a long off-time?

    Measuring the ON-time of each pulse will also allow us to confirm the programmed switching frequency.

    2) How much ripple is there on VIN during the start-up?

    The TPS544B20 uses the drop from VDD to SW to limit the switch current during the On-time.  If VIN is dropping during the ON time and VDD is not tracking it, it could prematurely triggering shutdown.

    3) Is there leakage from COMP to AGND?

    The TPS544B20 uses a transconductance amplifier.  If there is current leaking out of the COMP net due to board contamination, the DC current out of the COMP pin will create an input offset at the FB pin, which could create a UV fault at start-up.

    4) Is the Inductor really 470nH?

    The energy delivered with each switching cycle depends on the inductor, if it's not a 470nH, that could

    5) Is the MODE pin (39) pulled up to BP3.

    The MODE pin sets the loop, if the MODE pin is pulled to ground, the internal ramp is not added to the feedback and the loop would be unstable the low ESR output capacitors.  That could cause the part to start bursting.

    6) It would also be worth while to cut the trace between the AGND island and GND to make sure we are not seeing a problem with a ground loop induced by connecting GND and AGND.


  • Peter,

    We were able to get the proper output from the regulator after several tryouts and made few modifications.

    The single point connection between the AGND and GND was cut. The sense line are connected to output of regulator capacitors instead of processor (through 10E resistor). This is the combination which worked. However, need to check why the sense lines connected to processor is not functioning as intended. The total trace length of sense lines is approx 80mm. The continuity from processor VDD and VSS to retulator VOUTS_P and VOUTS_N are properly connected.

    Does this long route create any delay causing the regulator internal logic to turn off the output based on delayed sense voltage? Is this related to soft-start time? Is this related to capacitor connected to COMP pin? Currently it is 2.2nF as compared to 10nF suggested in datasheet. Any pointers would be appreciated.

    Thanks,
    Naveen

  •  

    The trace-length of the sense lines is not critical, though transmission line delay through the power-path could be.  Parasitic trace inductance and heavy bypass capacitance at the processing can add delay between the energy delivery at the inductor and the reflection of that energy at the sensed output.  This is what I was attempting to compensate for by connecting the 47nF capacitor from the output voltage at the inductor's output terminal to the sensed VOUTS_P at the IC.  That capacitor, coupled with the 50-ohm impedance of R285 should have cancelled any delay in the power-path by capacitively feedbacking back the output voltage right at the inductor without phase delay, while the DC regulation is maintained by the resistive return path through the on-die sense.

    Prehaps we can measure the inductor to On-die sense delay.

    Set the oscilloscope to trigger on the rising edge of the switching node (SW) with probes on SW and on the output of the on-die voltage measurement from the processor at the VDDSENSE side of R285.  We'll need the oscilloscope's resolution to be pretty high to get a good measurement.  Start with 50ns.

    Measure the time from the rising edge of the SW node to the valley of the output voltage ripple.  That is the power-path delay.  The TPS544B20's COT circuit only forces a minimum 90ns off-time after each ON-time.  If the sensed output voltage is not rising within that time, the TPS544B20 will send another pulse of energy, potentially over-charging the output voltage.  If the delay is too long, the 47nF x 50-Ohm might not be enough to overcome the power-path delay.

  •  

    Have you had any luck measuring the delay from the switching of the inductor to the on-die sense line yet?

    If we know what the delay is, we can size the correct capacitive coupling local to the TPS544C20 output and resistive feedback sense from the on-die sense, so that we can maintain the accuracy, DC regulation, but until we know how much power-path delay we are dealing with, we are just guessing at how much capacitive feedback we need.