A related question is a question created from another question. When the related question is created, it will be automatically linked to the original question.
If you have a related question, please click the "Ask a related question" button in the top right corner. The newly created question will be automatically linked to this question.
[FAQ] SK-TDA4VM: How do I connect the external debugger Blackhawk USB560v2 (XDS560v2) USB System Trace to the JTAG on the board?
As a disclaimer, the following instructions are for debugging the remote cores like the R5, C66, C7x cores running RTOS code, but does not include the A72 running HLOS (Linux):
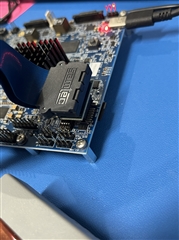
Connect debugger to SK board using adapter that should be included with debugger as shown in following picture:
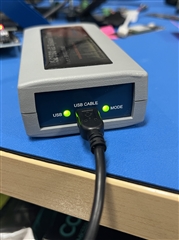
Connect debugger to PC. Ensure green LEDs show up. This may take 1-2 minutes. If no green LEDs show up, then check cable/connection
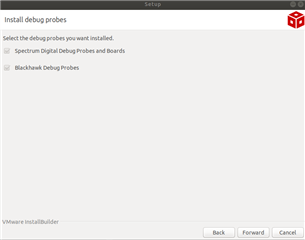
Start up CCS, and if Blackhawk debugger drivers are not installed, go to Help->Install Device Support... which will restart the installer. Go through the installation until the "Install debug probes" screen is reached and check off Blackhawk Debug Probes, and continue forward until installation is finished.
In a Linux terminal, run lsusb with debugger connected, and lsusb without debugger connected. If no debugger is detected (ie, no changes in lsusb output with/without debugger), manually run driver installer in <ccs1040 installation directory>/ccs/install_scripts/install_drivers.sh. Restart computer if the script was ran.
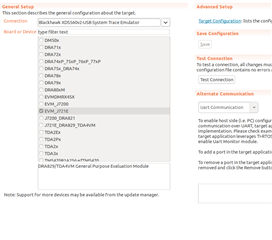
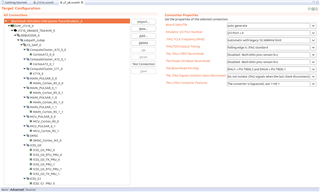
Start up CCS and create new Target Configurations file with below settings in screenshot, that is, "Connection" is "Blackhawk XDS560v2-USB System Trace Emulator", and "Board or Device" is "EVM_J721E", and remove the gel file path (....emulationgelJ721E_DRA829_TDA4VMgelJ721E.gel) from DMSC cortex M3 settings.
Info: If errors come up while connecting to cores or testing connection that mentions lowering TCLK, they can be changed in Advanced Setup->Target Configuration->Blackhawk XDS560v2-USB System Trace Emulator_0->Connection Properties->JTAG TCLK Frequency (MHz).
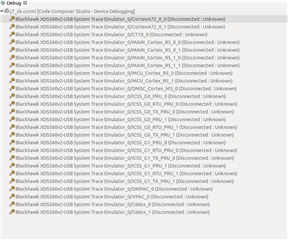
Save configuration file, right click newly created configuration file, and launch. Following screen should show up.
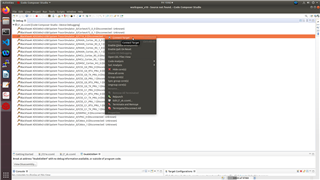
By default, the 8.4 SDK for SK-TDA4VM has the following cores up and running, as well as the A72 cores. Right clicking and connecting to any of the following cores should halt the core to load in symbols and programs. root@tda4vm-sk:/lib/firmware# ls | grep j7 j7-c66_0-fw j7-c66_1-fw j7-c71_0-fw j7-main-r5f0_0-fw j7-main-r5f0_1-fw j7-mcu-r5f0_0-fw root@tda4vm-sk:/lib/firmware#