This thread has been locked.

If you have a related question, please click the "Ask a related question" button in the top right corner. The newly created question will be automatically linked to this question.

WL1805MOD: Solder Voiding on inner ground pads using recommended footprint

Part Number: WL1805MOD

We are in development of a new design utilizing the WL1805MOD.  During the initial prototype build, we are encountering solder voiding on some of the inner ground pads of between 40-60%.

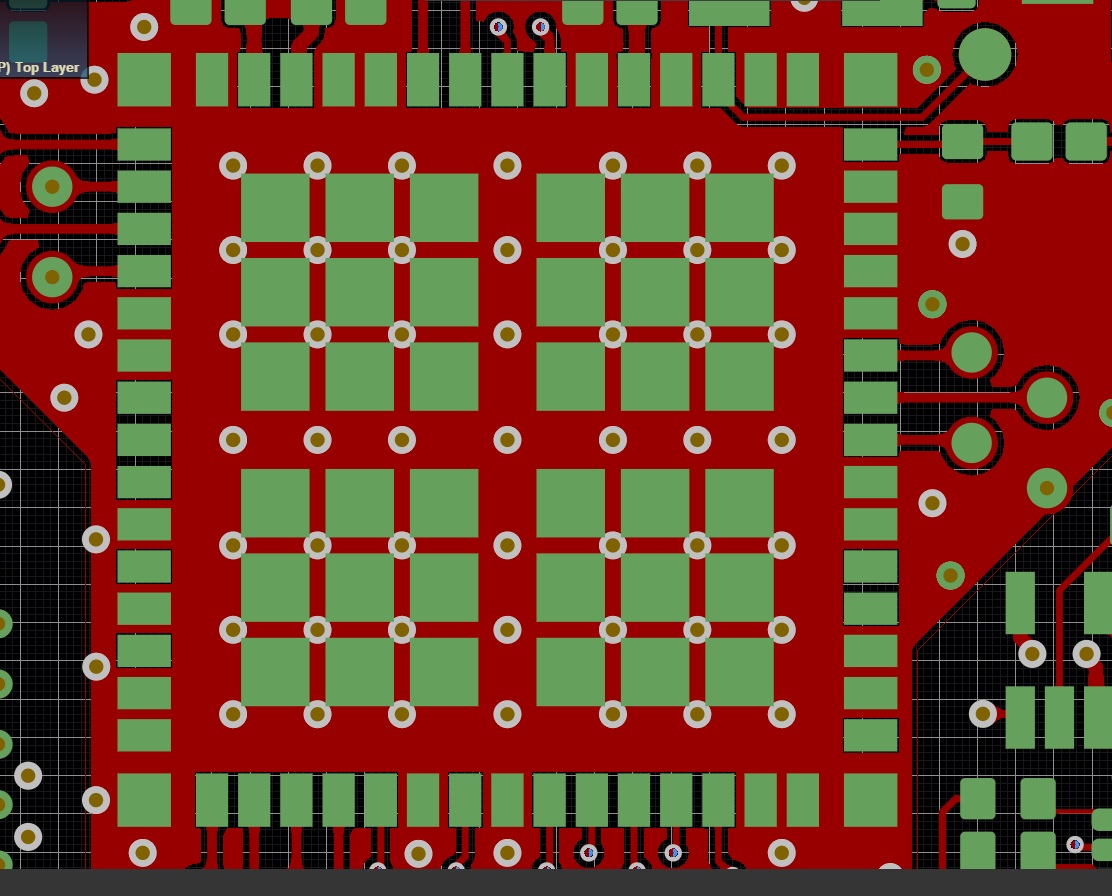
We are using the pad size and mask opening shown in section 9 of the datasheet.  Per the layout recommendation of section 7, we have a copper pour on layer 1 under the component, connecting all the ground pads:

We left the mask opening and stencil per the footprint, such that the inner ground pads were essentially solder mask defined pads over the single copper pour.  The via pattern is per the recommendation in section 7.

The CM was unable to fix the voiding by tweaking the reflow profile.  Their recommendation is to use large inner pads, where the center 4 blue areas shown above would each be mask defined pads.  Was that the intent of the illustration shown in the datasheet?  Does TI have any recommendations to reduce solder voiding?

  • Hi Robert,

    Per the IPC standard the voiding should be < 30%. I will need to consult with our experts here on other recommendations. I will get back to you as soon as I can.

    Thanks,

    Riz

  • Hi Robert,

    I was able to get a reply from our expert!

    The drawing that you are showing is from P35-P36 of the datasheet. This is the top metal for connection to group pad. Equally important are the solder mask and stencil on P48-49.

    The PCB pads are divided into smaller pieces by solder mask and match with stencil. The gap in between are air passages for outgassing to reduce voids.


    There are other factors that could affect voids, such as:
    - PCB and stencil design
    - PCB and component moisture
    - Solder paste flux contents

    - Reflow profile

    - Etc.

     It looks like you have tried the reflow profile with your CM. I would suggest that you take a closer look at the solder mask and stencil to ensure it follows our recommendation as stated above. This should fix the issue you are seeing.


    Thanks,

    Riz

  • Thank you for the response.  I have previously verified our stencil and mask match the datasheet recommendation.

    I would like to clarify what is being shown in the picture from the original question (figure 7-3 from page 35 of the datasheet).  The green color is copper, and looks to be a solid copper pour underneath the module (except for vias).  What is the blue color representing?  From your response above, I assume the mask and paste layers are not shown, and there would be 36 mask-defined pads underneath the 4 large blue squares.  If so, what are the 4 blue squares showing?

    Our layout is as follows, with red being the copper layer and green being the mask (negative layer; green = exposed copper).  The vias are filled.

  • Hi Robert,

    I discussed this further with our expert. We will need some additional info to be able to help troubleshoot this issue further. Can you please provide the following:

    1) X-ray showing the voids,

    2) stencil file

    3) Solder paste type

    4) reflow profile.

    Thanks,

    Riz