This thread has been locked.

If you have a related question, please click the "Ask a related question" button in the top right corner. The newly created question will be automatically linked to this question.

LAUNCHXL-CC1352R1: OAD Example, can't get it working

Part Number: LAUNCHXL-CC1352R1
Other Parts Discussed in Thread: UNIFLASH, CC2652RSIP, SYSCONFIG

can't find a good description how to get started,

this:

http://software-dl.ti.com/simplelink/esd/simplelink_cc13x2_26x2_sdk/5.10.00.48/exports/docs/thread/html/thread-oad/native-oad.html

is really informative, but doesn't say something "how to" start..

what I did:

- opened the door-lock-secure example (GCC).

- build

- started debugger

as nothing "happened" and I saw nothing on the serial-port, I changed the LED initialization and stepped over it..

they turned on, but stepping further, after bios_start() .. it "crashed" somehow
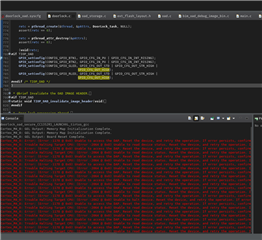
so, is it right to jast "flash" it via CCS?

Or do we somehow need to flash the _oad.bin ?

I have no clue.. Would like to enable OAD to all of my projects/devices!!

normally I would use the CC2652, but for testing purposes I am currently just using the cc1352 Launchpad :)

  • Hi,

    In Uniflash, try flashing at same time both the BIM and the OAD app bin:

    • BIM: bim_offchip_CC1352R1_LAUNCHXL_nortos_ccs.hex
      • project here: C:\ti\simplelink_cc13x2_26x2_sdk_5_10_00_48_s\examples\nortos\CC1352R1_LAUNCHXL\bim\bim_offchip
    • OAD app bin: doorlock_oad_secure_CC1352R1_LAUNCHXL_tirtos_gcc_oad.bin

    Perhaps these may be helpful as well:

    Thanks,
    Toby

  • Thanks Toby!

    Just did multiple OAD updates later on, using the CC2652 launchpad.

    after doing the initial set-up, just tried to play around with the "appType"/"imgId" to changed to a custom string.. not the platform type like in the examples..

    needed to modify the ttoad-server to use this property instead of just the platform type.. by registration of a device and reading in the firmware files. worked fine, but after that couldn't get any updates working anymore cause of the BIM was NOT using my modified imgId string..

    so, I need to modify the BIM and the example-app, to use my custom imgId string?? And then flash both using the uniflash?

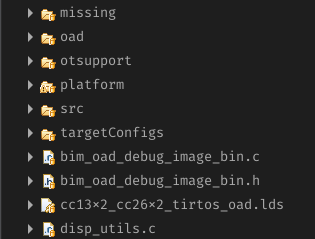
    Or do I need to embed it somehow into the example-app, like this bim_debug_img.c/.h ..

    if so, is there a step by step guide building and including this?

    thanks!!

  • Thanks for confirming!

    Yes, the BIM is meant to remain persistent for an OAD-enabled device (see imgIDCheck uses const uint8_t OAD_IMG_ID[OAD_IMG_ID_LEN] = OAD_IMG_ID_VAL;)

    Both the OAD-enabled project and BIM share same value for OAD_IMG_ID_VAL.

    1. Do you want to change it to a custom string once, and the device will always use that custom string for image validation?
    2. Or are you looking for a way to use different values of imgId dynamically?

    If it is 1. , then easiest way is to have OAD_IMG_ID_VAL to be synced during factory programming.

    If it is 2., then it may be possible with some changes to BIM and app image. Something like having an section in flash with the OAD_IMG_ID. This area could be changed based on the use-case.

    In either case, there must be something "shared" between the BIM and app. Something like:

    - a known, shared value (like we currenlty have with constant OAD_IMG_ID_VAL)

    - a known, shared flash address location (to contain the custom string for image validation)

  • Its 1) I guess.

    I will have an constant string for every "device-type" ..

    So, I will need a "BIM" for every device just with another string.. But that's fine! Slight smile Will try that

    I am not sure about the fallback case.. currently there is this embedded image (which is using the old "imgID") ..

    Do you have some more infos how to generate that? maybe automatically? the only comments I found are in the source-files itself..

    Thanks Toby!

  • Yes, that's right -- using the current implementation, a separate BIM is required per custom imgID verification string.

    I am not sure about the fallback case.. currently there is this embedded image (which is using the old "imgID") ..

    Do you have some more infos how to generate that? maybe automatically? the only comments I found are in the source-files itself..

    Sorry, I'm not fully understanding this -- can you clarify on what you mean here?

    The oad_image_tool script will convert the hex file (which was built with imgID string). The resulting .bin file can then be sent over-the-air to a device expecting this same imgID string.

  • I am just a bit confused about this two files here:

    bim_oad_debug_..... c/h

    what are those?

    why and when do I need them?

    and what's not really clear for me.. how is the "fallback image" working?

    which is the fallback image though?

    starting with "factory image" .. ext. flash is empty?

    OAD-update: ext-flash contains NEW image

    BIM flashes the new image: ext-flash and int-flash are SAME right now?

    OR is it just like... checking ext flash.. not valid.. ok, just stick with the internal version which worked before? =)

    thanks so far!!

  • another open question, one really important to us:

    how to generate an image with both, BIM and APP which is able to be "flashed" via the serial bootloader?

    cause not all products have the JTAG interface that easy connectable.. :)

  • how to generate an image with both, BIM and APP which is able to be "flashed" via the serial bootloader?

    There are some instructions here for a BIM.hex and an APP.bin, to generate a .hex which can be used with serial bootloader:

    https://dev.ti.com/tirex/explore/node?node=AIixxGE2y6tnPJ7cm65SFQ__pTTHBmu__LATEST

    This may be used in conjunction with the tool described in section 4 of https://www.ti.com/lit/pdf/swra466 .

    I've mostly used launchpads, so perhaps I take JTAG presence for granted -- I'll take an action item to find a good way of documenting this in an easy to find place (e.g. the OAD section in the Thread user guide).

    bim_oad_debug_..... c/h

    what are those?

    why and when do I need them?

    The initial goal of these was to provide an easy way to debug an OAD-enabled project without having to worry about the BIM.

    The array bim_oad_debug_image_bin is actually a copy of a built BIM, which simply jumps to the application image (no checks or anything).

    You can exclude these from the project once that project is production-ready, since the other, actual BIM.hex would be loaded.

    and what's not really clear for me.. how is the "fallback image" working?

    which is the fallback image though?

    starting with "factory image" .. ext. flash is empty?

    OAD-update: ext-flash contains NEW image

    BIM flashes the new image: ext-flash and int-flash are SAME right now?

    OR is it just like... checking ext flash.. not valid.. ok, just stick with the internal version which worked before? =)

    Understood -- thanks for clarifying.

    This is handled in the BIM project in function Bim_checkImages().

    In summary:

    1. Check if there is valid image in external flash. If not, do next step. If yes:
      1. Meta data indicates information, such as if this image has been loaded before.
      2. If this is the first time loading this image to internal flash, then we will write to meta data that the image was loaded to internal flash.
      3. Only loads image to internal flash if it hasn't been loaded before.
    2. Check if there is valid image in internal flash -- if yes, jump to that image and run. If not, do next step.
    3. Check if there is valid factory image (use metadata, e.g. EFL_ADDR_META_FACT_IMG). If yes, jump to that image and run. If not, do next step.
    4. No app image found, indicate error with LED (red on), and spin.
  • one last thing, I am wondering right now (not tested yet).. I read something about the CCFG, which is moved to another Flash section other than "normal". how does this effect the serial bootloader? which is making use of it.. Enable and Dio?! :)

    besides that - great, got all pieces together now. last thing to check is the serial-bootloader thing. then I am ready to go! awesome, thank you so much for your assistance! MuscleSunglassesInnocent

    didn't checked the BLE docs, thanks for the links!

    already removed those debug-bim files Ok hand

    all in all, it works great! sure there is here and there a lack of documentation.. but it's still "beta", right? =)

    will try to publish my "way" through this, after everything is working and tested more than just three times on my desk ;)

    hopefully this will help other's as well.

    had to touch multiple parts..

    ttoad-server (support CC2652RSIP, support custom IMG_IDs, ..)

    BIM (added a new flash type + IMG_ID)

    maybe as another action item: Infos like IMG_ID should be defined within the project and not, like yet, in shared files. or just copy the whole project to the newly created project directory.

    spent some hours searching strange behavior, after wondering why there is another IMG_ID strinStuck out tongue winking eyeg then expected WearySweat smile

  • one last thing, I am wondering right now (not tested yet).. I read something about the CCFG, which is moved to another Flash section other than "normal". how does this effect the serial bootloader? which is making use of it.. Enable and Dio?! :)

    The CCFG should be in the last flash page.

    The difference is the following:

    For OAD projects, the CCFG is in the BIM project (<bim>/Application/ccfg_app.c).
    For non-OAD projects, the CCFG is in a syscfg generated file (<project>/Generated Source/SysConfig/ti_devices_config.c).

    In either case, the bootloader settings in the respective CCFG will be used.

    Appreciate your other feedback here!