My EVM is no longer being registered as an Audio CODEC, what do I do?
This thread has been locked.
If you have a related question, please click the "Ask a related question" button in the top right corner. The newly created question will be automatically linked to this question.
My EVM is no longer being registered as an Audio CODEC, what do I do?
Applies to: TLV320AIC3254EVM-K, TLV320AIC3254EVM-U, TLV320AIC3204EVM-K, TLV320AIC3253EVM-K, TLV320AIC3256EVM-U, TLV320AIC3206EVM-U, TLV320AIC36EVM-K, TLV320ADC3101EVM-K, TLV320DAC3203EVM-K, PCM3070RHBEVM-K , TLV320AIC3212EVM-U, TLV320AIC3262EVM-U , TLV320AIC3268EVM-U
IMPORTANT: Before proceeding, ensure that the jumpers are set to their default positions. Refer to the EVM User Guide by clicking the link of the appropriate EVM above.
If the USB Active LED does not lit on the EVM and does not enumerate as a USB Audio device, follow these steps:
1. Download your USBfirmware files:
For TLV320AIC/DAC/ADC EVMs: http://www.ti.com/lit/zip/slac563.
For TAS/PCM EVMs and PurePath Console Motherboard: http://www.ti.com/lit/zip/sloc305.
2. Remove the USB cable from the board.
3. Short SDA and SCL lines by shorting the EEPROM SDA and SCL pins (not the test points).
4. Connect the EVM board to the USB socket.
5. After 5 seconds, remove the short.
6. A 'Found new Hardware' wizard will appear. The driver is in under "dfu_driver\" inside the USBfirmware files obtained above.
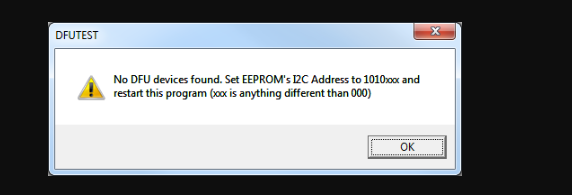
7. Run DFUTEST.exe. This is found inside the USBfirmware files obtained above. If the message below appears, repeat steps 2-6.
8. Click the Program EVM button. Browse for the DFUEE.bin file located in the "image\" directory. Click Open.
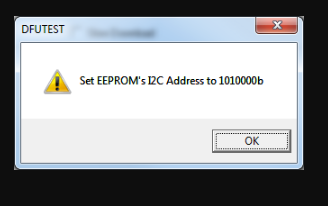
9. The following message will appear. Click OK.
10. A "Download completed" message will appear. Click OK.
11. A "Device was succesfully reset. Please..." message will appear. Wait 2-3 seconds before clicking OK. If a "Found new hardware wizard appears, install the DFU driver as explained in Step 6.
12. A "Detach call succeeded. Please..." message will appear. Wait 2-3 seconds before clicking OK. If a "Found new hardware wizard appears, install the DFU driver as explained in Step 6.
13. Browse for the desired firmware image file (e.g. USB-xxxx_441KHZ.bin) located in the "image\" directory. Click Open.
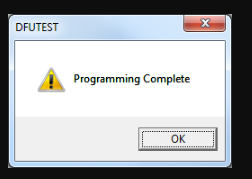
14. Click OK for the next two windows. The last window will look like the one below.
15. Click OK and close the DFUTEST program.
16. Run "remove-miniEVM.exe" as administrator (right click option). This is found inside the USBfirmware files obtained above.
17. Remove and re-connect the USB cable.
18. The EVM is now ready for use.
Hope this helps!