This thread has been locked.

If you have a related question, please click the "Ask a related question" button in the top right corner. The newly created question will be automatically linked to this question.

ADS1220EVM - to increase resolution of analog signal from pressure sensor

Other Parts Discussed in Thread: ADS1220EVM, ADCPRO, ADS1220, ENERGIA

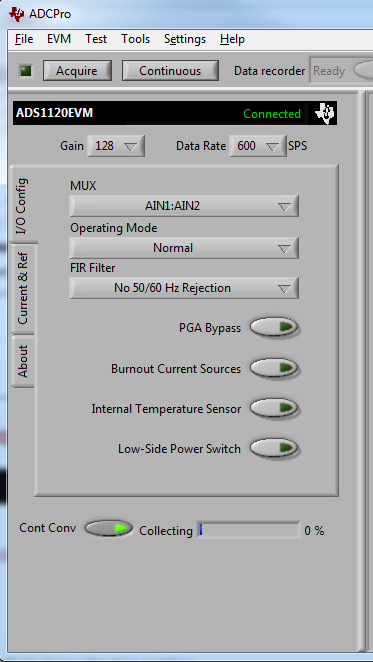
I am trying to use the ADS1220EVM to measure a very small change (5mV/V FS) of an analog pressure sensor. I am trying to use this EVM to increase the resolution of the signal coming from the pressure sensor so we are able to detect the small voltage fluctuation better. Is there an application note or guide that goes over how to use the ADCpro in conjunction with the ADS1220EVM board to accomplish this function. Can we use the ADCPro to capture and plot the analog signal as well?

Thanks!

Adriana

  • Hi Adriana,

    Many pressure sensors work similar to a bridge device.  It sounds like the device you are using works in this way.  The ADS1220 datasheet shows a resistive bridge measurement on page 58 in section 9.2.3.  For connecting a bridge to the ADS1220EVM, see the user's guide on page 11 in section 5.2.2. 

    To get the most sensor output using the EVM, you will need to set AVDD to 5V, which should give you a full-scale output of 25mV for the sensor.  If you also use 5V for the reference (REF1), then you can use a gain of 128 on the ADS1220.

    ADCPro will only show the result for the channels being measured.  So you will need to select the correct input channels from the mux setting, and the reference selected with the proper voltage being used.  ADCPro will then show the resultant voltage/code being converted for the selected input channels.  You will only see the ADC result in ADCPro.  There is no way to monitor the analog input directly.  You will need to use a scope or DMM to compare.

    Best regards,

    Bob B

  • Hi Bob,

    Thank you for your great feedback. I have a few more questions:
    - To set up the REF voltage, can we just set it to use the Internal Reference?
    - The Acquired data under the "Data monitor tab" shows two columns – Which one is the representation of the sensor output reading using
    channel (AIN1:AIN2)? The sensor is supposed to have an un-amplified output from 0 to 25mV FS. Therefore, I should be able to see the counts ramping up from 0PSI (0X0) to 5PSI (0X1000000) - right?
    - Is there an application note that goes over how to read the digital data collected by the EVM from the uC via SPI?

    Thanks!
    Adriana
  • Hi Adriana,

    You could use the internal reference, but it is often better to make the reference ratiometric to the sensor by using the excitation voltage as the reference.  In this way the measurement will cancel any common noise and drift that is common to both the sensor and the reference.

    One way to accomplish this is to use the AVDD supply on the EVM by connecting the jumpers JP1 and JP2 so that J1/J5 are connected to AVDD and AGND.  The connections marked EXC+ and EXC- shown on the PCB silkscreen can connect to the supply connections on the sensor.  The output of the sensor would then connect to what is marked as IN+ and IN-.

    Once you make these connections and assuming you have chosen 5V for AVDD at JP3, you would set up the ADCPro so it looks like the following:

    After you have Acquired data, the data monitor will display the results with decimal values on the left side and binary 2's complement from the ADC on the right side (ADCPro imports the data to 32-bit even though the ADC sends 24-bit so the values are sign extended.)  It is the same result.

    The codes will shift to a lesser or greater degree based on the gain selection.  With the configuration I have given, the full-scale range will be +/- 5V/128 or +/-39mV.  So the code size (LSB) is equal to 5.96nV.  If you were to use a gain of 1 then the code size would be 596nV.  So you can see you would see a much different code shift relative to pressure depending on which reference and gain you use.

    As to your last question I'm not quite sure what you are asking.  The datasheet gives a lot of information regarding proper timing and the reading of data.  You might want to look at the datasheet in section 8.5.4 which discusses the reading of data.

    Best regards,
    Bob B

  • Thank you so much Mr. Benjamin. How did you get 5.96nV? Based on equation 16 of datasheet I calculated the LSB to be 4.66nV - Am I looking at the wrong equation?

    Please let me know.  Thanks again.

  • Hi Adriana,

    You are correct...I was trying to answer too quickly.  596 nV for a gain of 1 with 5V reference, and approximately 4.66nV for a gain of 128.

    Best regards,

    Bob B 

  • Mr. Benjamin,

    If I want to use the Eval. board with the arduino board to capture the raw data. Let's say I want to be able to measure an input voltage from 0-3V using (AIN0 and AIN1 differential input). Therefore, I will need generate the SPI control signals to be able to talk to the ADC board. However, I have a couple of questions:
    Do the SPI signals need to be 3.3V or can they be 5V ?
    Would you power the ADC board with the USB cable or with external power? I imagine if the control signals are 5V pulses I would need to power the board with 5V as well. Correct?
    Anything else I need to take into account to be able to talk to the ADC board with the arduino board please let me know.

    Thanks!
  • Hi Adriana,

    In the ADS1220EVM user's guide on page 15 there is a section on External Control 5.4.3.  The EVM uses 3.3V logic, and to connect another processor to the EVM you will need to install a jumper which is explained in the section I just mentioned.

    Interestingly enough, there are other ways to command and control the ADS1220 on the EVM.  One method is to use the JTAG connections on the EVM to re-program the MSP430 and use Energia (programming is very similar to Arduino and no external connections are required).  Another option would be to connect a Launchpad to the EVM and again use Energia.

    A third option is to command and control the ADS1220 using the virtual COM port and the firmware that is already loaded on the EVM.  To do this all you need is a COM terminal like the old HyperTerminal, or TeraTerm, etc. Command data is sent as ASCII characters and data can be streamed and collected into a file by capturing the data as it is sent to the console.  It is old school, but works very well.  To set it up, all you need is to plug in the EVM to the USB and find which COM port is being used.  Open the console and select the same COM port as the EVM is using and configure the console to no parity, 8 data bits, and 1 stop bit.  You don't need to worry about baud rate as that is automatic.  The best part is you have full control over the ADS1220 and there is no rewiring or additional configuration required.

    I've attached the command file for your reference.  It is very simple.  When connected you should see an ADS1220 prompt.  To see the current configuration press 'q' and then Enter.  You will see the returned value of the device settings. 'z' +Enter shows the actual register contents. 's' +Enter starts streaming the data to the console for the current settings.  If you look at the commands and compare them with the various register bits, I think it will be pretty easy to follow.

    CONSOLE COMMANDS FOR ADS1220EVM basic.docx

    Best regards,

    Bob B

  • Mr. Benjamin,

    Is there any other setting that needs to be done to the terminal connection to be able to connect to the ADS1220 board?  I am having not luck making the connection. 

    every time I try to connect I get a warning " An Error Occured while attempting to open the port 5: Access Denied" . Is it b/c the ADS1220 is sending data already to the terminal?  

    Is there any other setting I have to do with the GUI to allow for this connection to happen?   Please let me know.

    Thanks!

  • Hi Adriana,

    One thing I neglected to mention is you cannot have ADCPro and the console terminal connection running at the same time. So if you already have ADCPro connected to the ADS1220EVM, you will not be able to connect the console terminal.  Close ADCPro and try again.  If this is not the issue, then you may be trying to connect to the wrong COM port. Let me know if you still have issues.

    Best regards,

    Bob B

  • Yes Sir, that was the issue. However, what does this sequence mean: P0|R0|M0|B0|C0|E0|F0|G0|H0|I0|J0|N0|T0|X0|Y0|PN1 ?
    How do you change configurations this way?
    Thanks!
  • Hi Adriana,

    You've got through the most difficult stuff.  ADCPro uses the same set of commands.  For example, when the ADS1220 plugin first connects to the EVM it sends a 'q' and that long parameter string returns.

    • P is for gain
    • R is for data rate
    • M is for MUX setting
    • B is for PGA Bypass setting
    • etc., based on the descriptions given earlier in the document

    The 'q' return values give a quick overview of the settings currently on the ADS1220.  You can get each individual parameter by entering the desired letter + Enter.  For example if you want to know the current gain setting on the ADS1220 you would press 'p' and Enter.  If you want to change the gain you would press 'p' followed immediately by a number from 0 to 7.  0 would be for a gain of 1 and 7 for a gain of 128 and corresponds to bits 3:1 in REG0 register.  This information is given in the document.  You need to compare the document information to the datasheet register values and I think it will become more apparent.

    As there are some settings that require a number greater than 9, you need to send the hex character equivalent. This might happen for the MUX settings where you have bits 7:4 of REG0.  In this case 15 is represented by F and 10 by A.

    If you want to stream data at the current device settings you would press 's' +Enter.  The data is sent as ASCII characters representing 3 bytes of data. Positive full-scale is 07FFFF and negative full-scale is 800000.  Pressing any key stops data streaming.

    Pressing 'z'+Enter will display the contents of the four device registers.

    Best regards,

    Bob B