Because of the holidays, TI E2E™ design support forum responses will be delayed from Dec. 25 through Jan. 2. Thank you for your patience.

This thread has been locked.

If you have a related question, please click the "Ask a related question" button in the top right corner. The newly created question will be automatically linked to this question.

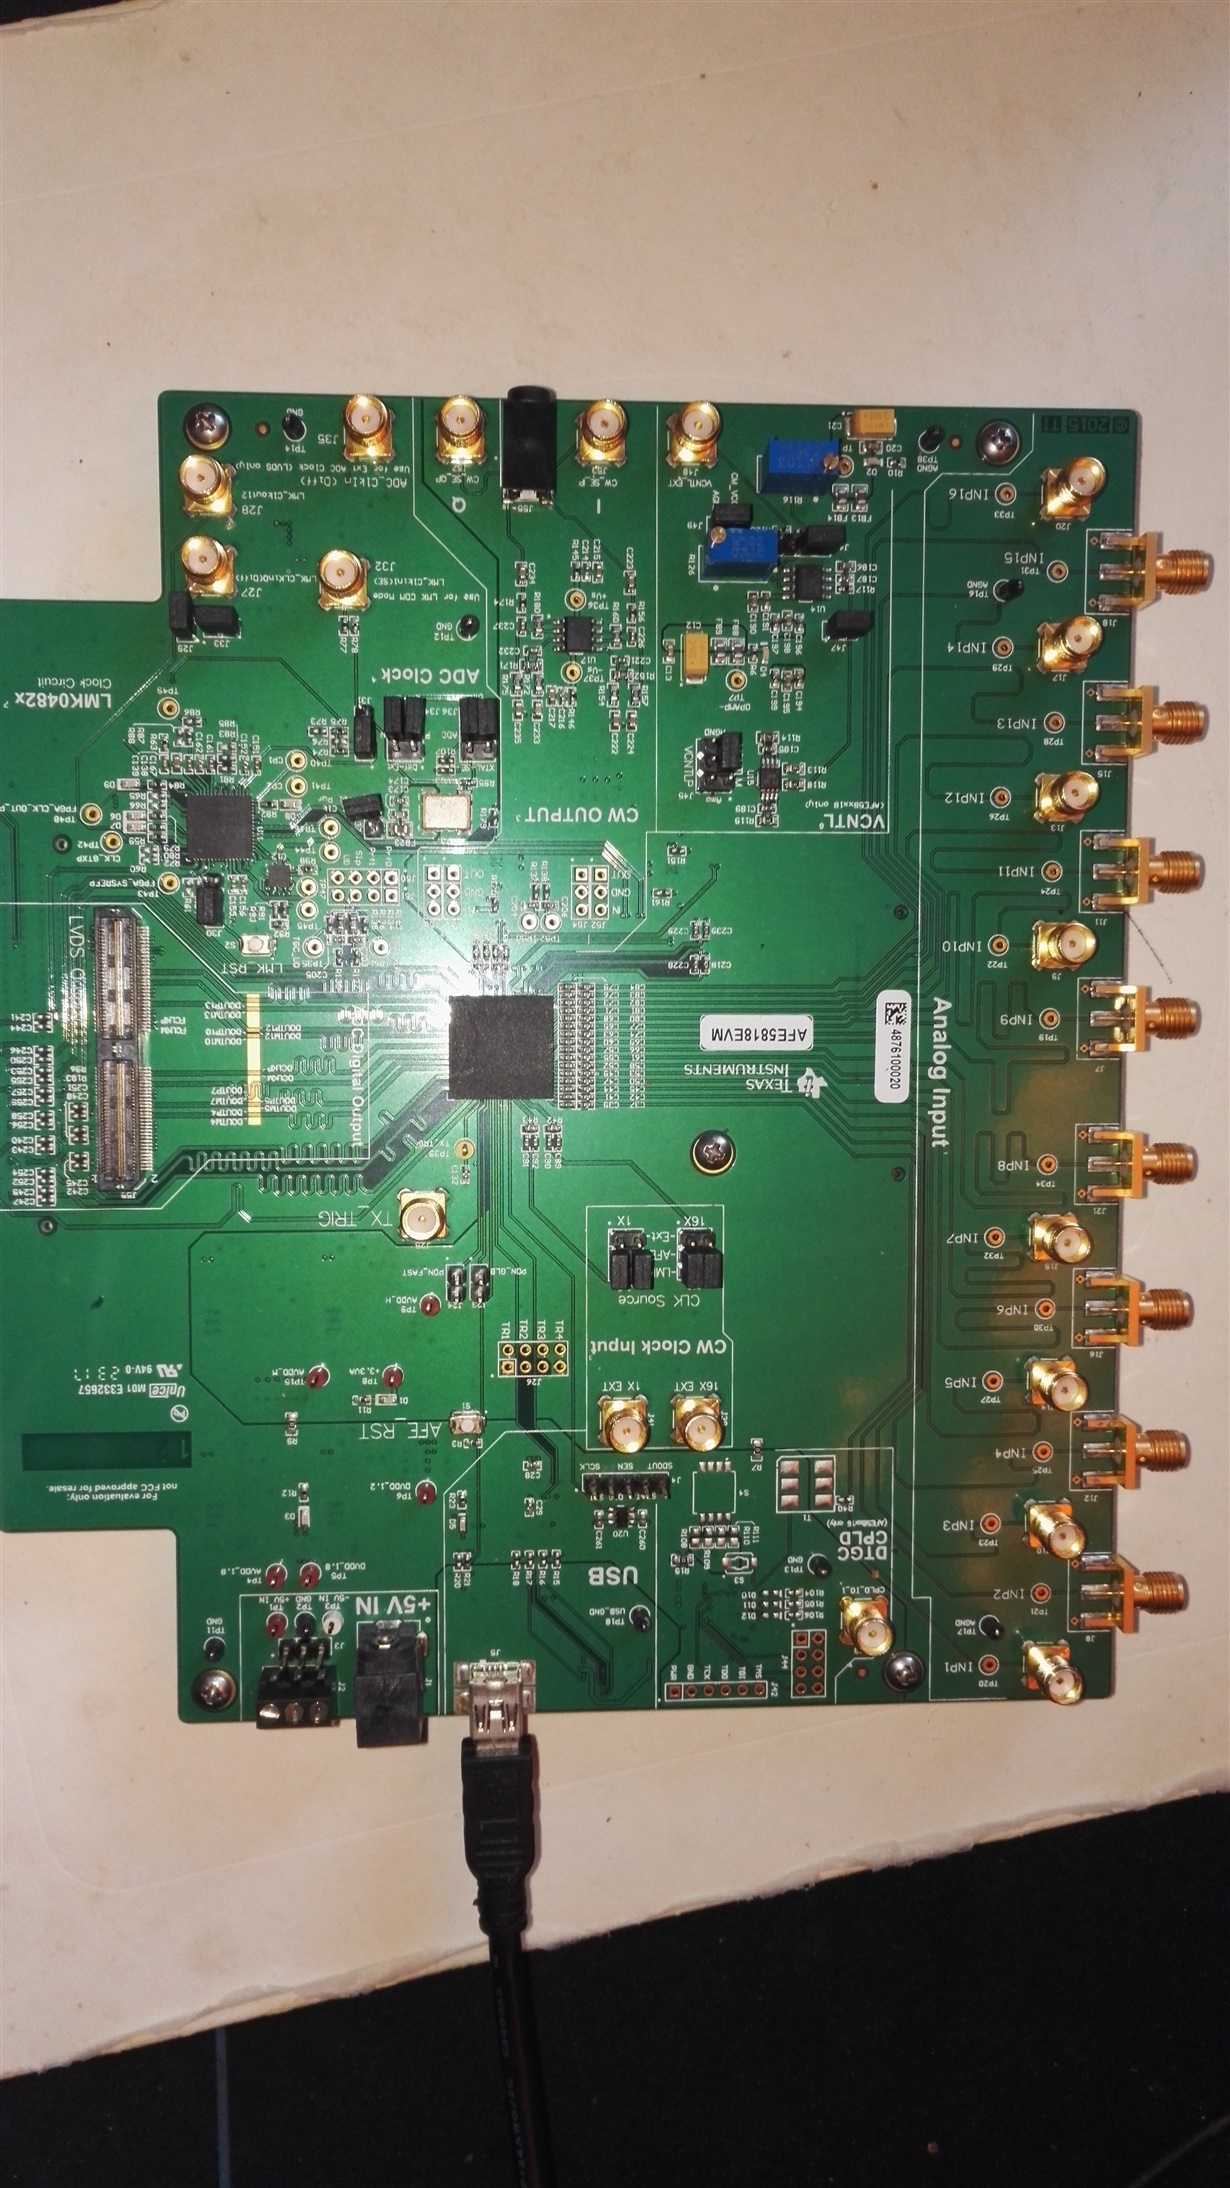
AFE5818EVM: Connection problem between AFE5818EVM and TSW1400EVM

Part Number: AFE5818EVM
Other Parts Discussed in Thread: AFE5818, AFE58JD18

Hi team,

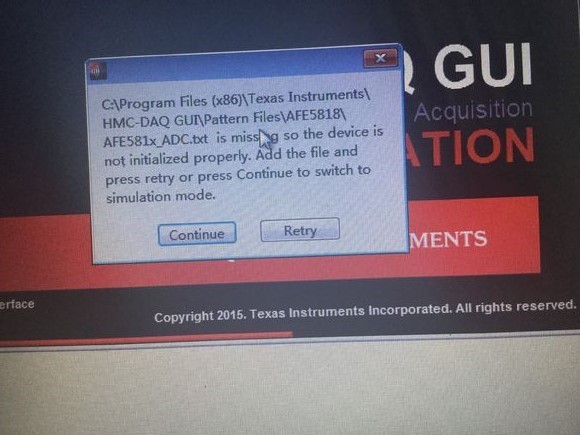
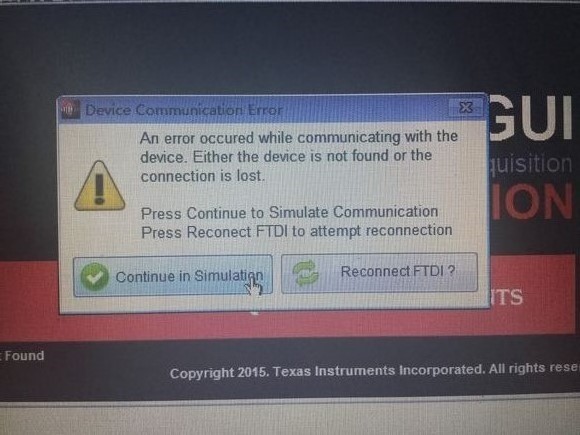
The customer has an AFE5818EVM and a TSW1400EVM board, downloaded the HMC-DAQ GUI and High Speed data converter GUI installer v5.0. After installing the program, connect the two boards and connect the USB cable to the PC. When running the High Speed data converter GUI program and selecting to download AFE5818 firmware according to the prompt, the download timeout will be prompted, and the error shown in Figure 1 and Figure 2 will appear. The HW-disconnected in the lower right corner of the HMC-DAQ GUI is always red.

The AFE5818EVM board and TSW1400EVM board are powered separately, and the jumper is set as the default. The PC is win 7 (64). Replace the USB cable and interface, the fault is not eliminated.

In addition, the customer only connects the PC to the AFE5818EVM, runs the HMC-DAQ GUI, and still cannot connect, and the PC shows that the device model is AFE58JD18.

Figure1

Figure2

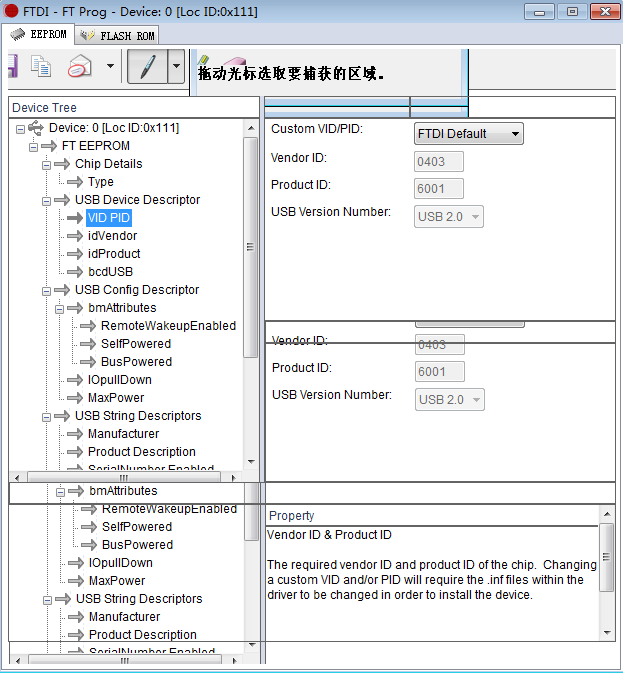
The customer runs FT_Prog software and gets the following information of AFE5818:

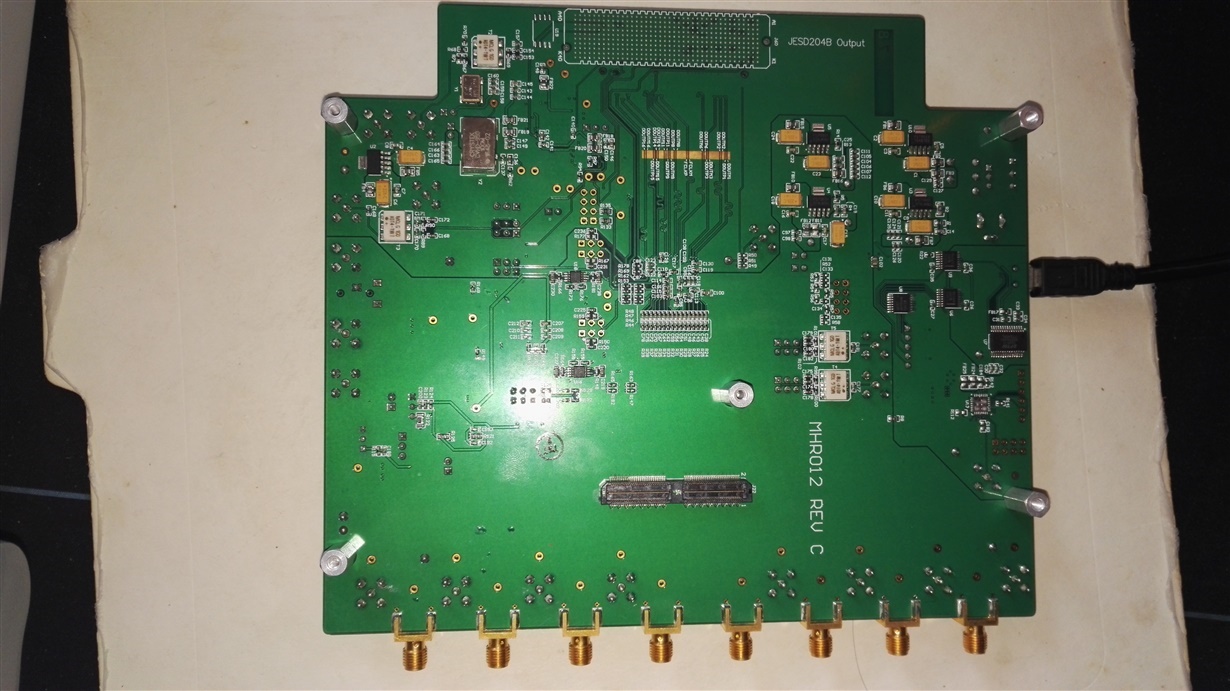
Could you confirm for me that this EVM board is the latest C version?

Do you have any suggestions for the above problems? Thank you in advance.

  • Hi,

    Could you please help the customer try on their FT_Prog Software

    and modify the EVM board original setting

    by loading the attached file to replace the original FTDI chip setting.

    Hopefully after this change, this can fix the issue.

    Thank you!AFE5818vCEVM.XML

  • Hello,

    Thanks for your reply and Amy’s help.

    I had tried to “prog  device afe5818jd18evm ”with your afe5818vcevm.xml,and displayed “device 0 programmed successfully”

    But when I rescan device, the eeprom doesn’t chang ,is still AFE5818JD18. I tried erase it at first,FTDI tell me ft245r is not possible  to erase it’s chip eeprom.

    Can you let me know how to replace this board’s  original chip setting detailly?My email:xeibing317@sina.com

    Thanks

  • Hi,

    Thank you!

    We need to try again and will let you know again.

    Thank you!

  • 5516.AFE5818vCEVM.xml
    <?xml version="1.0" encoding="utf-16"?>
    <FT_EEPROM>
      <Chip_Details>
        <Type>FT245R</Type>
      </Chip_Details>
      <USB_Device_Descriptor>
        <VID_PID>0</VID_PID>
        <idVendor>0403</idVendor>
        <idProduct>6001</idProduct>
        <bcdUSB>USB 2.0</bcdUSB>
      </USB_Device_Descriptor>
      <USB_Config_Descriptor>
        <bmAttributes>
          <RemoteWakeupEnabled>false</RemoteWakeupEnabled>
          <SelfPowered>false</SelfPowered>
          <BusPowered>true</BusPowered>
        </bmAttributes>
        <IOpullDown>false</IOpullDown>
        <MaxPower>100</MaxPower>
      </USB_Config_Descriptor>
      <USB_String_Descriptors>
        <Manufacturer>FTDI</Manufacturer>
        <Product_Description>AFE5818vCEVM</Product_Description>
        <SerialNumber_Enabled>true</SerialNumber_Enabled>
        <SerialNumber />
        <SerialNumberPrefix>KS</SerialNumberPrefix>
        <SerialNumber_AutoGenerate>true</SerialNumber_AutoGenerate>
      </USB_String_Descriptors>
      <Hardware_Specific>
        <HighIO>false</HighIO>
        <D2XX>true</D2XX>
        <ExternalOscillator>false</ExternalOscillator>
      </Hardware_Specific>
    </FT_EEPROM>
    Hi,

    Thank you so much using AFE5818 and TSW1400.

    Please load again the following attached XML Template File to your FTDI - FT_Prog again

    and see if this can help.

    Also on your Device: 0, please right-click on your mouse,

    you can see "Erase Device"

    and then after that, you can "Apply Template" => "From File" => please choose "AFE5818vCEVM.xml"

    and then you can "Program Device" to re-build on your FTDI chip.

    Then when you have set your AFE5818EVM with new XML file.

    You can try the following setting and run the Ramp test again as below:

    Run the "HSDC Pro v4.7" (for example, you may see different Version)
    by choosing the following directory on your PC:
    C:\Program Files (x86)\Texas Instruments\High Speed Data Converter Pro-v4.7\High Speed Data Converter Pro.exe

    You will see a screen:
    Choose on: "TIWY04W4-TSW1400" (for example, the number may be different on your PC screen)
    Click "OK"

    Then "HMC-DAQ GUI" will pop-up automatically
    and then "AFE5818 EVM GUI" will be set and shown

    On the "QUICK SETUP" tab from screen:
    Please set below as follows:
    on 1. Click   "DUT RESET"
    on 2. Click   "Initialize Device"
    on 3. Select  "LVDS: 14x 14b"
    on 3. Select  "Ramp Test Pattern"
    on 4. Select  "Mid Gain"

    Go to High Speed Data Converter Pro v4.70 Screen:
    Change "Real FFT" Button to be "Codes" Button
    Click on "Capture" Button

    then You can see Ramp plots on all 16 Channel output

    Hope the above setting can help your system working!

    Thank you!

    Have a very nice day!

    Best regards,

    Chen

    5516.AFE5818vCEVM.xml
    <?xml version="1.0" encoding="utf-16"?>
    <FT_EEPROM>
      <Chip_Details>
        <Type>FT245R</Type>
      </Chip_Details>
      <USB_Device_Descriptor>
        <VID_PID>0</VID_PID>
        <idVendor>0403</idVendor>
        <idProduct>6001</idProduct>
        <bcdUSB>USB 2.0</bcdUSB>
      </USB_Device_Descriptor>
      <USB_Config_Descriptor>
        <bmAttributes>
          <RemoteWakeupEnabled>false</RemoteWakeupEnabled>
          <SelfPowered>false</SelfPowered>
          <BusPowered>true</BusPowered>
        </bmAttributes>
        <IOpullDown>false</IOpullDown>
        <MaxPower>100</MaxPower>
      </USB_Config_Descriptor>
      <USB_String_Descriptors>
        <Manufacturer>FTDI</Manufacturer>
        <Product_Description>AFE5818vCEVM</Product_Description>
        <SerialNumber_Enabled>true</SerialNumber_Enabled>
        <SerialNumber />
        <SerialNumberPrefix>KS</SerialNumberPrefix>
        <SerialNumber_AutoGenerate>true</SerialNumber_AutoGenerate>
      </USB_String_Descriptors>
      <Hardware_Specific>
        <HighIO>false</HighIO>
        <D2XX>true</D2XX>
        <ExternalOscillator>false</ExternalOscillator>
      </Hardware_Specific>
    </FT_EEPROM>

  • Dear Chen,

    It is still can not Erase Device 0 on my PC

    I had email TFDI for helping

    Thank you

  • Hi acusor317,

    Thank you for letting us know.

    If any other question, please forward another question to us.

    Thank you!

    Best regards,

    Chen