This thread has been locked.

If you have a related question, please click the "Ask a related question" button in the top right corner. The newly created question will be automatically linked to this question.

DLPLCRC900DEVM and DLPLCR50XEVM

Other Parts Discussed in Thread: DLP500YX
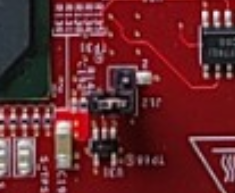
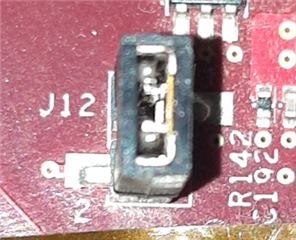
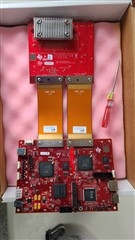
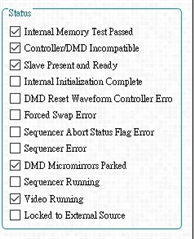
Excuse me, I got these two boards a few days ago, but I want to ask about the connection method of the two boards. I tried to use the cable connection as shown in the picture, but the status of the GUI of my computer is shown as the picture. It seems that the DMD is not connected to the DLP board

  • Hi YU-CHEN,

    Please provide below information to get problem details.


    1. GUI Version used. Share complete GUI screen capture.
    Update to latest GUI version and test again. https://www.ti.com/tool/DLPC900REF-SW#downloads

    2. Check power adaptor used. Power adaptor should be capable of providing sufficient required current.
    Share details of power adaptor being used.

    3. Tighten all the four screws of flex cable. Any loose connection of flex cable between Controller and DMD board could cause this problem.

    Thanks,
    Shivakumar

  • 1.

    2.

    3.I do have the screws tightened. Then I would like to ask again the picture in this article is the right way to connect my cable to the two boards? Is there a difference between the front and the back of the cable?  

  • Hi YU-CHEN,

    Cable connection is proper.

    Can you power up the EVM and share GUI Screen capture.
    Also share information about the LED indications on the EVM when powered up.

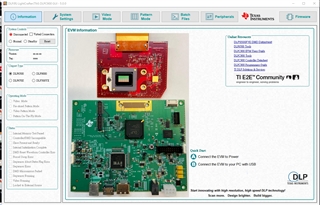
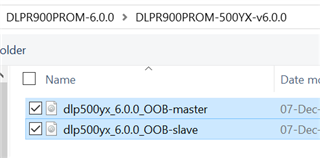
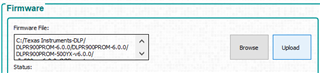
  •  When my EVM is connected to the computer, it reads the 670S chip, but I am using the 500YX chip

  • Hi YU-CHEN,

    Looks like firmware needs to be updated.

    Please follow below steps to update the firmware.


    1. Download the latest firmware from below link. Version: 6.0.0
    https://www.ti.com/tool/DLPR900#downloads

    2. Once the downloaded file is installed, Firmware is placed in below location.
    C:\Texas Instruments-DLP\DLPR900PROM-6.0.0\DLPR900PROM-6.0.0\DLPR900PROM-500YX-v6.0.0

    3. Remove EVM Power, Place HOLDBoot jumper (J12),  Power up the EVM, Open the GUI, Make sure connection status shows Green.

    4. Select DMD as DLP500YX

    5. Click on Firmware page

    6. Click Browse, Select DLP500YX firmware (Select both master and slave files)

    7. Click Upload

    8. Firmware download will begin. Wait till the firmware update gets completed.

    9. Power down the EVM, Remove HOLDBoot jumper (J12).

    10. Power up the EVM. Firmware version should be displayed as shown below.
    Version: 6.0.0
    Tag: dlp500yx_6.0.0_OOB

    11. DMD should start showing internally stored patterns.

    Please follow above procedure to update firmware and confirm if the issue is resolved.

    Thanks,
    Shivakumar

  • 1. I would like to ask where to buy the HOLDBoot jumper cable?
    2. Then you said remove the power, then after connecting the HOLDBoot, do I still need to connect the USB to the computer? Or will the EVM be connected to the computer once the HOLDBoot is connected?
    3. Because I used J20 to provide power and J8 to connect USB to update the firmware, but it didn't work, why is that?

  • Hi YU-CHEN,

    1. No need to buy any jumper. Already jumpers are included with the EVM. 

    Remove this jumper at J12 and place it across Pin1 and Pin2. Both Pin1 and Pin2 should get shorted.
    Place it as shown in below picture

    2. Yes, USB Cable needs to be connected.

    3. J20 to provide power and J8 to connect USB is proper. EVM is powering up properly. Once firmware is updated, issue will get resolved.

    Thanks,
    Shivakumar