This thread has been locked.

If you have a related question, please click the "Ask a related question" button in the top right corner. The newly created question will be automatically linked to this question.

DLP6500FLQ: Capture phase shift of multiple frequency

Part Number: DLP6500FLQ
Other Parts Discussed in Thread: DLPC900, DLP9000

Hi Team,

Can you please help us regarding our customer's inquiry below.

We purchased dlp6500 but finding it difficult to use for our image acquisition.

We need to capture phase shift of multiple frequency.

I want to capture an image with phase shift by uploading multiple frequency to dlp6500.

I would appreciate if i can get a video demo on this or online training. 

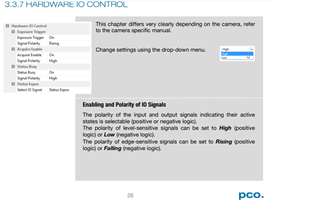
How we can synchronize dlp6500 with camera, I have read the guide but no useful information on these two need.

Regards,

Danilo

  • Danilo,

    I will need a little bit more understanding of what is meant by multiple frequency phase shift capture.

    Could you give more detail as to what the end customer is trying to do?

    Fizix

  • Hi Fizix,

    According to our customer,

    What I meant by multiple frequencies is that I need to upload 3 patterns generated from different frequencies. Then perform phase shifting to capture images at different phase.

    Regards,

    Danilo

  • Danilo,

    I was at a conference for a couple of days so I am sorry for the delay.

    There are three videos on YouTube by Texas Instruments:

    1.  Getting started: TI DLP® LightCrafterTm 6500 & 9000 

    2.  Getting started: TI DLP® LightCrafterTm 6500 & 9000 Pt 2

    3.  Getting started: TI DLP® LightCrafterTm 6500 & 9000 Pt 3

    These are for a much earlier version of the software, but the information about triggers near the end of part 2 are still much the same.

    I would recommend that you use the input trigger method as shown above.  The area outlined in a red box has the tinput triggers turned on.  This will cause the system to wait for an input trigger to display the pattern.  It will stop at the end of each pattern to wait for the next trigger. 

    I also suggest that you insert dark time at the end of the pattern, so that your camera will capture the whole pattern.  This is set in the magenta box and shows on the timeline as the two items in the magenta ellipses.

    The green box allows you to select the bit depth of the patterns and the exposure time.

    Example:

    Say for example you have a camera that can take patterns at 60 frames per second and you want to use 8 bit patterns.  Then set your bit depth to 8, set your Exposure time to 16000 us and your Dark time to 600.

    Now you would need an external trigger that you send to both the camera and the input trigger of the DLPC900 Controller board trigger input.  If needed in the Pattern Settings you could add a slight delay to the incoming trigger if your camera has some latency.

    Here is what would happen:  When the camera receives the trigger it will start the exposure and simultaneously the trigger will cause the DLP6500 to display the 8-bit pattern for 16 ms.  This is intentionally shorter that the camera capture time, which ensures that the camera captures the whole pattern.  After this, both the camera and the DLPC900/DLP6500 will stop and wait for the next trigger input.

    This was only an example.  You can adjust the values to match your system.  

    It is also possible to use Tigger Out 1 (with the input trigger turned off) to trigger the exposure of your camera.  Just make sure that the exposure time of the camera is longer, but shorter than the total 8-bit frame time.

    If you were looking at the older DLP6500/DLP9000 EVM Guide, I would recommend also getting DLPU101 which is the newer DLPC900 Single Controller EVM Guide which applies to the DLP6500.  It should cover how to connect your triggers.

    Fizix

  • Hi Fizix,

    We have received this feedback from our customer,

    I am sincerely grateful for your response. I have tried this approach. However, nothing was display from the projector. I waited for some minute to see if I will see display but no display. Then, I am thinking maybe it required some trigger connection. please, if this is required as I read in the manual about J20. Could you please guide me more on this?

    Regards,

    Danilo

  • Danilo,

    This sounds like the input trigger is not being received properly.  Please make sure that they have either used the jumper to set the reference input voltage for the trigger or have supplied the reference voltage.  This is how we do our testing.  If nothing is displayed then the pattern is not being triggered. This is shown in the DLPC900 Single Controller EVM Guide DLPU101 in section 1.5.2.

    NOTE:  Trigger input 2 acts like a gate.  The patterns will not advance from input 1 unless input 2 is held high.  The first paragraph of that section reads:

    The trigger inputs on J20 are inputs from external devices to control the pattern sequence. While trigger input 2
    is high, trigger input 1 advances the pattern sequence to the next pattern in the sequence on every pulse.

    If you are splitting the trigger signal between the camera and the EVM, you may need to check that the voltage is reaching the expected value.

    Try removing the camera so that the triggering system is driving only the EVM and see if the patterns advance.

    How are you driving the trigger signal?

    Fizix

  • Hi Fizix,

    Here is the response of our customer regarding the input trigger,

    Please, did you have a specific device that gives you this voltage that we can buy for our work?

    Regards,

    Danilo

  • Hi Danilo,

    The voltage level can be measured with an oscilloscope, or possibly a multimeter. TI performs their internal validation with a variety of o-scopes. This type of measurement would require a basic model. 

    Fizix may also reply with more detail on Monday.

    Thanks,

    Matt

  • Danilo,

    They can use an ordinary voltmeter to check the reference voltage.  The section of the EVM Guide [DLPU101 section 1.5.2] tells how to use one of the two voltages available on the header pins of the input trigger, or the user can supply their own voltage reference.  We use the reference voltages available on the header pins of the input and output triggers.  

    Table 1-1 on page 12 shows jumper 19 & 21.  Using a jumper connect pin 1 to pin 2 for 3.3V or pin 3 to pin 2 for 1.8 volts, but NOT both.  If the customer wishes to supply their own reference in the 1.8 V to 3.3 V range then they would use the input connector J21 to supply the reference voltage and leave Pin 2 on J19 and/or J21 open (see section 4.1).  Please see this image from table 1-1:

    The voltage they choose should either match the voltage of their pulse generation system that is used to trigger the DLPC900 and camera.

    The image on page 14 of the guide shows jumpers 19 & 21and the J20 connector.

    Fizix

  • Hi Matt and Fizix, 

    Thank you very much for your help. It seems that our customer's inquiry is about the device he needed to trigger the EVM. I have requested a photo of the camera as well as the user manual which I have attached below. 


    I noticed that the camera has two input and two output connectors. Can he connect the Output 3 or 4 directly to pin 2 or pin 5 and ground of J20 (if the voltage from the camera is 3.3V) then set the polarity of the I/O signal to high or low as shown in Section 3.3.7 of the user' manual?

    Here are some details of the camera as per our customer

    PCO 4.2 2048 X 2048 pixel, quantum efficiency up to 70% exposure times from 100us to 20s. Maximum frame rate 40fps at full resolution, Rolling shutter, USB 3.0 interface, small form factor: 102 x 79 x 70mm(USB)
    It is a Demo Unit with Serial Number 61000165.

    In addition please see the attached for the projector and the pco camera manual.
    Kindly guide on the following
    1. The required cables for connection
    2. The hookup connection image or generally comprehensive guide on the connections between the camera and the projector.

    Regards,

    Danilo

  • Hi Danilo,

    Let us review this camera info more closely. Fizix might have more info to share. However, this information is commonly known by the customers, as they have control over the exact camera for their application.

    Regards,

    Matt

  • Hi Matt,

    We will wait for your feedback. For some reason, the user manual was not attached to my previous post so I have reattached it below.

    7840.pco.camware_manual.pdf

    Regards,

    Danilo

  • Hello Danilo,

    This guide is for the software, but not the specific camera model.  The serial number does not help.  Rather, can they provide the model number?

    Fizix

  • Hi Fizix, 

    The part number of the camera is pco.edge 4.2m. Here is another manual from the camera manufacturer. 

    PCO-Edge Trg.pdf

    According to our customer,

    Please, can you show me how I can make connections between the the projector and camera to make trigger.
    OR
    How I can connect the J20 to trigger. If I connect the J20 where will I connect the other part of the cable to?
    Please if I can get a video demo of the connections I will be grateful. Please, I need this solution urgently. The time is going against me for my project. Thank you sincerely

    Regards,

    Danilo

  • Hello Danilo,

    The second document supplied (PCO-Edge Tirg.pdf) is about the camera's trigger timings, but does not provide any information about the voltage levels and other connection requirements.  The customer needs to reach out to the camera manufacturer to determine what levels and connection type is expected by their specific camera.  

    Fizix

  • Hi Fizix,

    I asked the customer to request this information from the camera manufacturer and he provided this details.

    The camera has:
    trigger input signals frame trigger, acquire (SMA connectors) Pin 1
    trigger output signals exposure, busy (SMA connectors) Pin 3
    It required TTL signal which is of voltage level 3.5V - 5V

    I have checked the schematic diagram of the EVM and I noticed that the input buffer is operating at 1.8V or 3.3V depending on the jumper setting of J19. It seems to me that the customer has to use a voltage level translator or maybe a voltage divider from the Output 3 of the camera to pin 2 of J20 of the EVM. Is my understanding correct?

    Regards,

    Danilo

  • Danilo,

    First, my apologies, it seems the you did supply the part number just above the trigger timing manual.  Apparently I missed that.

    Let me look at this and try to get a response tomorrow.  There are a couple of ways to do this.

    Fizix

  • Danilo,

    I looked over this camera and it's specs.  This camera is either rolling shutter or global reset with a phased readout which makes the exposure time different for different parts of the array of the camera.  It can be done with some work, but this really requires a conversation with the customer.

    It is not a simple matter of just hooking up the trigger one way or another.

    Fizix