This thread has been locked.

If you have a related question, please click the "Ask a related question" button in the top right corner. The newly created question will be automatically linked to this question.

DLP6500FYE: DLP6500 cannot connect to the computer anymore

Part Number: DLP6500FYE
Other Parts Discussed in Thread: DLPC900

Hi Experts,

Good day.

Our customer has a problem below.

I removed the USB cable connecting to the computer while DMD is still working. And after I re-connect the USB, I found that the DMD can no longer be recognized by the software (DLPC900REF-GUI).
And I re-start the DLP6500 for some time, but still no response in DLPC900REF-GUI.
And I tested the software on another DLP6500 we have, and all work normally.
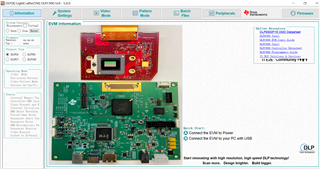
For this 'broken' DLP6500, after I power it, 2 LEDs on the EVM board are on, while the third one keeps twinkling, just as the manual described.
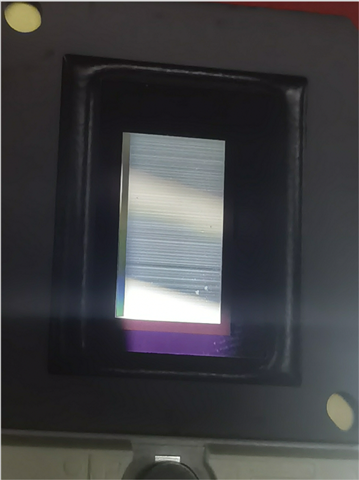
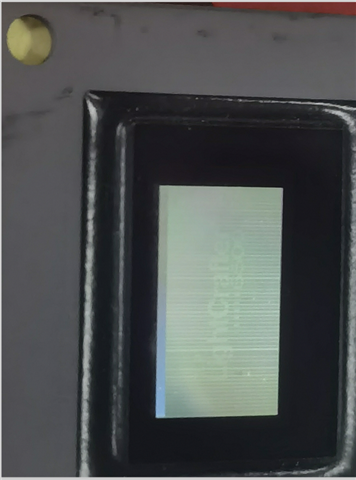
And actually, when powered, the DMD on this DLP6500 reacts. Just a computer cannot be connected.

We sometimes remove the USB connection directly when the DMD was still displaying under the time sequence of the software. At that time, the DMD kept displaying even if the USB was removed.
I don't know whether this kind of behavior damages the system.

Please advise.

Keep safe.

Regards,

Josel

  • Please allow us another day to respond on this topic with some ideas.

  • Josel,

    Can you please take a screenshot of the Status area of the GUI (on the left side)?  Especially the Controller/DMD Incompatible flag.

    Fizix

  • Hi Fizix,

    Good day.

    Please see the image below. Let me know if this includes what you are looking for.

    The GUI is keeping behaving like this........No reaction at all basically.


    Keep safe.


    Regards,

    Josel

  • Hello Fizix,

    I exchange the DMD chip on the two EVM boards we have, and something confusing happened.
    Let me label these two EVM boards as 'old one'(which has some problems) and 'new one'(which we haven't used before). And the same for these two DMD chips as 'old one' and 'new one'.

    Initially, the 'new' DMD on the new EVM just works well, while the 'old' DMD on the 'old' EVM cannot work.

    And then I exchanged the DMDs. The 'old' DMD worked well on the 'new' EVM. However, the 'new' DMD cannot work correctly on the 'old' EVM(see figure below).


    What is really confusing is that, after I return the 'new' DMD back to the 'new' EVM, it cannot display clear images(although it still can work and control, there are always some annoying strings on the DMD screen, please see figures below).


    Please advise.

    Keep safe.


    Regards,

    Josel

  • Josel, 

    The system lost my reply.

    Could you have the customer provide the same image as they did previously, but with the system that connects to the GUI.

    Also, what firmware are you using and are you issuing a Standby and waiting the 2 minutes before removing power.  This is particularly required for proper shutdown for B revision DMDs.

    I recommend that they download and install the latest 6.0.x firmware and the latest 5.0.x GUI then update the EVM firmware from the downloaded firmware.

    Fizix

  • Hello Fizix,


    They are currently using the 5.0.0GUI and 6.0.0 firmware now. The behavior of the 'new' DMD on the 'new' EVM board is shown below, from different angles.
    Still, the image looks broken with many uncontrollable strings(though there is indeed an image).
    For the 'old' DMD, sadly they have not followed the instructions when moving the power. But for this 'new' DMD, it is brand new, except that they replaced this DMD chip on the 'old' EVM board for testing once. And when off-power, the 'new' DMD now looks as follows, which is very terrifying. seems that it is broken. But what they did to it is just replace it on the 'old'(and suspiciously broken)EVM board...


    7215.Images.zip

    Keep safe.

    Regards,

    Josel

  • Hi Fizix,

    Good day.

    Could you please give the customer some advice on continuing the debug process on this DMD?
    They are becoming desperately eager to solve this problem because the construction of their whole system relies on this DMD.

    They are sure their 'new' DMD and the new EVM board worked well when first opened. Exchanging the DMD chip with the 'old' DMD on the old EVM causes the failure of the new DMD, while the old DMD still works well on the new EVM board.


    Keep safe.


    Regards,

    Josel

  • Hello Joselito,

    E2E was down for maintenance until mid day yesterday.  I am sorry for the inconvenience.  Thank you for the response letting us know the versions you are using.

    Apparently the bootloader on the "old" system is running since it has a heartbeat.

    So the next step to try on the "old" system is found in the current DLP® LightCrafterTm Single DLPC900 Evaluation Module (EVM) User's Guide [DLPU101B] starting on page 58 section 3.11 JTAG Flash Programming.  First try the procedure in the note:  

    Before using JTAG to reload the bootloader, first install the BOOTHold jumper (J11) and turn the
    system on. The system shows connected, but does not recognize the attached DMD. Manually select
    the radio button that matches your DMD and go to the firmware tab and select the FW image and
    reprogram. Then power down, remove the BOOTHold jumper and restart the system. Reprogramming
    in this manner often recovers a system without requiring reloading the bootloader through JTAG.

    If this works, please load the OOB image which you can find here: https://www.ti.com/tool/DLPR900 

    If not then try obtaining and using the USB-JTAG chip outlined in the section mentioned.

    Regarding the device that does not seem to be working after restoring it to the "new" EVM. Please try powering up, then go through a "Standby", allowing the full time to complete the timer (a little over two minutes).  I would repeat this several times and see if this recovers the DMD.  

    Does the "old" DMD still work well in the "new" EVM.  If so, and the Standby does not recover the "new" DMD, then inspect the pins on the back of the "new" DMD to see if any are bent.  Also inspect the ZIF socket for any issues with the contacts.  

    Let me know if this uncovers anything.

    Fizix

  • Hi Fizix,

    Good day.

    The customer really appreciates your advice!

    We tested the new DMD on the new EVM as you suggested. We powered it up and then went through the standby two times, and carefully checked the pins on the DMD chip(and found that one or two pins are bent very slightly). We carefully re-mounted the DMD on the EVM and found that it was recovered.

    But for the old DMD on the old EVM, there are still some questions I want to ask. First, the old DMD works well on the new EVM, I wonder whether I can adjust the old EVM without mounting the old DMD(because I wish not to damage the old DMD which seems good now).
    Second, the old EVM cannot connect to the control software at all. I mean there is no response at all when the PC is connected to the old EVM, and the software keeps showing 'disconnected'. I cannot do anything with the PC to the old EVM.

    Please advise.

    Keep safe


    Regards,

    Josel

  • Josel,

    Does the old EVM not "connect" when the HoldBOOT jumper is installed.  If so, then it sounds like the bootloader itself may be corrupted.  In that case they need to follow the full procedure in 3.11 JTAG Flash Programming.  They will need to obtain the FTDI USB-JTAG chip and wire it up to program over JTAG using the FlashProgrammer.exe.  By default it is located at:

    "C:\Texas Instruments-DLP\DLPC900REF-SW-5.0.0\DLPC900REF-JTAG" 

    You do not have to have the the DMD installed to do this.  Check that D6 is showing a heartbeat which means the bootloader was installed successfully.

    Fizix

  • Hi Fizix,

    Good day.

    You may need to know that there is always a heart beating LED even when the PC shows 'disconnected'. Does this mean anything?

    Keep safe.

    Regards,

    Josel

  • Joselito,

    This means that the bootloader is running, but it sounds like the part that sets up USB communication in the DLPC900  is not working.

    Fizix

  • Hi Fizix,

    Good day.

    So that means a JTAG module is needed to recover this EVM?

    Regards,

    Josel

  • Joselito,

    That is correct if a piece of the boot loader has been corrupted.  If it is not the bootloader, then there is a very slim chance that the I/O circuitry that handles USB in the DLPC900 controller has been damaged.

    I also recommend that you connect a USB-UART bridge to the controller and look at the ASCII debug messages during initialization.

    There is also an I2C port that can be used for communications for test purposes.

    Fizix

  • Hi Fizix,

    Good day.

    Thanks for the suggestions, The customer will try it and let you know as soon as possible. But if it is circuit damage, then how should the customer fix it?

    Keep safe.


    Regards,

    Josel

  • Joselito,

    When was the kit purchased?

    Fizix

  • Hi Fizix,

    The customer purchased it from digi-key in 2019.

    Regards,

    Josel

  • Hi Fizix,

    But if it is circuit damage, then how should the customer fix it?

    Regards,

    Josel

  • Hello again Josel,

    We do not provide repair services.  You can try contacting some of our design partners to see if they are willing to look at it, but we cannot promise anything.  Since the device is well over the 90 day warranty period for an EVM, we cannot provide a warranty replacement.

    You can start here:  https://www.ti.com/design-resources/embedded-development/dlp-chip/3d-printing-direct-imaging.html#Development.  Look under Production Services - Design Services.

    Fizix