This thread has been locked.

If you have a related question, please click the "Ask a related question" button in the top right corner. The newly created question will be automatically linked to this question.

TMS320F28379D: Debugging: auto-connect and flashing of all cores

Part Number: TMS320F28379D

Hi,
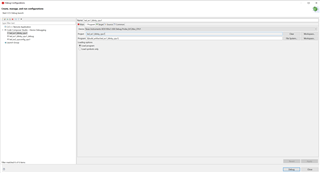
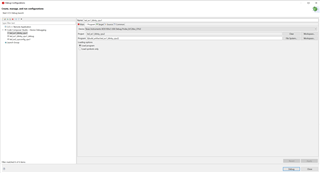
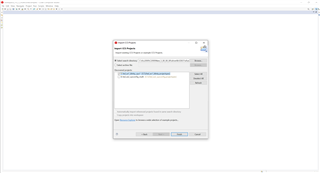
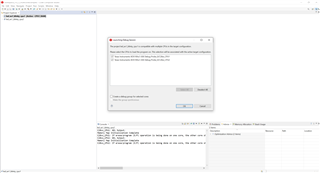
in the F2837x_FRM_EX_UG is a description how to debug both CPUs. Here you connect to the debugger, then connect to the cores and then download the .out file one by one. Is it possible to auto-connect to all cores and download the firmwares onto both CPUs in one step? May be there is already a script.

Regards, Holger

  • Hello Holger,

    I do not believe there is currently a way to do this at least not from what I've heard of. CPU1 is always programmed first since it is the main CPU and has control of handing off peripherals to CPU2. I will forward this to an emulation expert in case there is something I'm not thinking of, but from understanding, no there is no way to connect to both cores simultaneously.

    Best regards,

    Omer Amir

  • Holger,

    It is possible to change your debug settings in CCS to make this possible. There are quite a few steps to do this, so please allow me to get back to you about this tomorrow.

    Best Regards,

    Ben Collier

  • Holger,

    Apologies for the delay, you can do this by modifying the Debug Configuration:

    https://software-dl.ti.com/ccs/esd/documents/ccs_multi-core-debug.html (See “Debug Configurations” section)

    https://software-dl.ti.com/ccs/esd/documents/users_guide/ccs_debug-main.html#debug-configurations

    For example, I have a debug configuration for F28379D. Under the “Programs” tab for it, I can specify a different project for each CPU. Then when the debug configuration is launched, it should load the associated out file to each CPU.

    Best Regards,

    Ben Collier

  • Hi Ben,

    that is not working at my side. Have you tried it?

    Also customer wants to have hold or breakpoints which stops both CPUs.

    Regards, Holger

  • Holger, 

    Yes, I have tried this, but I think I left out a step. Here is exactly what I have done:

    1)

    Import the dual core example:

    2) Select led_ex1_blinky_cpu1 folder and hit the debug button, then click ok.

    This creates a debug configuration for led_ex1_blinky_cpu1. You can terminate this debug session immediately.

    3) Select Run > Debug Configurations

    4) Single-click on the led_ex1_blinky_cpu1 debug configuration, and click on the program tab

    5) Make sure that the CPU1 project is selected for the C28xx_CPU1 device

    6) In the 'Device' dropdown menu, change the device to C28xx_CPU2, then change the project to led_ex1_blinky_cpu2 by browsing the workspace. The 'Program' should automatically change to ${build_artifact:led_ex1_blinky_cpu2}

    You will then need to apply the changes.

    Now when you use the debug button on the led_ex1_blinky_cpu1 project, CCS will create the led_ex1_blinky_cpu1.out and led_ex1_blinky_cpu2.out files and load them to CPU1 and CPU2 respectively.

    Please let me know if these steps do not work for you. 

    As for the breakpoints, is this what the customer is looking for? https://www.youtube.com/watch?v=qDp2cIvHmW4

    Best Regards,

    Ben Collier