Creating CCS v5 Static Library Project For MSP430
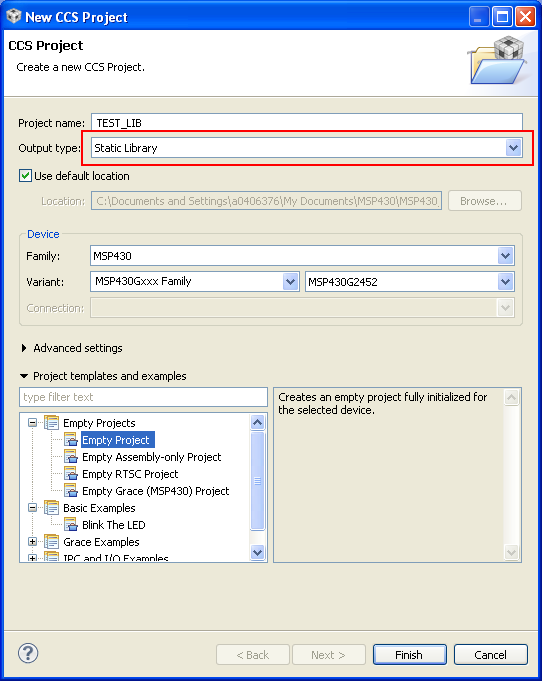
First step is to create a new CCS v5 project by selecting "File" -> "New" -> "CCS Project". Set the project name and most important, set the "Output Type" to "Static Library" as shown below.
Creating Static Library Code
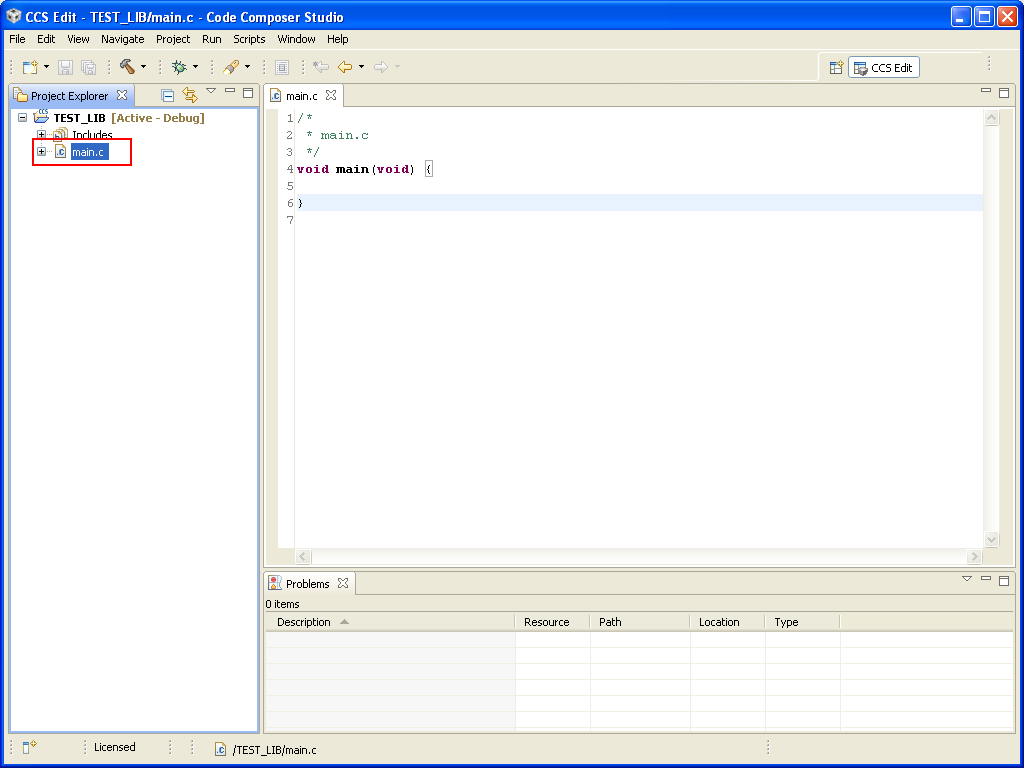
The next step is creating the static library code. Per default the CCS v5 Project will have main.c file in the project with main() function as shown as follows.
There are several things to be noticed when creating static library code:
- The library code shall not contain any function with the name "main", because this will result in linking error when the library is used by an application due to multiple definition of "main" function which is also available in the application code.
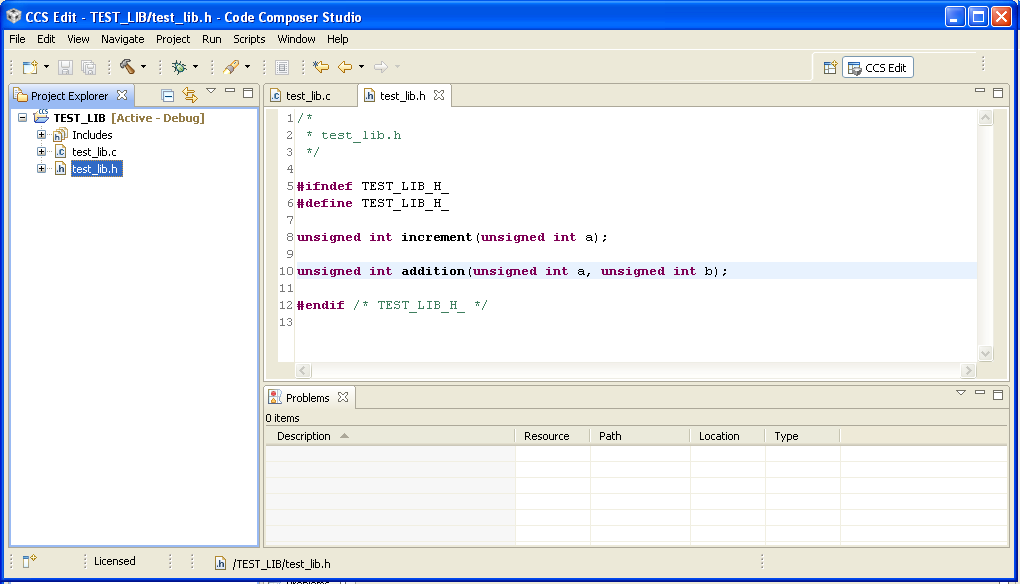
- A library usually comes with header files, and therefore the function declarations which shall be shared with the application using the library shall be listed in this header file.
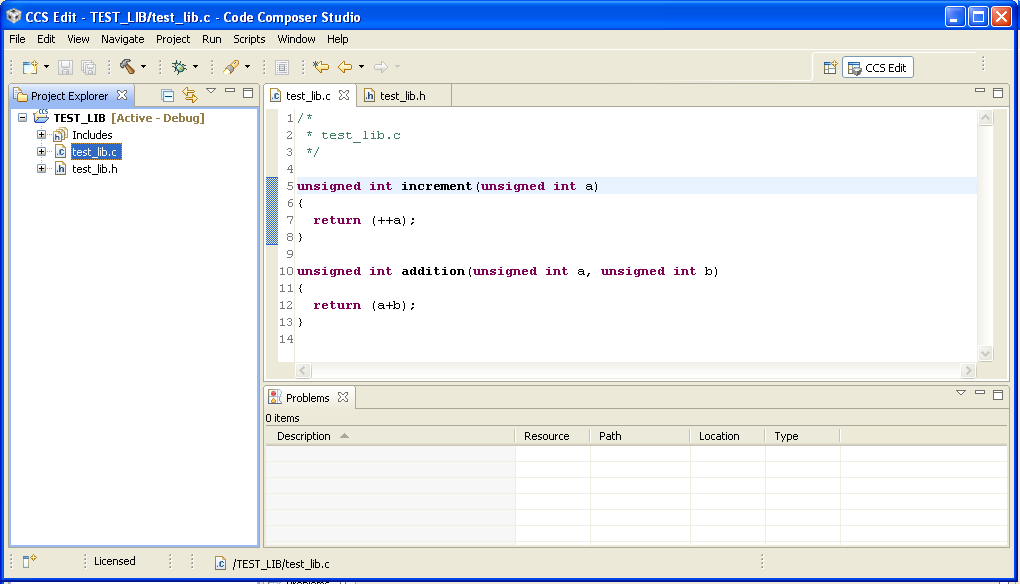
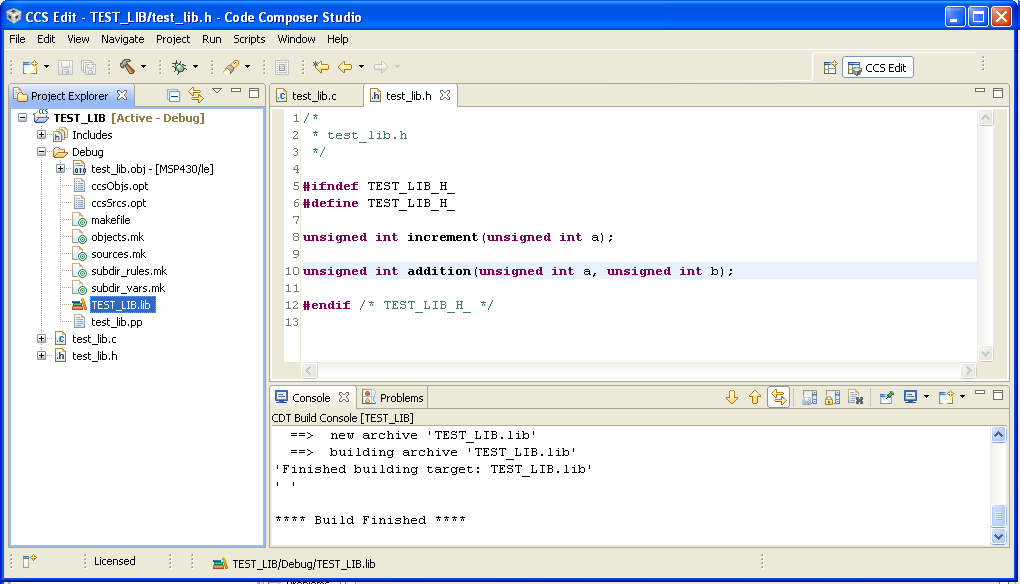
The following example shows the implementation of "test_lib.lib" which contains two functions: increment() and addition(). The implementation of source code and header file is as follows
Compiling Static Library Project
After finishing the code, make sure that the compilation succeeds and the library file is successfully created.
Example Application Using The Created Static Library
Creating CCS v5 Application Project
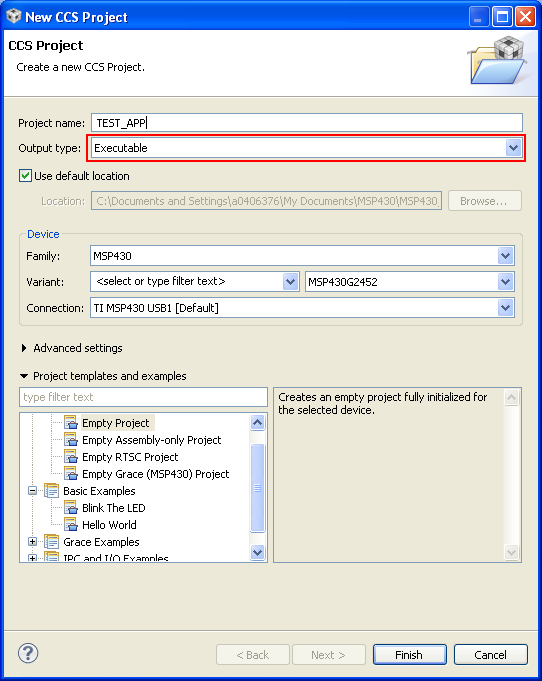
The application which uses the created library shall be implemented in separate project. The step is similar to the "Output Type" option shall be set to "Executable" instead of "Static Library".
Copying Library File and Library Header File
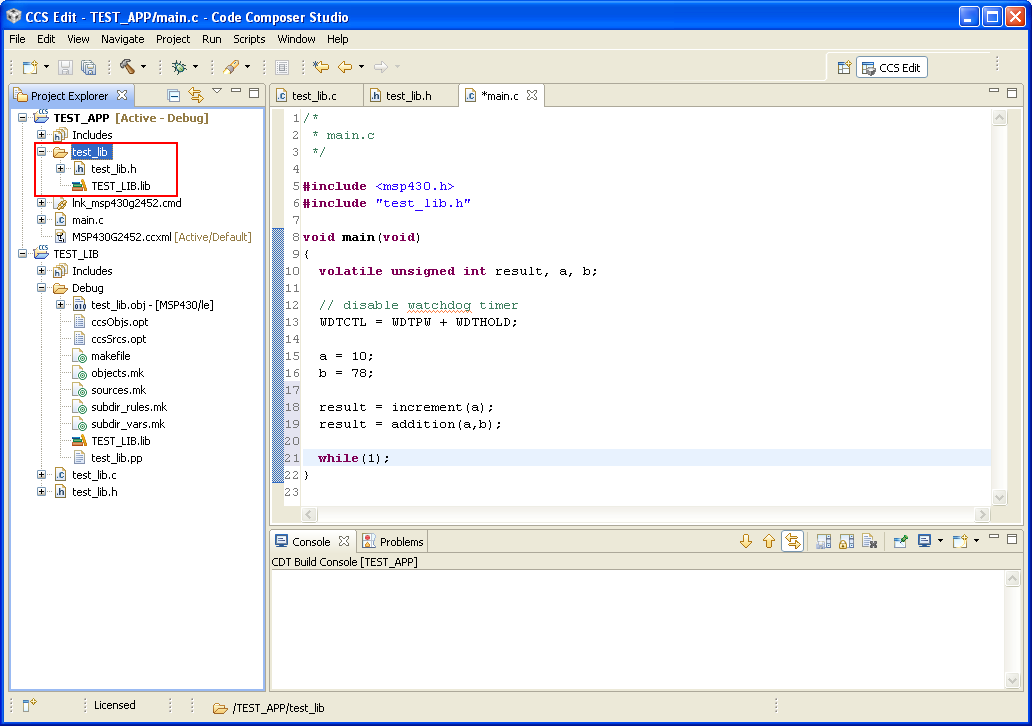
In order to use the created library file, it shall be copied into the application project along the header file for the function declarations which are available inside the library file.
The following figure shows how copying of library and header file can be done in the application project by creating a specific folder.
Setting Application Compliation/Linking Configuration
In order to enable the application project referring to the included header and library file, the application compilation/linking configuration shall be adjusted.
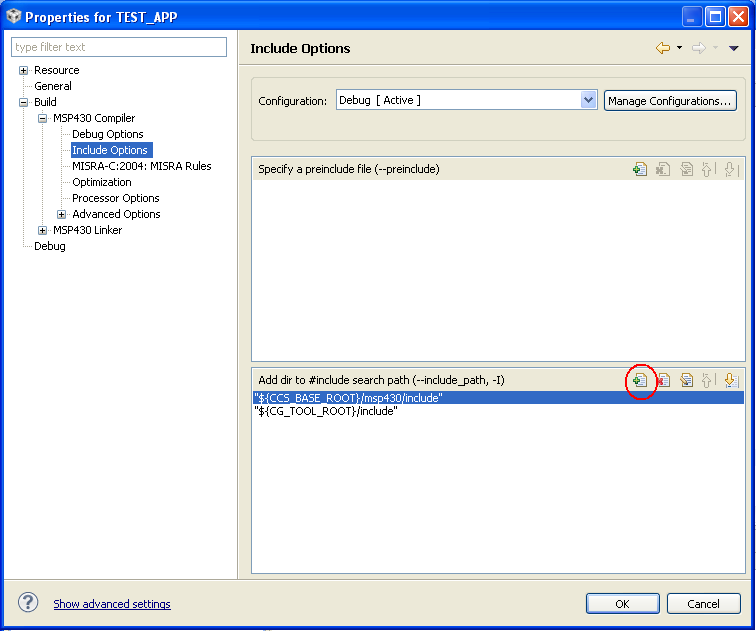
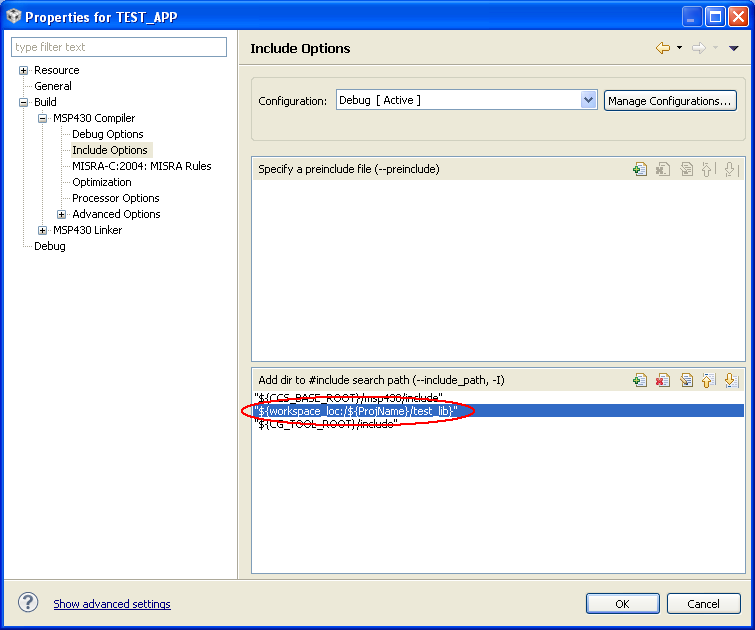
First add the include path to the folder containing the library header file. This can be done by going to Project Properties ("Project" -> "Properties"), and select "Build" -> "MSP430 Compiler" -> "Include Options"
Then add the path to the library header file.
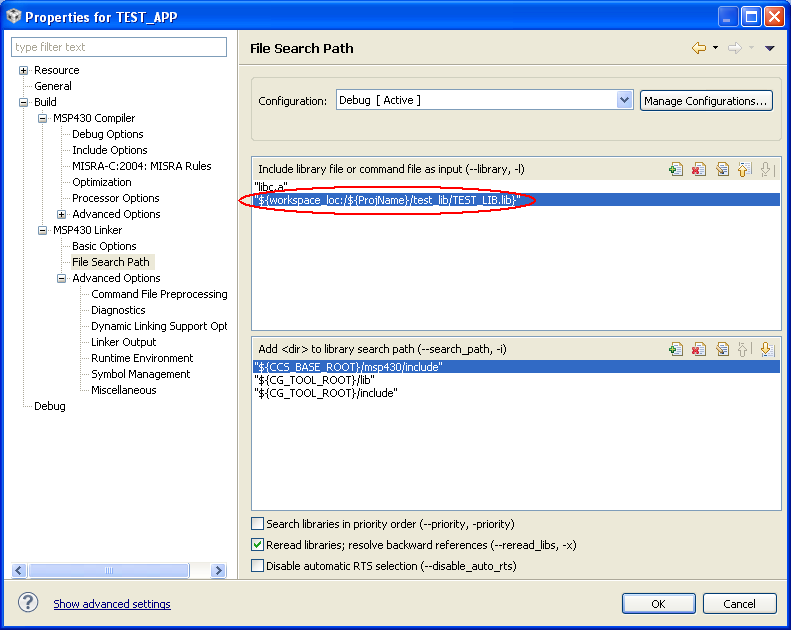
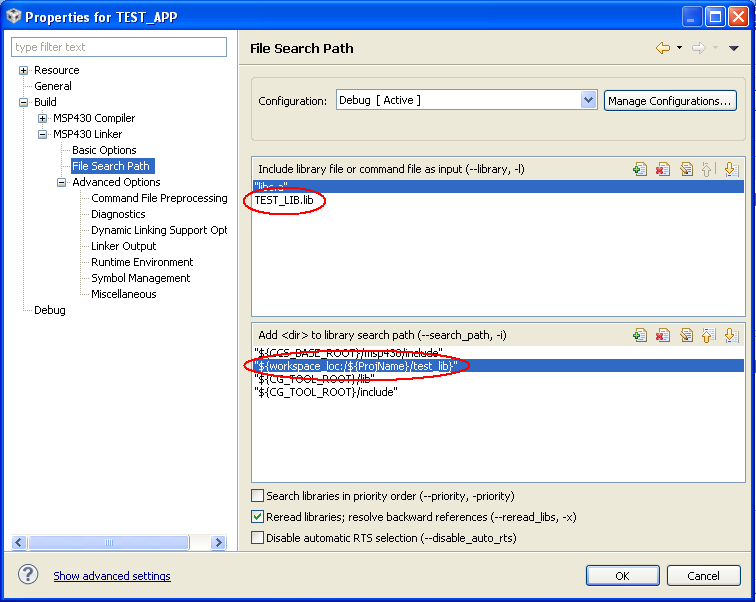
The next step is to include the library file in the linking process. This can be done in two ways:
- Providing the library name including the path which is shown as follows:
- Providing the library name only, and adding the folder where the library file resides to the library search path
Compiling Application Project
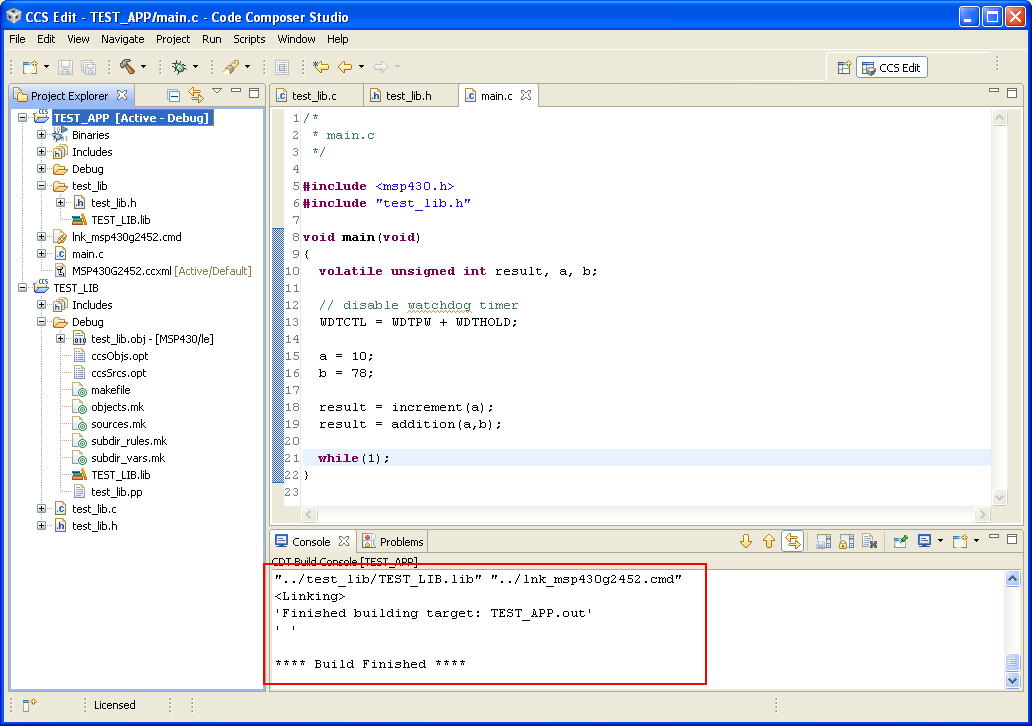
After adjusting the application project configuration to include the library header file in compiling process and the library file itself in the linking process, the application project shall be able to be compiled successfully.


