


Motor Studio Overview
Our new Motor Studio is a new and improved GUI focused on ease-of-use and aimed at simplifying the tuning process of the MCx BLDC motor drivers. It replaces the older GUI Composer based GUIs that are hosted on the TI Cloud Gallery (old GUIs will remain accessible).
You can download and install the Motor Studio GUI here.
Currently, the following devices are supported:
- MCF8316A
- MCF8316C
- MCF8315A
- MCF8329A
EVM Firmware Compatibility
Due to improvements to the communication speed, the new Motor Studio GUI requires a new firmware to be programmed on the MSP430 of the supported EVM.
To confirm whether your EVM currently has the old or new MSP430 firmware, simply plug in the USB and check whether LED D6 or D7 lights up:
- If LED D6 lights up immediately after plugging in USB, then the EVM has the old MSP430 firmware, and it will work with the old GUI Composer GUIs.
- If LED D7 lights up immediately after plugging in USB, then the EVM has the new MSP430 firmware, and it will work with the new Motor Studio GUI.
Programming the MSP430 Firmware on your EVM
The MSP430 firmware image files corresponding to the old and new firmware can be downloaded below:
- https://e2e.ti.com/cfs-file/__key/communityserver-discussions-components-files/38/MCxEVM_5F00_MSP430FR2355_5F00_Firmware.out - Works with the old GUI Composer GUI
- https://e2e.ti.com/cfs-file/__key/communityserver-discussions-components-files/38/MCxGUI_5F00_Comm_5F00_Bridge_5F00_MSP430FR2355_5F00_v0.0.9.out - Works with the new Motor Studio GUI
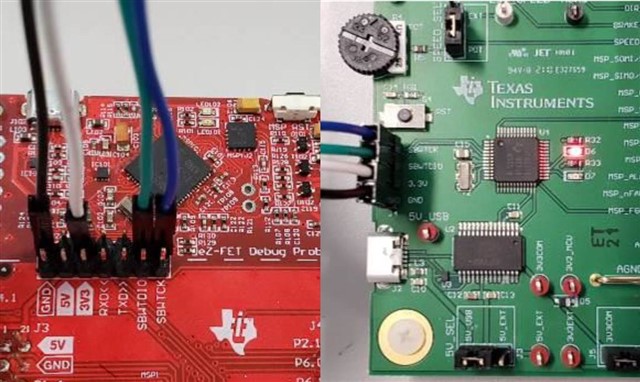
To program the MSP430 firmware onto the MCx EVMs, you will need a MSP430 LaunchPad (such as the MSP-EXP430FR2355) and 4 female-female jumper wires to connect the programming pins as shown below:
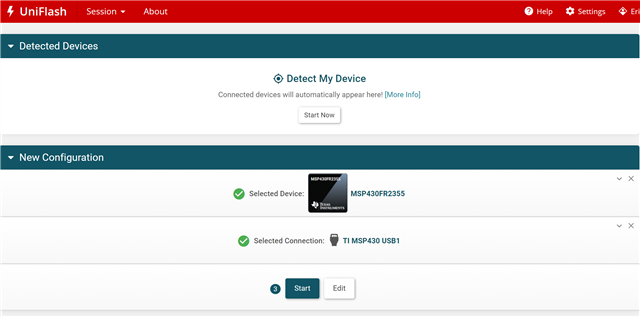
Connect the MSP430 LaunchPad to the computer through USB, then navigate to the TI Cloud Uniflash tool.
Select MSP430FR2355 and TI MSP430 USB1 then click Start:
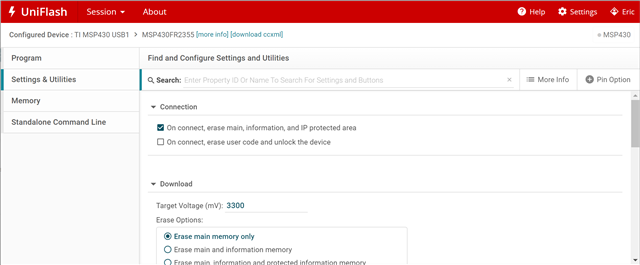
Navigate to Settings & Utilities and enable the "On connect, erase main, information, and IP protected area" checkbox:
Navigate to the Program tab and click on Browse and upload the desired firmware .out image file:
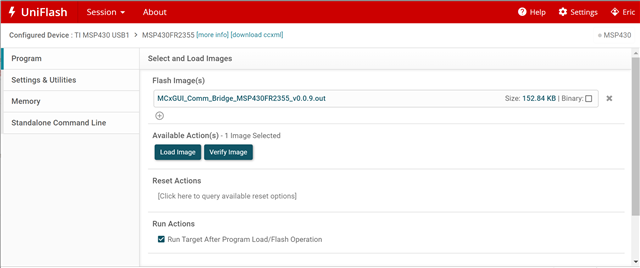
Click the Load Image button to program the firmware.
