Other Parts Discussed in Thread: BQSTUDIO, EV2400, BQ40Z50
Hi,
My name is Parker Schless and I am on the electrical team for Cornell University Autonomous Underwater Vehicle (CUAUV). We are making a new battery management system for our subs and want to use the BQ40Z80 chip to do this. However, we are all very new to this, and have many questions (some may seem trivial but we are students so please bear with us!) about how to implement this chip into our system. Here is an overview of our system for reference (our website for more info: https://cuauv.org/):
1. We use the following batteries to supply power to the sub via an underwater-rated cable (the batteries are located in their own separate pod enclosures): https://hobbyking.com/en_us/turnigy-graphene-professional-10000mah-4s-15c-lipo-pack-w-xt90.html
2. We have 2 of these battery pods in our sub, which we then merge using an OR controller on a PCB inside the main sub enclosure.
3. Right now, we do not have any sort of battery management system in the sub, so we are implementing this from scratch. Our plan is to make a custom PCB with the BQ40Z80 chip and an ATXMega MCU which will be located in the battery pod itself. The MCU will then send the BQ40Z80 SMBus commands and also receive commands over RS232 lines from the main sub computer in the main enclosure.
Here are the questions we have regarding the actual implementation of the chip:
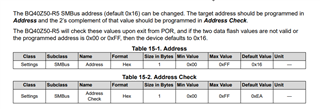
1. We understand that BQSTUDIO is necessary to create charging profiles for the batteries and change other parameters. However, we are not using the eval board since we plan on making our own PCB. Is it possible to use a generic USB to I2C FTDI converter to link the chip with BQSTUDIO? Or do we have to purchase an external EVM2400 module separately.
2. The recommended schematic in the datasheet shows an implementation for a 6S battery. We were wondering if there may be an example schematic for our 4S batteries we could use, especially a high resolution image since the datasheet image is quite pixelated. The main thing we are interested in seeing is how to implement the overvoltage chips with the 4S vs 6S batteries.
3. Since we power 8 BlueRobotics T200 thrusters from this battery + actuators, we can draw up to 60A. Does the current sensing feature of the chip support currents that high, assuming the use of a suitable 1 mOhm sense resistor as specified?
4. We see that the chip has the ability to use temperature readings to make decisions for the system. Since our batteries do not have internal thermistors, would it be possible to place external thermistors on the battery? Or would this not work and we should just not use the thermistor function. The chip also mentioned the ability to sense temperatures on the MOSFETS themselves, would we use external thermistors for these as well, and would they still be able to work if we put heat sinks on the FETS?
5. We also want to know exactly how the chip determines which mode it will operate in. Our goal is this: We want the chip to detect when the PACK inputs are connected to a DC charger, such that it will properly charge the battery. We also want the chip to detect when it is plugged into the sub to discharge the battery (I understand there is a SYSTEMPRES pin we would just ground when connected to the sub to accomplish this, but the pin also doubles as a SHUTDN pin so I am not sure how we might use both functions). When the battery pod is not plugged into anything, we want the chip to basically operate in the lowest possible power mode such that we can leave the pods as is for awhile and come back to them with the same charge level (or as close as possible) we left them as (I also reviewed the wake function and SHUTDN functionality which I'm assuming would be used for this function). I went through the datasheet to understand the different modes, but it would be great to understand how we could implement those into our specific system for our requirements.
6. The recommended schematic shows spark gaps for the SMBus connections. I am not familiar with these and am confused if these are actual SMD components (if so, which ones are recommended for the layout), or if they are solely implemented as PCB traces.
7. The datasheet shows how for the major faults (secondary protection features), a fuse can be blown to permanently disable the system. However, the recommended schematic shows this crossed out and says do not populate. What was the reason for removing the fuse and is this something we should implement in our board? If so, which fuse do you recommend for our application.
8. In addition, I was confused about if the primary safety features only disabled battery output or charging vs blowing the fuse like the secondary safety features. We are primarily interested in the overcurrent case, which we want to simply disable the battery output (and not blow the fuse) and be able to send a reset signal to the chip to reenable current flow after the issue has been verified).
I appreciate your time responding to this, and it would be great if we could get the email of a/some TI representative(s) who are familiar with this chip and can answer our questions along the way as we develop this solution for our sub over the next several months. Thank you for your time!