This thread has been locked.

If you have a related question, please click the "Ask a related question" button in the top right corner. The newly created question will be automatically linked to this question.

UCD3138: Fail to download .x0 file after re-build Lab01

Part Number: UCD3138
Other Parts Discussed in Thread: , USB-TO-GPIO2,

Tool/software:

Hi,

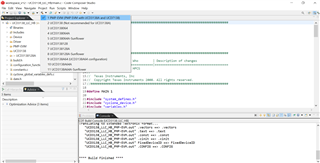
I was failed to rebuild and download the Lab01 of UCD3138 on CCS.

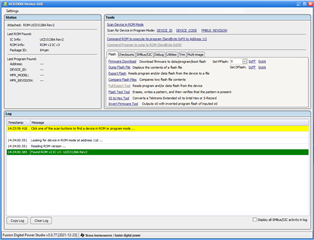
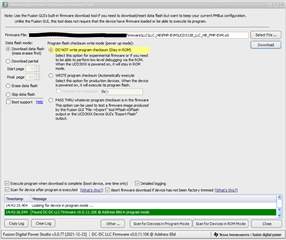
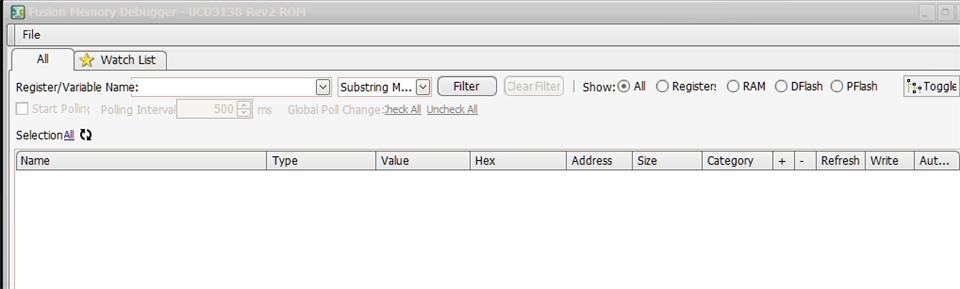
When I downloaded the original .x0 file to UCD3138CC64EVM-030, I can see the string contents through the memory debugger of UCD3138 Device GUI.

But after I rebuild the Lab01 on CCS, the new .x0 will not work. I found the .x0 miss the 1st line (seems 32 bytes).

And I also fail to load the new .map .pp file in Memory debugger.


I have no idea what I missed about it.

Thanks for your time to reply my question.

  • Hi Emin,

    I do not think you need to worry about looking into the code of the .x0 file. Can you confirm that you have followed the Getting Started steps as explained in this E2E post: https://e2e.ti.com/support/tools/code-composer-studio-group/ccs/f/code-composer-studio-forum/1352388/ucd3138-ucd-3138cc64evm-030/5191636?tisearch=e2e-sitesearch&keymatch=%252525252520user%25252525253A525510#5191636

    Hello Tasmiya,

    I think you are misunderstanding how to use the UCD3138. Please refer to the training lab videos "Basics and Tools" section again. Or, review the Introduction to UCD3138x Devices app note

    Step 1: Download the Fusion Studio GUI. When you download Fusion Studio GUI, you will have 3 programs that are installed: Fusion Studio Online, Fusion Design Offline and UCD3xxx Device GUI.

    Step 2: You only use Code Composer Studio (CCS) to BUILD your UCD project, not to flash. So, you download the UCD LLC EVM firmware and open the project in CCS. On CCS, you can make any changes to the firmware that you would like. Once you are satisfied with your UCD project, click build and CCS will build the project. Inherently, as a UCD project, CCS will generate a .x0 file in your project build folder. When you click build in CCS for your UCD LLC firmware, a .x0 file will automatically generate. Make sure to select the correct UCD target in the build dropdown.

    Step 3: Once you have the .x0 file generated, then you will open Fusion Studio UCD3xxx Device GUI. Connect the UCD3138A control card with your computer via the USB-TO-GPIO2 adapter. The USB-TO-GPIO2 adapter communicates via PMBus, not JTAG. Click "Scan Device in ROM Mode" in the GUI. A green "Found ROM..." message should show up in the log. If not, then there is either something wrong with your adapter or your UCD chip. 


    Step 4: Now that your UCD chip is detected in ROM mode, click on "Firmware Download". Navigate to the folder where your .x0 file has been generated and select the .x0 file. Click "Download". The LLC firmware will have successfully flashed onto your UCD3138A when the green "Found DC-DC LLC Firmware..." message shows up. The firmware is now flashed onto your UCD chip and is ready to be used.

    Step 5: The Fusion Studio Online is the GUI that allows you to change the loop compensation and other parameters real-time while your UCD is running on hardware. You will need to keep the UCD connected to your computer via the USB-TO-GPIO2 adapter while your UCD3138 is controlling an EVM. Fusion Studio Offline is used when you do not have a UCD connected and allows you to view example UCD projects.

    Step 6: Once you are satisfied with your firmware, you can then use JTAG and an XDS110 adapter to flash the final production firmware onto your UCD. This step should only be taken when your firmware is fully tested and will go into an end product. You do not need to use JTAG for debug and testing purposes.

    Best,

    Jonathan Wong

  • Hi Jonathan,

    I think I find the problem. The CCS has to be updated after installation. After updating, it can work.

    Thanks for your support.