This thread has been locked.

If you have a related question, please click the "Ask a related question" button in the top right corner. The newly created question will be automatically linked to this question.

BQ34Z100-G1: Learning Cycle Issue

Part Number: BQ34Z100-G1
Other Parts Discussed in Thread: BQSTUDIO
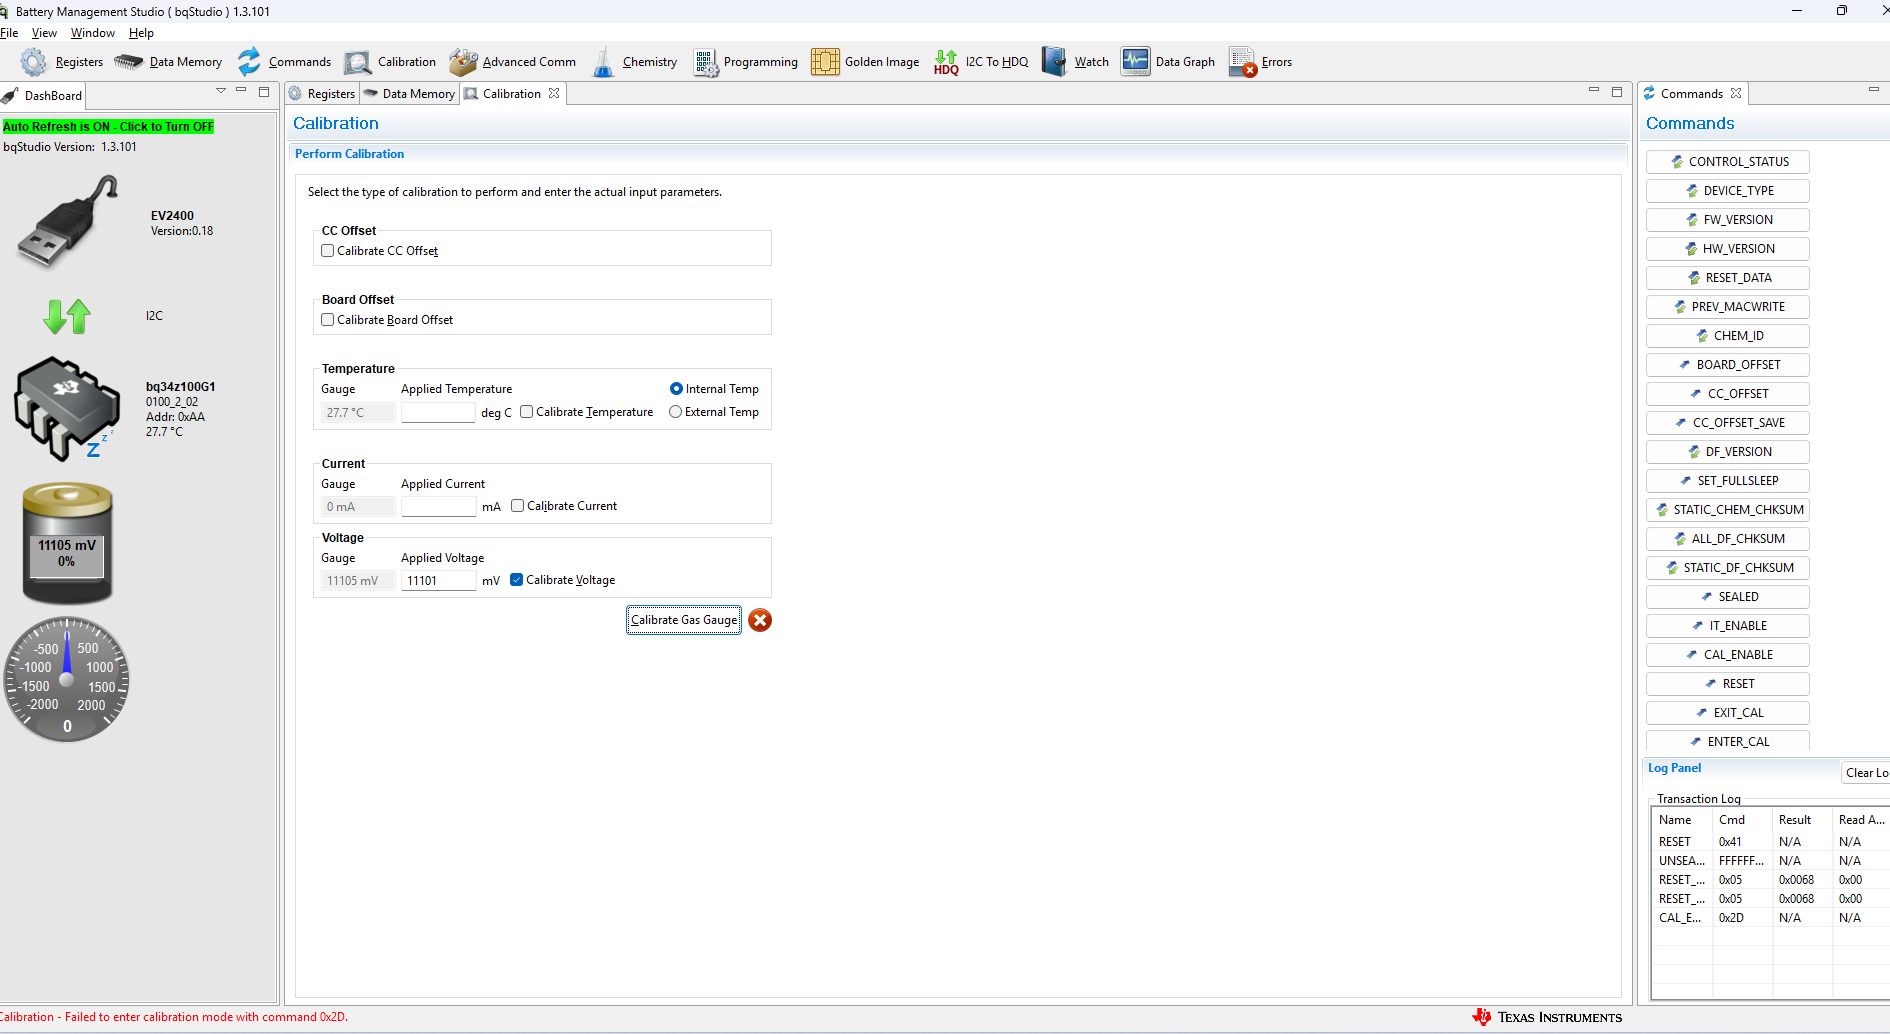
bat (1).png

Hi,
I am trying to run learning cycle on bq34z100-g1 EVM for my battery(3S, 5000mAh), but facing some issues.

  1. I have run voltage calibration many times on my evm but this time it shows error(failed to enter calibration mode with command 0x2D) . SS is attached. I tried enter calibration command.     

     2. What is relation between voltage divider resistors and voltage divider value in bq studio?
         And what should be the input voltage at pin 4 (BAT)?   

     3. After calibration, some parameters like cc gain, cc offset, voltage divider gets changed. how can i  verify if that are correct?   

     4. what is difference between files with .rom, .srec and .gg extensions?   

     5.  In which case, should i use IT_ENABLE(impedence track algorithm)?

Please help me get started.

Thank You

  • Hello,

    This question has been assigned within the team and will be reviewed and followed up with another application engineer when possible. In the meantime please attach any associated .log/.gg files associated with the projects

    Thank you,
    Alan 

  • 1: The gauge will auto-seal if it was sealed and you send a reset command. It won't allow the calibration command if it is sealed. You list of commands indicates that you sent a reset command after unsealing, which undoes the unseal command.

    2: Check out chapter 3.4, https://www.ti.com/lit/ug/sluuco5a/sluuco5a.pdf. This explains what the bqStudio Voltage Divider setting means and also elaborates on the external divider.

    3: You apply a known voltage to the gauge and check, if bqStudio reports this voltage.

    4: .rom is deprecated. .srec is a full firmware + data memory image. .gg is a human readable list of parameters

    5: This is issued after you configure the gauge and before you put the gauge into service.