Other Parts Discussed in Thread: UNIFLASH
Writing code to the IWRL6432 can be accelerated using a few developer tips. Here is a sequence of steps that may accelerate rapid iteration on software. Much of the information here is the same information found in the TiReX Debugging guide, but made more explicitly for the IWRL6432. For more information, see this guide on deep sleep debugging.
1. Write the empty image to the device.
Set the device to flashing mode. Using Uniflash, flash the IWRL6432 with the empty.release.appimage found in $MMWAVE_L_SDK$\examples\empty\xwrL64xx-evm\m4fss0-0_freertos\ti-arm-clang\.
2. Set the device back to functional mode
3. Download CCS 12.5 if not already downloaded. Open CCS 12.5.
4. Import the presence and motion demo with file->import->Code Composer Studio->CCS Projects->Browse->$MMWAVE_L_SDK$\examples\mmw_demo\motion_and_presence_detection\. Click Select Folder.

5. Select the motion_and_presence_demo_xwrL64xx demo. Click Finish.
6. In motion_detect.c, change gDebugTargetCode from 0 to 1. This will allow you to set breakpoints without losing the debugger connection with the device.

7. Build the project using ctrl+B
8. Once the project has built, navigate to view->target configurations. Create a new target configuration. Name it IWRL6432.ccxml
9. Open IWRL6432.ccxml. Select IWRL6432 for Board or Device. Set the connection to the XDS110 Debug Probe.

10. Navigate to the Advanced tab in the IWRL6423.ccxml.

11. Under CS_DAP_0. Use the initialization script found in $MMWAVE_L_SDK$\tools\gelfile\xwrLx432.gel. Use your actual version of the MMWAVE_L_SDK, not the $ signs shown in the screenshot.
...
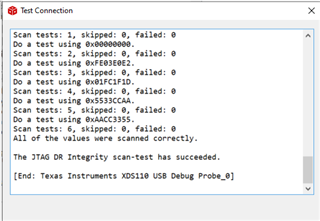
12. Navigate back to the Basic tab. Run Save and Test Connection. See that the connection is successful.

13. Right click the IWRL6432.ccxml. Select Launch Selected Configuration. You can now start to debug the device.
Every time you make a change to the code, do the following sequence of steps:
1. Change the code.
2. Disconnect from the IWRL6432 with ctrl+alt+d
3. Push the reset button on the IWRL6432
4. Connect to the IWRL6423 with ctrl+alt+c
5. Software Reset the IWRL6432 with ctrl+shift+r
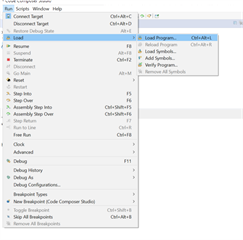
6. If the code is being loaded for the first time, navigate to Run->load->load program. Browse Project->Select the out file that you want to load. Otherwise, to reload the same .out file after successive changes, simply run ctrl+alt+r

7. Press Play and begin debugging. When you make changes, simply rebuild and run the sequence of steps again. It can all be done in <10 seconds if you know the keyboard shortcuts :).

