This thread has been locked.

If you have a related question, please click the "Ask a related question" button in the top right corner. The newly created question will be automatically linked to this question.

HDC3020-Q1: heater enable

Part Number: HDC3020-Q1
Other Parts Discussed in Thread: HDC3020

Tool/software:

Team,

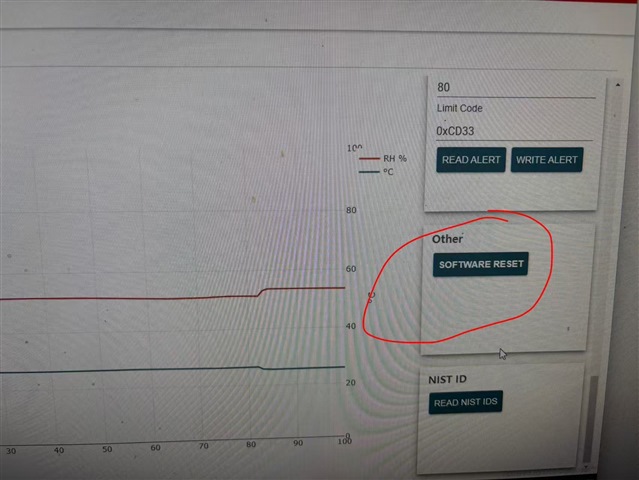
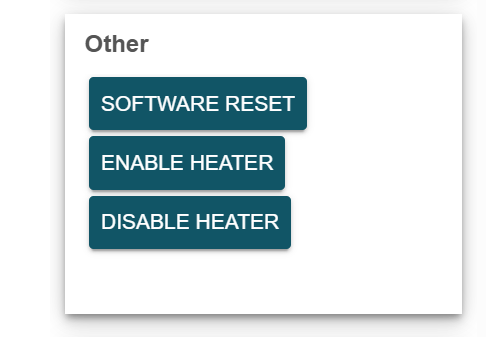
Customer enabled heater with command 0x306D. Read status through 0xF32D command and return 0x2000 bit 13=1 mean heater is enabled. The heater is configured as 0x3FFF, full power. 

But after 5s~10s running, the temperature is still at 26C (This temperature is reported by both HDC3020 and other external temperature sensor). 

Why doesn't the heater seems take effect? This doesn't happen only for one board. This happen for all the boards at customer side.

Thanks

  • Ryan,

    Is the customer doing temperature & RH reads during the heater rise? If so, do those show no temperature change? Is there any way to monitor the device current (IQ)? If the heater is truly enabled, the current should increase to the 10s of mA, so a spike in IQ is very noticeable.

    Please share the full I2C sequence of configuring and enabling the heater, so I can verify it is correct.

    Regards

    -Alex Thompson

  • Alex,

    Below is I2C capture for enable heater which is good.

    Below is I2C capture for Full power level setting HDC3020 response NACK. Do you know why?

  • Hi Ryan,

    The issue here is the customer is not sending the correct I2C sequence to configure the heater. The sequence needs to be: command to configure heater, then the configuration data, then the CRC. So after the address, these 5 bytes need to be sent in this order: 0x30 0x6E 0x3F 0xFF 0x06

    The 0x306E starts the configuration, the 0x3FFF actually sets the heater to full power, and when writing to the HDC3020 a CRC is needed. For 0x3FFF, that CRC is 0x06. The part will ACK when all the bytes are sent.

    Regards

    -Alex Thompson

  • Alex,

    these 5 bytes need to be sent in this order: 0x30 0x6E 0x3F 0xFF 0x06

    This is what customer do. But HDC response NACK when they send the 3rd byte "0x3F". They cannot send further data any more.

  • Ryan,

    Are they using 0x306D command to enable the heater first? Please confirm that they are trying to use the configure command sequence first. Then once that has been done successfully, have them enable the heater.

    Regards

    -Alex Thompson

  • Alex,

    You can see the I2C pic I attached in above post. The first pic is 0x306D which is successful. 

  • Ryan,

    Customer first needs power cycle the part, then use the configure heater commands ( 0x30 0x6E 0x3F 0xFF 0x06) without using the enable heater command. The HDC3x should not NACK during the communication sequence. Then if it still NACKs, try sending MACKs to the sensor to see if that forces the configuration to go through.

    Regards

    -Alex Thompson

  • Alex,

    try sending MACKs to the sensor to see if that forces the configuration to go through

    What does MACK mean?

    I let customer try with TI HDC3020 EVM. However, I cannot find button to control "enable heater" and "disable heater" which should be at "Other" group according to user guide. Could you help on this?

  • Hi Ryan,

    MACKs are master acknowledges, where the host controller forces the sensor to acknowledge instead of reading the acknowledge from the sensor. This shouldn't be necessary for this command sequence, but the customer could try it if they are still receiving NACKs after the 3rd byte of the heater configure sequence.

    The heater enable and disable buttons are visible on version 1.0.7 of the GUI, not on earlier versions. I was able to find that version without logging in to a TI account, but to use it requires a TI account. I have disabled that, so it should be available to anyone now.

    Now when you click enable heater, it will run at default heater power, which is not very strong.  There is not a way in the GUI to just send a particular configure command to change the heater power, but there is a workaround you can use to get the heater to max power.

    • first, go to the drift correction section and ensure the drop down is set to high power
    • Then, hit execute. The heater will turn on to high power. The user can then hit abort or let the drift correction sequence finish. The idea with the drift correction is to provide an offset code that can be programmed in, but we will ignore that.
    • now, the heater is off, but the high power code was loaded into the sensor when we hit execute. So now, when the heater is enabled and disabled with the previous buttons, it will operate at max power.

    Regards

    -Alex Thompson