This thread has been locked.

If you have a related question, please click the "Ask a related question" button in the top right corner. The newly created question will be automatically linked to this question.

PGA460: Help for parts selection in ultrasonic distance measurement

Part Number: PGA460
Other Parts Discussed in Thread: TDC1000, , DRV8870

Hello,

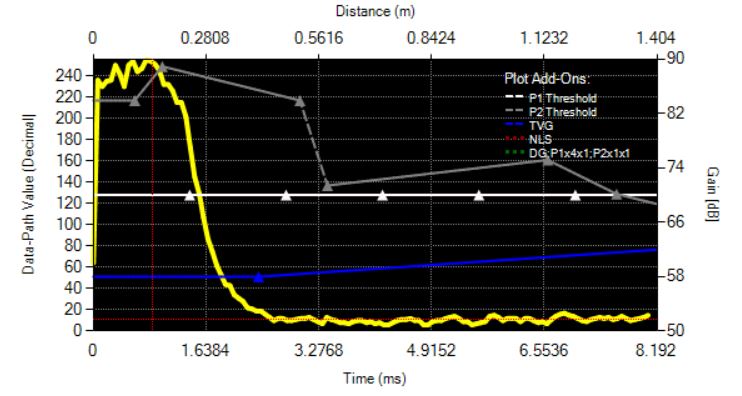
I need to measure the distance of a large object at a distance comprised of 10-30cm, in the air. I would need to have the transducer quite well protected against water, dust, etc., and so I was thinking of gluing them inside of the housing, as described in the TDC1000 app note about the water level measurement. The plastic is about 3mm thick. The expected resolution is about 1-5mm.

Could you help me on the following :

-would it be more appropriate to choose the TDC1000 or PGA460 ?

-would it be better to have a bistatic configuration and a 40kHz sensor, or monostatic and 200kHz ?

-what transducer voltage would be needed ?

-do you have a recommended transducer for this application ?

Thank you in advance for your help.

Best regards,

Sam

  • user5099503,

    I recommend that you use a PGA460 in a mono-static high-frequency (180-480kHz) configuration.
    Fortunately, the majority of high-frequency air-coupled transducers are closed-top, meaning they are hermetically sealed to protect against water and dust. This would eradicate your need of a plastic housing.
    High-freq transducers will typically enable sub-cm resolution, and reliable ranging from sub-5cm to +50cm.

    Most high-frequency closed-top transducers require at least 50-100Vpp on average, so you will need to use a compatible high-frequency transformer. You must limit the center-tap voltage to 15V regardless of whichever transformer you select. A small center-tap (supply based) voltage can be as low as 6V. Your options include:
    1) TDK-EPCOS B78416A2386A003 transformer, contact TDK-EPCOS support at en.tdk.eu/.../product-inquiry
    2) Wurth Electronics 750316928, contact the Wurth Electronics Midcom Inc. Headquarters at midcom@we-online.com
    When contacting either of these companies, be sure to mention that you are developing an ultrasonic sensing solution using the TI PGA460.

    Refer to a similar post discussing an example 200kHz transducer:
    e2e.ti.com/.../2316984

    For a complete listing of high-freq transducers, see the PGA460: Air-Coupled Ultrasonic Transducers & Transformers Listing at:
    e2e.ti.com/.../620399
  • Dear Akeem,

    Thank you very much for your help. I forgot to mention that using a transformer in my design is nearly impossible. Then I suppose I should go for a full bridge and 30V, could you please confirm ? According to your experience, is it a chance to go below 30V ?

    Thank you in advance for your feedback. Best regards

    Sam

  • Sam,
    Preliminary testing using a half-bridge driver at a 9V high side reference with the Murata MA300D1-1 shows ranging up to 20cm. I'm certain a larger high-side voltage will allow up to 30cm. I haven't fully explored excitation of high-frequency transducers using a bridge driver, but either the half-bridge or full-bridge should be acceptable based on the transducer's voltage requirement. I suspect the transducer's ringing-decay time will be prolonged when using a bridge-driver, but the time should be within the equivalent of 10cm in distance for the high-freq transducers.

    Do you have a better idea of which high-freq transducer you will be using (part number)?

    I am releasing a document which discusses important design considerations when using a full-bridge driver. I am waiting for our technical writers to finalize their review, so this document should be available within the next week.
  • Akeem,

    I've received my sensors and did a few tests with them, but without any real success.

    I'm currently in a bi-static half bridge configuration, using Steminc SMD10T2R111WL transducers hanging in the air 3cm apart (currently), in front of each other, with a 820R damping resistor on the transmitter.

    Basically, I did the following :

    -Removed R32 and R35 on the EVK and soldered pin headers (using the half bridge part)
    -Start the system with a 7V external power supply

    -Started the GUI
    -Clicked Burst freq range shift, selected 214.8kHz
    -Set both record times to 8.192
    -Set P1 pulse to 12
    -Disabled current limit
    -In utilities, selected 214.8kHz, clicked "Write coefficients"
    -Time Varying Gain : all mid code
    -In Data Monitor, Stared the stuff, and here's what I get:

    How could I improve my setup ?

    Thank you in advance,

    Sam

    EDIT: apparently the screenshot was not stored properly, and I can't repost it right now. To describe it,  I get no echo on the receiver, and I even can't see the initial burst. By the way, could you provide me with your full-bridge document ? Thanks

  • Hi Sam,

    If you are using the bi-static half-bridge configuration, then you must keep R35 populated with a zero ohm short. Do not populate the R34 zero ohm short. In the half-bridge configuration, one terminal (the negative terminal for polar transducers) of the transmitting element must always be grounded. This may explain why you are unable to see any return echoes.

    If this does not resolve your error, can you also use an oscilloscope to probe the positive terminal of the transmitting transducer to monitor the excitation voltage and waveform? You can also try adding a larger external voltage supply (up to 28V).

    Your last post did not contain an image (must have failed to attach), but no need now - let's see if the R35 short fixes your problem.
  • Hi Akeem,

    Well, to keep the EVM as complete as possible, I didn't remove the Murata SMD transducer. I disconnected it by removing R35, and connected one end of the transducer to J9 pin 2, and the other one directly to GND.

    The maximal Vpp is not provided for this transducer. Do you think 28Vpp is still safe ? Any comment on the transducer choice ? This is a disk transducer.

    I checked the positive terminal with an oscilloscope, and I see the square wave followed by the transducer decay ringing.

    Thanks!
  • Sam,

    I now understand your intended modification. To drive an external transducer in bi-static mode, but keep the MA40H1S-R populated, ensure you've applied the following modifications from the daughtercard's default state:
    1) Desolder R35 to float the MA40H1S-R negative terminal
    2) Desolder R33 (optional but recommended) to prevent unintended loading of the XDCR. 2.0kOhm may or may not be suitable for the Steminc SMD10T2R111WL. You can start with a large value (10kOhm) if preferred.
    3) Desolder R32 to prevent the transmit only signal from appearing at INP as a return signal
    4) Connect the transmitting transducer's pos-terminal to J9-1, and the neg-terminal directly to ground.
    5) Connect the receiving transducer to J11.

    If these modifications match your setup, then your hardware should be ok. If you see a square wave followed by the decay-ring, then excitation should be successful. Is the driving square wave's frequency at 214.8kHz? Also, I recommend that you disable the current limit to prevent unintended damage to the driving FETs. Most transducer don't require more than 50mA, so you can set the enable the driver current limit to the lowest setting. I need to update our documentation to reflect this new direct-drive recommendation.

    In my experience, the high-freq transducers typically require large driving voltages, which is why we typically recommend pairing with a high-freq transformer(as previously listed). 28Vpp at direct-drive should be safe, but you could incrementally check performance up to 28V to see if there is any difference as you increase the voltage.

    I would recommend that the Write Coefficients button click be the last change you make before issuing a burst+listen command to prevent an unintended rewrite of the coefficients when changing any other setting.
  • Hi Akeem,

    This is indeed what I did, except point 2, because as we remove R35, then R33 is only connecting the 40kHz transducer's pins together (not to ground anymore).

    As In continued my investigations today, I've noticed that the resonance frequency of this transducer is 245 kHz (and not 215). The ringing frequency after some time ends at this frequency.

    I've also noticed that in bistatic configuration with the RX transducer unconnected and no damping resistor on the TX transducer, a strong signal couples to the input of the PGA460, which is dramatically reduced when the RX pin is grounded or with a damping resistor. I put 470R and it seems better.

    Now, it also seems that the RX transducer must be damped in some way, otherwise there's a large blind zone. Adding 180k in parallel gives the following result with 2 transducers 2cm apart.

    Now , it looks like that shape doesn't change when I move the sensors. It looks more like this is EM coupling or so. Have you had experiences on your side ?

    I also need to sense a distance at ~10cm. Could you give me a few hints to improve my setup ?

    Thanks in advance and best regards,

    Sam

  • For those following this post:

    The Steminc SMD10T2R111WL 's decay time is longer than most high-frequency transducers. TI currently does not recommend the use of Steminc SMD10T2R111WL for short-ranging measurements in the direct-drive mode due to the long decay time.

    For alternative high-frequency transducers, refer to a complete listing of air-coupled transducers and transformers at the post:
    e2e.ti.com/.../620399
  • Dear Akeem,

    I tried today with the Murata MA300D1-1, and the results are much better. The ringing seems to stop at about 15cm distance with 5k6 damping resistor.

    Do you have experience with that sensor ? If yes, what are your settings, in term of damping resistor, digital gain, TVG/AFE gain ?

    I still have a very strong noise (unfortunately I have no picture right now to attach).

    If you have no settings for this very transducer, could you share some of a similar configuration ?

    I'm using a mono-static configuration, with the EVK board in half-bridge mode, where I disconnected the SMD transducer as described above, using 20V.

    Thank you in advance for your feedback.

    Sam

  • Hi Sam,

    An important update about the PGA460 EVM GUI: Version 1.0.0.9 (available now) no longer requires you to re-check the Burst Frequency Range Shift and re-write the coefficients after changing any of the device settings. Prior to sending a burst-and/or-listen command, the GUI now checks to see if the Burst Freq Range Shift is checked. If so, it will automatically ensure the equivalent bit is logic-high in the TVGAIN6 register, and that the BPF coefficients are updated with the values shown in the BPF coefficient calculator tool. (No more having to manually setup and correct the GUI for high-freq eval!)

    I have evaluated the Murata MA300D1-1 in a mono-static half-bridge driver mode with a 20V supply and a R_Damp value of 24.0kOhm. The results are as follows:

    Memory Map:

    ;GRID_USER_MEMSPACE
    00 (USER_DATA1),00
    01 (USER_DATA2),00
    02 (USER_DATA3),00
    03 (USER_DATA4),00
    04 (USER_DATA5),00
    05 (USER_DATA6),00
    06 (USER_DATA7),00
    07 (USER_DATA8),00
    08 (USER_DATA9),00
    09 (USER_DATA10),00
    0A (USER_DATA11),00
    0B (USER_DATA12),00
    0C (USER_DATA13),00
    0D (USER_DATA14),00
    0E (USER_DATA15),00
    0F (USER_DATA16),00
    10 (USER_DATA17),00
    11 (USER_DATA18),00
    12 (USER_DATA19),00
    13 (USER_DATA20),00
    14 (TVGAIN0),33
    15 (TVGAIN1),33
    16 (TVGAIN2),33
    17 (TVGAIN3),21
    18 (TVGAIN4),06
    19 (TVGAIN5),1C
    1A (TVGAIN6),81
    1B (INIT_GAIN),80
    1C (FREQUENCY),64
    1D (DEADTIME),80
    1E (PULSE_P1),1F
    1F (PULSE_P2),1F
    20 (CURR_LIM_P1),40
    21 (CURR_LIM_P2),C0
    22 (REC_LENGTH),00
    23 (FREQ_DIAG),33
    24 (SAT_FDIAG_TH),EE
    25 (FVOLT_DEC),7C
    26 (DECPL_TEMP),4F
    27 (DSP_SCALE),00
    28 (TEMP_TRIM),00
    29 (P1_GAIN_CTRL),24
    2A (P2_GAIN_CTRL),24
    2B (EE_CRC),51
    40 (EE_CNTRL),00
    41 (BPF_A2_MSB),56
    42 (BPF_A2_LSB),72
    43 (BPF_A3_MSB),F3
    44 (BPF_A3_LSB),72
    45 (BPF_B1_MSB),06
    46 (BPF_B1_LSB),47
    47 (LPF_A2_MSB),7C
    48 (LPF_A2_LSB),D3
    49 (LPF_B1_MSB),01
    4A (LPF_B1_LSB),97
    4B (TEST_MUX),00
    4C (DEV_STAT0),80
    4D (DEV_STAT1),00
    5F (P1_THR_0),33
    60 (P1_THR_1),33
    61 (P1_THR_2),33
    62 (P1_THR_3),33
    63 (P1_THR_4),33
    64 (P1_THR_5),33
    65 (P1_THR_6),3A
    66 (P1_THR_7),12
    67 (P1_THR_8),C8
    68 (P1_THR_9),4E
    69 (P1_THR_10),B6
    6A (P1_THR_11),B2
    6B (P1_THR_12),B4
    6C (P1_THR_13),B4
    6D (P1_THR_14),B4
    6E (P1_THR_15),00
    6F (P2_THR_0),33
    70 (P2_THR_1),33
    71 (P2_THR_2),33
    72 (P2_THR_3),33
    73 (P2_THR_4),33
    74 (P2_THR_5),33
    75 (P2_THR_6),3A
    76 (P2_THR_7),12
    77 (P2_THR_8),C8
    78 (P2_THR_9),4E
    79 (P2_THR_10),B6
    7A (P2_THR_11),B2
    7B (P2_THR_12),B4
    7C (P2_THR_13),B4
    7D (P2_THR_14),B4
    7E (P2_THR_15),00
    7F (THR_CRC),DE
    EOF

    Echo Data Dump (from 30cm down to 10cm):

    (short range can be improved by decreasing digital gain multiplier value)

    Ultrasonic Measurement Result:

    Ultrasonic Measurement Results: (2017-10-23_162013)
    O1 Dist(m): 0.338
    O1 Width(us): 100
    O1 Amp: 184
    Ultrasonic Measurement Results: (2017-10-23_162015)
    O1 Dist(m): 0.307
    O1 Width(us): 84
    O1 Amp: 156
    Ultrasonic Measurement Results: (2017-10-23_162015)
    O1 Dist(m): 0.282
    O1 Width(us): 92
    O1 Amp: 158
    Ultrasonic Measurement Results: (2017-10-23_162016)
    O1 Dist(m): 0.270
    O1 Width(us): 128
    O1 Amp: 176
    Ultrasonic Measurement Results: (2017-10-23_162016)
    O1 Dist(m): 0.257
    O1 Width(us): 176
    O1 Amp: 255
    Ultrasonic Measurement Results: (2017-10-23_162016)
    O1 Dist(m): 0.248
    O1 Width(us): 204
    O1 Amp: 255
    Ultrasonic Measurement Results: (2017-10-23_162017)
    O1 Dist(m): 0.238
    O1 Width(us): 200
    O1 Amp: 255
    Ultrasonic Measurement Results: (2017-10-23_162017)
    O1 Dist(m): 0.224
    O1 Width(us): 204
    O1 Amp: 255
    Ultrasonic Measurement Results: (2017-10-23_162017)
    O1 Dist(m): 0.210
    O1 Width(us): 224
    O1 Amp: 255
    Ultrasonic Measurement Results: (2017-10-23_162018)
    O1 Dist(m): 0.198
    O1 Width(us): 184
    O1 Amp: 255
    Ultrasonic Measurement Results: (2017-10-23_162018)
    O1 Dist(m): 0.186
    O1 Width(us): 184
    O1 Amp: 232
    Ultrasonic Measurement Results: (2017-10-23_162018)
    O1 Dist(m): 0.173
    O1 Width(us): 192
    O1 Amp: 182
    Ultrasonic Measurement Results: (2017-10-23_162019)
    O1 Dist(m): 0.162
    O1 Width(us): 180
    O1 Amp: 176
    Ultrasonic Measurement Results: (2017-10-23_162019)
    O1 Dist(m): 0.152
    O1 Width(us): 192
    O1 Amp: 192
    Ultrasonic Measurement Results: (2017-10-23_162020)
    O1 Dist(m): 0.145
    O1 Width(us): 216
    O1 Amp: 255
    Ultrasonic Measurement Results: (2017-10-23_162020)
    O1 Dist(m): 0.136
    O1 Width(us): 232
    O1 Amp: 255
    Ultrasonic Measurement Results: (2017-10-23_162020)
    O1 Dist(m): 0.127
    O1 Width(us): 236
    O1 Amp: 255
    Ultrasonic Measurement Results: (2017-10-23_162021)
    O1 Dist(m): 0.116
    O1 Width(us): 240
    O1 Amp: 200
    Ultrasonic Measurement Results: (2017-10-23_162021)
    O1 Dist(m): 0.104
    O1 Width(us): 260
    O1 Amp: 212
    Ultrasonic Measurement Results: (2017-10-23_162021)
    O1 Dist(m): 0.091
    O1 Width(us): 244
    O1 Amp: 248

  • Thanks Akeem ! Indeed, that much better than what I had before. I'd need now to play around with values and see what's optimal.
    Do you also have experience or measuring through a plastic enclosure at 200-300kHz ?
  • Sam,
    I have limited experience with air-coupled measurements through a plastic enclosure, but only with low-frequency (30-80kHz) transducers. I did have some success, but my maximum detectable range was reduced to less than 50% of what can be captured through air-only. The thinner the plastic, the more likely you should be able to detect objects.

    Here is my response to a similar e2e question from August:

    We have not done a significant amount of testing, but air-coupled transducers perform very poorly when the echo is expected to propagate through a material other than air. Because of the large acoustic impedance mismatch of air versus most solid materials, most of the energy is reflected at the inner surface of the enclosure to which the transducer is mounted to. This is the same reason most automobiles are not able to hide the ultrasonic transducer behind the bumper, so the sensor must remain visible. Radar technology, on the other hand, is able to propagate through various materials more effectively.

    This is why your performance with the sensor outside of the enclosure is much better, and you can actually see the return echos. If you are going to continue experimentation with the sensor inside the enclosure, I recommend that you try various coupling agents (glues or epoxies) to reduce any air-gaps that would otherwise be present between the surface of the transducer and inner wall of the enclosure.

    I have only been able to successfully detect objects through plastics and polycarbonate up to 0.093” in thickness. In the case of the polycarbonate, I mounted the transducer using cyanoacrylate at the surface, and hot-glue around the sides. Other transmission mediums (glass, acrylic, steel) failed, or require other mounting techniques (to be further explored).
  • Akeem,

    Ok, thanks for this information.

    I'm currently investigating the DRV8870 based full bridge that is in the reference designs, and it looks like it has a strange behavior. When I compare the signal on an input pin, it has a ~40us blind time during which the driver won't turn any pin high. You can see it from the pictures below : the blue trace is the driver's input, the yellow trace is the output.

    I've tested it at both low and high frequency, the time is the same, resulting in about 2 lost pulses at low frequency and 15 at high frequency.

    Did you experience similar behaviors ?

    Thank you in advance for your feedback

    Sam

  • Hi Sam,

    The 40us delay is due to the DRV8870 waking-up from sleep mode.
    As described in the DRV8870 datasheet:
    7.3.2 Sleep Mode
    When the IN1 and IN2 pins are both low for time t_SLEEP (typically 1 ms), the DRV8870 device enters a low-power
    sleep mode, where the outputs remain High-Z and the device uses I_VMSLEEP (μA) of current. If the device is
    powered up while both inputs are low, it immediately enters sleep mode. After the IN1 or IN2 pins are high for at
    least 5 μs, the device is operational 40~50 μs (t_ON) later.

    Since this mode cannot be avoided on the PGA460-DRV8870 full-bridge reference design as-is, you will need to transmit more pulses to account for the lack of excitation during the DRV8870's t_ON delay window. The supporting PGA460 Full-Bridge Driver app note will contain a comment about this DRV8870 limitation. Fortunately, most transducers' sound pressure levels (SPL) for maximum ranging become saturated by 20 pulses. Thus, margin is available for n-blank pulses given the PGA460 supports up to 31 pulses max.
  • Hi Akeem,

    Ok, good, thanks for this information, I'll do as recommended.

    I have another question : in my design, I need to use the PGA460 very rapidly after it was powered up. Volatile registers must be reprogrammed before the unit can be used.

    When programming the thresholds, the GUI writes to the register about every 200ms. Is it possible to program all volatile registers in a much shorter period of time ? At 115200 bps, programming one register takes about 500us, which means about 25ms.

    Thanks and best regards,

    Sam

  • Hi Sam,

    The GUI introduces excessive delays and timing overhead due to the USB-to-PC communication. I would not refer to the GUI as an example for timing requirements.

    To write to all thresholds as quickly as possible, I recommend that you use the bulk threshold write command (CMD16). At 115.2kBaud, the write time is calculated as 3.34ms.

    Here is my ideal calculation of the timing requirement for CMD16:

    Timing budget per sensor    Unit
    Sync 1 bytes
    Addr+Cmd 1 bytes
    Checksum 1 bytes
    CMD16 Thr Bulk (Write) 32 bytes
         
    TOTAL BYTES 35 bytes
    TOTAL UART Bits (w/ 1Start, 2Stop) 385 bits
    Baud Rate 115200  baud
         
    TOTAL UART Time (at Baud Rate) 0.003342014 s
      299.2207792 Hz

    When timing this command using a logic analyzer, and executing CMD16 using the PGA460 GUI's Interface Mode --> UART -- > Command (Single Addr) --> CMD16 --> Run Command button, I measured ~3.16ms:

  • Thanks for the information Akeem