This thread has been locked.

If you have a related question, please click the "Ask a related question" button in the top right corner. The newly created question will be automatically linked to this question.

LPSTK-CC1352R: I am not getting right current consumption values from Energytrace. Want to know how to hookup the LPSTK-CC1352R with CC1352R launch pad to do Energytrace analysis

Part Number: LPSTK-CC1352R
Other Parts Discussed in Thread: CC1352R, , ENERGYTRACE

Hello,

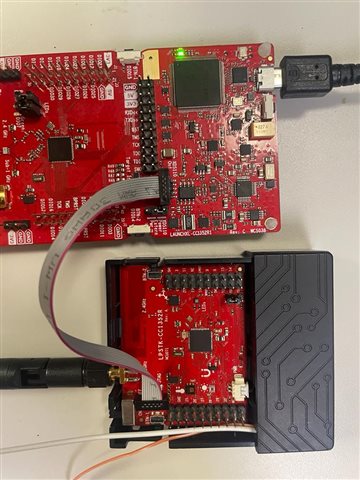
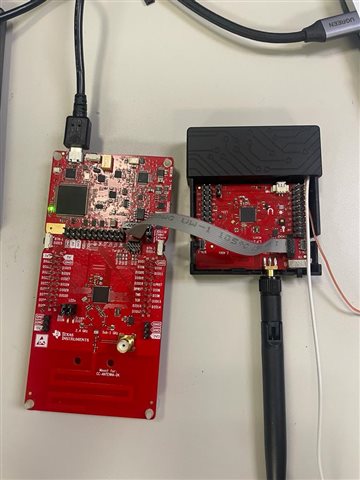
I am not getting the right current consumption values from Energytrace. I want to know how to hookup the LPSTK-CC1352R with CC1352R launch pad to do Energytrace analysis. I am sharing pictures of the connection that I have established to get the current consumption values however when I am running the analysis there is no change seen if I do it without hooking the LPSTK-1352R as its current consumption with the LPSTK-1352R attached and detached remains the same which means that the Energytrace is not running as expected.

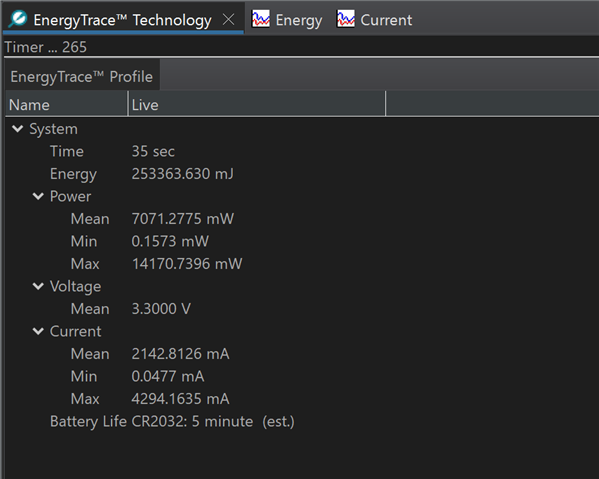
I am pretty sure these measurements are not right !!

Thank you,

Best regards,

Pukhraj Singh

  • Hi Pukhraj,

    To trigger a recalibration of the Energy Trace, unplug and plug in the Launch Pad after all the connections have been made. Then start the measurement. 

    This is a snippet on an app note I have linked in another thread: 

    https://www.ti.com/lit/an/swra478d/swra478d.pdf

    Regards,

    Sid

  • Hello Sid, 

    I hope you are doing great!

    I got the unplug and plug part and I also went through the manual that you shared but, still I am unsure about the connection part because the manual doesn't include the sensor tag LPSTK-CC1352R. I would like you to take a look at the pictures I have shared above and let me know if the LPSTK-CC1352R should be hooked in this way?

    Thank you,

    Best regards,

    Pukhraj Singh

  • Hi Pukhraj,

    This is the set up I would use for flashing the LPSTK device. 

    But to measure current, we should just connect the 3.3V pin and GND.

    This would supply the board with the 3.3V pin through energy trace, enabling accurate results for current measurements. 

    Regards,

    Sid