This thread has been locked.

If you have a related question, please click the "Ask a related question" button in the top right corner. The newly created question will be automatically linked to this question.

LP-EM-CC2340R5: oad-onchip example merge data-stream

Part Number: LP-EM-CC2340R5
Other Parts Discussed in Thread: UNIFLASH

Hi Team,

Background situation:My customer have learned about the basic knowledge of OAD in the user guide, but the current example uses three parts to implement it, so there is no conflict between persistent and oad-onchip. For me, using three parts of code will be more troublesome. I prefer to use it in the same code. Implement complete OAD functions in the project.

SDK:simplelink_lowpower_f3_sdk_7_20_00_29

The data-stream code is downloaded from the link :

https://e2e.ti.com/support/wireless-connectivity/bluetooth-group/bluetooth/f/bluetooth-forum/1263726/cc2340r5-uart-to-ble-bridge-example-based-on-the-official-data-stream-one-from-ti

Call DataStream_start() in App_StackInitDoneHandler; the current phenomenon is that simplelink scans the broadcast information, but it disappears quickly. It should be that broadcast data is stopped after it is started.

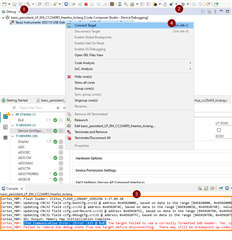
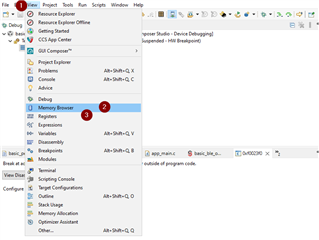
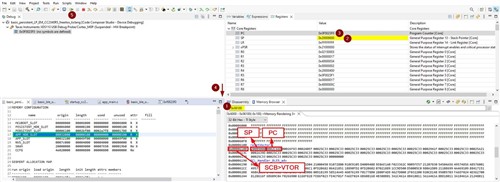
Currently there is only one development board, and the code is programmed using the three-part form of mcuboot+persistent+oad-onchip. Please provide some debugging ideas. Thank you very much!

Thanks for your support!

Best Regards,

Galaxy

  • Hi Galaxy,

    Thank you for reaching out. Can you provide a bit more information as to the debugging issues you are facing with the three separate projects? Typically, having the three separate projects will help split up the different parts of the MCUBoot structure and should ease in debugging.

    Best Regards,

    Jan 

  • Hi Jan,

    I asked the customer to sort out the process

    1. Modify flash_map_backend.h

        #define BOOT_PRIMARY_1_BASE_ADDRESS         0x00006000
        #define BOOT_PRIMARY_1_SIZE                 0x0002c000
    
        #define BOOT_SECONDARY_1_BASE_ADDRESS       0x00032000
        #define BOOT_SECONDARY_1_SIZE               0x0004a000

    2. Compile mcuboot, persistent and oad-onchip projects respectively

    3. Use uniflash to program three projects   Burn separately

    4. Expect to use ccs to debug the oad-onchip project.I have modified the content myself and I don’t know how to debug it.

    The broadcast interruption is due to a logical conflict in the Uart part during the merging process, resulting in failure to open the Uart.

    Best Regards,

    Galaxy

  • Hey Galaxy,

    I found this thread that sounds like it may be the same/similar issue you are facing in order to debug the OAD-onchip example. I would recommend you check this thread out and then let me know if it is not useful and I can work on finding another solution!

    Thanks,

    Luke

  • Hi Luke,

    Is there any way to debug this part of the oad-onchip code? The current program needs to communicate with another application and uses the uart port, which is inconvenient to read and print.

    Best Regards,

    Galaxy

  • Galaxy,

    Could you clarify which part of the oad-onchip code you are trying to debug? I am not sure I understand exactly what you mean!

    Could you also provide some detail into the other application that the current program needs to communicate with?

    Thanks,

    Luke

  • Hi Luke,

    There is still a lot to debug in the oad-onchip part of the code, mainly in the serial port communication, which is the data-stream part.

    BLE is used as an intermediate communication module. The mobile terminal and another application exchange data through BLE.

    Best Regards,

    Galaxy

  • Galaxy,

    Thanks for providing that context! What issues are you currently facing in debugging the data_stream part with the serial port communication?

    Thanks,

    Luke

  • Hi Luke,

    When programming flash in three parts, how to use CCS to debug the third part of the program.

    Looking forward to a reply with specific debugging methods.

    Best Regards,

    Galaxy

  • Galaxy,

    Here are the steps I recommend to follow to debug the basic_ble_oad_on_chip project


    • I- Build the image, flash the device and connect the debugger
    1. Build the basic_ble_oad_on_chip app
    2. Click the Debug button – This leads the debugger to erase the device’s flash then download the newly built image
    3. This is going to lead to a JTAG Communication Error: (Error -615 @ 0x0). This is due to MCUBoot image not being programmed leading the code at address 0x0 to be invalid
    4. In the “Debug” window, right click on “Texas Instruments XDS110 USB Debug Probe” then “Connect Target”


    • II- Enable the “Memory Browser” and “Registers” views
    1. Click “View”
    2. Then select “Memory Browser”
    3. Click again “View” and select “Registers”


    • III- Force the device to execute the image you want to debug
    1. In the memory browser, find the entry point of the image. You can leverage the map file (see the green square) if you are not sure of the address.
      In all the cases, you should find the resetVectors symbol at the entry point of the image.
      For the basic_ble_persistent app, the entry point is at 0x6100
    2. In the “Registers” view, update the value of the Core Registers > SP register with the first value of the resetVectors (0x20009000 in my case)
    3. In the “Registers” view, update the value of the Core Registers > PC register with the second value of the resetVectors (0x2C66D in my case)
    4. In the “Registers” view, update the value of the SCB > VTOR register with the address of the resetVectors (which is also the entry point of the app, i.e. 0x6100 in my case)
    5. Setup a breakpoint in the basic_persistent application (e.g. on the call to BLEAppUtil_init() in the function appMain in app_main.c) and click the “Run button”


    Note: The steps provided here only leads to flash one app (which is the recommended approach for app debugging). In case multiple apps have to be flashed at the same time, Uniflash should be used. Then the step to connect the Debugger to a Running Target described in the Debugger Guide should be followed. And, eventually, the steps in II- and III- should be applied.

    I hope this will help,

    Luke