This thread has been locked.

If you have a related question, please click the "Ask a related question" button in the top right corner. The newly created question will be automatically linked to this question.

CC2745R10-Q1: OAD-On-chip fundamentals_Btool and Uniflash issue

Part Number: CC2745R10-Q1
Other Parts Discussed in Thread: UNIFLASH, SYSCONFIG

Tool/software:

Hello; 

In fact, we are trying to use the OAD on-chip project to test it and flash the board with the new image.

So, we referred to " https://dev.ti.com/tirex/explore/node?node=A__ASIs1Z.Aaff8jdoi4xRghw__SIMPLELINK-ACADEMY-CC23XX__gsUPh5j__LATEST"  in following the steps,

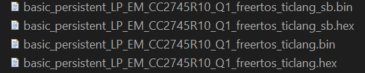
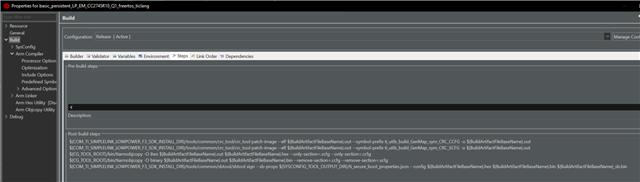
First, we have built the oad_onchip project.

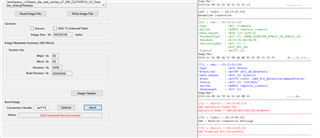
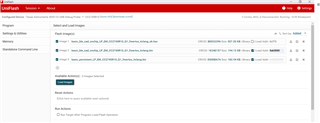
Second, we select our board on Uniflash, and choose the images as described on picture below. As, we have understanded from previous questions that we can use the oad_onchip_sb.hex file instead of the mcuboot_oad_onchip.hex file. 

For the load address, we choose that address because the other addresses as mentioned on the .map file does not work we always have an overlapping problem.

We succeed in flashing the board with the 3 images with that load address as shown in picture below.

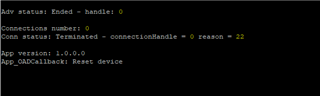
But the problem here is that when we try to use BTOOL to flash the new image (we have upgraded the image version to 2.0 and rename the new image to oad_onchip_v2.bin),

Now, we click on send, it goes for device reset, then it stuck into establish connection, then the failure to download OAD download.

So, could you please help us in this subject because it has been a while facing this issue, can you also tell us if our steps are right or if we are missing ones.

Thank you for your response.

Best regards;

  • Hello,

    The OAD projects no longer use MCUBoot, however, they do use Secure Boot. Secure Boot is part of ROM on the CC2745. Below I'll explain how Secure Boot and the OAD projects work.

    1. First, open the basic_persistent_LP_EM_CC2745R10_Q1 project, and open the basic_persistent.syscfg file. In the Sysconfig file, go to the following: 
    Device Configuration --> Security Configuration. There are four things to note in this section.

    a. The Image Type:

    App for Primary means that this app is meant to execute in the Primary slot. There are two slots, Primary and Secondary

    b. Primary Slot address space:

    This means that because basic_persistent is meant for the Primary Slot that it will need to be flashed at 0x0. We will cover this later on, however, take note of this for future development.

    c. Secondary Slot address space:

    The Secondary Slot will eventually contain basic_ble_oad_onchip. 0x31000 will be the address that we flash the binary image (this will be covered later).

    d. Update Mode

    The update mode determines just that, the update mode (you can find more information in the Secure Boot section in the TRM about the different modes). 

    XIP Revert Enabled means the following:

    1. An image for Primary and an image for Secondary slots are present.

    2. The image with the highest version number is executed by Secure Boot.

    For instance, basic_persistent has a version number:

    We will see later that basic_oad_onchip has a version number as 1.0. This means that when both images are present in flash, basic_oad_onchip will be executed. This makes sense because this would be your application that you develop.

    The revert in XIP Revert Enabled means that if one of the images were to be invalidated, erased, etc. that it will revert back to the image that is still present in flash (i.e. if the secondary slot were to be erased, invalidated, etc. that the primary slot application will be executed during boot and vice versa). 

    Okay great, now that we have that explained we can move on to the actual process of getting it working.

    1. Build the basic_persistent image. 

    You'll notice that there is multiple .hex and .bin files that are generated.

    The basic_persistent_sb.bin file contains the application that's been signed by the secure boot tool, but does not contain the SCFG/CCFG.

    The basic_persistent_sb.hex file contains both the application that's been signed by the secure boot tool and contains the SCFG/CCFG.

    The basic_persistent.hex file contains only the SCFG/CCFG and no application and has not been signed by the secure boot loader tool. You can ignore this file.

    The basic_persistent.bin file contains only the application and no SCFG/CCFG and has not been signed by the secure boot loader tool. You can ignore this file.

    basic_persistent_sb.hex file is what we want to flash the chip first. The reason:

    1. basic_persistent_sb.hex is meant to be in the primary slot. 

    2. It contains the SCFG/CCFG and we only need to flash that one time. 

    basic_oad_onchip has the same type and number of files as basic_persistent

    I will not cover basic_oad_onchip as thoroughly as basic_persistent because it's about the same as I've covered above. However, I do recommend looking at the Sysconfig file for basic_oad_onchip and note what we did like above. It also helps to look at the Post-Build steps for the project to see how the images are generated:

    Once you have built both projects, we can continue to flashing.

    ---

    We will need the basic_persistent_sb.hex file and the basic_oad_onchip_sb.bin file.

    First, flash the basic_persistent_sb.hex file using Uniflash.

    If the chip was blank, you should flash the HSM firmware after this step. Otherwise, continue on to the next step.

    Now, go to Settings & Utilities and make sure to check Do not erase program before load.

    Now we can flash the basic_oad_onchip_sb.bin at the address of the Secondary slot (0x31000).

    Once the two images are flashed, you're set!

    Any additional images you want to download must be of basic_oad_onchip_sb.bin files.

    Hope that helps!

    Best,

    Nima Behmanesh

  • Hello Nima, 

    Thank you very much for your clear explanation.

    I followed the steps you told me to do, the flash using the uniflash was successful. But when i proceed with the Btool, trying to flash the new version of the oad_onchip, always having the same error 

    and the putty shows this 

    Could you please help on this.

    Thank you 

    Best regards; 

  • Hello,

    What file are you (type, size, etc) are you trying to download over the air?

    Do you mind trying the SimpleLink app on the Android/iPhone app store? 

        I've only tested using the SimpleLink app and not Btool. It may be an internal tool issue.

    Additionally, do you mind running through the exact steps you went through and note any modifications/deviations from the process I stated above?

    Best,

    Nima Behmanesh

  • Hello Nima; 

    I succeed in upgrading through the BTool, because I have already tested with the connect app it fails for me. The steps I have used are:

    • In Uniflash session for the CC2745, when I go to Settings & Utilities  to check “Do not erase program before load”, then I flash the persistent_sb.hex it gives me an error.
    • So, first I proceed with flashing both images in a time:

     *Persistent_sb.hex

    *OAD_Onchip_sb.bin at load address 0x30000, as given on the FW_update git repository.

    • I flashed the host_app.hex on an other board.
    • I create a new version of oad_onchip_v2_sb.bin.
    • In BTool, I connected both boards, then choosing Over the air download, and choosing the new version of my image and just send it.

    I think that the problem was with Btool.

    Thank you for your help.

    Best regards;