This thread has been locked.

If you have a related question, please click the "Ask a related question" button in the top right corner. The newly created question will be automatically linked to this question.

CCS/CC3200-LAUNCHXL: CCS/CC3200-LAUNCHXL:

Part Number: CC3200-LAUNCHXL
Other Parts Discussed in Thread: CC3200, CC3200SDK

Tool/software: Code Composer Studio

Hello,

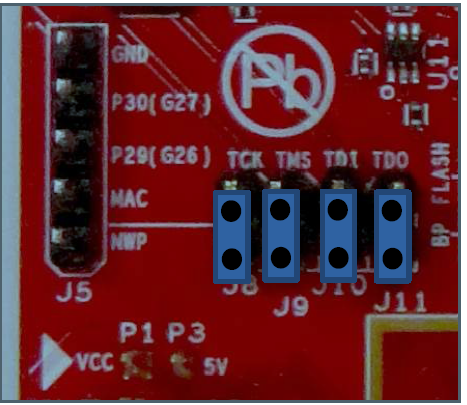
currently I use CC3200-LAUNCHXL board. My JTAG headers jumpers are shorted by default (JTAG usage). Because I want to use its on-board debugger (FTDI JATAG/SWD emulator) is possible to connect it to Code Composer Studio v7? If possible, please tell me how? If CCSv7 do not support such on-board debugger, please tell me which others GUIs I can use for that.

Thank you in advance!

  • Desislav,

    Can you explain what you mean by shorting the JTAG headers? These are directly connected to ground? If this is true, you will not be able to debug, since debugging relies on the JTAG connection.

    VR
  • Hello Vincent,

    about the JTAG headers i mean that the all JTAG headers are connected, like is explained in TI User's Guide (CC3200 SimpleLink™ Wi-Fi® and IoT Solution with MCU LaunchPad Hardware - swru372b.pdf)

    By the way, I succeed to run FTDI JTAG emulator. I did that like I followed the steps described in TI User's Guide ( CC3200 SimpleLink Wi-Fi and IoT Solution With MCU LaunchPad Getting Started Guide - swru376e.pdf).

    So I installed CCSv8. I installed RTOS and CC3200SDK_1.3.0  (software development kit for CC3200) as well. In my CCS project I included them plus the libraries which are explained in this document (driverlib, oslib and simplelink). I took them from CC3200 STK. Finally I applied the application which I wanted to trace. I connected to target like I'd used 'Stellaris In-Circuit Debug Interface' connection. In the my case: from CCS->Project Explorer I opened related 'ccxml' file. Then from 'General Setup' menu I chose Connection: Stellaris In-Circuit Debug Interface and appropriate device. Finally I ran 'Tera Tetm' terminal which I was setup followed the steps described into swru376e.pdf. That was my setup and it work fine.

    swru376e.pdf

    Thank you.