


Part Number: DS320PR810
Other Parts Discussed in Thread: USB2ANY,
Hi Team,
After SigCon installation completed successfully , I followed the instructions provided.
The USB2Any has connected successfully, but the device can not be found (see attached photo).
We followed the configuration has described in the snlu297 (EVM), Section 2.11 Quick start guide , Also attached below but without success.
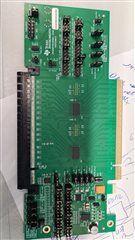
Im also attaching a photo of the card with the shunts in case needed.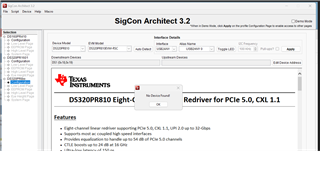
Quick-Start Guide (SMBus Slave Mode)
- Configure all devices to operate in the SMBus Slave Mode by setting their MODE pins to the L2 level. This is accomplished by placing a shunt on J1 L2 location.
- Set a unique SMBus Slave address for each device by placing shunts in the following arrangement: • On J15 connector, place shunts in L0 locations for all downstream devices (DS1_0 and DS2_0; DS1_1
and DS2_1 are a Don't Care).
- On J16 connector, place shunts in L0 locations for the DS1_0 and in L1 locations for DS2_0 (DS1_1 and DS2_1 are a Don't Care).
- On J22 connector, place shunts in L0 locations for all upstream devices (US1_0 and US2_0; DS1_1 and DS2_1 are a Don't Care).
- On J23 connector, place a shunt in L2 location for the US1_0 and remove shunts for US2_0 to achieve L3 level (US1_1 and US2_1 are a Don't Care).
- Move shunts from pins 1-2 to pins 2-3 on J17, J18, J19, J20, J24, J25, J26, and J27 to connect the dual function redriver pins to the SMBus, I2C bus.
- Enable all devices by pulling their PWDN pins to GND. This is accomplished by placing a shunt on J4 between PWDN and GND.
- Connect the USB2ANY Adapter to J3 (Note that the USB2ANY Adapter is not supplied with the DS320PR810-RSC-EVM).
- Install SigCon Architect Version 3.0.0.15 application and the DS320PR810 profile.
- Plug the EVM into a PCIe x16 server motherboard slot. Ensure the motherboard is powered down before installing the EVM or configured for hot-plug operation.
- Install a compatible PCIe endpoint card into the straddle connector of the EVM.
- Power-up the motherboard.
- Start the SigCon Architect application.
- Select the DS320PR810 Configuration Page and click Apply box to enable the device profile. If necessary,
edit devices addresses in the Edit Device Addresses box.
- In the DS320PR810 High Level Page, select Block Diagram as shown in Figure 2-1.
- Select the desired EQ Settings and Driver VOD.
- Select devices you want to apply the selected settings and click Apply to All Channels.
