This thread has been locked.

If you have a related question, please click the "Ask a related question" button in the top right corner. The newly created question will be automatically linked to this question.

SigCon Architect - Register read/write command using the script.

Guru 19785 points
Other Parts Discussed in Thread: ALP, DS125BR820

Hello Team,

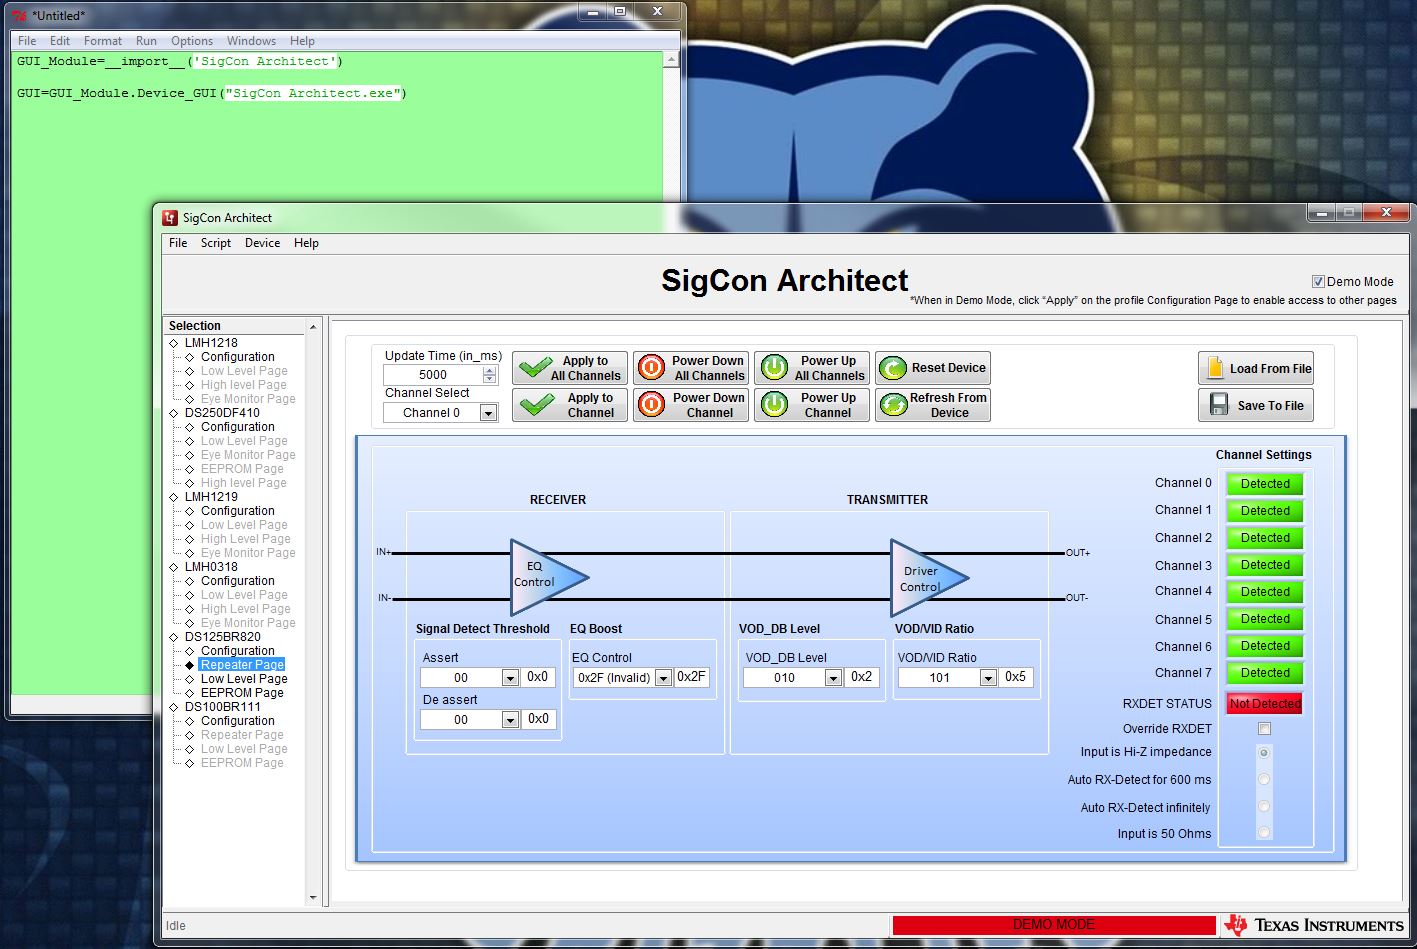
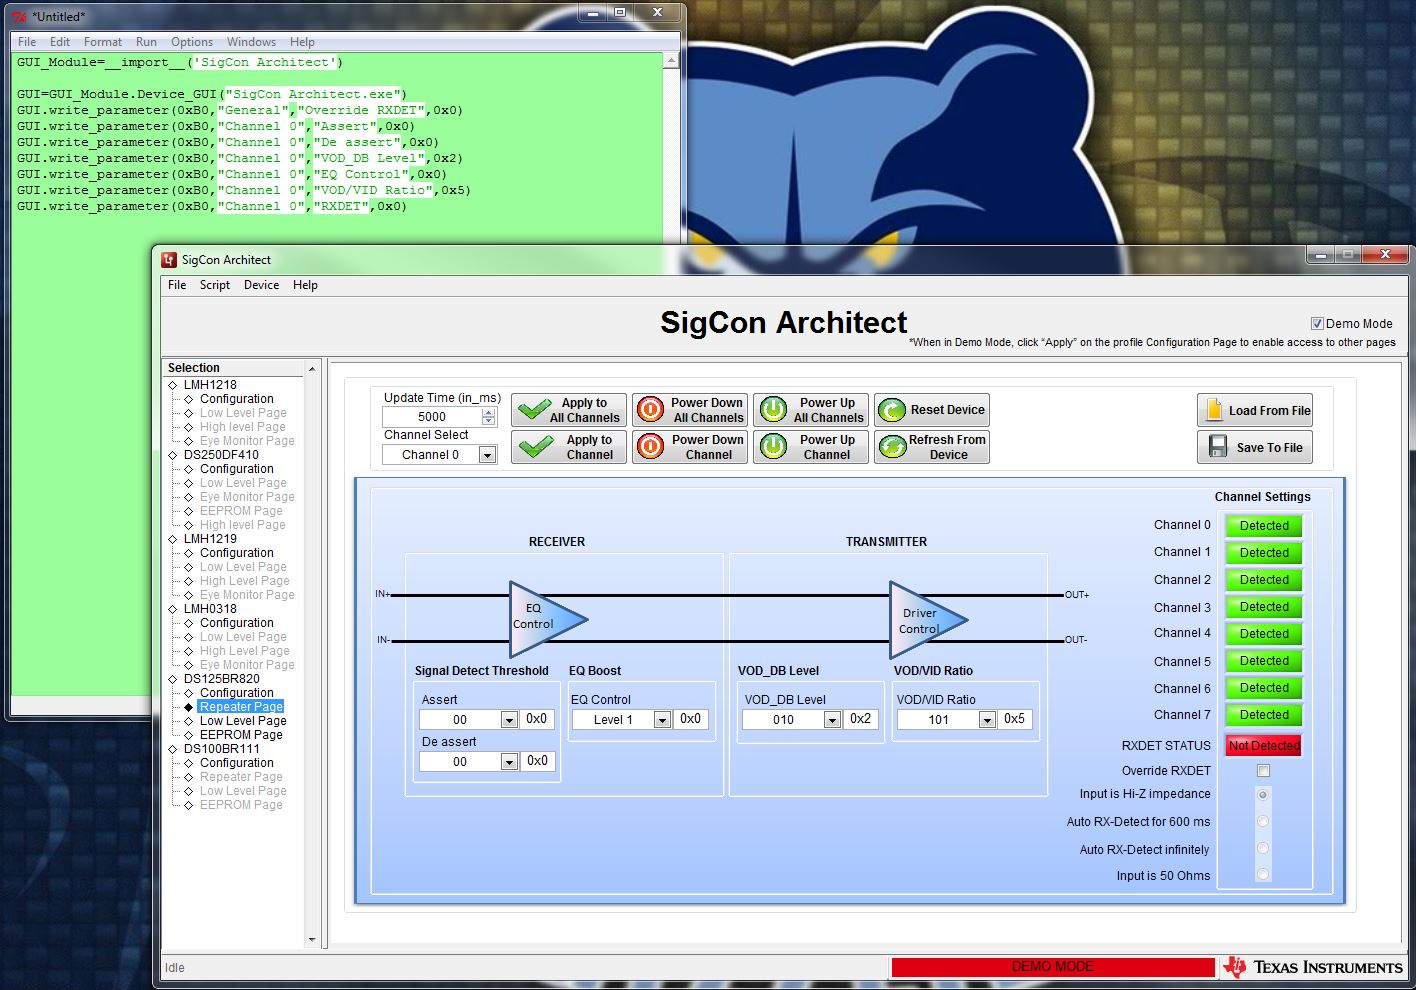
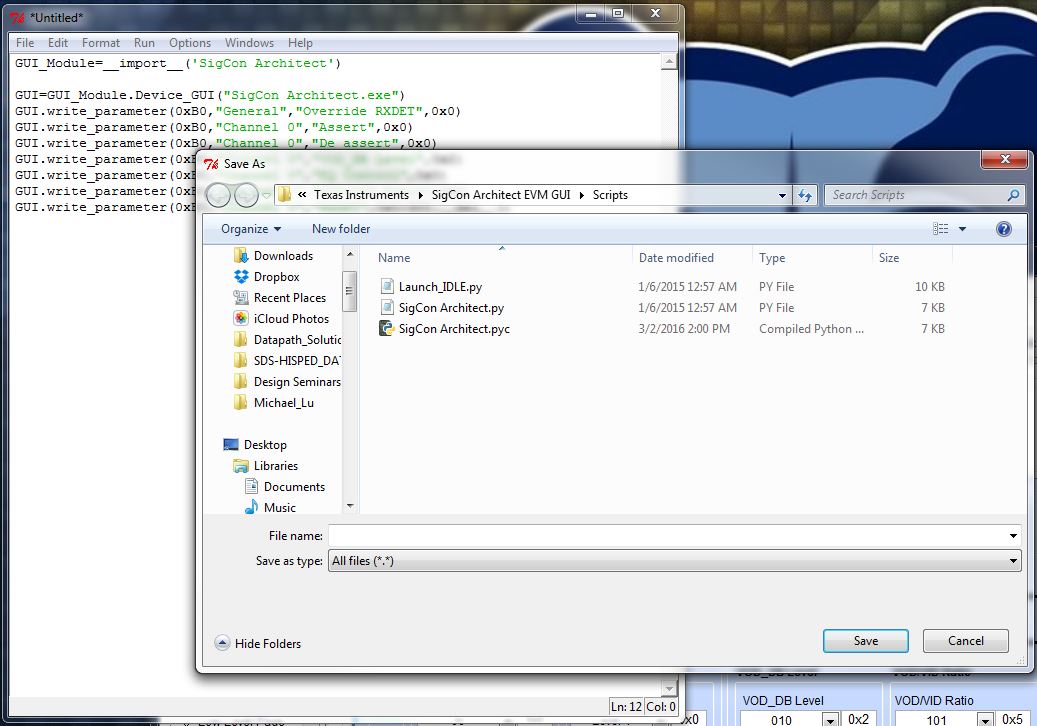
Could you please tell us how to use the script function in the SigCon Architect ? 

It would be very helpful if you could send us a sample python script which read/write some registers. I tried the same command which I used in the ALP, however, it did not work.

Best Regards,

Kawai

  • Hi Kawai-san,

    The scripting commands that you used in ALP will not work in SigCon Architect, as these two softwares are built from two different architectures. Therefore, the commands will all be different syntactically.

    In order to use the scripting utility in SigCon Architect, you will need to make sure you have Python V2.7. I have noticed that the scripting utility may sometimes malfunction if you use a more recent version of Python. Scripting can be used whether there is a physical device connected or you are in Demo Mode. Below is a set of instructions to get Scripting working:

    Recording a Python Script:

    1. Open the desired profile (in my example, I am using the DS125BR820.

    2. In the top taskbar, click Script-> Launch Window. A new Python window will appear.

    3. Go back to SigCon Architect and in the top task bar, click Script->Start Recording. Once you do that, the Python window in the background will start blinking green.

    4. Go to the High Level Page and begin clicking through all the desired settings. In my example below, I set EQ Boost to Level 1, then clicked "Apply." Note that in the High Level Page, multiple "Write" commands may be executed, because all drop-down menu settings are overwritten with the latest settings chosen at the time you click "Apply."

    5. When you are done clicking through the settings, you can go to the top taskbar and click Script->Stop Recording.

    6. To save all the read/write commands from the Launch Window, save the Python file by going to File->Save As... in the Python window. Make sure that the file extension is .py.

    Running a Python Script:

    1. In order to run this saved Python scripting file in the future, you can simply repeat Steps 1-2 in Recording a Python Script.

    2. When the Python window opens, select File->Open, then select the saved python script file you want to load.

    3. Once it is loaded in, in the Python Window top taskbar, click Run->Run Module (or press F5). This will execute the Python script.

    4. Python write from the script will execute in SigCon Architect.

    Writing a Python Script:

    A python script can be written manually by using a similar syntax, but instead of using the function GUI.write_parameter to indicate a specific parameter name, you can call on the following functions to write to specific device addresses (I believe this is what you are intending to do):

    GUI.write_register(Device_Address,Register_Address,Register_Value)

    GUI.read_register(Device_Address,Register_Address)

    As a simple example, I took the recorded file I showed earlier and wrote two extra Python script lines. One is to change the DS125BR820 Channel 0 EQ value (located in Reg 0x0F) to 0x01 instead of 0x00. I then read back from the same regsiter to make sure that the EQ is now 0x01, and I embedded this read into a print function so that the Python shell can show me the output. Note that a value of "1" appears in the Python shell:

    You can implement a similar method in order to get scripting working with the profile you are currently using. To help you get started, I recommended trying the Recording method first, then add or remove register read/write commands as necessary for your application.

    Regards,

    Michael

  • Hello Michael-san,

    Thank you very much for the detail explanation. I will try recording method and then customizing the python script.

    Best Regards,
    Kawai