This thread has been locked.

If you have a related question, please click the "Ask a related question" button in the top right corner. The newly created question will be automatically linked to this question.

TUSB3410

Other Parts Discussed in Thread: TUSB3410

Morning Roberto,

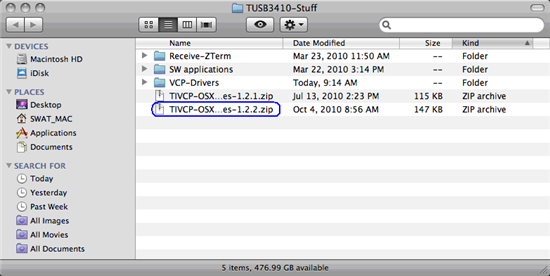
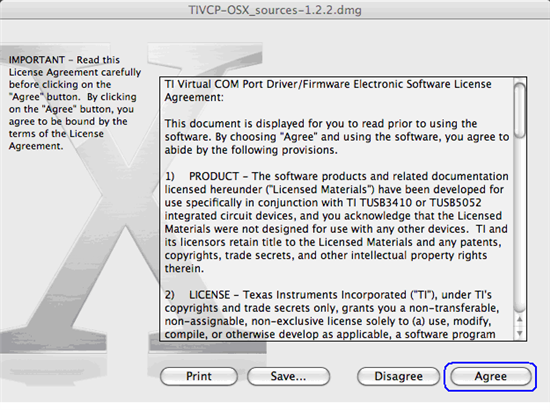
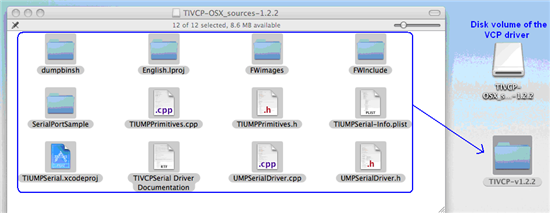
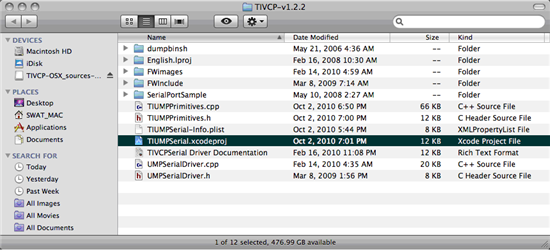
Thank you because I saw TERMINAL and copied  theses in it : sudo cp -R TIVCPSerial.kext  and so on.After rebooting when I connect the tusb3410,this message appears: the system extension can't be use.the extension < SYSTEM/LIBRARY/EXTENSION/TIVCPSerial.kext doesn't corectly installed.

Please can you help again.

Regards

BEN.

  • Hello Ben,


                I want to know if all the commands that I sent you before ran without problems. Or if you have some troubles when you ran them?


    Regards,

    Roberto.

  • Hello Roberto,

    I wrote all the commands in Terminal and after rebooting, when  I connect the tusb3410 cable, I have this trouble or message < the system extension can't be use.the extension < SYSTEM/LIBRARY/EXTENSION/TIVCPSerial.kext doesn't corectly installed>


    Regards,

    Ben.

  • Ben,


                Provably the binary files that you are trying to install is not the adequate file for your system, please download the source files and recompile the driver wiht the adequate vendor and product IDs.


    The following guide pretends to show you a quick overview of how to extract, build and install the TUSB3410 VCP driver for Mac OS-X v10.5 (Leopard) and v10.6 (Snow Leopard).


    Step 1: Select the proper zip file which contains the DMG file of the VCP driver project. For this example, let suppose we have the latest driver version and it is called “TIVCP-OSX_sources-1.2.1.zip”. http://e2e.ti.com/support/interface/digital_interface/m/videos__files/198719.aspx


     Step 2: Once the DMG has been extracted (TIVCP-OSX_sources-1.2.1.dmg), double-click on it and the “License Agreement” for the VCP driver will show up. Click on “Agree” so the proper disk volume can be mounted into your Desktop.

    Step 3: After the proper disk volume has been mounted, double-click on it and select all files and folders. Copy them all into a folder previously created in your Desktop.


    Step 4: Select the source code driver project file “TIUMPSerial.xcodeproj” and open it using at least X-Code program v3.1. For this example, we are opening the source code project using X-Code v3.2 so we can compile it for Mac OS-X for both 32-bit and 64-bit targets.


    This is a brief description of each file and folder that must be present for compiling the VCP driver for Mac OS-X:


    ·    TIUMPSerial.xcodeproj – This is the project file for X-Code IDE version 3.1 and higher. To build for Intel 64-bit platform as well you need to use X-Code IDE version 3.2 and higher which run on Mac OS X 10.6.


    ·    dumpbinsh – This folder contains a script for converting Firmware images (residing in FWImages folder) to compilable source code


    ·   FWImages – It contains the actual Firmware images in *.i51 format. Because of limitation of kernel extension (driver) architecture on Mac OS-X, firmware must be statically compiled into KEXT binary. For recompilation convenience, it is sufficient to just copy any new FW images to this folder and recompile the driver source code by opening TIUMPSerial.xcodeproj project using X-Code program.


    ·   build – This folder will be generated once you have successfully built the source code and thus it contains resulting kernel extension/driver (TIVCPSerial.kext).


    ·   SerialPortSample - This folder contains some source code files for building a testing application - it is a sample code available from Apple website - adapted to enumerate correctly all serial drivers and use /dev/cu.TIVCP3410 device for communication.


    ·   All other files and folders contain source files important to build the driver.


    Step 5: Once the source code project has been opened, check the target boxes for “TIUMPPrimitives.cpp”, “TIUMPSerial-Info.plist” and “UMPSerialDriver.cpp”. These are the files that need to be chosen for properly build the driver source code.


    Step 6: From the drop-down menu (located at the top left corner of the X-Code program) check the proper target options for this example: Mac OS X 10.6 à Release à TIUMPDriver Universal à x86_64


    Step 7: Once the proper settings for the driver project has been selected, it’s time to plug your TUSB3410 board in the Mac OS-X system.  If you already know which are the bcdDevice, PID and VID values, you can skip this step. Otherwise, open IORegistryExplorer. Select the IOUSB category from the drop-down menu located in the top left corner, choose the proper TUSB3410 device and look for the “bcdDevice”, “idProduct” and “idVendor” values. For this example the values are:


    • bcdDevice = 0x101
    • idProduct = 0xc0da
    • idVendor = 0xacdc


    Step 8: Go back and take a look to the X-Code program. Select the “TIUMPSerial-Info.plist” file and expand the “IOKitPersonalities à TIVCP3410” list. Change the bcdDevice, idProduct and idVendor values according to your TUSB3410 board. For this example, please note the values need to be converted from Hexadecimal to Decimal.


    • bcdDevice = 257 (0x101)
    • idProduct = 49370 (0xc0da)
    • idVendor = 44252 (0xacdc)


    Step 9: Once the proper values has been modified in the plist file, it’s time to build the driver. Right-click on “TIUMPDriver Universal” target and select “Build TIUMPDriver Universal”.


    A message stating “Save before building?” will show up because you modified the “plist” file. Click on “Save All” to continue with the building process.


    In order to check that the build process has succeeded, take a look at the bottom right corner and look for “Succeeded” message


    Step 10: Open a terminal session and go to your “release” folder (which contains the built driver) located within the path where you are compiling the driver source code from. For this example the path is Desktop/TIVCP-v1.2.2/build/release/. Once you are there, type the next commands within the terminal session in order to install the VCP driver in the system:


    ·    Copy TIVCPSerial.kext extension into /System/Library/Extensions folder


              sudo cp -R TIVCPSerial.kext /System/Library/Extensions

         sudo touch /System/Library/Extensions


    ·    Set kext owner to root - it is kext system specification. Without it, kext is not recognized by system


              sudo chown -R root:wheel /System/Library/Extensions/TIVCPSerial.kext


    ·    Set kext privileges to 755 - it is kext system specification - without it, kext is not recognized by system


              sudo chmod -R 755 /System/Library/Extensions/TIVCPSerial.kext


    ·    Rebuild internal system kext cache


              sudo kextcache -e


    ·    Reboot computer


    After the rebooting, the connected TUSB3410 device should be recognized and thus the driver loaded appropriately.

     Regards,

    Roberto.


  • Hello Roberto,

    Thank you for your apreciable help .But I want to precise that I have Mac OS v.10.4.11 on Mac G4 800mhz. Can I install on it Mac Os v10.5?

    Regards,

    Ben.

  • Ben,


                Yes, as I mention before you just need to choose the proper compilation target in the X-Code program, for you it will be “Mac OS X 10.6” .


    Regards

    Roberto

  • Roberto,

    Thank you for your very detailed instructions. I have a TI Launchpad which uses the TUSB3410 IC as a UART->USB bridge for the development board. I installed the drivers (Intel Core Duo, OS X 10.6.6), but I am getting errors in the kernel log (this is using the DEBUG kext):

    eb 10 08:54:27 joelmacbook kernel[0]: Chipset: 0
    Feb 10 08:54:27 joelmacbook kernel[0]: TIUMPDevice_c
    Feb 10 08:54:27 joelmacbook kernel[0]: Before Device request
    Feb 10 08:54:29 joelmacbook kernel[0]: Device request - error E0004051, wLenDone 0
    Feb 10 08:54:29 joelmacbook kernel[0]: USBLogData - Write, size =        8
    Feb 10 08:54:29 joelmacbook kernel[0]: 0100000044BE2758                                                   ....D.'X
    Feb 10 08:54:29 joelmacbook kernel[0]: devrequest error!
    Feb 10 08:54:31 joelmacbook kernel[0]: FWUpload - Interface is NULL!!!

    I also noticed that in your instructions above, you reference a v1.2.2 of the driver, but link to a version 1.2.1.


    Any thoughts you have would be appreciated!


    Joel


  • Hello Joel,


                Sorry for the delay, if you are using these drivers with a LauchPad please contact to the MSP430 team (http://e2e.ti.com/support/microcontrollers/msp43016-bit_ultra-low_power_mcus/default.aspx ).


    Regards,

    Roberto.