Other Parts Discussed in Thread: EK-TM4C1294XL
Hi Team,
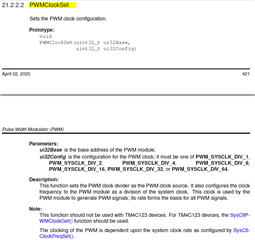
In this pwm example program .how to configer the different frequency.What is the max frequency can able to generate?
//*****************************************************************************
//
// pwm_dead_band.c - Example demonstrating the PWM dead-band generator.
//
// Copyright (c) 2019-2020 Texas Instruments Incorporated. All rights reserved.
// Software License Agreement
//
// Texas Instruments (TI) is supplying this software for use solely and
// exclusively on TI's microcontroller products. The software is owned by
// TI and/or its suppliers, and is protected under applicable copyright
// laws. You may not combine this software with "viral" open-source
// software in order to form a larger program.
//
// THIS SOFTWARE IS PROVIDED "AS IS" AND WITH ALL FAULTS.
// NO WARRANTIES, WHETHER EXPRESS, IMPLIED OR STATUTORY, INCLUDING, BUT
// NOT LIMITED TO, IMPLIED WARRANTIES OF MERCHANTABILITY AND FITNESS FOR
// A PARTICULAR PURPOSE APPLY TO THIS SOFTWARE. TI SHALL NOT, UNDER ANY
// CIRCUMSTANCES, BE LIABLE FOR SPECIAL, INCIDENTAL, OR CONSEQUENTIAL
// DAMAGES, FOR ANY REASON WHATSOEVER.
//
// This is part of revision 2.2.0.295 of the EK-TM4C1294XL Firmware Package.
//
//*****************************************************************************
#include <stdbool.h>
#include <stdint.h>
#include "inc/hw_memmap.h"
#include "driverlib/debug.h"
#include "driverlib/gpio.h"
#include "driverlib/pin_map.h"
#include "driverlib/pwm.h"
#include "driverlib/rom.h"
#include "driverlib/rom_map.h"
#include "driverlib/sysctl.h"
#include "driverlib/uart.h"
#include "utils/uartstdio.h"
//*****************************************************************************
//
//! \addtogroup pwm_examples_list
//! <h1>PWM Dead-band Generator Demo (pwm_dead_band)</h1>
//!
//! The example configures the PWM0 block to generate a 25% duty cycle signal
//! on PF2 with dead-band generation. This will produce a complement of PF2 on
//! PF3 (75% duty cycle). The dead-band generator is set to have a 10us delay
//! on the rising and falling edges of the PF2 PWM signal.
//!
//! This example uses the following peripherals and I/O signals.
//! - GPIO Port F peripheral (for PWM pins)
//! - M0PWM2 - PF2
//! - M0PWM3 - PF3
//!
//! UART0, connected to the Virtual Serial Port and running at 115,200, 8-N-1,
//! is used to display messages from this application.
//
//*****************************************************************************
//*****************************************************************************
//
// The variable g_ui32SysClock contains the system clock frequency in Hz.
//
//*****************************************************************************
uint32_t g_ui32SysClock;
//*****************************************************************************
//
// The error routine that is called if the driver library encounters an error.
//
//*****************************************************************************
#ifdef DEBUG
void
__error__(char *pcFilename, uint32_t ui32Line)
{
}
#endif
//*****************************************************************************
//
// Configure the UART and its pins. This must be called before UARTprintf().
//
//*****************************************************************************
void
ConfigureUART(void)
{
//
// Enable the GPIO Peripheral used by the UART.
//
MAP_SysCtlPeripheralEnable(SYSCTL_PERIPH_GPIOA);
//
// Enable UART0.
//
MAP_SysCtlPeripheralEnable(SYSCTL_PERIPH_UART0);
//
// Configure GPIO Pins for UART mode.
//
MAP_GPIOPinConfigure(GPIO_PA0_U0RX);
MAP_GPIOPinConfigure(GPIO_PA1_U0TX);
MAP_GPIOPinTypeUART(GPIO_PORTA_BASE, GPIO_PIN_0 | GPIO_PIN_1);
//
// Initialize the UART for console I/O.
//
UARTStdioConfig(0, 115200, g_ui32SysClock);
}
//*****************************************************************************
//
// Configure PWM for dead-band generation.
//
//*****************************************************************************
int
main(void)
{
uint32_t ui32PWMClockRate;
//
// Run from the PLL at 120 MHz.
// Note: SYSCTL_CFG_VCO_240 is a new setting provided in TivaWare 2.2.x and
// later to better reflect the actual VCO speed due to SYSCTL#22.
//
g_ui32SysClock = MAP_SysCtlClockFreqSet((SYSCTL_XTAL_25MHZ |
SYSCTL_OSC_MAIN |
SYSCTL_USE_PLL |
SYSCTL_CFG_VCO_240), 120000000);
//
// Initialize the UART.
//
ConfigureUART();
//
// Display the setup on the console.
//
UARTprintf("PWM ->\n");
UARTprintf(" Module: PWM0\n");
UARTprintf(" Pin(s): PF2 and PF3\n");
UARTprintf(" Features: Dead-band Generation\n");
UARTprintf(" Duty Cycle: 25%% on PF2 and 75%% on PF3\n");
UARTprintf(" Dead-band Length: 250 cycles\n\n");
//
// Enable the GPIO port that is used for the on-board LED.
//
MAP_SysCtlPeripheralEnable(SYSCTL_PERIPH_GPION);
//
// Enable the GPIO pin for the LED (PN0) as an output.
//
MAP_GPIOPinTypeGPIOOutput(GPIO_PORTN_BASE, GPIO_PIN_0);
//
// The PWM peripheral must be enabled for use.
//
MAP_SysCtlPeripheralEnable(SYSCTL_PERIPH_PWM0);
//
// Enable the GPIO port that is used for the PWM output.
//
MAP_SysCtlPeripheralEnable(SYSCTL_PERIPH_GPIOF);
//
// Configure the GPIO pad for PWM function on pins PF2 and PF3.
//
MAP_GPIOPinConfigure(GPIO_PF2_M0PWM2);
MAP_GPIOPinConfigure(GPIO_PF3_M0PWM3);
MAP_GPIOPinTypePWM(GPIO_PORTF_BASE, GPIO_PIN_2);
MAP_GPIOPinTypePWM(GPIO_PORTF_BASE, GPIO_PIN_3);
//
// Set the PWM clock to be SysClk / 8.
//
MAP_PWMClockSet(PWM0_BASE, PWM_SYSCLK_DIV_8);
//
// Use a local variable to store the PWM clock rate which will be
// 120 MHz / 8 = 15 MHz. This variable will be used to set the
// PWM generator period.
//
ui32PWMClockRate = g_ui32SysClock / 8;
//
// Configure PWM2 to count up/down without synchronization.
// Note: Enabling the dead-band generator automatically couples the 2
// outputs from the PWM block so we don't use the PWM synchronization.
//
MAP_PWMGenConfigure(PWM0_BASE, PWM_GEN_1,
PWM_GEN_MODE_UP_DOWN | PWM_GEN_MODE_NO_SYNC);
//
// Set the PWM period to 250Hz. To calculate the appropriate parameter
// use the following equation: N = (1 / f) * PWMClk. Where N is the
// function parameter, f is the desired frequency, and PWMClk is the
// PWM clock frequency based on the system clock.
//
MAP_PWMGenPeriodSet(PWM0_BASE, PWM_GEN_1, (ui32PWMClockRate / 250));
//
// Set PWM2 to a duty cycle of 25%. You set the duty cycle as a function
// of the period. Since the period was set above, you can use the
// PWMGenPeriodGet() function. For this example the PWM will be high for
// 25% of the time or (PWM Period / 4).
//
MAP_PWMPulseWidthSet(PWM0_BASE, PWM_OUT_2,
MAP_PWMGenPeriodGet(PWM0_BASE, PWM_GEN_1) / 4);
//
// Enable the dead-band generation on the PWM0 output signal. PWM bit 2
// (PF2), will have a duty cycle of 25% (set above) and PWM bit 3 will have
// a duty cycle of 75%. These signals will have a 10us gap between the
// rising and falling edges. This means that before PWM bit 3 goes high,
// PWM bit 2 has been low for at LEAST 10us. The same applies before
// PWM bit 2 goes high. The dead-band generator lets you specify the width
// of the "dead-band" delay, in PWM clock cycles, before the PWM signal
// goes high and after the PWM signal falls.
// For this example the PWM clock rate is 15 MHz, so we will use
// 150 cycles (150 cycles / 15MHz = 10us) on both the rising and falling
// edges of PF2. Reference the datasheet for more information on PWM
// dead-band generation.
//
MAP_PWMDeadBandEnable(PWM0_BASE, PWM_GEN_1, 150, 150);
//
// Enable the PWM Out Bit 2 (PF2) and Bit 3 (PF3) output signals.
//
MAP_PWMOutputState(PWM0_BASE, PWM_OUT_2_BIT | PWM_OUT_3_BIT, true);
//
// Enable the PWM generator block.
//
MAP_PWMGenEnable(PWM0_BASE, PWM_GEN_1);
//
// Loop forever blinking an LED while the PWM signals are generated.
//
while(1)
{
//
// Turn on the LED.
//
MAP_GPIOPinWrite(GPIO_PORTN_BASE, GPIO_PIN_0, GPIO_PIN_0);
//
// This function provides a means of generating a constant length
// delay. The function delay (in cycles) = 3 * parameter. Delay
// 0.5 seconds arbitrarily.
//
MAP_SysCtlDelay((g_ui32SysClock / 2) / 3);
//
// Turn off the LED.
//
MAP_GPIOPinWrite(GPIO_PORTN_BASE, GPIO_PIN_0, 0x00);
//
// This function provides a means of generating a constant length
// delay. The function delay (in cycles) = 3 * parameter. Delay
// 0.5 seconds arbitrarily.
//
MAP_SysCtlDelay((g_ui32SysClock / 2) / 3);
}
}

Thanks and regards
ARAVIND.S.R