This thread has been locked.

If you have a related question, please click the "Ask a related question" button in the top right corner. The newly created question will be automatically linked to this question.

TM4C1294NCPDT: HOW TO LOAD NEW FIRMWARE FROM ETHERNET PORT

Part Number: TM4C1294NCPDT
Other Parts Discussed in Thread: EK-TM4C1294XL

Hello All,

I am using TM4C controller in my projects . Recently i have made Data Acquisition system with this part.

Now systems are at sites where manual access to board JTAG/serial port is not possible.

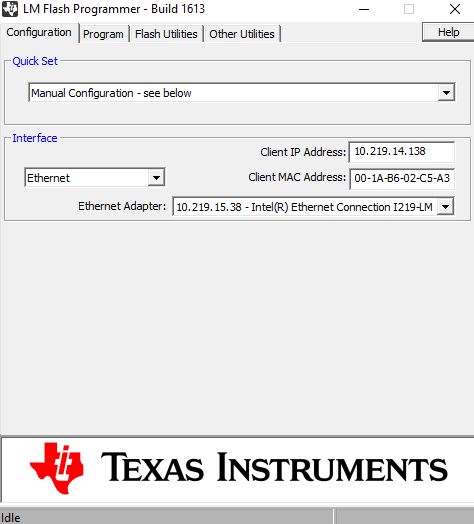
It there is any way to upgrade the firmware through ethernet port.

I am using Code composer studio for firmware development .

  • Hi,

      Yes, you can upgrade your firmware through the Ethernet Port. Please refer to Ethernet bootloader at C:\ti\TivaWare_C_Series-2.2.0.295\examples\boards\ek-tm4c1294xl\boot_emac_flash. This is a bootloader that is to be downloaded to the flash at0x0 through JTAG. Once the bootloader is running, it will receive the new application firmware or you can upgrade your firmware through the Ethernet interface. An example firmware can be found at C:\ti\TivaWare_C_Series-2.2.0.295\examples\boards\ek-tm4c1294xl\boot_demo_emac_flash. This firmware will be programmed to 0x4000. I will suggest you run these two examples as is and get a feel for how it works before you adapt to your application. 

    Below are the steps you need to take.

    1. Program the TivaWare example such as enet_lwip into the MCU flash via the JTAG interface using CCS or LM flash programmer. 

    2. Run the enet_lwip and you should see the IP addressed printed out on the terminal window. You need to record this IP address. This IP address is dynamically generated by the DHCP server. This IP address needs to be used later when you run the boot_emac_flash example. The reason is that the PC running the LM flash programmer is also a BootP server as well as the TFTP server. The BootP server is static in nature. You need to manually associate a client's IP address with the client's MAC address in a fixed table in the BootP server.  Note the only purpose to run the enet_lwip is to obtain an IP address. Once the dynamic address is acquired it is leased on your network for some hours. You might be able to configure your router to lease an IP address indefinitely. Check with your IT department. 

    3. Program the boot_emac_flash into the MCU's flash via the JTAG interface. You can use the CCS or LM flash programmer to load the code. Note the boot_emac_flash starts at 0x0.

    4. Run the boot_emac_flash bootloader. The boot_emac_flash is supposed to send the BootP request now. However, since you have not yet launched the BootP server, the client will just keep sending the request. If you have a wireshark you should see the BootP requests at 1s, 2s, 4s, 8s and so on. 

    5. Open the LM flash programmer. See below. Enter the IP address that you just acquired from running the enet_lwip into the Client IP address field. Next enter the MAC address of your client. If you are using the LaunchPad you should see the MAC address on the sticker at the back of the board. What you are doing here is more like manually updating the BootP server's table of IP address and MAC address association. 

    6. Go to the Program tab and specify the boot_demo_emac_flash.bin as your application program image and hit the Program button. See below. 

    7. Give some time and you should see the download happening via the Ethernet. 

  • Thank you . I will update on successful testing of above.