This thread has been locked.

If you have a related question, please click the "Ask a related question" button in the top right corner. The newly created question will be automatically linked to this question.
[FAQ] AM263P4: Enabling XIP in AM263PX

Part Number: AM263P4

Tool/software:

How to create and enable XIP in AM263PX (step-by-step guide)?

  • 1. How to import example.projectspec?

    • Open CCS.
    • Open project explorer: Go to 'View' → 'Project Explorer' .
    • Right click in 'Project Explorer' → 'Import→ 'CCS Projects'.                                                                                         
    • Choose 'Browse' and go to MCU_PLUS_SDK directory.
    • Select 'required project' and click 'Finish'.

    2. Changes in Sysconfig for Enabling XIP

    • Open example.syscfg.
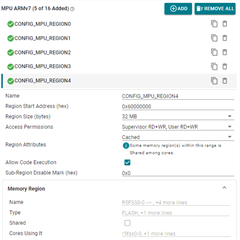
    • Go-to software>MPU ARMv7
    • Add new MPU ARMv7

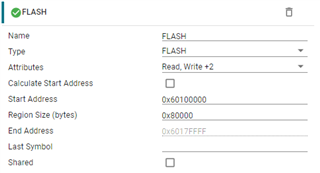
    • Go-to software>Memory Region
    • Add Flash in Memory Region

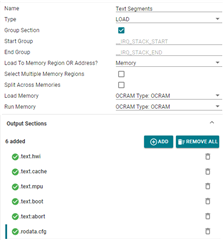
    • Go-to software>section>text-segments
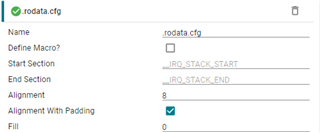
    • Add new output section in Text Segments
      • Name it : .rodata.cfg

      • In .rodata.cfg "Enable alignment with padding"
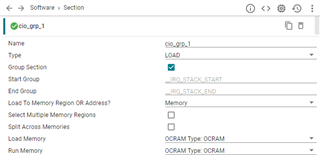
    • Add new section in software→section
      • Name the section as desired: cio_grp1
      • Set the load memory as "OCRAM"

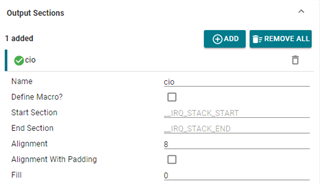
      •  Add output section in cio_grp1
        • Name: cio  
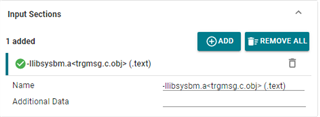
        • Add input section in cio_grp1
        • Name: -llibsysbm.a<trgmsg.c.obj> (.text)

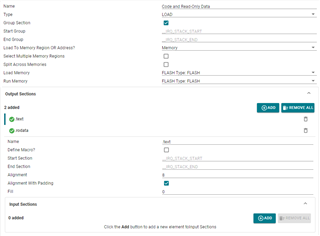
    • Go-to software→section
    • Open "Code and Read-Only Data" section.
    • Update "Load Memory" and "Run Memory" as FLASH
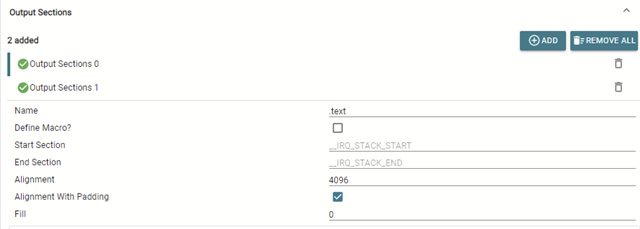
    • Keep the .text and .rodata section as flash sector aligned.

    In this case the sector size if 4096, so alignment has been made as such. This needs to be done for .rodata as well
    Regards,
    Gunjan