This thread has been locked.

If you have a related question, please click the "Ask a related question" button in the top right corner. The newly created question will be automatically linked to this question.

INTERFACING OF GY80 WITH TM4C1294

Other Parts Discussed in Thread: ENERGIA, TM4C1294NCPDT

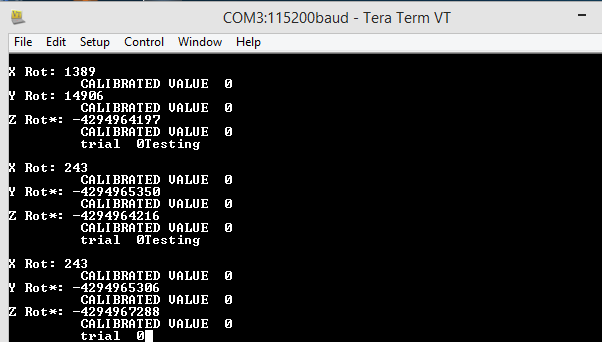
I need to interface ADXL345 of gyro 80 :-

1.IDE-KEIL 5

2.BOARD :TM4C1294

3. tIVAWARE already installed and using the i2c.c file  trying to interface but not getting clear idea regarding the interfacing..I have created a new project in keil5 AND ADDED the i2c.c file and has change the slave address,data bits according to the requirement.Some of the .h file added too.Pls guide me to solve my problem as soon as possible.

4. Which will be better IDE to use for tm4c1294 board :Energia or KEIL 5?

Thanks and Regards

Himsikha Hazarika

  • Hello Himshikha,

    Have you referred this App Note: www.ti.com/.../spma073

    Thanks,
    Sai
  • himshikha hazarika said:
    Pls guide me to solve my problem as soon as possible.

    You note, "Not getting clear idea regarding I2C interface" - yet we see no description of ANY problem.

    You've also "Created a new project" - yet not described if it fully works - or why you felt the need to do so.   Creating a new project most always causes delay, and adds time & much extra effort to your task.

    It's doubtful that many here have experience w/"GY80" - using that as your Subject line may not yield great response...

  • The below is the code for I2C:
    I have chance the data bits and slave addresss.
    what else i have to do?


    #include <stdbool.h>
    #include <stdint.h>
    #include "inc/hw_i2c.h"
    #include "inc/hw_ints.h"
    #include "inc/hw_memmap.h"
    #include "inc/hw_types.h"
    #include "driverlib/gpio.h"
    #include "driverlib/i2c.h"
    #include "driverlib/interrupt.h"
    #include "driverlib/pin_map.h"
    #include "driverlib/sysctl.h"
    #include "driverlib/uart.h"
    #include "utils/uartstdio.h"

    //*****************************************************************************
    //
    //! \addtogroup i2c_examples_list
    //! <h1>Slave Receive Interrupt (slave_receive_int)</h1>
    //!
    //! This example shows how to configure a receive interrupt on the slave
    //! module. This includes setting up the I2C0 module for loopback mode as well
    //! as configuring the master and slave modules. Loopback mode internally
    //! connects the master and slave data and clock lines together. The address
    //! of the slave module is set to a value so it can receive data from the
    //! master.
    //!
    //! This example uses the following peripherals and I/O signals. You must
    //! review these and change as needed for your own board:
    //! - I2C0 peripheral
    //! - GPIO Port B peripheral (for I2C0 pins)
    //! - I2C0SCL - PB2
    //! - I2C0SDA - PB3
    //!
    //! The following UART signals are configured only for displaying console
    //! messages for this example. These are not required for operation of I2C.
    //! - UART0 peripheral
    //! - GPIO Port A peripheral (for UART0 pins)
    //! - UART0RX - PA0
    //! - UART0TX - PA1
    //!
    //! This example uses the following interrupt handlers. To use this example
    //! in your own application you must add these interrupt handlers to your
    //! vector table.
    //! - INT_I2C0 - I2C0SlaveIntHandler
    //
    //*****************************************************************************

    //*****************************************************************************
    //
    // Set the address for slave module. This is a 7-bit address sent in the
    // following format:
    // [A6:A5:A4:A3:A2:A1:A0:RS]
    //
    // A zero in the R/S position of the first byte means that the master
    // transmits (sends) data to the selected slave, and a one in this position
    // means that the master receives data from the slave.
    //
    //*****************************************************************************
    #define SLAVE_ADDRESS 0x53

    //*****************************************************************************
    //
    // Global variable to hold the I2C data that has been received.
    //
    //*****************************************************************************
    static uint32_t g_ui32DataRx;

    //*****************************************************************************
    //
    // This is a flag that gets set in the interrupt handler to indicate that an
    // interrupt occurred.
    //
    //*****************************************************************************
    static bool g_bIntFlag = false;

    //*****************************************************************************
    //
    // This function sets up UART0 to be used for a console to display information
    // as the example is running.
    //
    //*****************************************************************************
    void
    InitConsole(void)
    {
    //
    // Enable GPIO port A which is used for UART0 pins.
    // TODO: change this to whichever GPIO port you are using.
    //
    SysCtlPeripheralEnable(SYSCTL_PERIPH_GPIOA);

    //
    // Configure the pin muxing for UART0 functions on port A0 and A1.
    // This step is not necessary if your part does not support pin muxing.
    // TODO: change this to select the port/pin you are using.
    //
    GPIOPinConfigure(GPIO_PA0_U0RX);
    GPIOPinConfigure(GPIO_PA1_U0TX);

    //
    // Enable UART0 so that we can configure the clock.
    //
    SysCtlPeripheralEnable(SYSCTL_PERIPH_UART0);

    //
    // Use the internal 16MHz oscillator as the UART clock source.
    //
    UARTClockSourceSet(UART0_BASE, UART_CLOCK_PIOSC);

    //
    // Select the alternate (UART) function for these pins.
    // TODO: change this to select the port/pin you are using.
    //
    GPIOPinTypeUART(GPIO_PORTA_BASE, GPIO_PIN_0 | GPIO_PIN_1);

    //
    // Initialize the UART for console I/O.
    //
    UARTStdioConfig(0, 115200, 16000000);
    }

    //*****************************************************************************
    //
    // The interrupt handler for the for I2C0 data slave interrupt.
    //
    //*****************************************************************************
    void
    I2C0SlaveIntHandler(void)
    {
    //
    // Clear the I2C0 interrupt flag.
    //
    I2CSlaveIntClear(I2C0_BASE);

    //
    // Read the data from the slave.
    //
    g_ui32DataRx = I2CSlaveDataGet(I2C0_BASE);

    //
    // Set a flag to indicate that the interrupt occurred.
    //
    g_bIntFlag = true;
    }

    //*****************************************************************************
    //
    // Configure the I2C0 master and slave and connect them using loopback mode.
    //
    //*****************************************************************************
    int
    main(void)
    {
    #if defined(TARGET_IS_TM4C129_RA0) || \
    defined(TARGET_IS_TM4C129_RA1) || \
    defined(TARGET_IS_TM4C129_RA2)
    uint32_t ui32SysClock;
    #endif
    uint32_t ui32DataTx;

    //
    // Set the clocking to run directly from the external crystal/oscillator.
    // TODO: The SYSCTL_XTAL_ value must be changed to match the value of the
    // crystal on your board.
    //
    #if defined(TARGET_IS_TM4C129_RA0) || \
    defined(TARGET_IS_TM4C129_RA1) || \
    defined(TARGET_IS_TM4C129_RA2)
    ui32SysClock = SysCtlClockFreqSet((SYSCTL_XTAL_25MHZ |
    SYSCTL_OSC_MAIN |
    SYSCTL_USE_PLL), 25000000);
    #else
    SysCtlClockSet(SYSCTL_SYSDIV_1 | SYSCTL_USE_OSC | SYSCTL_OSC_MAIN |
    SYSCTL_XTAL_16MHZ);
    #endif

    //
    // The I2C0 peripheral must be enabled before use.
    //
    SysCtlPeripheralEnable(SYSCTL_PERIPH_I2C0);

    //
    // For this example I2C0 is used with PortB[3:2]. The actual port and
    // pins used may be different on your part, consult the data sheet for
    // more information. GPIO port B needs to be enabled so these pins can
    // be used.
    // TODO: change this to whichever GPIO port you are using.
    //
    SysCtlPeripheralEnable(SYSCTL_PERIPH_GPIOB);

    //
    // Configure the pin muxing for I2C0 functions on port B2 and B3.
    // This step is not necessary if your part does not support pin muxing.
    // TODO: change this to select the port/pin you are using.
    //
    GPIOPinConfigure(GPIO_PB2_I2C0SCL);
    GPIOPinConfigure(GPIO_PB3_I2C0SDA);

    //
    // Select the I2C function for these pins. This function will also
    // configure the GPIO pins pins for I2C operation, setting them to
    // open-drain operation with weak pull-ups. Consult the data sheet
    // to see which functions are allocated per pin.
    // TODO: change this to select the port/pin you are using.
    //
    GPIOPinTypeI2CSCL(GPIO_PORTB_BASE, GPIO_PIN_2);
    GPIOPinTypeI2C(GPIO_PORTB_BASE, GPIO_PIN_3);

    //
    // Enable loopback mode. Loopback mode is a built in feature that helps
    // for debug the I2Cx module. It internally connects the I2C master and
    // slave terminals, which effectively lets you send data as a master and
    // receive data as a slave. NOTE: For external I2C operation you will need
    // to use external pull-ups that are faster than the internal pull-ups.
    // Refer to the datasheet for more information.
    //
    HWREG(I2C0_BASE + I2C_O_MCR) |= 0x01;

    //
    // Enable the I2C0 interrupt on the processor (NVIC).
    //
    IntEnable(INT_I2C0);

    //
    // Configure and turn on the I2C0 slave interrupt. The I2CSlaveIntEnableEx()
    // gives you the ability to only enable specific interrupts. For this case
    // we are only interrupting when the slave device receives data.
    //
    I2CSlaveIntEnableEx(I2C0_BASE, I2C_SLAVE_INT_DATA);

    //
    // Enable and initialize the I2C0 master module. Use the system clock for
    // the I2C0 module. The last parameter sets the I2C data transfer rate.
    // If false the data rate is set to 100kbps and if true the data rate will
    // be set to 400kbps. For this example we will use a data rate of 100kbps.
    //
    #if defined(TARGET_IS_TM4C129_RA0) || \
    defined(TARGET_IS_TM4C129_RA1) || \
    defined(TARGET_IS_TM4C129_RA2)
    I2CMasterInitExpClk(I2C0_BASE, ui32SysClock, false);
    #else
    I2CMasterInitExpClk(I2C0_BASE, SysCtlClockGet(), false);
    #endif

    //
    // Enable the I2C0 slave module.
    //
    I2CSlaveEnable(I2C0_BASE);

    //
    // Set the slave address to SLAVE_ADDRESS. In loopback mode, it's an
    // arbitrary 7-bit number (set in a macro above) that is sent to the
    // I2CMasterSlaveAddrSet function.
    //
    I2CSlaveInit(I2C0_BASE, SLAVE_ADDRESS);

    //
    // Tell the master module what address it will place on the bus when
    // communicating with the slave. Set the address to SLAVE_ADDRESS
    // (as set in the slave module). The receive parameter is set to false
    // which indicates the I2C Master is initiating a writes to the slave. If
    // true, that would indicate that the I2C Master is initiating reads from
    // the slave.
    //
    I2CMasterSlaveAddrSet(I2C0_BASE, SLAVE_ADDRESS, false);

    //
    // Set up the serial console to use for displaying messages. This is just
    // for this example program and is not needed for proper I2C operation.
    //
    InitConsole();

    //
    // Enable interrupts to the processor.
    //
    IntMasterEnable();

    //
    // Display the example setup on the console.
    //
    UARTprintf("I2C Slave Interrupt Example ->");
    UARTprintf("\n Module = I2C0");
    UARTprintf("\n Mode = Receive interrupt on the Slave module");
    UARTprintf("\n Rate = 100kbps\n\n");

    //
    // Initialize the data to send.
    //
    ui32DataTx = 'I';

    //
    // Indicate the direction of the data.
    //
    UARTprintf("Transferring from: Master -> Slave\n");

    //
    // Display the data that I2C0 is transferring.
    //
    UARTprintf(" Sending: '%c'", ui32DataTx);

    //
    // Place the data to be sent in the data register.
    //
    I2CMasterDataPut(I2C0_BASE, ui32DataTx);

    //
    // Initiate send of single piece of data from the master. Since the
    // loopback mode is enabled, the Master and Slave units are connected
    // allowing us to receive the same data that we sent out.
    //
    I2CMasterControl(I2C0_BASE, I2C_MASTER_CMD_SINGLE_SEND);

    //
    // Wait for interrupt to occur.
    //
    while(!g_bIntFlag)
    {
    }

    //
    // Display that interrupt was received.
    //
    UARTprintf("\n Slave Interrupt Received!\n");

    //
    // Display the data that the slave has received.
    //
    UARTprintf(" Received: '%c'\n\n", g_ui32DataRx);

    //
    // Loop forever.
    //
    while(1)
    {
    }
    }
  • Thanks, i will go through it.
  • To see my accelerometer reading on terminal ,what chances i have to do in coding?
  • I created new project because it was not availbe as i2c.uvproj. The squence was:
    TivaWare_C_Series -> examples->Peripherals->i2c
  • Now , my aim is to interface ADXL345 with TM4c1294 board in keil5.

    So, i created a new project and copied the  i2c code present in tivaware_c_series . 

    what i have to do?

  • Most ALL beginners do BEST by employing a, "Known Good" factory created project - and simply adding their code to that. You open yourself to all kinds of difficulty by trying to create your, "Own project."

    Search the forum for "Own Project" - be prepared to find HUNDREDS of similar users - crashing/burning upon (very) rocky shores.

    Your program will run NO BETTER - even when placed w/in your "own project!" And - inevitably - it will NOT run at all - due to the huge number of details which must be accommodated during the creation of any "own/custom" project. And for what?
  • ok sir.
    thank you.
  • which IDE :ENERGIA OR KEIL 5 will be easier to interface?

  • Hello,

    Now i have done the following squence(KEIL 5):

    Project->open project->tivaware_c_series->examples->boards->tm4c1294XL->blinky->acc.uvprojex.

  • In the blinky example , i added he i2c.c code but target was not created.

    Rebuild target 'blinky'
    compiling blinky.c...
    assembling startup_rvmdk.S...
    compiling I2C.c...
    linking...
    .\rvmdk\blinky.axf: Error: L6200E: Symbol __ARM_use_no_argv multiply defined (by i2c.o and blinky.o).
    .\rvmdk\blinky.axf: Error: L6200E: Symbol main multiply defined (by i2c.o and blinky.o).
    Not enough information to list image symbols.
    Not enough information to list the image map.
    Finished: 2 information, 0 warning and 2 error messages.
    ".\rvmdk\blinky.axf" - 2 Error(s), 0 Warning(s).
    Target not created.
    Build Time Elapsed: 00:00:00

  • Hello sir,
    What chances i have to do in he below code in order to interface ADXL345 WITH TM4C1294 .


    #include <stdbool.h>
    #include <stdint.h>
    #include "inc/tm4c1294ncpdt.h"
    #include "inc/hw_i2c.h"
    #include "inc/hw_ints.h"
    #include "inc/hw_memmap.h"
    #include "inc/hw_types.h"
    #include "driverlib/gpio.h"
    #include "driverlib/i2c.h"
    #include "driverlib/interrupt.h"
    #include "driverlib/pin_map.h"
    #include "driverlib/sysctl.h"
    #include "driverlib/uart.h"
    #include "utils/uartstdio.h"

    //*****************************************************************************
    //
    //! \addtogroup i2c_examples_list
    //! <h1>Slave Receive Interrupt (slave_receive_int)</h1>
    //!
    //! This example shows how to configure a receive interrupt on the slave
    //! module. This includes setting up the I2C0 module for loopback mode as well
    //! as configuring the master and slave modules. Loopback mode internally
    //! connects the master and slave data and clock lines together. The address
    //! of the slave module is set to a value so it can receive data from the
    //! master.
    //!
    //! This example uses the following peripherals and I/O signals. You must
    //! review these and change as needed for your own board:
    //! - I2C0 peripheral
    //! - GPIO Port B peripheral (for I2C0 pins)
    //! - I2C0SCL - PB2
    //! - I2C0SDA - PB3
    //!
    //! The following UART signals are configured only for displaying console
    //! messages for this example. These are not required for operation of I2C.
    //! - UART0 peripheral
    //! - GPIO Port A peripheral (for UART0 pins)
    //! - UART0RX - PA0
    //! - UART0TX - PA1
    //!
    //! This example uses the following interrupt handlers. To use this example
    //! in your own application you must add these interrupt handlers to your
    //! vector table.
    //! - INT_I2C0 - I2C0SlaveIntHandler
    //
    //*****************************************************************************

    //*****************************************************************************
    //
    // Set the address for slave module. This is a 7-bit address sent in the
    // following format:
    // [A6:A5:A4:A3:A2:A1:A0:RS]
    //
    // A zero in the R/S position of the first byte means that the master
    // transmits (sends) data to the selected slave, and a one in this position
    // means that the master receives data from the slave.
    //
    //*****************************************************************************
    #define SLAVE_ADDRESS 0x53

    //*****************************************************************************
    //
    // Global variable to hold the I2C data that has been received.
    //
    //*****************************************************************************
    static uint32_t g_ui32DataRx;

    //*****************************************************************************
    //
    // This is a flag that gets set in the interrupt handler to indicate that an
    // interrupt occurred.
    //
    //*****************************************************************************
    static bool g_bIntFlag = false;

    //*****************************************************************************
    //
    // This function sets up UART0 to be used for a console to display information
    // as the example is running.
    //
    //*****************************************************************************
    void
    InitConsole(void)
    {
    //
    // Enable GPIO port A which is used for UART0 pins.
    // TODO: change this to whichever GPIO port you are using.
    //
    SysCtlPeripheralEnable(SYSCTL_PERIPH_GPIOA);

    //
    // Configure the pin muxing for UART0 functions on port A0 and A1.
    // This step is not necessary if your part does not support pin muxing.
    // TODO: change this to select the port/pin you are using.
    //
    GPIOPinConfigure(GPIO_PA0_U0RX);
    GPIOPinConfigure(GPIO_PA1_U0TX);

    //
    // Enable UART0 so that we can configure the clock.
    //
    SysCtlPeripheralEnable(SYSCTL_PERIPH_UART0);

    //
    // Use the internal 16MHz oscillator as the UART clock source.
    //
    UARTClockSourceSet(UART0_BASE, UART_CLOCK_PIOSC);

    //
    // Select the alternate (UART) function for these pins.
    // TODO: change this to select the port/pin you are using.
    //
    GPIOPinTypeUART(GPIO_PORTA_BASE, GPIO_PIN_0 | GPIO_PIN_1);

    //
    // Initialize the UART for console I/O.
    //
    UARTStdioConfig(0, 115200, 16000000);
    }

    //*****************************************************************************
    //
    // The interrupt handler for the for I2C0 data slave interrupt.
    //
    //*****************************************************************************
    void
    I2C0SlaveIntHandler(void)
    {
    //
    // Clear the I2C0 interrupt flag.
    //
    I2CSlaveIntClear(I2C0_BASE);

    //
    // Read the data from the slave.
    //
    g_ui32DataRx = I2CSlaveDataGet(I2C0_BASE);

    //
    // Set a flag to indicate that the interrupt occurred.
    //
    g_bIntFlag = true;
    }

    //*****************************************************************************
    //
    // Configure the I2C0 master and slave and connect them using loopback mode.
    //
    //*****************************************************************************
    int
    main(void)
    {
    #if defined(TARGET_IS_TM4C129_RA0) || \
    defined(TARGET_IS_TM4C129_RA1) || \
    defined(TARGET_IS_TM4C129_RA2)
    uint32_t ui32SysClock;
    #endif
    uint32_t ui32DataTx;

    //
    // Set the clocking to run directly from the external crystal/oscillator.
    // TODO: The SYSCTL_XTAL_ value must be changed to match the value of the
    // crystal on your board.
    //
    #if defined(TARGET_IS_TM4C129_RA0) || \
    defined(TARGET_IS_TM4C129_RA1) || \
    defined(TARGET_IS_TM4C129_RA2)
    ui32SysClock = SysCtlClockFreqSet((SYSCTL_XTAL_25MHZ |
    SYSCTL_OSC_MAIN |
    SYSCTL_USE_PLL), 25000000);
    #else
    SysCtlClockSet(SYSCTL_SYSDIV_1 | SYSCTL_USE_OSC | SYSCTL_OSC_MAIN |
    SYSCTL_XTAL_16MHZ);
    #endif

    //
    // The I2C0 peripheral must be enabled before use.
    //
    SysCtlPeripheralEnable(SYSCTL_PERIPH_I2C0);

    //
    // For this example I2C0 is used with PortB[3:2]. The actual port and
    // pins used may be different on your part, consult the data sheet for
    // more information. GPIO port B needs to be enabled so these pins can
    // be used.
    // TODO: change this to whichever GPIO port you are using.
    //
    SysCtlPeripheralEnable(SYSCTL_PERIPH_GPIOB);

    //
    // Configure the pin muxing for I2C0 functions on port B2 and B3.
    // This step is not necessary if your part does not support pin muxing.
    // TODO: change this to select the port/pin you are using.
    //
    GPIOPinConfigure(GPIO_PB2_I2C0SCL);
    GPIOPinConfigure(GPIO_PB3_I2C0SDA);

    //
    // Select the I2C function for these pins. This function will also
    // configure the GPIO pins pins for I2C operation, setting them to
    // open-drain operation with weak pull-ups. Consult the data sheet
    // to see which functions are allocated per pin.
    // TODO: change this to select the port/pin you are using.
    //
    GPIOPinTypeI2CSCL(GPIO_PORTB_BASE, GPIO_PIN_2);
    GPIOPinTypeI2C(GPIO_PORTB_BASE, GPIO_PIN_3);

    //
    // Enable loopback mode. Loopback mode is a built in feature that helps
    // for debug the I2Cx module. It internally connects the I2C master and
    // slave terminals, which effectively lets you send data as a master and
    // receive data as a slave. NOTE: For external I2C operation you will need
    // to use external pull-ups that are faster than the internal pull-ups.
    // Refer to the datasheet for more information.
    //
    HWREG(I2C0_BASE + I2C_O_MCR) |= 0x01;

    //
    // Enable the I2C0 interrupt on the processor (NVIC).
    //
    IntEnable(INT_I2C0);

    //
    // Configure and turn on the I2C0 slave interrupt. The I2CSlaveIntEnableEx()
    // gives you the ability to only enable specific interrupts. For this case
    // we are only interrupting when the slave device receives data.
    //
    I2CSlaveIntEnableEx(I2C0_BASE, I2C_SLAVE_INT_DATA);

    //
    // Enable and initialize the I2C0 master module. Use the system clock for
    // the I2C0 module. The last parameter sets the I2C data transfer rate.
    // If false the data rate is set to 100kbps and if true the data rate will
    // be set to 400kbps. For this example we will use a data rate of 100kbps.
    //
    #if defined(TARGET_IS_TM4C129_RA0) || \
    defined(TARGET_IS_TM4C129_RA1) || \
    defined(TARGET_IS_TM4C129_RA2)
    I2CMasterInitExpClk(I2C0_BASE, ui32SysClock, false);
    #else
    I2CMasterInitExpClk(I2C0_BASE, SysCtlClockGet(), false);
    #endif

    //
    // Enable the I2C0 slave module.
    //
    I2CSlaveEnable(I2C0_BASE);

    //
    // Set the slave address to SLAVE_ADDRESS. In loopback mode, it's an
    // arbitrary 7-bit number (set in a macro above) that is sent to the
    // I2CMasterSlaveAddrSet function.
    //
    I2CSlaveInit(I2C0_BASE, SLAVE_ADDRESS);

    //
    // Tell the master module what address it will place on the bus when
    // communicating with the slave. Set the address to SLAVE_ADDRESS
    // (as set in the slave module). The receive parameter is set to false
    // which indicates the I2C Master is initiating a writes to the slave. If
    // true, that would indicate that the I2C Master is initiating reads from
    // the slave.
    //
    I2CMasterSlaveAddrSet(I2C0_BASE, SLAVE_ADDRESS, false);

    //
    // Set up the serial console to use for displaying messages. This is just
    // for this example program and is not needed for proper I2C operation.
    //
    InitConsole();

    //
    // Enable interrupts to the processor.
    //
    IntMasterEnable();

    //
    // Display the example setup on the console.
    //
    UARTprintf("I2C Slave Interrupt Example ->");
    UARTprintf("\n Module = I2C0");
    UARTprintf("\n Mode = Receive interrupt on the Slave module");
    UARTprintf("\n Rate = 100kbps\n\n");

    //
    // Initialize the data to send.
    //
    ui32DataTx = 'I';

    //
    // Indicate the direction of the data.
    //
    UARTprintf("Transferring from: Master -> Slave\n");

    //
    // Display the data that I2C0 is transferring.
    //
    UARTprintf(" Sending: '%c'", ui32DataTx);

    //
    // Place the data to be sent in the data register.
    //
    I2CMasterDataPut(I2C0_BASE, ui32DataTx);

    //
    // Initiate send of single piece of data from the master. Since the
    // loopback mode is enabled, the Master and Slave units are connected
    // allowing us to receive the same data that we sent out.
    //
    I2CMasterControl(I2C0_BASE, I2C_MASTER_CMD_SINGLE_SEND);

    //
    // Wait for interrupt to occur.
    //
    while(!g_bIntFlag)
    {
    }

    //
    // Display that interrupt was received.
    //
    UARTprintf("\n Slave Interrupt Received!\n");

    //
    // Display the data that the slave has received.
    //
    UARTprintf(" Received: '%c'\n\n", g_ui32DataRx);

    //
    // Loop forever.
    //
    while(1)
    {
    }
    }
  • do WE NEED TO CONFIGURE AND SELECT i2c PINS  TWICE??

    wHAT IS THE DIFFERENCEBETWEEN THE TWO???

    GPIOPinConfigure(GPIO_PB2_I2C0SCL);
    GPIOPinConfigure(GPIO_PB3_I2C0SDA);

    //
    // Select the I2C function for these pins. This function will also
    // configure the GPIO pins pins for I2C operation, setting them to
    // open-drain operation with weak pull-ups. Consult the data sheet
    // to see which functions are allocated per pin.
    // TODO: change this to select the port/pin you are using.
    //
    GPIOPinTypeI2CSCL(GPIO_PORTB_BASE, GPIO_PIN_2);
    GPIOPinTypeI2C(GPIO_PORTB_BASE, GPIO_PIN_3);

  • Do we need  enable loopback mode for interfacing adxl345 with tivac1294?

    Wanted to read data from adxl345 on terminal?

  • GPIOPinConfigure(GPIO_PB2_I2C0SCL);
    GPIOPinConfigure(GPIO_PB3_I2C0SDA);

    Indeed - you need both functions for "PinConfig."   You may use just ONE function for "PinType" (usually) - except for the differences w/in I2C.   (your listing is correct.)

    Loopback is not appropriate when you HAVE hardware.   (as you do)

    Your ADXL device is challenging to code - you'd be far better off to "practice & learn" with a simpler I2C device - such as a SIMPLE (low capacity), 8 pin, EEProm or similar.   Starting too advanced ALWAYS leads to delay & frustration - and (unwanted) extra work for you and your cadre of helpers...

  • ok.
    But i got the task to interface with adxl345 only and has to get the output within the deadline.
  • But i got the task to interface with adxl345 only and has to get the output within the deadline.

    For the records: This is YOUR task and YOUR deadline. You can't rely on anybody else (here on this forum) to do your homework.

    I'd start with carefully studying the datasheets.

  • I am going through datasheets carefully and trying to understand the basic code of i2c.
  • Haven't used the ADXL345, so I can't provide a specific example. However, this device is very similar to others on the market I dealt with.

    I'd first start with reading the device ID register back - if that works, you can start to setup the device according your requirements (which are probably not the default values). Just use the appropriate device address / register address values in the "single-byte read" sequence as depicted at page 18 of the datasheet.

    If that I2C sequence works, you can copy/modify it for single-write, multiple-read and multiple-write access. And using this sequences/functions, you can base your config and readout access upon. At least this is the way I do it usually.

    A scope will be very useful in this process.

    Another point: "I2C multi-byte access" means "stateful design". If this sequence gets interrupted (by an error or during debugging), it becomes very difficult to get master and slave back in sync. The best option is then to power-cycle your board. That's what poster cb1 meant when saying a simpler I2C device would be more appropriate.

  • Yah,got your point.
    I am trying now.
    Also,thanks a lot for guidance and fast reply.
  • himshikha hazarika said:
    But i got the task to interface with adxl345 only and has to get the output within the deadline.

    So - by your logic - every PRO Soccer Player is to START ONLY at the highest levels - without YEARS of practice and development - as they too - are under Deadline!

    This cannot be right - you are NO CLOSER to your goal by following your "Too Demanding, ill-considered" twisting path.

    Clearly - Soccer Players AND MCU Users NEED to master the basics - sooner rather than later - and ALWAYS when under Deadline!  (Especially when under Deadline!)

    Only after you can use I2C to "talk" to a far simpler chip are you (properly) prepared to deal w/the far more demanding/complex ones...   (where ARE your teachers?)

  • Any suggestion of books for programming cortex M4 series?
  • "The definitive guide to ARM Cortex M4" by Joseph Yiu, even available as PDF download ...

  • What is the significance of  SetPowerMode(0x01) ?

  • Which "SetPowerMode()", where from ?

  • void SetPowerMode(unsigned char powerMode)
    {
    uint8_t i2c_data = readI2C0(Accl_ADDR,0x2d);
    if (powerMode==1){
    i2c_data = i2c_data | (powerMode<<3);
    } else if (powerMode==0){
    i2c_data &= ~(1<<3);
    }
    i2c_data = i2c_data | (powerMode<<3);
    writeI2C0(Accl_ADDR,0x2d,i2c_data);
    }
    significance of the above code while interfacing adxl345 with tm4c1294?
  • That would be a "power mode" of the ADXL345 accelerometer.

    For operating this device, i.e. reading acceleration data back, you would certainly need an "aktive" mode.

    Usually (extrapolating from other devices I worked with) this is done by writing specific values to a "mode" register. Check the datasheet to see which register it is, what the values are, and what the default/startup state is.

  • Hi ,

    I am trying to interface l3g4200d (gyroscope) with tm4c1294 but  finding the code for l3g4200d  compatible with arduino.

    How should i proceed for tm4c1294 board.

    I have read the datasheet of gyroscope but still not getting solution.

  • Perhaps this is of any help for you:

    http://www.st.com/content/st_com/en/products/embedded-software/mems-and-sensors-software/drivers-for-mems/stsw-mems001.html


    Since ST (the vendor of this gyroscope) has it's own series of Cortex M devices, expect all example code to be based on their products. Perhaps you can reuse some code. (And I guess a registration is required for download ...).

    I personally don't have any experience with this specific MEMS part.

  • ok.

    I have one more doubt in printing the float values in uart( viewing on TeraTerm).

    I tried using sprintf or uartprintf but showing invalid function.

    Please provide a solution.

    Board-tm4c1294

    IDE-keil5

    thanks.

  • if (rotationX>=0) {
    UART_OutString("\r\nX Rot: ");
    UART_OutUDec((unsigned int ) rotationX);
    UART_OutString("\r\n\t CALIBRATED VALUE ");
    //UART_OutUDec(((float) rotationX)/32768);
    UARTprintf(((float) rotationX)/32768);
    } else {
    UART_OutString("\r\nX Rot*: -");
    UART_OutUDec((unsigned int ) rotationX);
    UART_OutString("\r\n\t CALIBRATED VALUE ");
    // UART_OutUDec(((float) (rotationX*-1))/32768);
    UARTprintf(((float) rotationX)/32768);

    But i am not getting the 2g values :showing zeros.  Please provide some solutions.

    Also.can anuone explain why i am getting so big values for  negative axis of rotation.

    thank you.


  • Hi,
    The below is the code for configuration of registers for interfacing gyroscope with tmc1294xl board.
    void init_L3G4200D_Gyroscope(){ initI2C0(); writeI2C0(Gyro_ADDR,CTRL_REG1,0xBF); writeI2C0(Gyro_ADDR,CTRL_REG2,0x00); writeI2C0(Gyro_ADDR,CTRL_REG3,0x08); writeI2C0(Gyro_ADDR,CTRL_REG4,0x00); writeI2C0(Gyro_ADDR,CTRL_REG5,0x00); }

    But the readings are coming constant (all the 3 axis value are same).

    screenshot of gyro reading

    Please give some suggestions what changes to be made.