This thread has been locked.

If you have a related question, please click the "Ask a related question" button in the top right corner. The newly created question will be automatically linked to this question.

TDA4VM: Lauterbach using Trace32

Part Number: TDA4VM
Other Parts Discussed in Thread: DRA829,

Hi team,
I need to debug my ti-rtos based application running on mcu r5 core J721e_evm.


->lauterbach and trace32 V2.5.9.
->Pdk 7.03

->Lauterbach configurations scripts for different cores from official website
Rev 8.

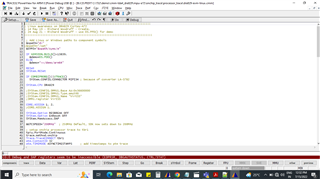
when I connect the debugger from J16 of EVM and start trace32 
as first time user I have tried Running the x_gel_to_cmm/dra829_allcoretypes_connect.cmm script
after that message is received as "target processor is in reset"


can you please help to configure this?
 can you share the procedure to load source c" code on trace 32?

Regads,
Tanvi

  • Hi Team,

    I want to update this post with the conditions that we are using the Lauterbach.

    The OnBoard DIP Switch SW3.2 --> High

    The Lauterbach hardware that we are using -->

    1) LA-3505 - PowerDebug PRO Ethernet
    2) LA-7843 - Debug Cortex - A/R(ARMv7 32-bit) Ext
    3) LA-3808 - 20PIN to 60 PIN JTAG MIPI Connector

    Now, with the above configurations when we run the "SYStem.Detect JtagClock" we get the following error -->

    /**************************************************************************

    Cannot detect JTAG clock
    debug port fail
    Scanning DR: Cannot determine length of DR.
    Scanning DR: TDO stays constantly LOW.

    *************************************************************************/

    I am also attaching the image.

    Please specify what other changes do we need to do so that JtagClock is correctly enabled.

    Thanks & Regards,

    Tanvi

  • Hi Team,

    Any update for this thread  ?

    Regards,

    Tanvi

  • Tanvi,

    Since you are using the j721e_evm. We can provide the standard cmm scripts to connect to cores.

    Are you using standard cmm scripts or you are preparing your own?

    - Keerthy

  • keerthy,

    We are using cmm files provided by TI's Collaborative Design and Delivery System (CDDS).

    ->
    https://cdds.ext.ti.com/ematrix/common/emxNavigator.jsp?objectId=28670.42872.65438.8414

    is there a script for loading a source code on trace32?

    can you provide user guide for same?

    Please specify what other changes do we need to do so that JtagClock is correctly enabled.

    suggestion on this is highly appreciated.


    regards,

    Tanvi

  • Tanvi,
    -0-
    Based on the information provided it looks like you are not familiar with TRACE32 and trying to figure out how to start.   How you use the debugger depends on the code you need to debug and the systems initial state.  JTAG-Stop-Mode debugging via TRACE32 is effective for bootloaders and drivers and can be used with Applications.  Use of 'Run-Mode debugging' with TRACE32 (talking to a gdbserver on the target) is effective for Linux Applications.  The Lauterbach documentation and videos describes these in detail.
    -1-
    A: As the readme's indicate the scripts at the ./x_gel_to_cmm_public/<*>.cmm assume 'bare' metal with no code executed before the debugger runs.  This means no SD card boot or flash boot image before running them.  This situation can be forced by setting SW8 and SW9 to NOBOOT settings (settings per the board guide).    The scripts under ./x_gel_to_cmm_public are useful for bare metal board check out and for PDK unit test execution where the JTAG is used as a bootloader.
    B: As the readme indicates scripts at the level above this can be used to debug running a system which has already executed code.  To debug a Linux which is started or in the process of starting you should use scripts like : ./cmm-tda4_dra829/mpu-a72/onchip_trace/processor_trace/dra829-evm-linux.cmm.
    -2-
    The failure you report for dra829_allcoretypes_connect.cmm indicates you probably ran this script after Linux booted.  It is not possible to run this script with Linux as the script assumes it controls the system and doesn't know what Linux has done.  See 1.A.
    The failure you show with SYStem.Detect JtagClock happens as you likely ran no script and this command will fail if no target is specified.  For this command to work you would need to first run the j7es_m3.cmm script.
    -3-
    For debugging at a certain level of the system you typically need to fashion a script which has the right mix of control in the SW and one in CMM scripts.  For a running Linux, you only need the vmlinux in the CMM and you will not want to touch hardware registers.  For bare metal you will want the CMM to first touch a lot of hardware registers then load your test code.   When you debug in the middle, you need to find a clean 'attachment' point (could be a while(1) loop or a break point) in some code then attach and debug.,
    -4-
    I'll attach a video of how to attach to Linux early for debugging using the scripts and a target.
     
    Regards,
    Richard W.
  • Hi Richard,

    Thanks for such a detailed response.

    A: As the readme's indicate the scripts at the ./x_gel_to_cmm_public/<*>.cmm assume 'bare' metal with no code executed before the debugger runs.  This means no SD card boot or flash boot image before running them.  This situation can be forced by setting SW8 and SW9 to NOBOOT settings (settings per the board guide).    The scripts under ./x_gel_to_cmm_public are useful for bare metal board check out and for PDK unit test execution where the JTAG is used as a bootloader.
    B: As the readme indicates scripts at the level above this can be used to debug running a system which has already executed code.  To debug a Linux which is started or in the process of starting you should use scripts like : ./cmm-tda4_dra829/mpu-a72/onchip_trace/processor_trace/dra829-evm-linux.cmm.

    While following above step we got an error. I am attaching the image.

    We tried to run the cmm script in :--

    1.) NO-BOOT mode

    2.) BOOT mode with a MMCSD card booting Linux.

    But it resulted in the same error in the attached given image.

    Please suggest the steps that are required to resolve this issue.

    Regards,

    Tanvi

  • Hello Tanvi,
    From your screen shot alone it is not possible to understand what step is missing. I would recommend using something like the free screenpresso (https://www.screenpresso.com/ ) to capture a video of the steps.
    A test with this Linux early attach cmm and NOBOOT mode makes no sense.  The script waits for a typical Linux SD boot time then try's to attach.  In NOBOOT mode Linux would never start so the script would obviously fail.  The attached screen shot failure seems to correspond with this expected fail test run.
    A test of this script using a working Linux SD/MMC boot 'likely' would not fail like shown in the screenshot unless the A72 core was never started.   You could increase the insertion timeout in the powerup script in case somehow your startup delay is longer.   A video of a good system should show the UART console getting messages.  If there are no-messages then the setup is wrong and the reported observations are invalid.
    You need to verify that Linux can boot properly when the JTAG header is plugged in and the PowerDebugPro box is powered on.  If it can't boot in this state no script will work.  If the Lauterbach debug cable is bad or one of the adaptors is it cannot work.   Also, you need to ensure the EMU_SW DIP switch near the MIPI-60 debug connector is set to  1-1.  Other settings can result in different TAP modes which could cause boot issues.
    Regards,
    Richard W.
  • Hi Richard,

    Thanks for the quick reply.

    I have one concern regarding the file "cmm-tda4_dra829\mpu-a72\onchip_trace\processor_trace\dra829-evm-linux".

    In the file "dra829-evm-linux" line number 21 -->

    SYStem.CONFIG.CONNECTOR MIPI34 ; because of converter LA-3782

    Here it says that here converter LA-3782 is being used so it is getting configured as MIPI34.

    In the set of hardware which I have mentioned

    The Lauterbach hardware that we are using -->

    1) LA-3505 - PowerDebug PRO Ethernet
    2) LA-7843 - Debug Cortex - A/R(ARMv7 32-bit) Ext
    3) LA-3808 - 20PIN to 60 PIN JTAG MIPI Connector

    There is no such connector.

    Thus, by following your advice which said MIPI-60 as quoted under I changed the line to-->

    MIPI-60 debug connector

    SYStem.CONFIG.CONNECTOR MIPI60 ; because of converter LA-3782

    But, same error was noticed.

    I am unable to use screenpresso.com as my organization restricts it.

    Also, you need to ensure the EMU_SW DIP switch near the MIPI-60 debug connector is set to  1-1

    I also ensured that the EMU_SW DIP switch was set to 1:1.

    I am able to boot linux on a72 using MMCSD and I am able to see the logs.

    Please specify what other things can be done to resolve this.

    Thanks & Regards,

    Tanvi

  • Hello Tanvi,
    A few points/questions:
    - As I recall the line 21 directive for "system.Config.Connector MIPI60" is for fixing up trace when using a combiprobe or other device which has a mipi-34 segment. For 'standard' configurations using a PowerDebugPro box I do not think it will matter.
    - For TDA4 EVMs Lauterbach recommends the use of a LA-3818 adaptor (ARM-20 to MIPI-60).  This is what I typically use with TDA4 EVMs.  TI does also provide a TI-14 to MIPI-60 adaptor in the box and also a cTI-20 to MIPI-60 adaptor.  I have used those in in combination with an LA-3780.  I also have some older LA-3812's which I have used but those have been modified to bridge the MIPI-60 reset pins.  The MIPI-60 footprint offers two reset options but boards typically only populated one of them, the adaptor tends to be built to match the board reset circuitry (open drain or driven reset type).
      -- I have never used a LA-3808 like you cite. I do not know if it is properly driving the reset or if it can be reconfigured.  You should ask Lauterbach if a 'unmodified' LA-3808) is compatible with the TDA4 board.  I do not have one to test with.  A search seems to indicate it was a custom adaptor for use with a STM L8540 target.  Given your continued negative results that may be the problem as you have now eliminated many other types of issues.
    Question:  With the NOBOOT DIP switch setting & 1/1 EMU_SW DIP switch could you connect at all using the dra829_allcoretypes_connect.cmm?   This should work.  If not, then probably the adaptor is not compatible.
    Regards,
    Richard W.
  • Hi Richard,

    As per the confirmation from Lauterbach team they have specified that

    I have never used a LA-3808 like you cite

    this convertor(LA-3808) can be used for debugging TDA4 board.

    Please can you specify what other things can be looked into ?

    Regards,

    Tanvi

  • Hello Tanvi,
    -0-
    Did Lauterbach just confirm in theory it should work, or did they try it on their TDA4VM board?  Further, I had an interaction with an engineer at Lauterbach a while back and he described using an adaptor like this, but his adaptor was not 'stock' and it had the MIPI resets soldered together.   Lauterbach has TDA4VM and other family boards and they should be able to provide more trouble shooting ideas beyond whatever I have provided.
    -1-
    You have not yet fully answered the previous question, please do this.
    Question:  With the NOBOOT DIP switch setting & 1/1 EMU_SW DIP switch could you connect at all using the dra829_allcoretypes_connect.cmm?   This should work.  If not, then probably the adaptor is not compatible
    -2-
    You should discuss with your IT how to enable screen recordings so you can export more information. Many tools will work, I mentioned screenprocesso as I use it.  When I first tried screenpresso it was not allowed for me inside my org also.  After some requests and review it was added as it made sense.
    Regards,
    Richard W.
  • Hi Richard,

    With the NOBOOT DIP switch setting & 1/1 EMU_SW DIP switch could you connect at all using the dra829_allcoretypes_connect.cmm?

    I tried the steps you mentioned.

    I got the following as output -->

    Please suggest what step should I follow now.

    Regards,

    Tanvi

  • Hello Tanvi,
    Do you have access to a 2nd TDA4VM platform?  Do you have access to a 2nd Lauterbach setup?  I have directly interacted with dozens of other folks who are able to use the tool as you are trying.  Many folks have some start up issues but they typically clear quickly unless there is some hardware issue.  Finding some way to have trust in the hardware path and exporting more information (like in videos) are what can be done.  You should be able to also work directly with Lauterbach to get it going.  They will have the ability to send you a known working loader machine also.
     
    Regards,
    Richard W.
  • Hi Richard,

    Sorry for the delay in response.

    Finding some way to have trust in the hardware path and exporting more information (like in videos) are what can be done.  You should be able to also work directly with Lauterbach to get it going.

    Will follow what you suggested.

    Regards,

    Tanvi