This thread has been locked.

If you have a related question, please click the "Ask a related question" button in the top right corner. The newly created question will be automatically linked to this question.

[FAQ] AM64X: How to Load/Flash PRU binaries into external memory

Part Number: AM6442
Other Parts Discussed in Thread: UNIFLASH

How can I load/flash PRU binaries into external memory?

I want to keep my PRU software in external memory and for every time reset the AM64X SOC, it has to read PRU binaries from external memory and Load it in PRU memory.
How can I solve this problem? This FAQ is intended to explain how to flash PRU binaries to external memory.

  • Please follow the steps below to load PRU binary from R5F0_0 into external memory.

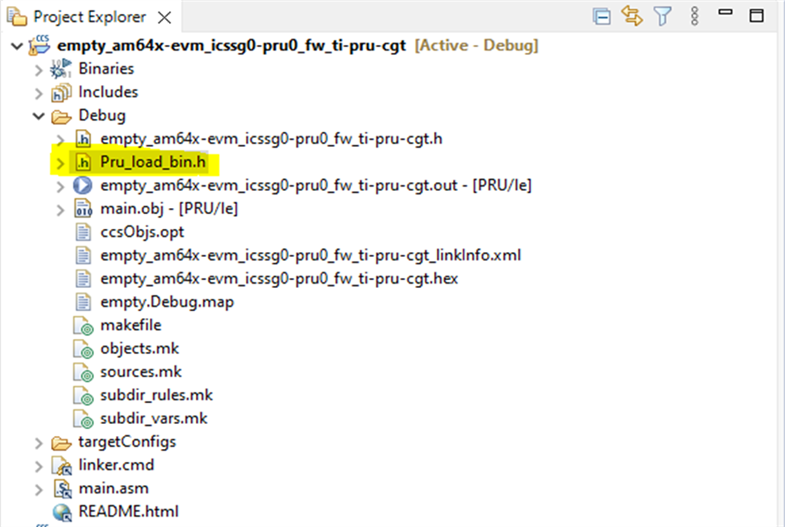
    1. Compile your PRU project and finally you will get Pru_load_bin.h file.

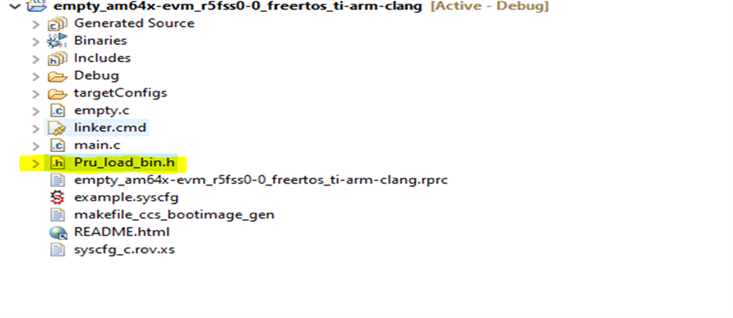
     2. Include your Pru_load_bin.h file in your R5F0_0 Application

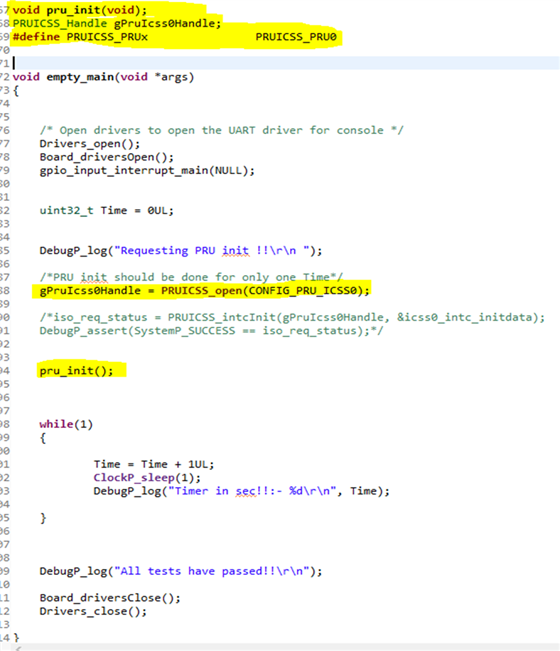
    3. You can call pru_init( ) function before while(1) function  in  R5F0_0 Application and detail information about pru_init( ) function is added in R5F0_0 example. Please go through it.

    extern uint32_t Board_getGpioButtonIntrNum(void);
    extern uint32_t Board_getGpioButtonSwitchNum(void);
    static void GPIO_bankIsrFxn(void *args);
    void gpio_input_interrupt_main(void *args);
    extern void Board_gpioInit(void);
    
    uint32_t            gGpioBaseAddr = GPIO_PUSH_BUTTON_BASE_ADDR;
    HwiP_Object         gGpioHwiObject;
    
    void pru_init(void);
    PRUICSS_Handle gPruIcss0Handle;
    #define PRUICSS_PRUx                PRUICSS_PRU0
    
    
    void empty_main(void *args)
    {
    
    
        /* Open drivers to open the UART driver for console */
        Drivers_open();
        Board_driversOpen();
        gpio_input_interrupt_main(NULL);
    
    
        uint32_t Time = 0UL;
    
    
        DebugP_log("Requesting PRU init !!\r\n ");
    
        /*PRU init should be done for only one Time*/
        gPruIcss0Handle = PRUICSS_open(CONFIG_PRU_ICSS0);
    
        /*iso_req_status = PRUICSS_intcInit(gPruIcss0Handle, &icss0_intc_initdata);
        DebugP_assert(SystemP_SUCCESS == iso_req_status);*/
    
    
        pru_init();


        while(1)
        {
    
                Time = Time + 1UL;
                ClockP_sleep(1);
                DebugP_log("Timer in sec!!:- %d\r\n", Time);
    
        }


        DebugP_log("All tests have passed!!\r\n");
    
        Board_driversClose();
        Drivers_close();
    
    }


    4. Compile your R5F0_0 Application.

    5. Power OFF the EVM and switch the EVM boot mode to UART BOOT MODE.

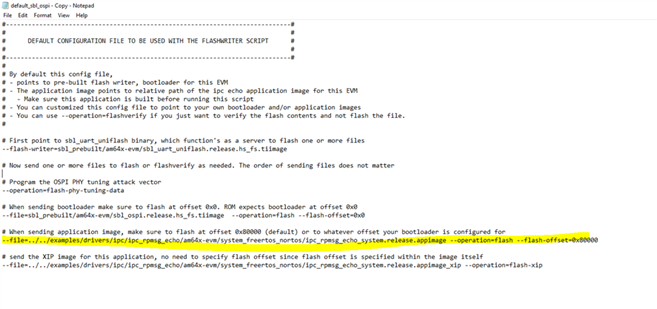
    6. Give your R5F0_0 application app image path in yellow marked area.

    Path: C:\ti\mcu_plus_sdk_am64x_08_05_00_24\tools\boot\sbl_prebuilt\am64x-evm

    7.  Power ON the EVM and open a command prompt and run the below command to flash the Application into the External Memory.

    python uart_uniflash.py -p COM8 --cfg=sbl_prebuilt/am64x-evm/ default_sbl_ospi.cfg

    Here COM<x> is the port name of the identified UART port in Windows. After all the flashing is done, you will see success message in command prompt window.

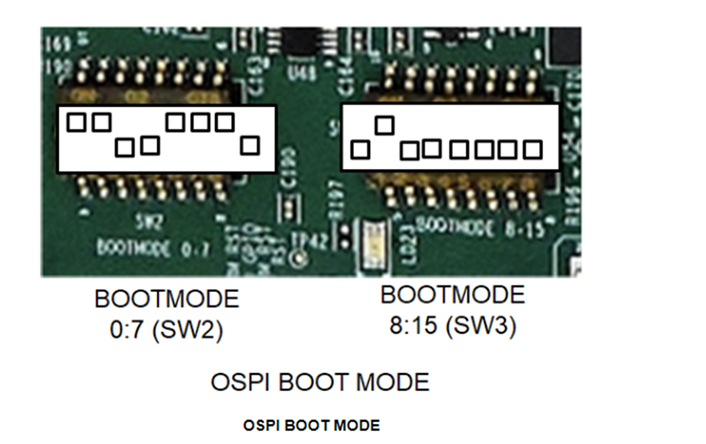
    8. Power OFF the EVM and switch the EVM boot mode to OSPI mode as shown below.

     9Now R5F can load binaries into the PRU core for every warm Reset/POR.

  • Example Projects : 

    I have attached example projects of R5F and PRU for your reference .

    R5F Code :

    5355.empty_am64x-evm_r5fss0-0_freertos_ti-arm-clang.zip

    PRU Code : 

    1070.empty_am64x-evm_icssg0-pru0_fw_ti-pru-cgt.zip