Because of the Thanksgiving holiday in the U.S., TI E2E™ design support forum responses may be delayed from November 25 through December 2. Thank you for your patience.

This thread has been locked.

If you have a related question, please click the "Ask a related question" button in the top right corner. The newly created question will be automatically linked to this question.

Installing Beaglebone dev env under Windows / Virtual Box - separate USB card reader required?

Other Parts Discussed in Thread: LINUXEZSDK-SITARA

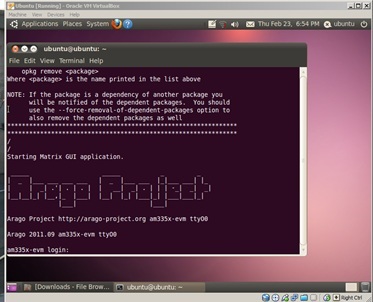
I've installed the TI supplied microSD card into the Beaglebone and connected it to my Windows PC.  I'm able to access the serial shell and get the "am335x-evm login:" prompt.

On my windows box I've opened the /windows_users/windows_users.html file where it states "You will need to insert the USB SD Card Reader into a Linux machine" and provides instructions on setting up a Linux env.

I've installed VirtualBox and have a Ubuntu 10.4 image running.  Next step (I believe) is to install the tool chain via the "START_HERE.sh" script referenced in the documents.

Does this require that I use a separate USB card reader and make it accessible to Virtual Box as described in the wiki?  

I'm confused by the statement  "you will need to insert *the* USB SD card reader...." - it makes it sound like the USB card reader is included?  Or is the beaglebone supposed to look like a SD card reader to Windows?

Thanks,

Dan

  • Dan,

    The beaglebone should appear to windows to have a mass storage device (the same one where the START_HERE.sh script is located).  You should pass that device into your virtual box so that you can run the SDK installer.

    You should also probably disconnect your serial console from the beaglebone if you are connecting through windows and instead connect it through your Ubuntu setup.

    But overall, if you pass the START_HERE partition of the beaglebone to the virtual box then you should be able to use the beaglebone as an SD card reader and install the SDK by running the .bin installer.

    Thanks,

    Chase

  • Chase -

    Thanks for your response.  I added the "Linux 3.1.0-rc8 with musb-hdrc Mass Storage Gadget" as a USB device.  Now I can see the START_HERE.sh script in my VirtualBox / Ubuntu environment.

    I was following the process laid out here, which refers to a USB card reader and not the Mass Storage Gadget, so I was a bit confused.

    http://processors.wiki.ti.com/index.php/How_to_Build_a_Ubuntu_Linux_host_under_VirtualBox

    http://processors.wiki.ti.com/index.php/How_to_Build_a_Ubuntu_Linux_host_under_VirtualBox#How_to_Read_a_USB.C2.A0SD.C2.A0Card_Reader_in_VirtualBox

    Thanks for your help.

    - Dan

  • Hi,


    I'm having a similar problem.

    I have the Ubuntu Linux virtual machine running under VirtualBox using both Windows 7 and Windows XP.

    I believe I've got the machine defined correctly.

    If I plug the BeableBone in with the SD card holding the Angstrom distribution, it gets recognized immediately and I can use the enet port to get to the Cloud 9 app.

    However, if I start up with the TI AMSDK card in the Bone, it isn't recognized.

    If I put the card in a USB SD reader, it works OK ( I see the boot, fsroot and START.HERE partitions) but I can't get the serial port initialized correctly using the setup.sh.


    Any suggestions?


    Dave

  • Dave,

    Are you passing the beaglebone device into the virtual machine.  I'm not familiar with VirtualBox but I believe it is like VMWare in that you should pass the hardware to the virtual machine.

    As for getting your serial port setup correctly when you use the setup.sh the serial port will be of the form /dev/ttyUSBx where x is the second port of the FTDI device.  If you have not passed the beaglebone into the virtual machine such that doing lsusb | grep "0403:a6d0" then the script will be unable to determine the port to use.

    Also, when you say the Angstrom image is recognized immediately do you mean by the virtual machine or by Windows itself.  I believe that image ships with drivers for windows and Mac platforms.

    Chase

  • Chase,


    1/3. Yes, if I power up the Bone with the Angstrom card, the "Linux 3.1.0-rc8 with musb-hdrc Mass Storage Gadget" shows up on the VirtualBox start up screen as a USB device that I can select to pass to the virtual machine. I select it and then also select as a a device once the Linux machine boots. The BeagleBone partition shows up on the Linux desktop.


    2. When I run the startHere.sh/setup.sh from the SD card reader, I do get to the minicom setup that indicates that it sets up ttyUSB1 but when I run minicom, it says that the device doesn't exist.


    I can see the remote desktop via the Firefox browser, but I need to be able to change and download the code base which I'm currently unable to accomplish.


    Dave.

  • Dave,

    A couple more questions to help:

    1. when you run the following command is the device found?

                           lsusb | grep "0403:a6d0"

    If not then the beaglebone is not being passed through to the virtual machine.

    2. If you do an lsmod is the ftdi_sio module installed?

    If not then try "modprobe ftdi_sio vendor=0x0403 product=0xa6d0"

    3. Does your virtual machine have a /dev/ttyUSB1 device node?

    The above modprobe should have caused that device node to be created.  Now you can connect minicom to it.

    Chase

  • Chase,

    I stumbled on the ftdi driver info in the Android DevKit wiki. I was able to provide drivers that enabled me to get the SDK card partitions when booting up.

    The setup.sh process completes and I get a boot prompt. However, on subsequent boot ups, even if I umount the boot and START_HERE partitions, I never get the  ttyUSB1 device.

    From viewing the setup.sh file and following your instructions, it appears that I am passing the device through but I can't get the ftdi_module installed.

    See below the output of the terminal window following your instructions.


    Dave


    user@user-desktop:~$ lsusb | grep "0403:a6d0"
    Bus 001 Device 002: ID 0403:a6d0 Future Technology Devices International, Ltd
    user@user-desktop:~$ lsmod
    Module                  Size  Used by
    nls_iso8859_1           3249  1
    nls_cp437               4919  1
    vfat                    8933  1
    fat                    47767  1 vfat
    nls_utf8                1069  1
    isofs                  29250  1
    vboxvideo               1228  1
    drm                   163747  2 vboxvideo
    agpgart                31724  1 drm
    binfmt_misc             6587  1
    vboxsf                 35755  0
    snd_intel8x0           25652  2
    snd_ac97_codec        100646  1 snd_intel8x0
    ac97_bus                1002  1 snd_ac97_codec
    snd_pcm_oss            35308  0
    snd_mixer_oss          13746  1 snd_pcm_oss
    snd_pcm                70694  3 snd_intel8x0,snd_ac97_codec,snd_pcm_oss
    nfsd                  238903  13
    exportfs                3437  1 nfsd
    snd_seq_dummy           1338  0
    snd_seq_oss            26722  0
    nfs                   265434  0
    snd_seq_midi            4557  0
    lockd                  64881  2 nfsd,nfs
    snd_rawmidi            19056  1 snd_seq_midi
    nfs_acl                 2245  2 nfsd,nfs
    auth_rpcgss            33767  2 nfsd,nfs
    snd_seq_midi_event      6003  2 snd_seq_oss,snd_seq_midi
    snd_seq                47263  6 snd_seq_dummy,snd_seq_oss,snd_seq_midi,snd_seq_midi_event
    sunrpc                193578  12 nfsd,nfs,lockd,nfs_acl,auth_rpcgss
    snd_timer              19130  2 snd_pcm,snd_seq
    snd_seq_device          5700  5 snd_seq_dummy,snd_seq_oss,snd_seq_midi,snd_rawmidi,snd_seq
    joydev                  8740  0
    snd                    54244  14 snd_intel8x0,snd_ac97_codec,snd_pcm_oss,snd_mixer_oss,snd_pcm,snd_seq_oss,snd_rawmidi,snd_seq,snd_timer,snd_seq_device
    ppdev                   5259  0
    usbhid                 36110  0
    usb_storage            40033  1
    hid                    67288  1 usbhid
    parport_pc             25962  0
    soundcore               6620  1 snd
    fbcon                  35102  71
    tileblit                1999  1 fbcon
    font                    7557  1 fbcon
    bitblit                 4707  1 fbcon
    softcursor              1189  1 bitblit
    vboxguest             195799  6 vboxsf
    psmouse                63677  0
    serio_raw               3978  0
    snd_page_alloc          7076  2 snd_intel8x0,snd_pcm
    i2c_piix4               8335  0
    vga16fb                11385  1
    vgastate                8961  1 vga16fb
    lp                      7028  0
    parport                32635  3 ppdev,parport_pc,lp
    ahci                   32680  2
    e1000                  97435  0
    user@user-desktop:~$ modprobe ftdi_sio vendor=0x0403 product=0xa6d0
    FATAL: Error inserting ftdi_sio (/lib/modules/2.6.32-38-generic/kernel/drivers/usb/serial/ftdi_sio.ko): Operation not permitted
    user@user-desktop:~$ df -hT
    Filesystem    Type    Size  Used Avail Use% Mounted on
    /dev/sda1     ext4     29G  9.4G   18G  35% /
    none      devtmpfs    245M  276K  245M   1% /dev
    none         tmpfs    249M  224K  249M   1% /dev/shm
    none         tmpfs    249M  108K  249M   1% /var/run
    none         tmpfs    249M     0  249M   0% /var/lock
    none         tmpfs    249M     0  249M   0% /lib/init/rw
    /dev/sr0   iso9660     44M   44M     0 100% /media/VBOXADDITIONS_4.1.8_75467
    user@user-desktop:~$

  • Dave,


    You are almost there I think.  Try adding "sudo" in front of your modprobe command.  You will be prompted for your password but this should allow you to insert the ftdi_sio module.

    Chase

  • I made the following tutorial for getting your host linux machine usb drivers setup for the BeagleBone. For a Linux newbie, this may be helpful. Today is my first time using Linux and this is the procedure I followed.

    In terminal type the following while in the root directory. This opens an editor called ‘nano’ and creates the nano file in the directory specified. This is a rules file for udev.

    sudo nano /etc/udev/rules.d/10-local.rules

    Type this into nano and hit ctrl+o to save then type ctrl+x to exit. 

    ACTION=="add", SUBSYSTEM=="usb", ENV{DEVTYPE}=="usb_interface", \

            ATTRS{idVendor}=="0403", ATTRS{idProduct}=="a6d0", \

            DRIVER=="", RUN+="/sbin/modprobe -b ftdi_sio"


    ACTION=="add", SUBSYSTEM=="drivers", \

            ENV{DEVPATH}=="/bus/usb-serial/drivers/ftdi_sio", \

            ATTR{new_id}="0403 a6d0"


    ACTION=="add", KERNEL=="ttyUSB*", \

                        ATTRS{interface}=="BeagleBone", \

            ATTRS{bInterfaceNumber}=="00", \

                        SYMLINK+="beaglebone-jtag"


    ACTION=="add", KERNEL=="ttyUSB*", \

                        ATTRS{interface}=="BeagleBone", \

            ATTRS{bInterfaceNumber}=="01", \

                        SYMLINK+="beaglebone-serial"

    To run/load the new udev rule, type the following in the root terminal.

    sudo udevadm control --reload-rules

    To connect the BeagleBone serial console, type this in root.
    sudo screen /dev/ttyusb1 115200
     The code compiled and brought up this.

    I used the following references

    (BeagleBone specific information)

    http://beagleboard.org/static/beaglebone/a3/README.htm#drivers

    (Where to save the new rule)

    http://reactivated.net/writing_udev_rules.html

    (How to use nano)

    http://www.gentoo.org/doc/en/nano-basics-guide.xml


  • Hi ,

    may be this is not the right forum to discuss, but I have lost my TI supplied sd card content so I do not have start_here.sh script. Can someone please help me to recreate the sd card for ti linux sdk image boot..

    regards

  • Tarun,

    All the content that was on the START_HERE partition of the SD card can also be found on the SDK download page.  Go to www.ti.com/tool/linuxezsdk-sitara and select your processor to get to the download page.  In SDk 5.04 (being released this week) there is a script called create-sdcard.sh in the bin directory that will help you create an SD card (although it can only create 3 partition SD cards if you have access to tarballs for the partitions which is not typical).  You can get this script early at:

    http://arago-project.org/git/?p=arago.git;a=blob;f=recipes/ti/ti-tisdk-setup/create-sdcard.sh;h=2638d354fe1a4cd8a6536e2ff82cd5a8ab449aae;hb=next

    and find instructions on using it at:

    http://processors.wiki.ti.com/index.php/Sitara_Linux_SDK_create_SD_card_script

    Chase

  • Thanks Chase,

    On the following link:

    http://processors.wiki.ti.com/index.php/Sitara_Linux_Software_Developer%E2%80%99s_Guide

    under the heading Start your Linux Development for beaglebone (point 3).  I was unable to find the Start_Here.sh script. please help. I was able to partition the sd card. I placed the prebuilt images from linux ez sdk into the sd card boot and rootfs partition. But I am confused about this Start_Here.sh script. Setup.sh is there in sdk but Start_here.sh, I was unable to find out.

    regards

  • Tarun,

    start_here.sh only exists for a 3 partition card out of the box and is to help get the SDK installed and perform the out-of-box setup.  Since you have already installed the SDK and booted the board you do not need that script.

    Chase

  • I have install and setup ti-sdk-am335x-evm-05.04.01.00 in ubuntu 10.04 TLS success, and I use create-sdcard.sh to make a sd card with prebuilt-images, but beaglebone can not start up. When I insert the sd card in the host computer, the files are right. Is there something should I have not to do?

  • Please provide additional information.  Did you connect the XDS100v2/beaglebone device to the VM image?  Do you see /dev/ttyUSB devices in your VM?

  • you need the boot partition to be Bootable, that is why it is not booting.

  • Chase,

    I got a BeagleBone from another developer and the original SD card contents are gone, so I can't seem to set up the BeagleBone - it is never recognized as a MSD, so the setup script complains that the BeagleBone is not connected.

    The script appears to be looking for the BeagelBone rootfs to be mounted on the Linux VM, but as I mentioned, the BeagleBone never shows up as an MSD.

    Long story short, some users may, in fact need access to the raw tarballs for the 3 partition option in create-sdcard.sh. Hopefully this can be provided by TI?

    Ralph

  • The third partition only contains the SDK installer, CCS installer, and START_HERE.sh script.


    START_HERE.sh will help you launch remote matrix using the .ipaddr file on the boot partition and then install the SDK and invoke the setup script.

    That being said, there was an issue with script that loaded the g_mass_storage gadget driver on the root file system such that it would only do so for a 3 partition card.  This will be fixed in the next release of the SDK.  You can modify the following file on the rootfs partition of the SD card and change the check to only look for and mount the first partition.

    /etc/init.d/storage-gadget-init

    Chase

  • I am responding to this old post, because I think there is a lot of confusion over this subject.  I think Dan Giorgis who posted this was having trouble, because he was using Beaglebone SDK setup instructions for the SD card that is not shipped with the Beaglebone anymore.  When Beaglebone stopped shipping the SD card, the installation instructions were not updated to reflect this.  I verified the problem in this post: http://e2e.ti.com/support/dsp/sitara_arm174_microprocessors/f/791/t/238635.aspx  I believe there is confusion, because people think these instructions are referring to the one card that is currently shipped with the Beaglebone.  But, in fact, the instructions are referring to another card that they have don't ship anymore with he Beaglebone.  Dan writes about having a lot of confusion, and then talks about the "START_HERE.sh"  This file is on the SD card that is not shipped with the Beaglebone anymore.  

    I tried the same thing Dan did and hit a dead end.  At the end of the setup script the program tells you the SD card is not mounted and that you should mount the card and run the setup program again.  I found the instructions for "AMSDK START HERE Script" (the card that does not ship with Beagleboard anymore).   This says the START_HERE partition of the SD card is automatically mounted to the host during boot up of the card.  I believe this is what the SDK install software is looking for.  I am working with Ubuntu 10.04 in a VirtualBox with Windows XP host.  If I setup the Beaglebone USB Mass Storage Device in VirtualBox and then boot the Beaglebone with the current SD card, it puts the SD card on the Ubuntu Desktop, as Dan described in his post.   I don't think this is mounted correctly for setup.sh, because it still complains that it is not mounted and will not complete the setup.  

    If I want to setup the SDK for the current SD card that ships with Beaglebone, should I just follow all the instructions for the EVM?  One problem I can see is that the EVM does not use serial communications through USB.  If I tell the setup program I am using an EVM, it may not configure the system correctly for this type of serial communications.