This thread has been locked.

If you have a related question, please click the "Ask a related question" button in the top right corner. The newly created question will be automatically linked to this question.

RTOS/AM3359: how to flash on AM3359ICE2 using J-Link

Part Number: AM3359
Other Parts Discussed in Thread: TMDSICE3359, , UNIFLASH

Tool/software: TI-RTOS

Hi. there

I have AM3359ICE (TMDSICE3359) and J-Link Debugger.

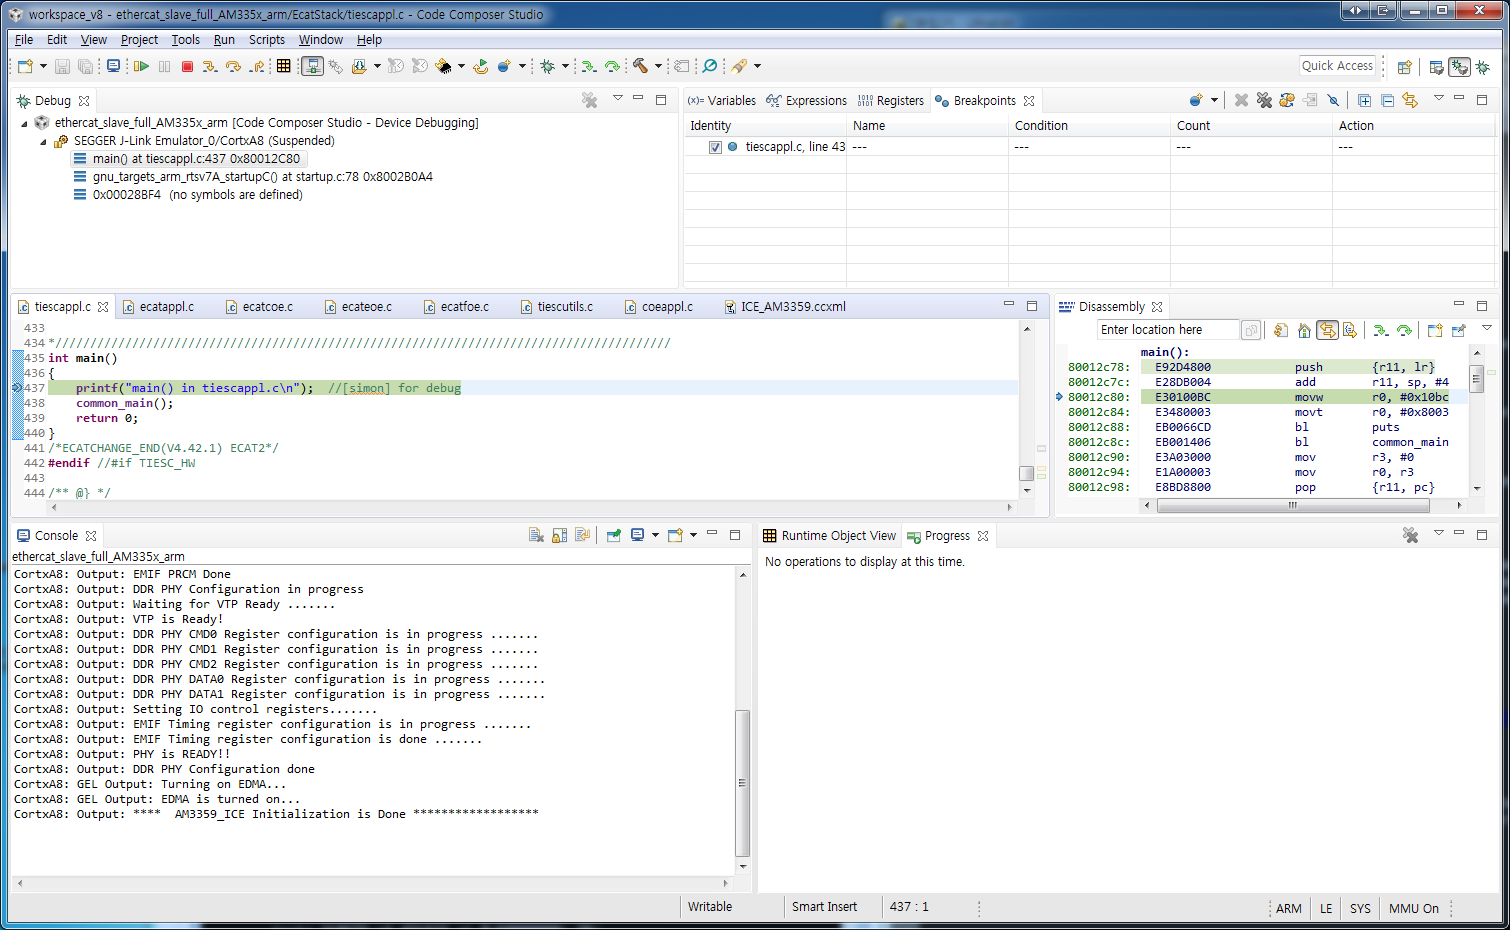
Debugging the AM3359 from CCS was successful.

I would like to flash "ethercat_slave_full_AM335x_arm.out" files to the AM3359 using J-Link Debugger.

How do I flash?

Environment :

  1) AM3359ICE2 Board Setting - Pin 2 & 3 shorted on J5.

  2) AM3359ICE2 Flash Device / Jtag
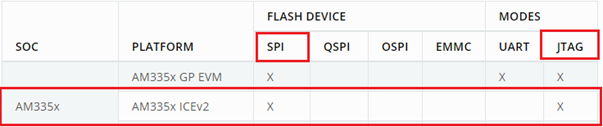
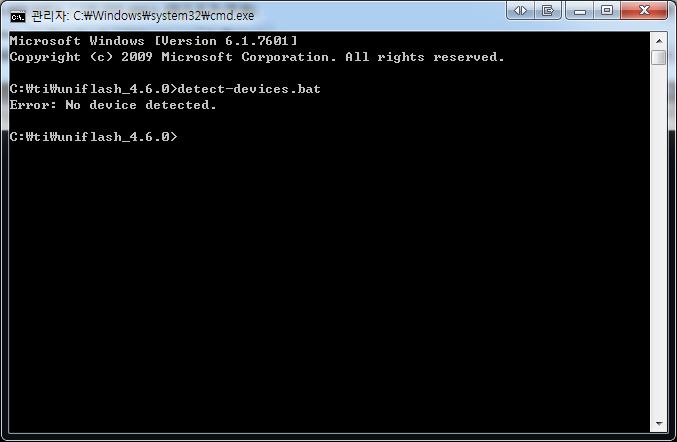
  3) I used Uniflash but could not detect the AM3359Ice2 device.

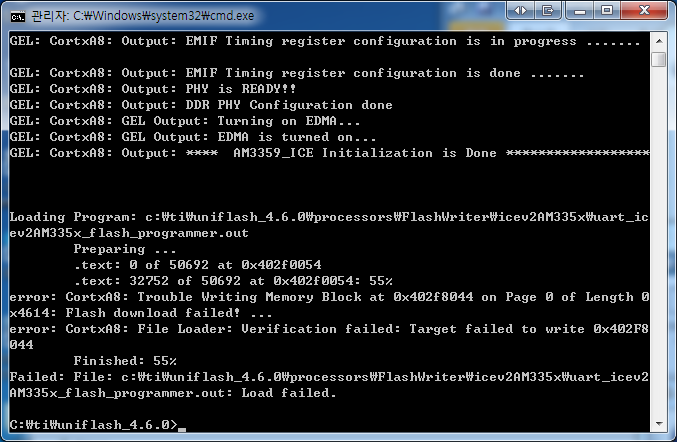
  4) Using ICE_AM3359.ccxml causes the following error:

Thank you in advance.

  • Simon,

    The steps for using JTAG approach to program flash is described in the Processor SDK RTOS developers guide here:
    software-dl.ti.com/.../index_board.html (REfer Steps section)


    It needs to be done from command line and not from the GUI. We are still working on getting the tool integrated in the GUI. Until then it needs to be excercised from command line

  • Hi. Rahul.

    Thank you for your reply.

    I have additional questions.

    Q1. Is it correct that I understood about flash method using J-Link in AM335xICEv2?


      1. AM3359ICE2 BootMode Setting.
        a jumper is connected between pin 2 & 3 on J5

      2. PRU-ICSS Mode Setting.
        a jumper is connected between pin 2 & 3 on J18, and J19

      3. Make ethercat_slave_full_AM335x_arm.out
        Project > Build in Code Compose Studio.
        c:\ti\PRU-ICSS-EtherCAT_Slave_01.00.07.02\protocols\ethercat_slave\projects\ethercat_slave_full_AM335x_arm\AM335x_debug\ethercat_slave_full_AM335x_arm.out

      4. Install UniFlash
        Run Cmd.exe on c:\ti\uniflash_4.6.0\

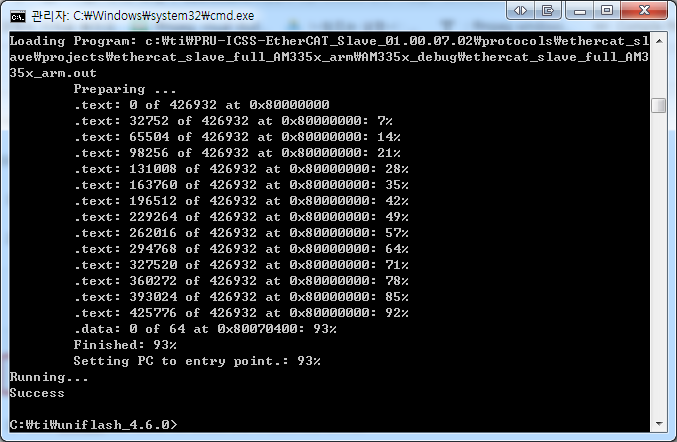
      5. "dslite.bat --mode load --config=<ccxml file> -f <out file> -n 1" in Cmd Shell.
        dslite.bat --mode load --config=c:\ti\PRU-ICSS-EtherCAT_Slave_01.00.07.02\protocols\ethercat_slave\projects\ethercat_slave_full_AM335x_arm\targetConfigs\ICE_AM3359.ccxml -f c:\ti\PRU-ICSS-    EtherCAT_Slave_01.00.07.02\protocols\ethercat_slave\projects\ethercat_slave_full_AM335x_arm\AM335x_debug\ethercat_slave_full_AM335x_arm.out -n 1

    Q2. How do I know if my flash is working properly?
      1. Check LCD message before flash.


      2. Flash...

      3. Check LCD message after flash.


      But turn off the power and turn it on again, the LCD message will appear as the previous one.


    Thank you in advance.

  • Simon,

    Your understanding doesn`t seem to be correct. Programming flash on TI EVM platform using JTAG is a two step process.

    1. Run the dslite script using target configuration file (.ccxml) to load .out for the UART flashing binary and ensure that you see ping character "C" in the console. This can also be done using CCS IDE if you want. The .out to load in this step is located here:
    C:\ti\uniflash_4.5.0\processors\FlashWriter\icev2AM335x\uart_icev2AM335x_flash_programmer.out

    2. Then close the terminal and execute dslite command to send the flash image (_ti.bin or app ) over the UART interface so that it is flashed.

    You seem to be sending the .out for the ethercat application using dslite which only loads and runs the application over JTAG but doesn`t flash that to the serial flash.

    Please refer to the video that I have posted here that shows the process of programming flash using JTAG Approach. The video was created on AM65x platform but the same process applies to AM335x.
    e2e.ti.com/.../2833144

    Hope this helps.

    Regards,
    Rahul
  • Hi. Rahul.

    Thank you for your reply.

    1. Run the dslite script using target configuration file (.ccxml) to load .out for the UART flashing binary
    and ensure that you see ping character "C" in the console.
    This can also be done using CCS IDE if you want.
    The .out to load in this step is located here:
    C:\ti\uniflash_4.5.0\processors\FlashWriter\icev2AM335x\uart_icev2AM335x_flash_programmer.out

      Q1. uart_icev2AM335x_flash_programmer.out load fail.
        1. JTAG Connect.
        2. USB Connect.
        3. Power On.
        4. Check terminal


        5. Run Cmd.exe in c:\ti\uniflash_4.6.0\
        6. Apply ICE_AM3359.ccxml & uart_icev2AM335x_flash_programmer.out
           dslite.bat --mode load --config=c:\ti\PRU-ICSS-EtherCAT_Slave_01.00.07.02\protocols\ethercat_slave\projects\ethercat_slave_full_AM335x_arm\targetConfigs\ICE_AM3359.ccxml \
           -f c:\ti\uniflash_4.6.0\processors\FlashWriter\icev2AM335x\uart_icev2AM335x_flash_programmer.out -n 1
        7. Check Result.


      Q2. Is the console a terminal?

    2. Then close the terminal and execute dslite command to send the flash image (_ti.bin or app ) over the UART interface so that it is flashed.

      Q3. What format should ethercat_slave_full_AM335x_arm.out convert to?
        _ti.bin? Or is it a .tiimage?
        Please let me know how to convert.


    Thank you in advance.

  • I am not completely sure what is going on with your setup. Is there a image that is already flashed on your board flash that is booting when you power cycle the board? Are you running a GEL file on the device when you connect to cortex A8 ?

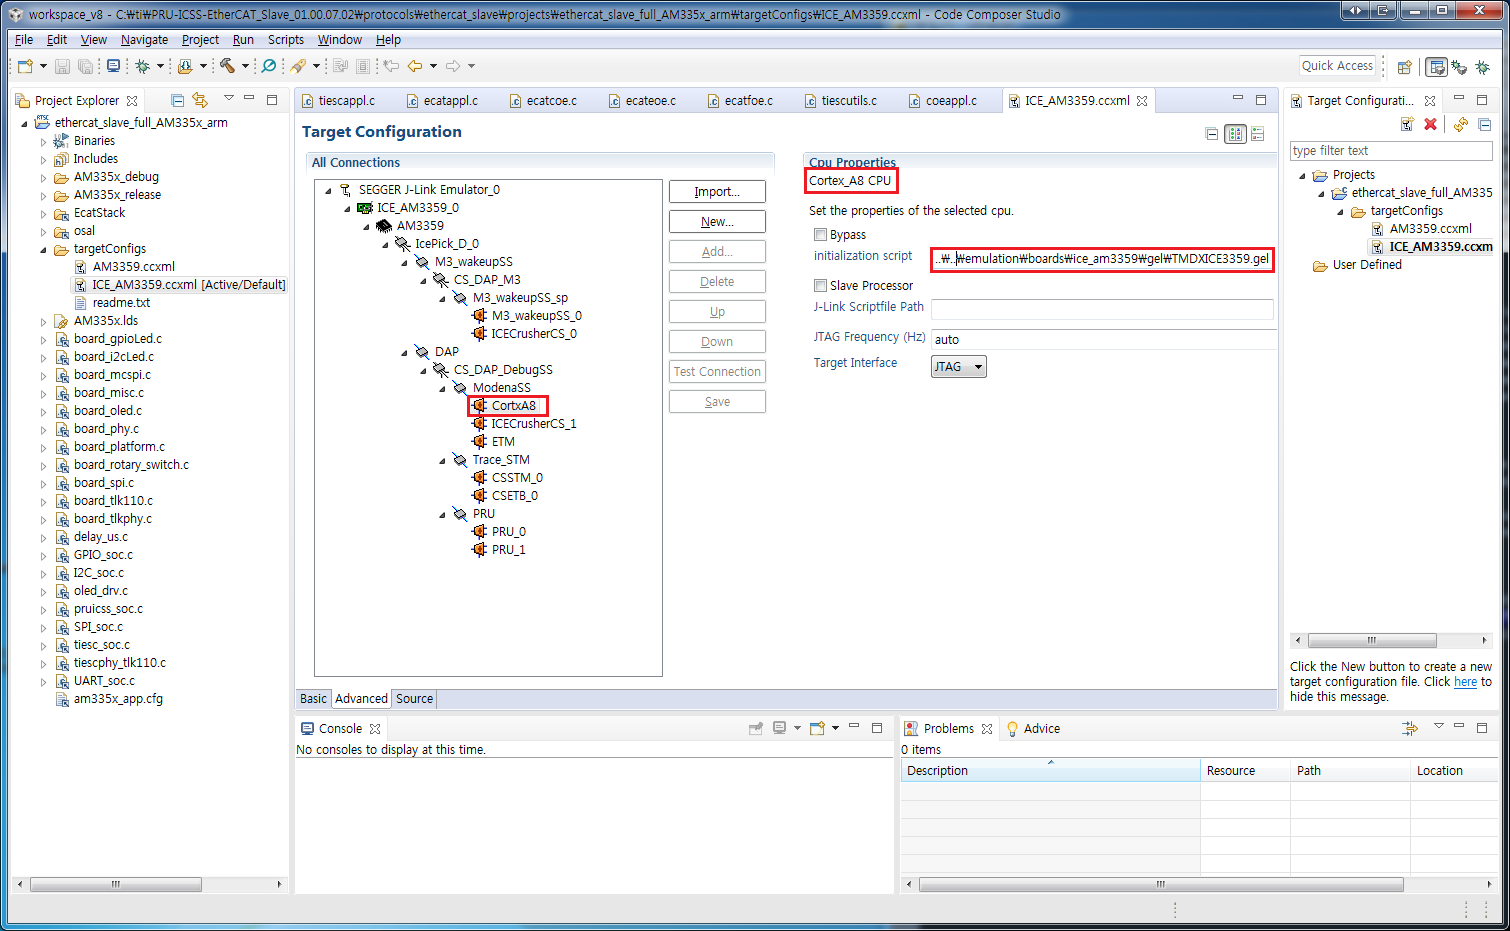
    Can you please sanity check the setup of by with your HW and CCS setup to see that the AM355x ICEv2 ccxml has GEL files running when you connect to cortex A8 and you are able to load the uart_icev2AM335x_flash_programmer.out over JTAG. This should load on the device without any issues as we have sanity tested it as part of our system test.

    When using dslite utility the windows terminal is the only thing that you need. the tool interfaces with the windows serial driver to transfer the image

    The image that you are sending over UART is for the SPI flash to the image to use is _ti.bin as is explained in the softwre developers guide here:
    software-dl.ti.com/.../index_Foundational_Components.html

    Regards,
    Rahul
  • Hi. Rahul.

    The default image is applied to AM3359ICE2.
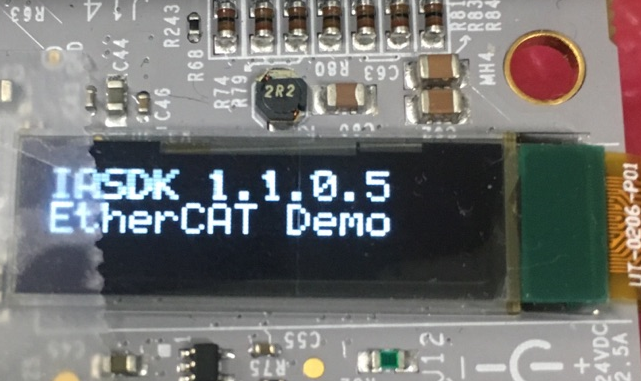
    "IASDK 1.1.0.5 / EtherCAT Demo"

    Are any of the following incorrect?


    Step.


    1. HW Configuration
      1-1. AM3359ICE2 BootMode Setting.=> a jumper is connected between pin 2 & 3 on J5
      1-2. PRU-ICSS Mode Setting. => a jumper is connected between pin 2 & 3 on J18, and J19
      1-3. Power On AM3359ICE2
      1-4. Check LCD Message => "IASDK 1.1.0.5 / EtherCAT Demo"
      1-5. Power On AM3359ICE2


    2. Make ethercat_slave_full_AM335x_arm.out
      2-1. Run CCS
      2-2. Open PRU Project
        C:\ti\PRU-ICSS-EtherCAT_Slave_01.00.07.02\protocols\ethercat_slave\projects\ethercat_slave_full_AM335x_arm


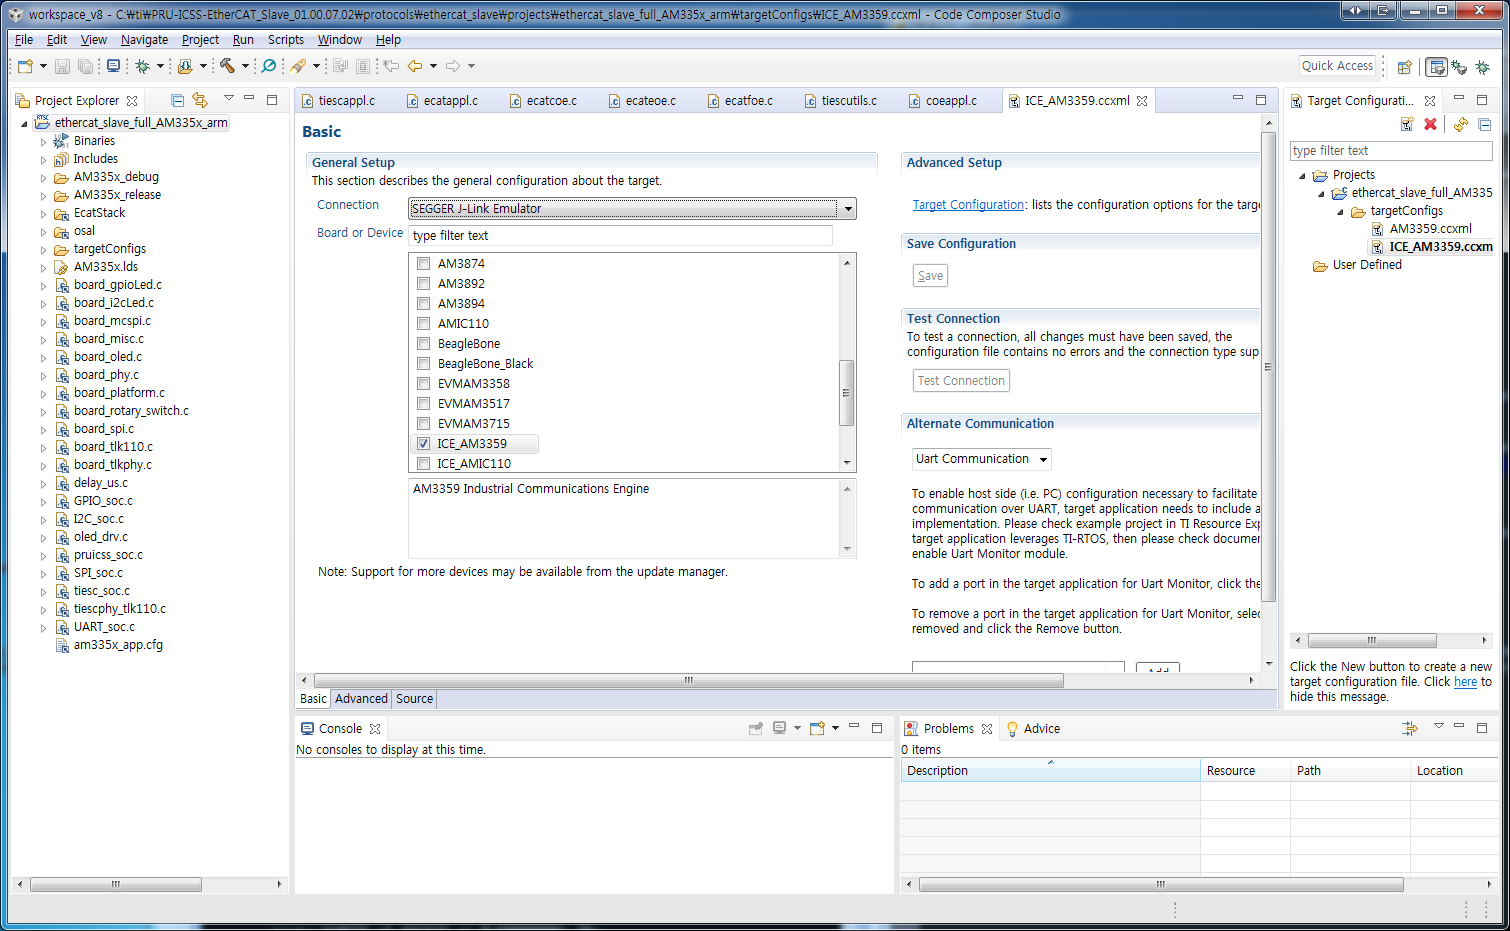
      2-3. Check ccxml
        c:\ti\PRU-ICSS-EtherCAT_Slave_01.00.07.02\protocols\ethercat_slave\projects\ethercat_slave_full_AM335x_arm\targetConfigs\ICE_AM3359.ccxml


      2-4. Check GEL
        c:\ti\ccsv8\ccs_base\emulation\boards\ice_am3359\gel\TMDXICE3359.gel


      2-5. Build PRU Project


      2-6. Check Output files.
        ethercat_slave_full_AM335x_arm.bin
        ethercat_slave_full_AM335x_arm.map
        ethercat_slave_full_AM335x_arm.out
      2-7. make _ti.bin
        tiimage.exe 0x00000008 NONE ethercat_slave_full_AM335x_arm.bin ethercat_slave_full_AM335x_arm_ti.bin

    3. Debug Test

      3-1. Connect J-Link
      3-2. Power On AM3359ICE2
      3-3. Run Debug


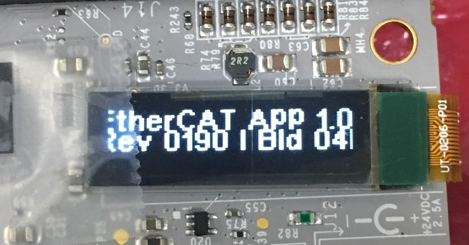
      3-4. Check LCD Message => "EtherCAT APP 1.0.7 / Rev 0190|Bld 04EE|"

      3-5. Power Off AM3359ICE2


    4. Flashing Image
      4-1. Connect J-Link
      4-2. Connect USB => USB Serial Port : COM29
      4-3. Run Hyper Terminal
      4-4. Power On AM3359ICE2
      4-7. Check Hyper Terminal


      4-8. Close hyper Terminal
      4-9. Launch Configuration ICE_AM3359.ccxml
      4-10. Connect Target and Resume


      4-11. Load uart_icev2AM335x_flash_programmer.out
        c:\ti\uniflash_4.6.0\processors\FlashWriter\icev2AM335x\uart_icev2AM335x_flash_programmer.out


        CortxA8: Trouble Writing Memory Block at 0x402f8044 on Page 0 of Length 0x4614: Flash download failed! ...
        CortxA8: File Loader: Verification failed: Target failed to write 0x402F8044
        CortxA8: GEL: File: C:\ti\uniflash_4.6.0\processors\FlashWriter\icev2AM335x\uart_icev2AM335x_flash_programmer.out: Load failed.

      4-12. Run Cmd.exe
      4-13. move to c:\ti\uniflash_4.6.0\
      4-14. dslite.bat --mode processors -c COM29 -e 10000 -d 1 -o 0
      4-15. dslite.bat --mode processors -c COM29 -f ethercat_slave_full_AM335x_arm_ti.bin -d 1 -o 0


    Q1. Is it correct to convert ethercat_slave_full_AM335x_arm.bin to ethercat_slave_full_AM335x_arm_ti.bin?

    Q2. Why can not I load uart_icev2AM335x_flash_programmer.out in 4-11?

    Q3. Is ccxml/gel used in debugging the same as ccxml/gel used in flashing?

    Q4. Debugging works correctly. Why does not it work in flashing?


    Thank you in advance.

  • Simon,

    Please open the pdkAppImageCreate.bat that is used. The file has all the necessary steps needed to generate the app (_ti.bin) file required for booting. You don`t need to run the tiimage.exe if you are using that script.

    If you check the file pdk_am335x_1_0_13\packages\pdkAppImageCreate.bat, you will see the following lines of code generates the application boot image:

    :SOC_AM3_AM4
        %CG_TOOL_PATH%/bin/arm-none-eabi-objcopy -O binary %APP_NAME%.out %APP_NAME%.bin
        %PDK_PATH%/ti/starterware/tools/ti_image/tiimage.exe 0x80000000 NONE %APP_NAME%.bin app )
        goto ENDSCRIPT

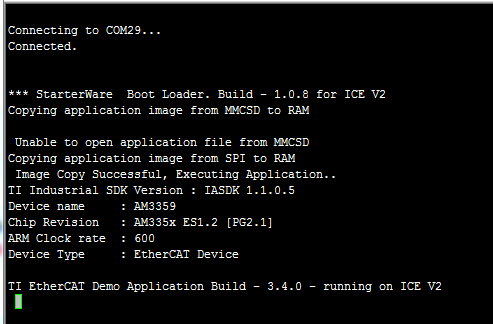
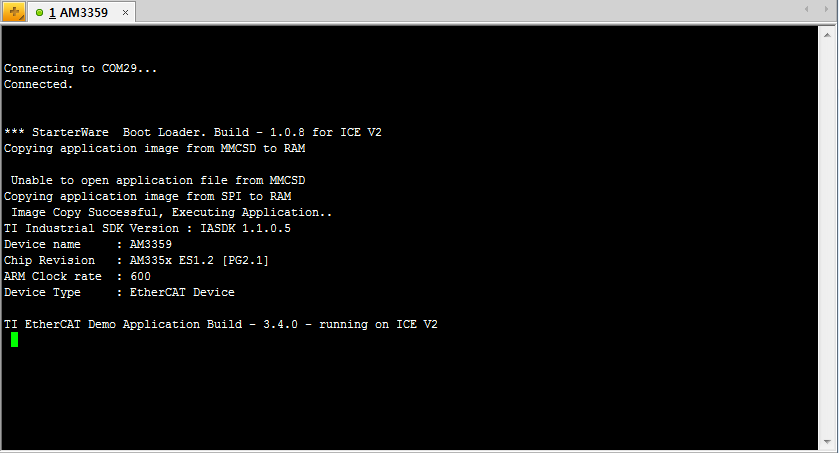
    BAsed on your log provided in step 4, it appears that on power cycle there is a image that is booting from SD/MMC . Can you please take the MMC/SD card out from slot J16 from the boot of the HW. If you don`t have a SD card in the slot then it possible that you have the wrong version of bootloader on the SPI flash. The Log on UART says copying application from MMCSD to RAM then it says copying from SPI to RAM. Notice the MMCSD boot loader and SPI boot loader binary is different. Check the file name of the bootloader file you used from the folder :

    pdk_am335x_1_0_13\packages\ti\starterware\binary\bootloader\bin\am335x-evm\gcc

    • bootloader_boot_mcspi_a8host_release_ti.bin   <-- This file is for booting from SPI flash
    • bootloader_boot_mmcsd_a8host_release_ti.bin <--this is file for booting from MMCSD

    To get a clean environment, I would erase the SPI flash using the instructions here and start fresh. 

    http://processors.wiki.ti.com/index.php/AM335x_ICEv2_flash_erase

    Ensure after SPI is erased nothing is booting from flash and then try to load the uart_icev2AM335x_flash_programmer.out

    GEL file for AM335x ICEv2 is same for debugging and flashing. If you wish to not use the Uniflash/UART loader way to flash an alternate CCS way for programming the images is described here:

    http://software-dl.ti.com/processor-sdk-rtos/esd/docs/latest/rtos/index_Foundational_Components.html#booting-via-mcspi

    Please try the above approach and see if you have better luck than using Uniflash.

    Regards,

    Rahul

  • Hi. Rahul.


    I used the information you gave and tested it as follows.

    Environment :
      The MMC/SD card is not inserted.
      AM3359ICE2 Board Setting - Pin 2 & 3 shorted on J5

    1. Load isdk_spi_flasher.out from CCS : Successfully deleted memory.
      1.1 bootloader
        Enter Operation [1 - Flash ] [2 - Erase] : 2
        Enter the offset [in Hex]: 0x0
        Enter size to be erased in Kilo bytes: 64

      1.2 application
        Enter Operation [1 - Flash ] [2 - Erase] : 2
        Enter the offset [in Hex]: 0x20000
        Enter size to be erased in Kilo bytes: 248

        Q1. How do I flash?


    2. Load spi_flash_writer_AM335X.out from CCS : Flash Success.
      2.1 bootloader
        Enter Operation [1 - Flash ] [2 - Erase] : 1
        Enter File Name : C:\ti\pdk_am335x_1_0_12\packages\ti\starterware\binary\bootloader\bin\am335x-evm\gcc\bootloader_boot_mcspi_a8host_release_ti.bin
        Enter the offset [in Hex]: 0x0

      2.2 application
        Enter Operation [1 - Flash ] [2 - Erase] : 1
        Enter File Name : C:\ti\pdk_am335x_1_0_12\packages\ti\starterware\binary\mcspi_app_flash\bin\am335x-evm\gcc\mcspi_app_flash_a8host_release_ti.bin
        Enter the offset [in Hex]: 0x20000

        Q2. How do I erase?


    3. Load uart_icev2AM335x_flash_programmer.out from CCS : Load Program Failed.
      3.1 Bootloader erase.
      3.2 Application erase.
      3.3 Load uart_icev2AM335x_flash_programmer.out
        CortxA8: Trouble Writing Memory Block at 0x402f8044 on Page 0 of Length 0x4548: Flash download failed! ...
        CortxA8: File Loader: Verification failed: Target failed to write 0x402F8044
        CortxA8: GEL: File: C:\ti\pdk_am335x_1_0_12\packages\ti\board\utils\uniflash\bin\icev2AM335x\uart_icev2AM335x_flash_programmer.out: Load failed.


    Regards,
    Simon

  • Simon,

    In the steps indicated above steps indicted in (2) are correct to flash the images as they match the instructions provided for programming images for booting from MCSPI that we have listed here:
    software-dl.ti.com/.../index_Foundational_Components.html

    You can use the spi_flash_writer_AM335X.out to erase as well. by selecting option 2 when the console prompt you to "Enter operation". Why are you trying to load the uart flash writer at that point. Did you reset the board and run the GEL when you are trying to load that binary?

    Regards,
    Rahul