This thread has been locked.

If you have a related question, please click the "Ask a related question" button in the top right corner. The newly created question will be automatically linked to this question.

CCS/AM3358: Starter kit debug

Part Number: AM3358
Other Parts Discussed in Thread: CCSTUDIO

Tool/software: Code Composer Studio

Hi,

I am trying to run a simple Hello world on TI AM3358 starter kit using CCStudio v10 and did the following:

- Powered board without SDCard and turned it on by holding PowerON switch.

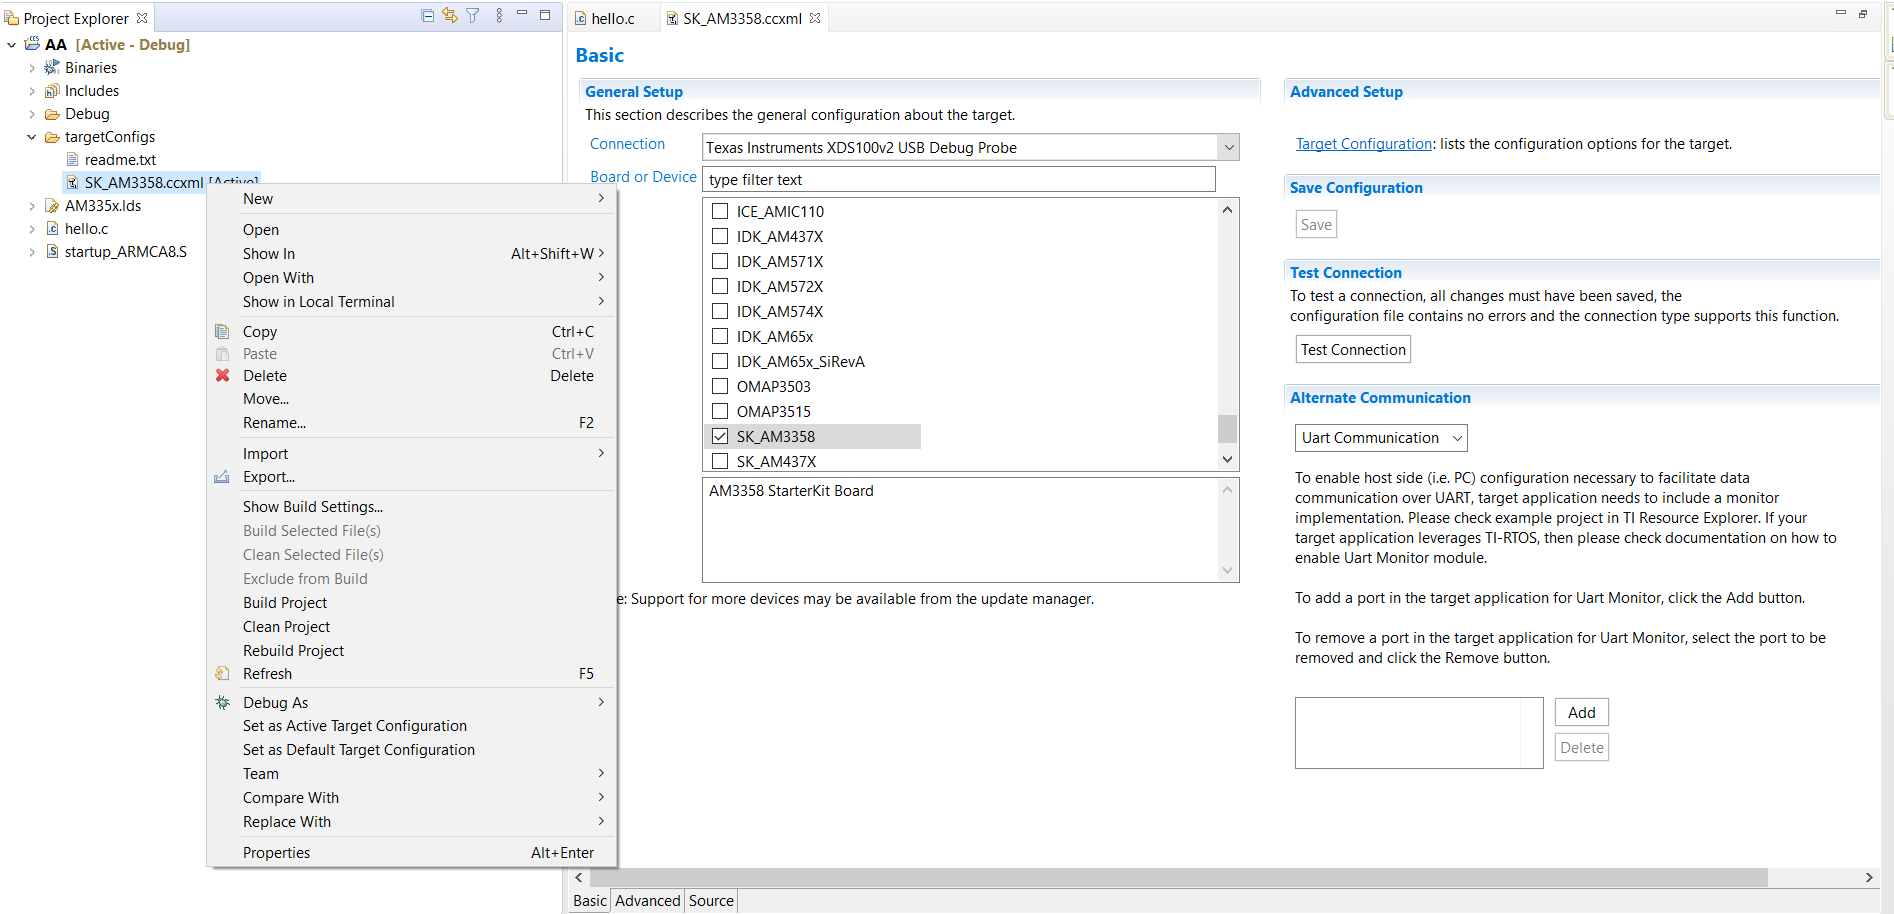
- In CCStudio, created new CCS project (Basic Example - Hello World) with Target - SK_AM3358, Connection - XDS100v2 Debug probe (verified connection).

- Built project successfully.

- Created Debug config under CCS device debug with only CortexA8 selected (in Main tab).

- When I click run, it throws error saying device cannot be connected and it is in reboot loop.

All I am trying to do is to run a simple hello world program. Could you please help me in understanding what is wrong here and how do I fix this. Is it looking for SDcard and how do I erase this part?

Regards

  • Hi Avinash,

    Would you be able to elaborate on "AM3358 starter kit" ?

    Which board are you using?

    Thanks,

    Max

  • Hi Avinash,

    In your .ccxml configuration, after you select SK_AM3358 as your board, there should be a "Test Connection" option to the right of "General Setup".

    If you click on that, does the test pass?

    Thanks,

    Max

  • Below is the result of 'Test Connection':

    [Start: Texas Instruments XDS100v2 USB Debug Probe]

    Execute the command:

    %ccs_base%/common/uscif/dbgjtag -f %boarddatafile% -rv -o -F inform,logfile=yes -S pathlength -S integrity

    [Result]


    -----[Print the board config pathname(s)]------------------------------------

    C:\Users\AVINAS~1.APP\AppData\Local\TEXASI~1\
    CCS\ccs1000\0\0\BrdDat\testBoard.dat

    -----[Print the reset-command software log-file]-----------------------------

    This utility has selected a 100- or 510-class product.
    This utility will load the adapter 'jioserdesusb.dll'.
    The library build date was 'Feb 13 2020'.
    The library build time was '18:30:11'.
    The library package version is '9.1.0.00001'.
    The library component version is '35.35.0.0'.
    The controller does not use a programmable FPGA.
    The controller has a version number of '4' (0x00000004).
    The controller has an insertion length of '0' (0x00000000).
    This utility will attempt to reset the controller.
    This utility has successfully reset the controller.

    -----[Print the reset-command hardware log-file]-----------------------------

    The scan-path will be reset by toggling the JTAG TRST signal.
    The controller is the FTDI FT2232 with USB interface.
    The link from controller to target is direct (without cable).
    The software is configured for FTDI FT2232 features.
    The controller cannot monitor the value on the EMU[0] pin.
    The controller cannot monitor the value on the EMU[1] pin.
    The controller cannot control the timing on output pins.
    The controller cannot control the timing on input pins.
    The scan-path link-delay has been set to exactly '0' (0x0000).

    -----[The log-file for the JTAG TCLK output generated from the PLL]----------

    There is no hardware for programming the JTAG TCLK frequency.

    -----[Measure the source and frequency of the final JTAG TCLKR input]--------

    There is no hardware for measuring the JTAG TCLK frequency.

    -----[Perform the standard path-length test on the JTAG IR and DR]-----------

    This path-length test uses blocks of 64 32-bit words.

    The test for the JTAG IR instruction path-length succeeded.
    The JTAG IR instruction path-length is 6 bits.

    The test for the JTAG DR bypass path-length succeeded.
    The JTAG DR bypass path-length is 1 bits.

    -----[Perform the Integrity scan-test on the JTAG IR]------------------------

    This test will use blocks of 64 32-bit words.
    This test will be applied just once.

    Do a test using 0xFFFFFFFF.
    Scan tests: 1, skipped: 0, failed: 0
    Do a test using 0x00000000.
    Scan tests: 2, skipped: 0, failed: 0
    Do a test using 0xFE03E0E2.
    Scan tests: 3, skipped: 0, failed: 0
    Do a test using 0x01FC1F1D.
    Scan tests: 4, skipped: 0, failed: 0
    Do a test using 0x5533CCAA.
    Scan tests: 5, skipped: 0, failed: 0
    Do a test using 0xAACC3355.
    Scan tests: 6, skipped: 0, failed: 0
    All of the values were scanned correctly.

    The JTAG IR Integrity scan-test has succeeded.

    -----[Perform the Integrity scan-test on the JTAG DR]------------------------

    This test will use blocks of 64 32-bit words.
    This test will be applied just once.

    Do a test using 0xFFFFFFFF.
    Scan tests: 1, skipped: 0, failed: 0
    Do a test using 0x00000000.
    Scan tests: 2, skipped: 0, failed: 0
    Do a test using 0xFE03E0E2.
    Scan tests: 3, skipped: 0, failed: 0
    Do a test using 0x01FC1F1D.
    Scan tests: 4, skipped: 0, failed: 0
    Do a test using 0x5533CCAA.
    Scan tests: 5, skipped: 0, failed: 0
    Do a test using 0xAACC3355.
    Scan tests: 6, skipped: 0, failed: 0
    All of the values were scanned correctly.

    The JTAG DR Integrity scan-test has succeeded.

    [End: Texas Instruments XDS100v2 USB Debug Probe]

    When I try to debug, I get the following:

  • Do you right click the created .ccxml file and then click "Launch Selected Configuration"?

  • No, because if I right click on my .ccxml I get options shown below, instead I double click it and select SK_AM3358 and press Test Connection.

  • In CCS try going to Window > Show View > Target Configurations and create the target configuration in that interface, rather than in Project Explorer.

    Then try to right click that .ccxml and select "Launch Selected Configuration" 

  • Hi,

    Moved a step further. Now it shows this and stops:

  • Hi Avinash,

    Check out this resource: http://software-dl.ti.com/processor-sdk-rtos/esd/docs/latest/rtos/index_examples_demos.html#connecting-to-the-target

    Which will walk you through loading and executing a program with CCS.

    Thanks,
    Max

  • Hi,

    Thank you. This helped me a lot in understanding and debugging starter kit. I have one final question:

    In the starterware user guide, they showed us how to create microSD card and run the device with prebuild BOOT and APP files. But I would like to know what project creates these files and how do I import it to CCS.

    Regards

    Avinash

  • Hi Avinash,

    Please see http://software-dl.ti.com/processor-sdk-rtos/esd/docs/06_03_00_106/rtos/index_overview.html#windows-sd-card-creation-guide

    Let me know if you have any further questions after you've gone through that resource.

    Thanks,

    Max