This thread has been locked.

If you have a related question, please click the "Ask a related question" button in the top right corner. The newly created question will be automatically linked to this question.

CCS/CC2640R2F: merged file is not generated

Part Number: CC2640R2F
Other Parts Discussed in Thread: UNIFLASH,

Tool/software: Code Composer Studio

Hi

I want to have an on-chip OAD program.

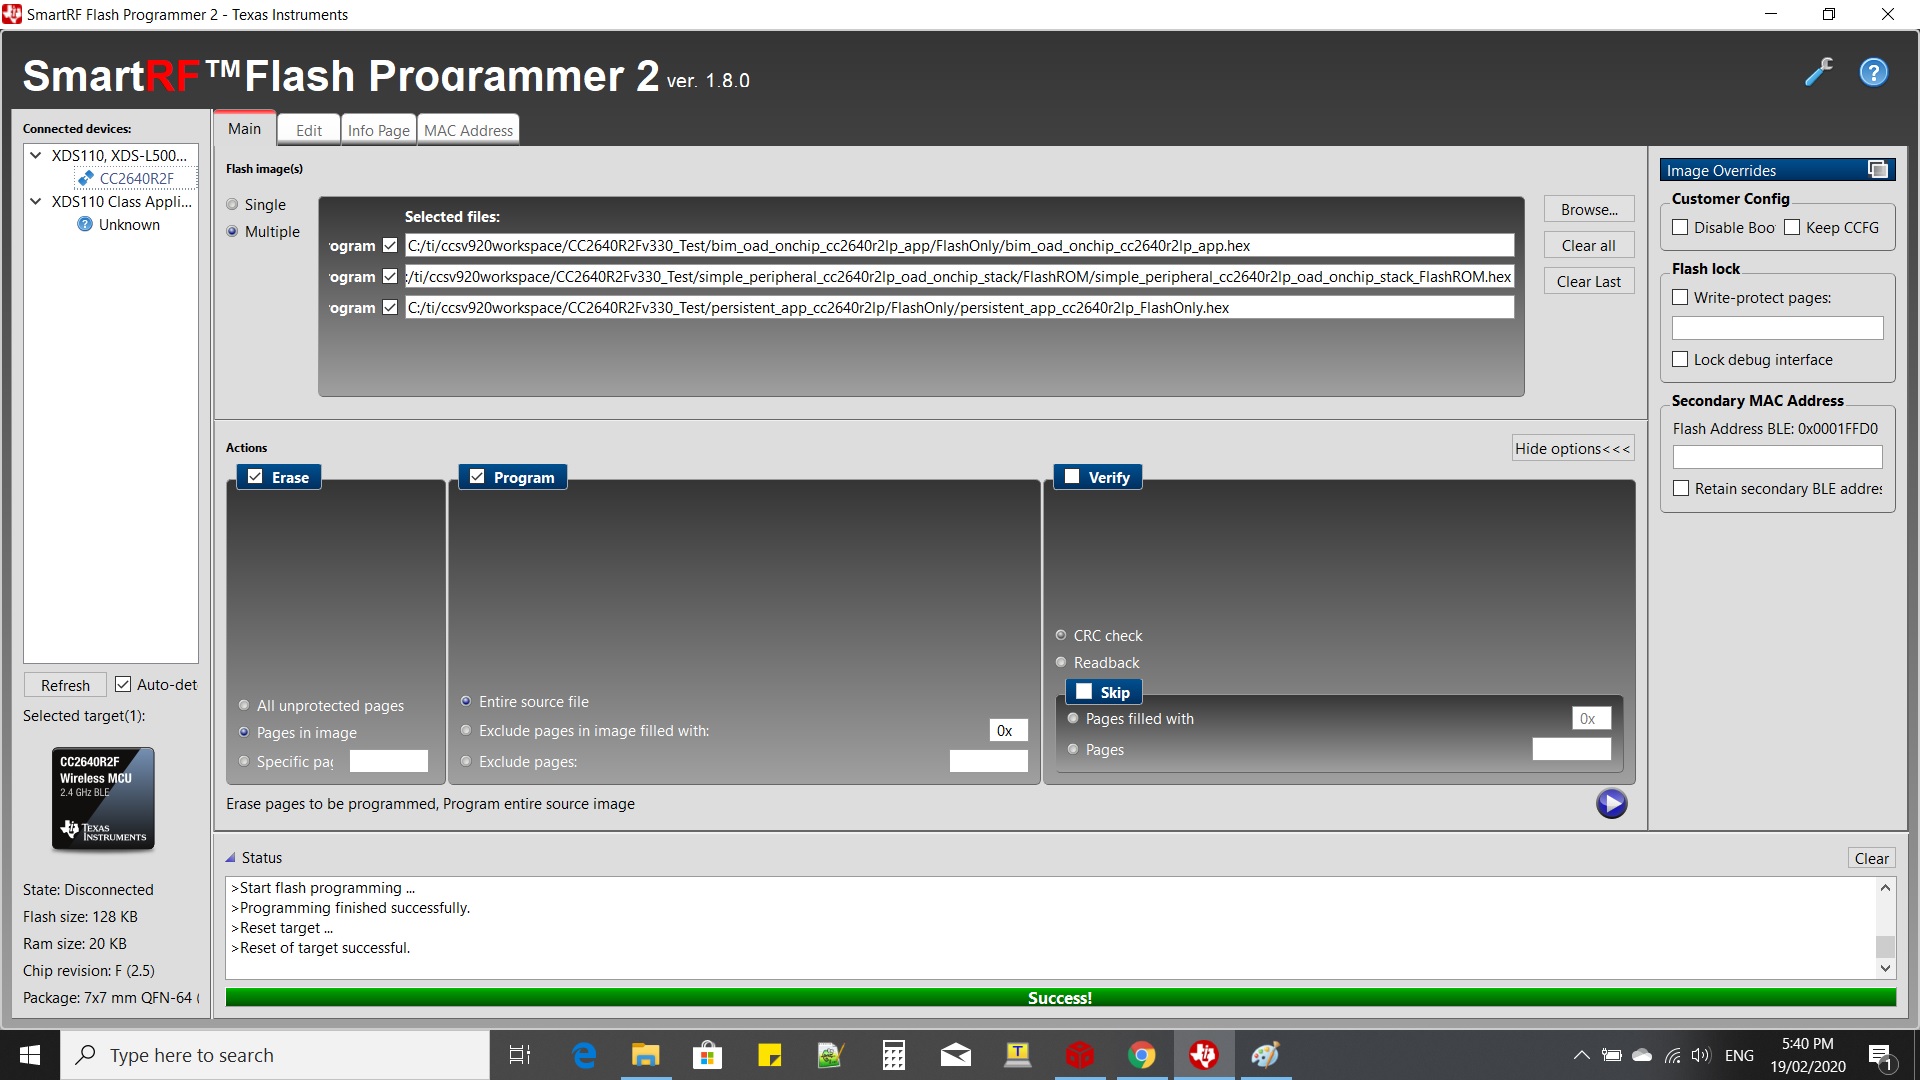
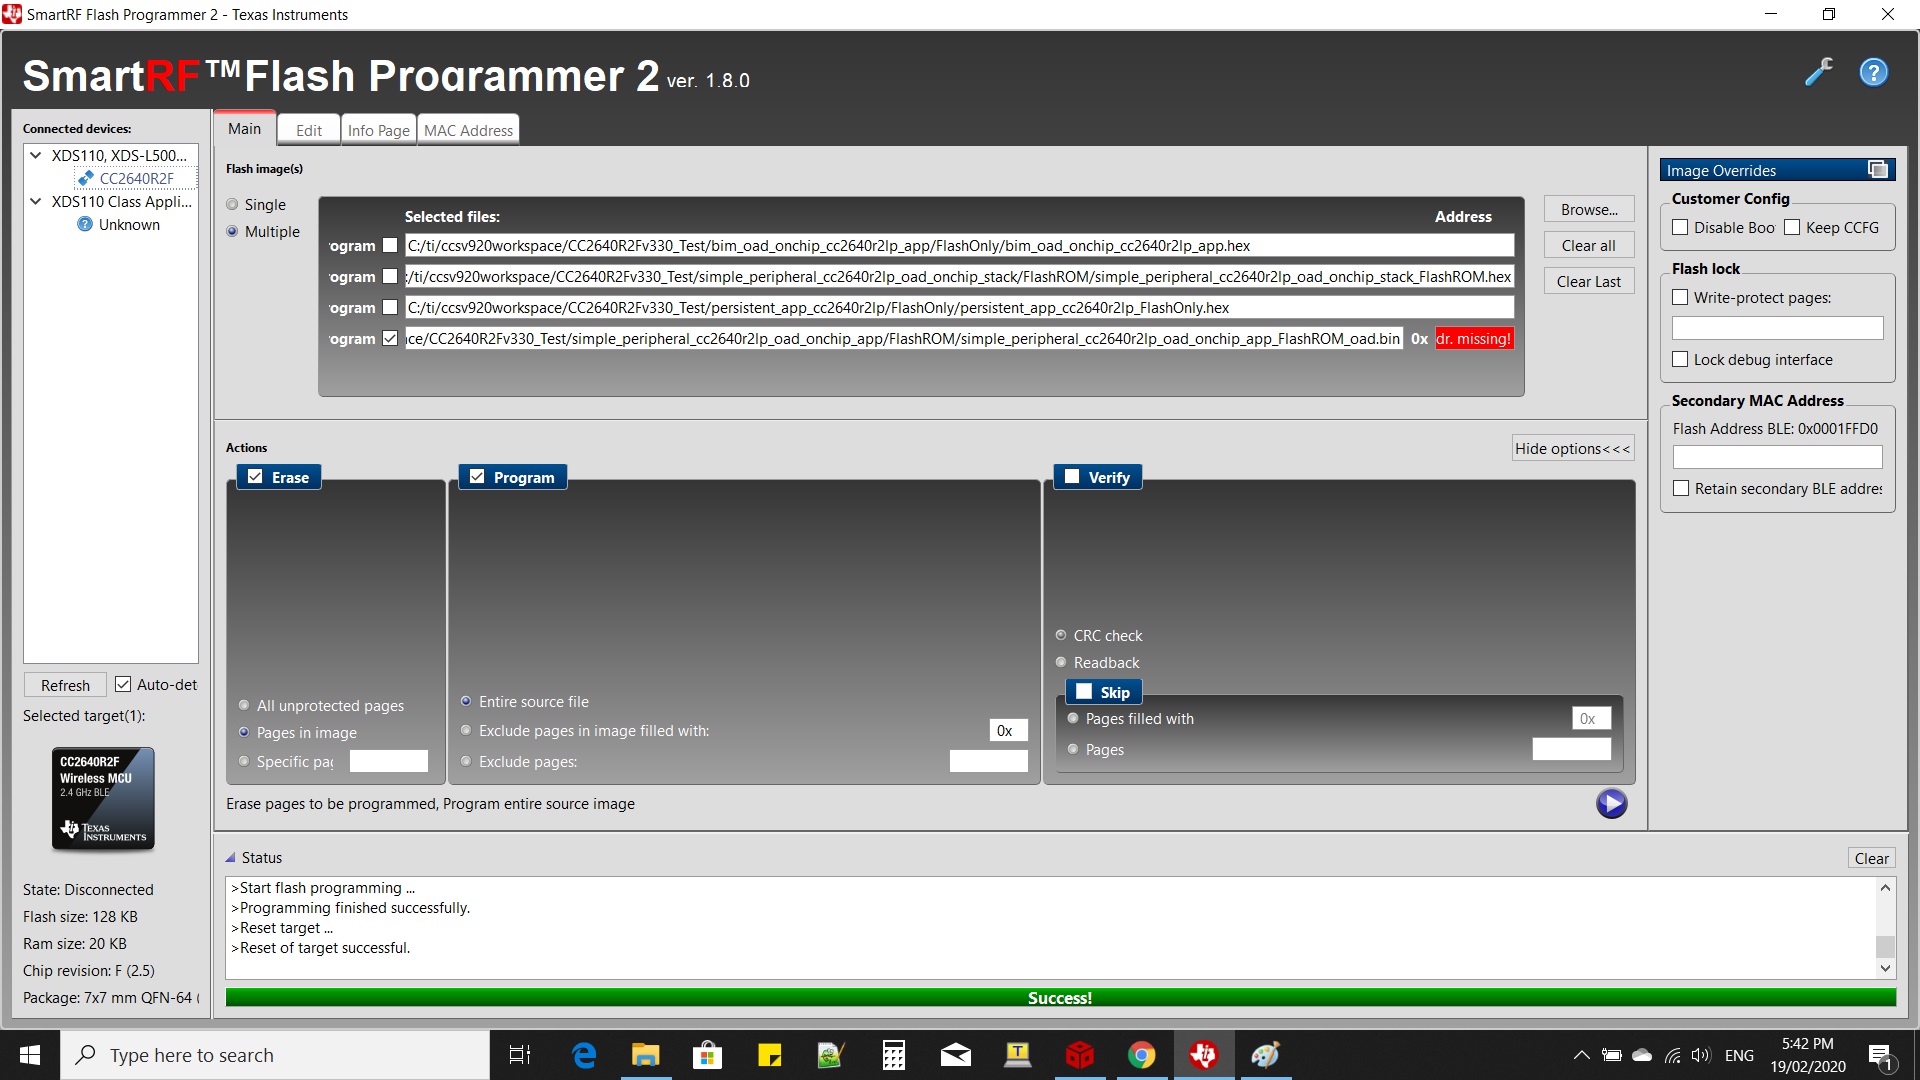
I built BIM, persistent, stack and app in all of the orders :))

But in the app folder there were no merged files. 

Am I wrong or what level I am missing?

  • From what I know the latest SDK version the merged files implementation was removed. So you need to flash the BIM, persistent, stack and app hex files using SmartRF Flash Programmer 2.

    -kel

  • Hi Kel, Thanks for your reply.

    What is the next step? Do I have to make image A and B or I have to skip these levels?

  • Hi,

    You need to flash the hex files individually using SmartRF Flash Programmer. It should work, I have done it before. Also the procedure for OAD at latest SDK is wrong. Refer to procedure for on chip oad at older SDK version.

    Also use SmartRF Flash Programmer 1.8.0. The version 1.8.1 has problems.

    -kel

  • Hi M S2,

    By default, the CCS doesn't create a merged file anymore. But you can use the OAD Image Tool to create one on your own. 

    Otherwise, you can use the steps in the OAD Target Setup in the User's Guide to load all projects. I just tested with both off- and on-chip OAD and they both work as expected. Please note that all projects except the app project should be loaded in CCS. To load the app _oad.bin file you can use either the latest version of UNIFLASH or v1.8.0 of Flash Programmer 2. 

    Thanks, 
    Elin

  • Hi Elin, Thank you for reply.

    I started to do the user's guide steps.

    I build and flash persistent as it is said. But when I try to build and flash stack it gives me errors 1170 and 2064.

    Few projects ago, when I faced this error, I mass erased the chip in Flash programmer 2 and then rebuilt it, so it would work correctly. But now that there are 4 projects (persistent, stack, app, bim) if I want to mass erase the chip after persistent is built and stack is going to be built, the persistent built in the chip would be erased. 

    What do you suggest?

  • Hi M S2,

    Do exactly below. I am using CC2640R2F SDKv3.30.

    1. Import the Simple Peripheral On-Chip OAD Example Program. There should BIM, STACK, PERSISTENT APP, AND MAIN APP.
    2. Enable hex generation to the 4 CCS Projects. Rebuild all to generate the hex files and bin file for MAIN APP.
    3. Using SmartRF Flash Programmer 2 1.8.0, select the hex files in the order of BIM, STACK, PERSITENT APP hex file as shown in the screenshot 1. After flashing the hex files you would see at your smart phone OAD Persitent App advertising.
    4. Deselect the BIM, STACK, and PERSISTENT APP at SmartRF Flash Programmer 2. Select the bin file of simple peripheral on chip oad app as shown in screenshot 2. After you flash the bin file you will see at your smartphone SBP OAD on-chip advertising.

    SCREENSHOT 1:

    SCREENSHOT 2:


    -kel

  • Hi

    Thank you very much for your detailed and helpful reply 

    I afraid I have to say that I did everything you said, but it didn't work. I mean in my smartphone in "Serial Bluetooth Terminal" the module's name didn't appear.

    What is the problem?

  • Hi,

    Make sure you set the correct options at SmartRF Flash Programmer 2. Erase -> Pages in Range, Program -> Entire Source File. I am using on chip oad example program from SDKv3.30

    Also use nRF App, or IOS LightBlue App for testing.

    -kel

  • I did these steps:

    1. In ccs: import projects in the CCS from sdk 3.30.00.20

    2. projects -> build all

    3. In flash programmer 2 v. 1.8.0: import hex files in the save path in order: bim, stack,persistent 

    4. Erase -> Pages in Range, and then run

    5. in smartphone: open Serial Bluetooth Terminal and search for BLEs.

    Or:

    3. In flash programmer 2 v. 1.8.0: import app.bin file.

    4. Erase -> Pages in Range, and then run

    5. in smartphone: open Serial Bluetooth Terminal and search for BLEs.

    .

    no BLE is found. :(

  • Rebuild All CCS Project to generate hex and bin files. Erase -> Pages in Range, Program -> Entire Source File.

    I can do the same procedure all day will work every time. Use nRF App or IOS LightBlue App for testing.

    -kel

  • Thank you for all your helps

    I don't want to bother you

    But it didn't work either.

    I will appreciate anyone helping me.

  • I did all of the steps and settings you mentioned.

    But I still can't see the module's name in BLE scan list.

    What can I do?

  • M S2

    I told you to use nrF Connect App and IOS Lightblue App. The Serial Bluetooth Terminal App does not work.

    Step 3:

    Step 4:

    Using Serial Bluetooth Terminal no device is shown:

  • I tried with nRF too. But it didn't show it.

  • When you rebuild the CCS project do you go to properties and rebuild? Are you using SmartRF Flash Programmer 1.8.0? The version 1.8.1 has issues.

  • Yes my flash programmer 2 version is 1.8.0

    I rebuild all in this way:

  • Attached is the production image of oad on chip bin file. Flash that using SmartRF Flash Programmer 2. The Launchpad should blink 5x. and advertise.oad_on_chip330.rar

  • Thank you

    1. What name does it have in BLE scan list?

    2. What address should I write in flash programmer? IT says "address missing"

    3. I am not using launchpad. I am using HM-17. Which is just the module. here is the picture:

  • Hi,

     "SBP OAD APP v001" will be shown at nRF Connect. I suggest you make it work first with the Launchpad. Then make it work with HM-17.

    -kel

  • Hi M S2,

    Did you get it to work with the LaunchPad as Markel suggested? 

    Thanks, 
    Elin

  • Hi

    It was very helpful

    But I'm still trying to match the code with my module (because the code is for launchpad)

  • Hi M S2,

    The example programs are meant to work for the Launchpad. The simple peripheral will work with your board by commenting out the pin initialization at BoardGpioInitTable[]. That is assuming that your board is working.

    const PIN_Config BoardGpioInitTable[] = {
    
        //CC2640R2_LAUNCHXL_PIN_RLED | PIN_GPIO_OUTPUT_EN | PIN_GPIO_LOW | PIN_PUSHPULL | PIN_DRVSTR_MAX,       /* LED initially off */
        //CC2640R2_LAUNCHXL_PIN_GLED | PIN_GPIO_OUTPUT_EN | PIN_GPIO_LOW | PIN_PUSHPULL | PIN_DRVSTR_MAX,       /* LED initially off */
        //CC2640R2_LAUNCHXL_PIN_BTN1 | PIN_INPUT_EN | PIN_PULLUP | PIN_IRQ_BOTHEDGES | PIN_HYSTERESIS,          /* Button is active low */
        //CC2640R2_LAUNCHXL_PIN_BTN2 | PIN_INPUT_EN | PIN_PULLUP | PIN_IRQ_BOTHEDGES | PIN_HYSTERESIS,          /* Button is active low */
        //CC2640R2_LAUNCHXL_SPI_FLASH_CS | PIN_GPIO_OUTPUT_EN | PIN_GPIO_HIGH | PIN_PUSHPULL | PIN_DRVSTR_MIN,  /* External flash chip select */
        //CC2640R2_LAUNCHXL_UART_RX | PIN_INPUT_EN | PIN_PULLDOWN,                                              /* UART RX via debugger back channel */
        //CC2640R2_LAUNCHXL_UART_TX | PIN_GPIO_OUTPUT_EN | PIN_GPIO_LOW | PIN_PUSHPULL,                         /* UART TX via debugger back channel */
        //CC2640R2_LAUNCHXL_SPI0_MOSI | PIN_INPUT_EN | PIN_PULLDOWN,                                            /* SPI master out - slave in */
        //CC2640R2_LAUNCHXL_SPI0_MISO | PIN_INPUT_EN | PIN_PULLDOWN,                                            /* SPI master in - slave out */
        //CC2640R2_LAUNCHXL_SPI0_CLK | PIN_INPUT_EN | PIN_PULLDOWN,                                             /* SPI clock */
    
        PIN_TERMINATE
    };

  • Hi

    Thank you for your reply

    I commented some other lines too and simple peripheral example worked. Then I tried to do it in OAD on-chip example and struggled with it but it didn't work. OAD code is a strange!