


Other Parts Discussed in Thread: CC2530, Z-STACK, CC2531
As I was trying to set up the Z-Stack Home Automation Gateway with the TI CC2530 development kit, I didn’t find a full set of answers to the setup issues I encountered. I found many posts on this forum, but no one had a full solution and the documentation leaves out what I consider essential details.
I’m posting this as a tutorial on how I set up the Z-Stack Gateway on a BeagleBone Black using the CC2531 USB dongle. I made sure to include details on things that tripped me up or weren’t intuitive. My notes below are a combination of steps I figured out myself and comments from the following forum posts:
- https://e2e.ti.com/support/wireless_connectivity/zigbee_6lowpan_802-15-4_mac/f/158/t/132740
- https://e2e.ti.com/support/wireless_connectivity/zigbee_6lowpan_802-15-4_mac/f/158/p/482991/1740893
- https://e2e.ti.com/support/wireless_connectivity/zigbee_6lowpan_802-15-4_mac/f/158/t/511206
- https://e2e.ti.com/support/wireless_connectivity/zigbee_6lowpan_802-15-4_mac/f/158/p/538167/1962121
Setting up the BeagleBone Black
- Flash a >4GB micro SD card with an image of Debian 7.8 (note, this is an old version!). The image can be found here: https://beagleboard.org/latest-images
- Download the Z-Stack Gateway Installer from here: http://www.ti.com/tool/z-stack-archive
- I downloaded the Linux Gateway onto a laptop I had running Ubuntu 16.04
- Run the installer
- Transfer the Z-Stack binaries .tar to the BeagleBone Black
- The precompiled binaries are in Z-Stack_Linux_Gateway…-src/Precompiled_arm
- cd to Precompiled_arm and find z-stack_linux_gateway_arm_binaries_<revision>.tar
- Copy the .tar file to BBB and then extract the binaries
Setting up the CC2531 USB Dongle
- For CC2531, you need to flash with firmware that was shipped with Z-Stack(note this is different than what the dongle came flashed with)
- In the Z-Stack directory you downloaded to install the gateway (not the gateway dir you untarred on the BBB), go into the “Firmware” directory
- There will be a file in there called cc2531_gw….hex in there
- Copy the hex file to a machine where you have SmartRF Tools installed
- Make sure you have SmartRF Flash Programmer (8051 MCUs) installed – this is a separate download from SmartRF Tools. It can be downloaded here: http://www.ti.com/tool/flash-programmer
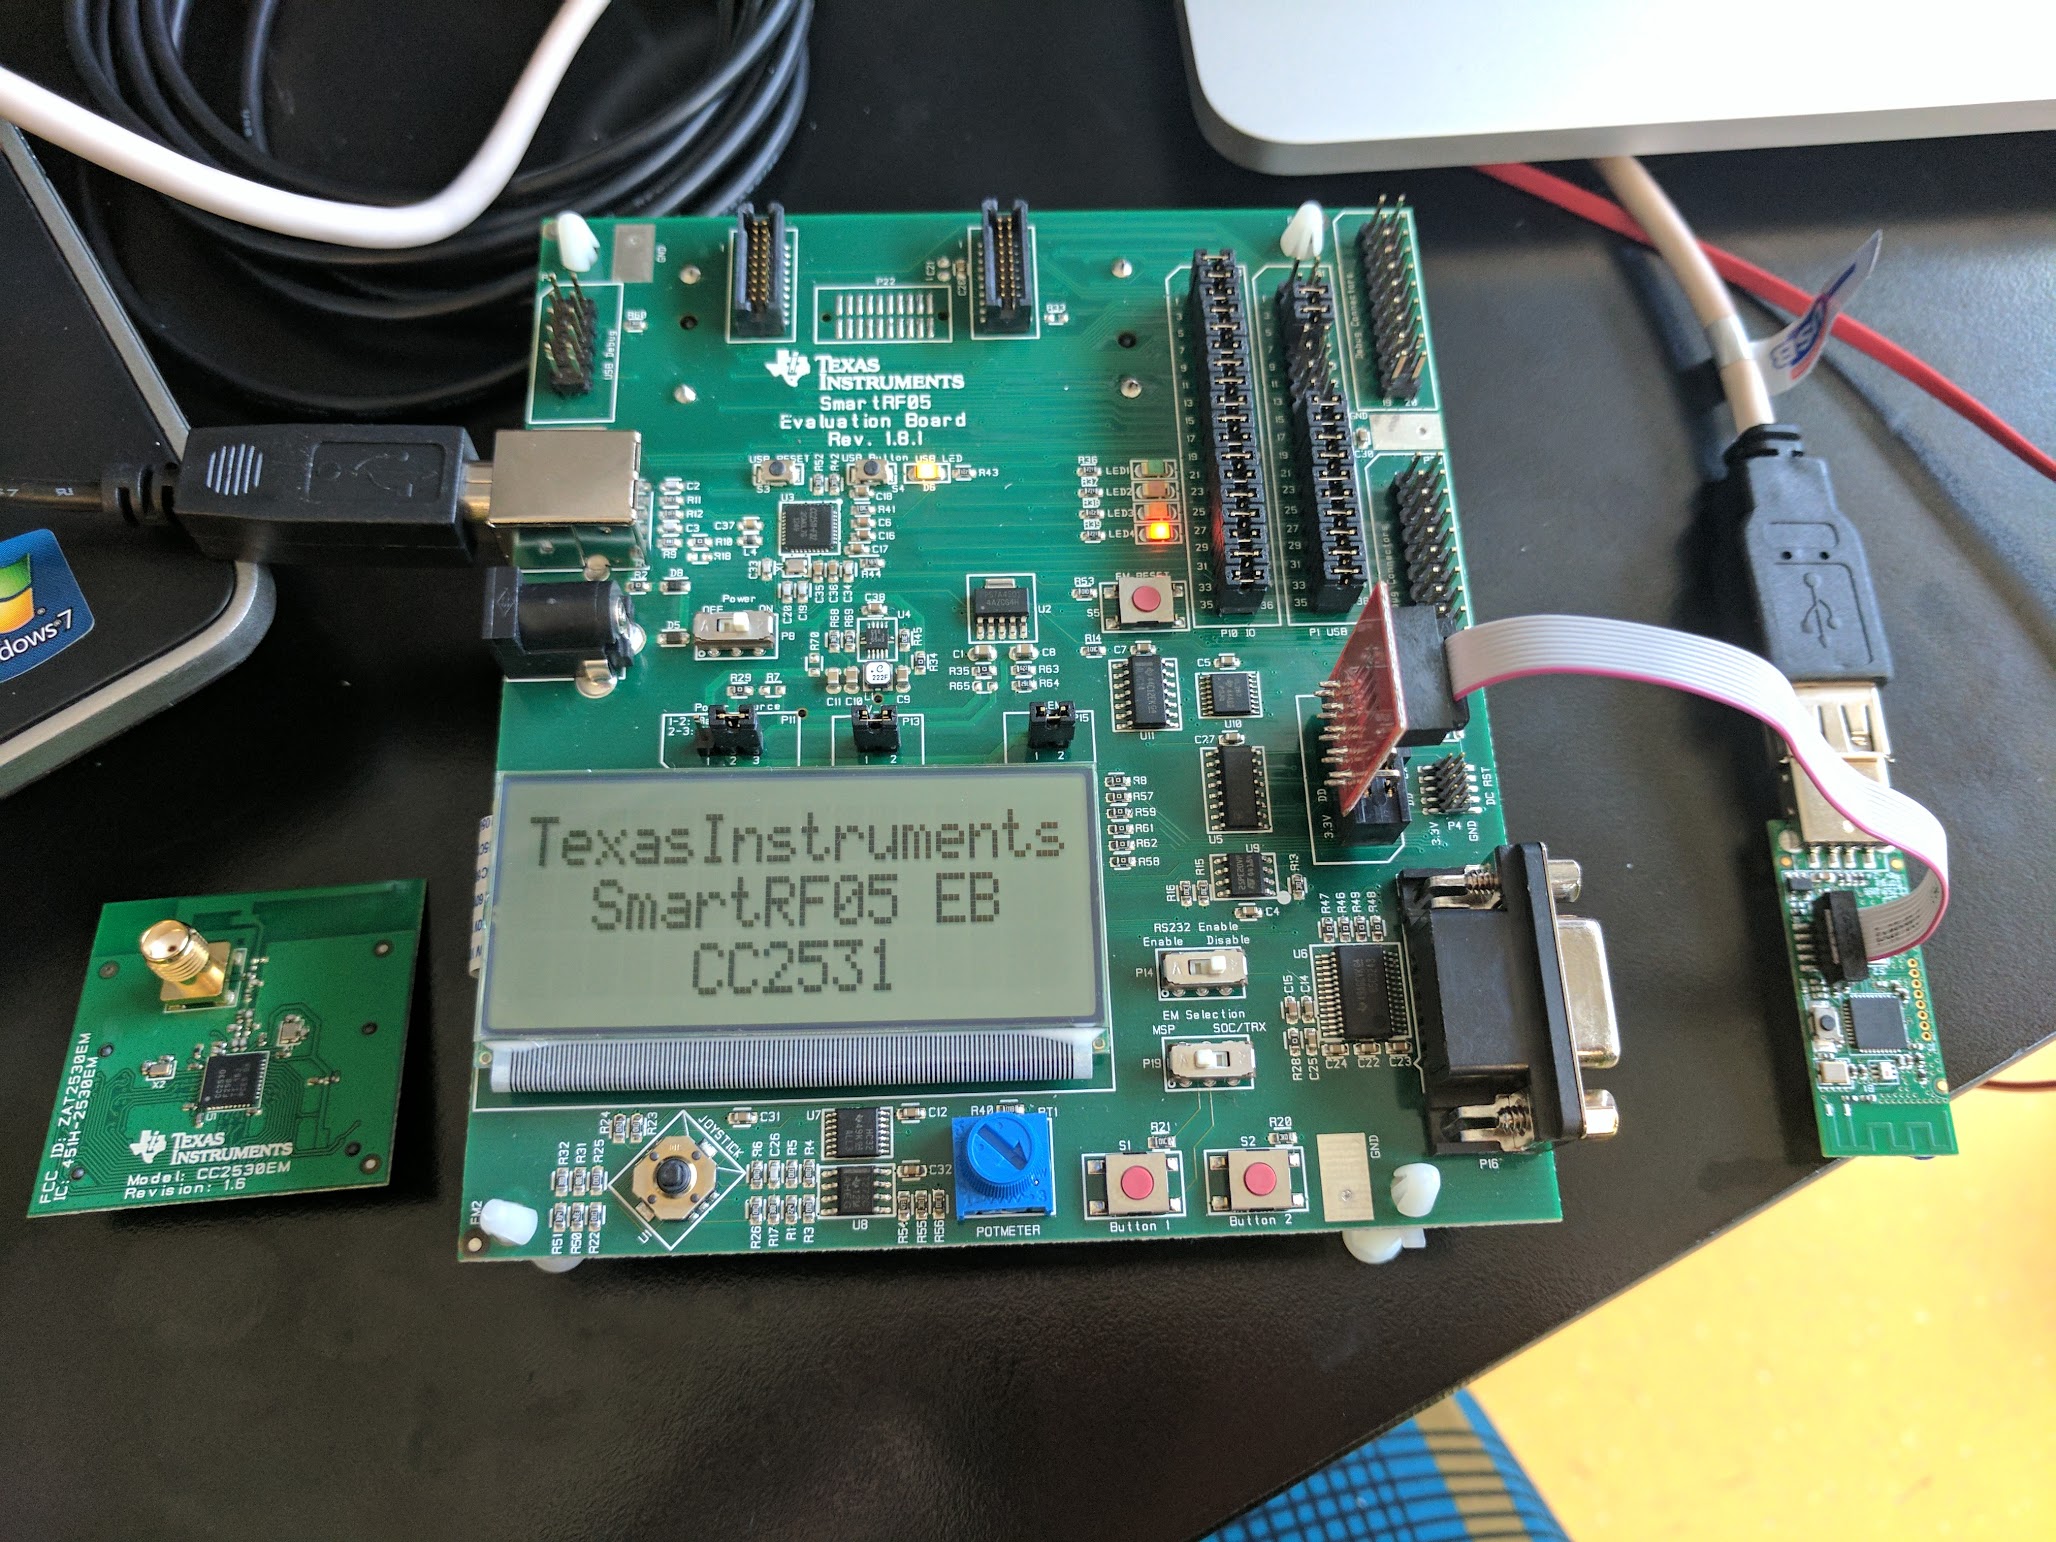
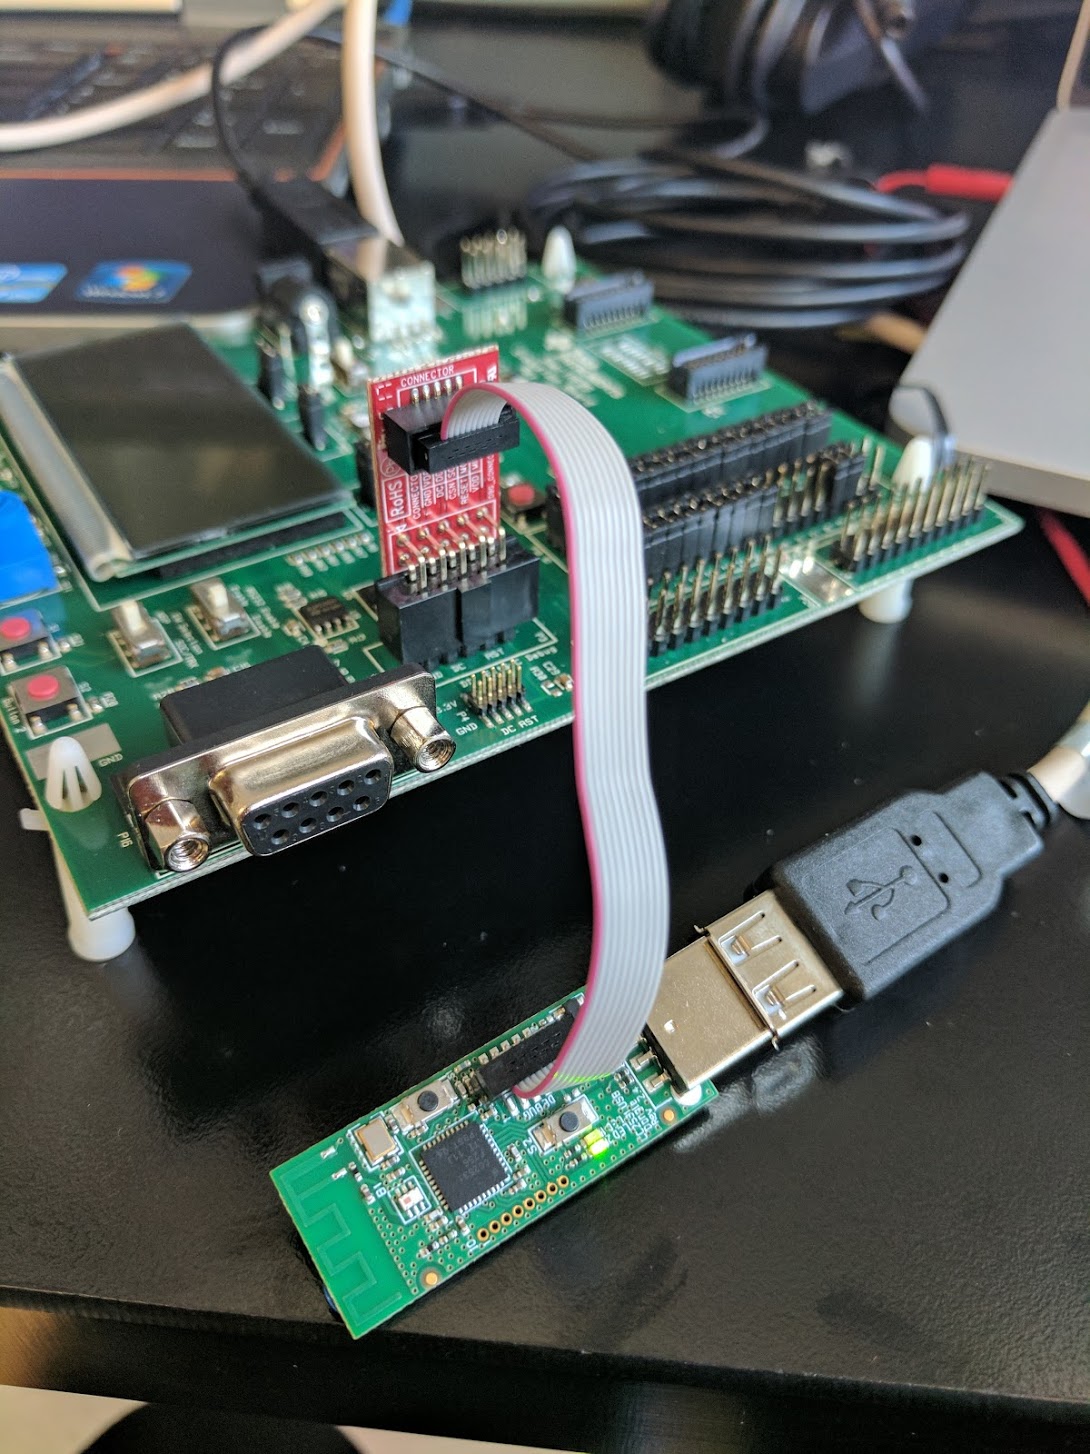
- Connect the USB dongle to an evaluation board and the laptop using the debugging cables from the TI SDK
- Connect the CC2531 USB dongle to a USB port. I used the female-to-male cable included in the TI development kit
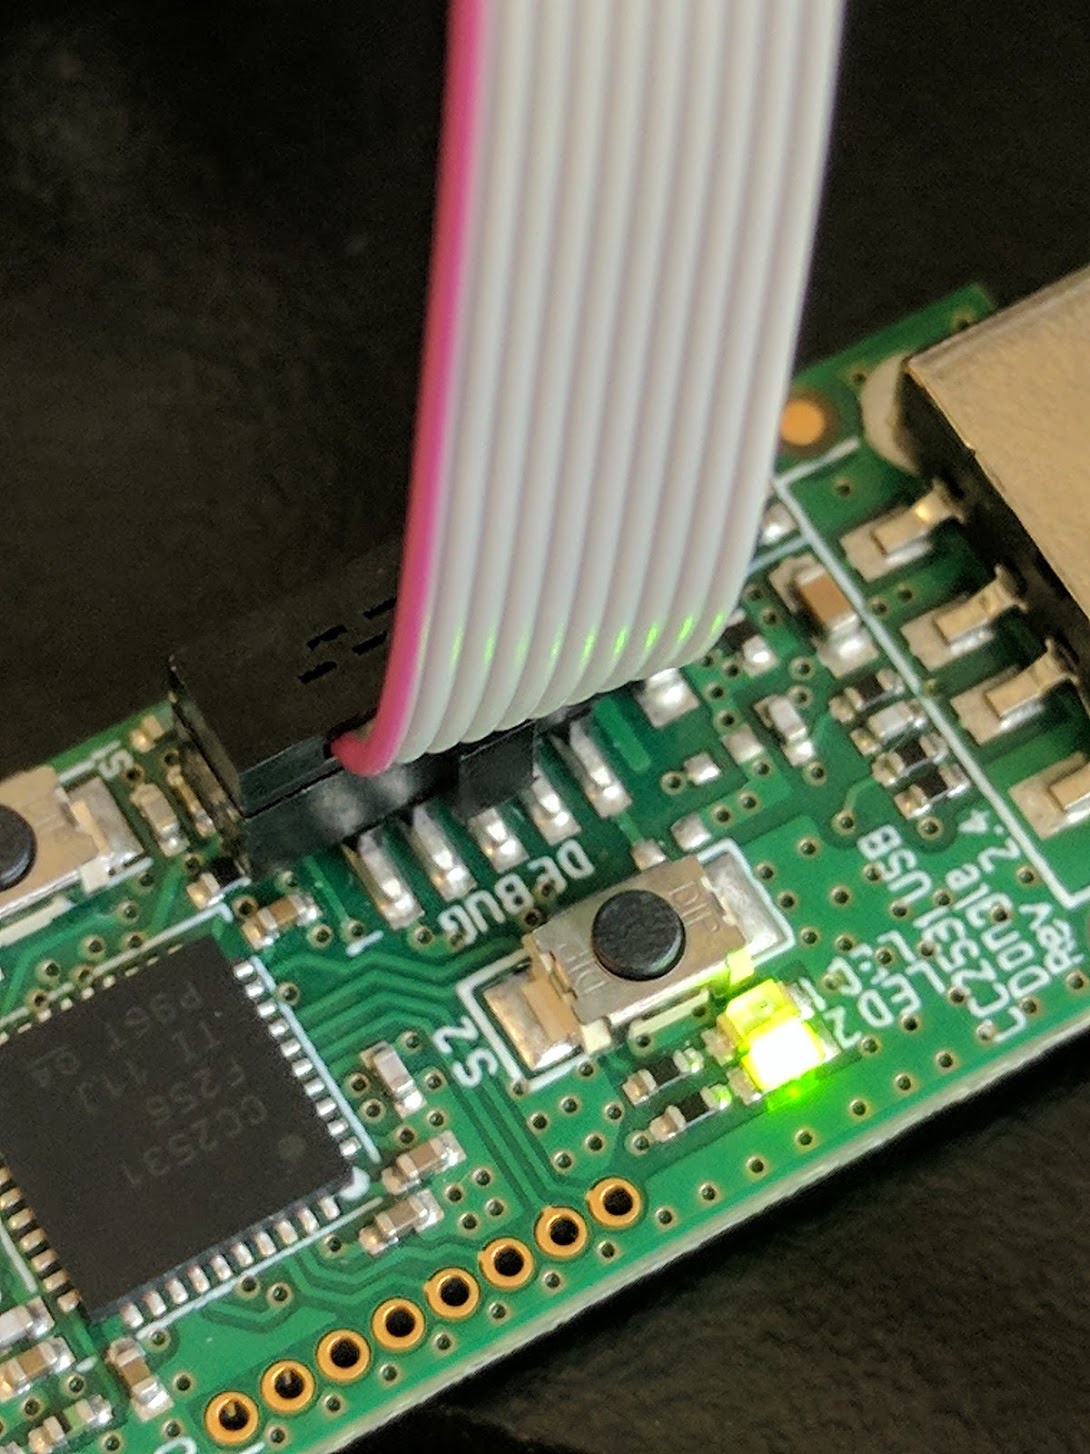
- Connect the CC2531 dongle to CC2530 evaluation board with small debug connector from the development kit.
- If you’ve connected everything correctly, the LCD screen on the evaluation board will read “Texas Instruments SmartRF05 EB CC2531”
- If you don’t get that message
- Make sure the red band on the cable connects the 1 pins
- Make sure the evaluation module is not connected
- Try power cycling the CC2350 evaluation board
- Make sure there is enough power to the USBs - if using a USB splitter, try plugging in the power adapter
- Double check by opening SmartRF Studio – the USB dongle should pop up in the connected devices should be recognized if everything is connected properly
- There is a picture you can follow in the quick start guide found here: http://www.ti.com/lit/ml/swra276/swra276.pdf. I’ve also included picture from my own setup
- If you don’t get that message
- Flash the USB dongle with the cc2531_gw….hex file
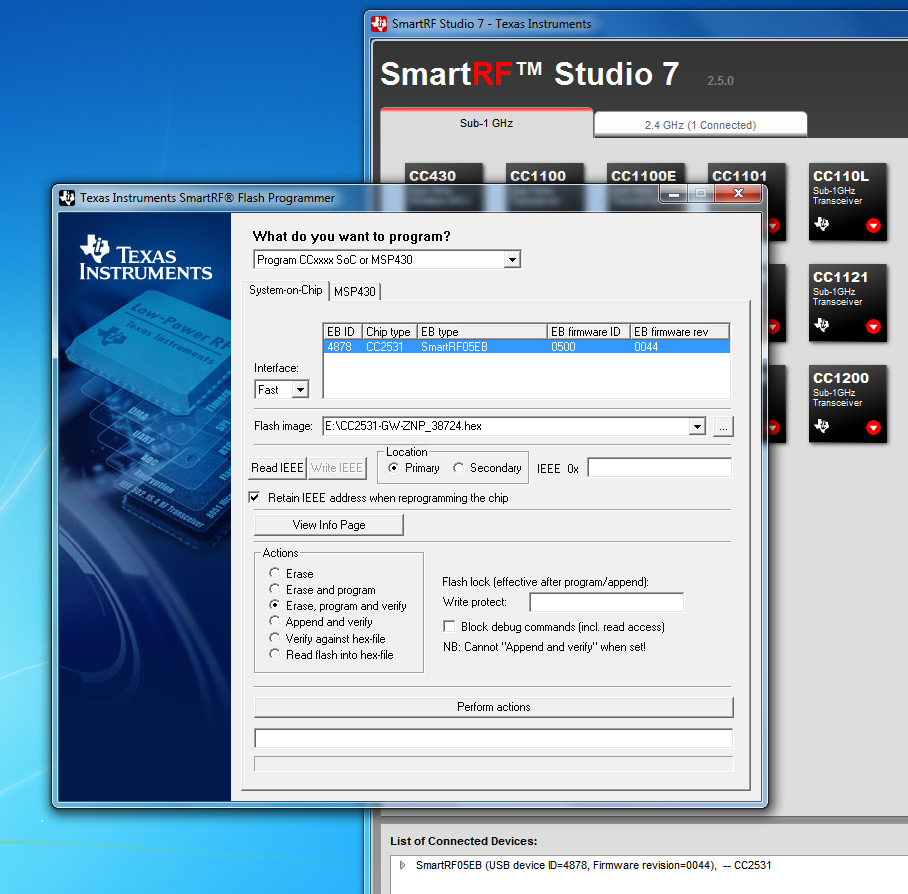
- Open up Flash Programmer (8051 MCUs)
- Select “Program CCxxxx SoC or MSP430”
- Under the System-on-Chip tab, your CC2531 dongle should appear in the list
- You can dump the original firmware by selecting “Read flash into hex-file” and saving that to a separate file
- Select the hex file you copied over in Flash Programmer and select the “erase, program and verify” option
- Click “Perform Actions” and wait for it to do its thing
Running the Gateway
- Plug your CC2531 into the BeagleBone Black
- Connect to your BeagleBone Black and cd into the “servers” directory
- In one terminal, start run ./zigbeeHAgw bbb
- If you have an error with /dev/ttyACM0, make sure you’ve flashed the USB dongle with the correct firmware and are running on Debian 7.8
- If it hangs after “Using serial port: /dev/ttyACM0” run the script using sudo –E ./zigbeeHAgw bbb
- If the servers started successfully, you’ll see star banners denoting each of the connected servers
- In another terminal, run ./start_application
- Once you’ve properly resized the terminal, the gateway UI will pop up
- At that point, you can join devices
Compiling the Gateway to run on x86
- Requirements: older version of Ubuntu (14.04) and GCC (4.8.2)
- More details can be found here:

