This thread has been locked.

If you have a related question, please click the "Ask a related question" button in the top right corner. The newly created question will be automatically linked to this question.

TMDS243EVM: New AM2432 chip first time to load SBL

Part Number: TMDS243EVM
Other Parts Discussed in Thread: UNIFLASH, SYSCONFIG, AM2434, AM2432

Tool/software:

Hi Ti Expert,

     I have an our own designed board whose main IC is AM2432BSEFHIALVR.

     The following related part of our schematic is no difference from TMDS243EVM's.

     I accorded to the following link to load the SBL to my board for the first time.

     linke https://software-dl.ti.com/mcu-plus-sdk/esd/AM243X/latest/exports/docs/api_guide_am243x/EVM_SETUP_PAGE.html#EVM_FLASH_SOC_INIT

     I tried Flash SOC Initialization Binary and SOC Initialization Using SD BOOT.

     For Flash SOC Initialization Binary, on Uart mode, it stuck here.

PS C:\ti\mcu_plus_sdk_am243x_09_02_01_05\tools\boot> python uart_uniflash.py -p COM13 --cfg=sbl_prebuilt/am243x-evm/default_sbl_null.cfg

Parsing config file ...
Parsing config file ... SUCCESS. Found 2 command(s) !!!

Executing command 1 of 2 ...
Found flash writer ... sending sbl_prebuilt/am243x-evm/sbl_uart_uniflash.release.hs_fs.tiimage
Sent flashwriter sbl_prebuilt/am243x-evm/sbl_uart_uniflash.release.hs_fs.tiimage of size 324798 bytes in 33.53s.

Executing command 2 of 2 ...
Command arguments : --file=sbl_prebuilt/am243x-evm/sbl_null.release.hs_fs.tiimage --operation=flash --flash-offset=0x0
Sending sbl_prebuilt/am243x-evm/sbl_null.release.hs_fs.tiimage: 0%| | 0/292638 [00:00<?, ?bytes/s]s

  For SOC Initialization Using SD BOOT there was nothing printed through Uart.

  Then I tried UniFlash tool, there was also an error and failed. (I selected the right chip, and there showing: MAIN_Cortex_R5_0_0 Disconnected: Running Free the R5)

Error: File: C:/Users/cfue07770/workspace_v12/sbl_null.debug.hs_fs.tiimage: Load failed.

[ERROR] MAIN_Cortex_R5_0_0: File Loader: Memory write failed: Unable to read algorithm file "C:\ti\uniflash_8.7.0\deskdb\content\TICloudAgent\win\ccs_base\DebugServer\bin\..\..\sitara_mcu\flasher\"

 I have no idea what to do next, would you please guide me to load SBL and Application Image to my board for the first time?

 By the way I found the following picture from api_guide_am243x/EVM_SETUP_PAGE is not match to the Technical Reference Manual.

 It seems like they are Opposite. TRM shows: OSPI B3:B6  1000, while the EVM_SETUP_PAGE  shows B3:B6  0111.

  Am I misinterpreting or there is sth wrong?

BR, 

Chunyang 

  • Hi,

    Thank you for waiting.

     It seems like they are Opposite. TRM shows: OSPI B3:B6  1000, while the EVM_SETUP_PAGE  shows B3:B6  0111.

    I believe the one shown in TRM is the correct representation and the one shown in the MCU SDK documentation is actually written as OSPI but according to the TRM it is xSPI bootmode with the SFDP bit enabled. 

    Can you confirm my above statement?

    Apart from this, can you confirm the flash part which is used on your custom board?

    Regards,

    Vaibhav

  • Hi Vaibhav,

        I can confirm your statement that EVM actually is using xSPI.

        On my board the Flash part is the same as EVM's, S28HS512TGABHI010.

        And that's the reason I keep my Mode Pin configuration as the MCU SDK documentation shows for OSPI.

    Mode Pin

    15

    14

    13

    12

    11

    10

    9

    8

    7

    6

    5

    4

    3

    2

    1

    0

    O(x)SPI

    0

    0

    0

    0

    0

    0

    1

    0

    0

    1

    1

    1

    0

    0

    1

    1

      I ruled out the cause for individual board, as I tested on several my boards, and the results all the same as I posted yesterday.

      I've been browsing the relevant posts in E2E, and awarded that you are an expert in this area.

      Please help me with this Issue.

    BR,

    Chunyang 

  • Hi,

    I understand that you have set in xSPI bootmode.

    Can you confirm if the DDR is correct for your custom board.

    Please tell me if you have MMCSD settings correct as well?

    Looking forward to your response.

    Regards,

    Vaibhav

  • Hi Vaibhav,

      Yes, refer to EVM configuration in MCU SDK documentation I use xSPI bootmode when I try to load SBL by Uniflash.

       When I try to load SBL by Uart and Python command, I use Uart bootmode.

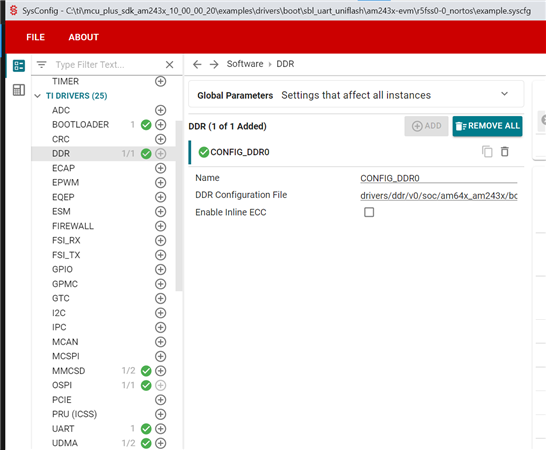
       For DDR, the EVN's is 2G while My DDR is 1G in my board. In project sbl_uart_uniflash_am243x-evm_r5fss0-0_nortos_ti-arm-clang,

       I modify the MPU_ARMv7->CONFIG_MPU_REGION4 0x80000000 from 2GB to 1GB in the Sysconfig.

       And I load this sbl_uart_uniflash.Debug.hs_fs.tiimage to my board by Uart&Python and Uniflash, and both are failed too.

       For MMCSD the Card Type default value is EMMC, while my card is SD.

       Is that matter with DDR or SD card when I load  sbl_uart_uniflash.release.hs_fs.tiimage and sbl_null.release.hs_fs.tiimage by Uart&Python?

       By the way, when I try to follow your guide from this link, I always get step the following picture shows.

    e2e.ti.com/.../5744361

    1. Open the file SBL Null: C:\ti\mcu_plus_sdk_am243x_10_00_00_20\examples\drivers\boot\sbl_null\am243x-lp\r5fss0-0_nortos\main.c
    2. Introduce loop_forever() after int32_t status;
    3. Rebuild the application in debug mode and not release mode so that we can debug step by step.
    4. Make sure to perform the uart unigflash step via the Python command and then when it gets stuck at Step 2 which is SBL Null.debug.tiimage(hs fs image)
    5. Then, open CCS and connect to the R5F0_0 core and you will see that the flow is stuck at loop_forever().
    6. Once you are at this point, simply set the value of loop = 0 inside loop_forever() and proceed to debug one line at a time.
    7. Please do so, until you see some error happens at lets suppose a certain API. Please let me know the name of this API.


    What should I do to let it jump to Main.c-> loop_forever()?

    And which project should I use, sbl_null_am243x-evm_r5fss0-0_nortos_ti-arm-clang or sbl_uart_uniflash_am243x-evm_r5fss0-0_nortos_ti-arm-clang?

    Both I've tried, and both failed to debug successfully.

    BR,

    Chunyang 

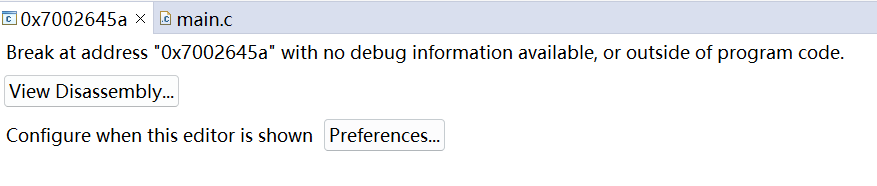
  • For my board and EVM, I both failed to run your guide in  e2e.ti.com/.../5744361, as the they all jump to "Break at address "0x7002645a" with no debug information available, or outside of program code." not to the function loop_forerver().

    FYI

  • Hi, Vaibhav

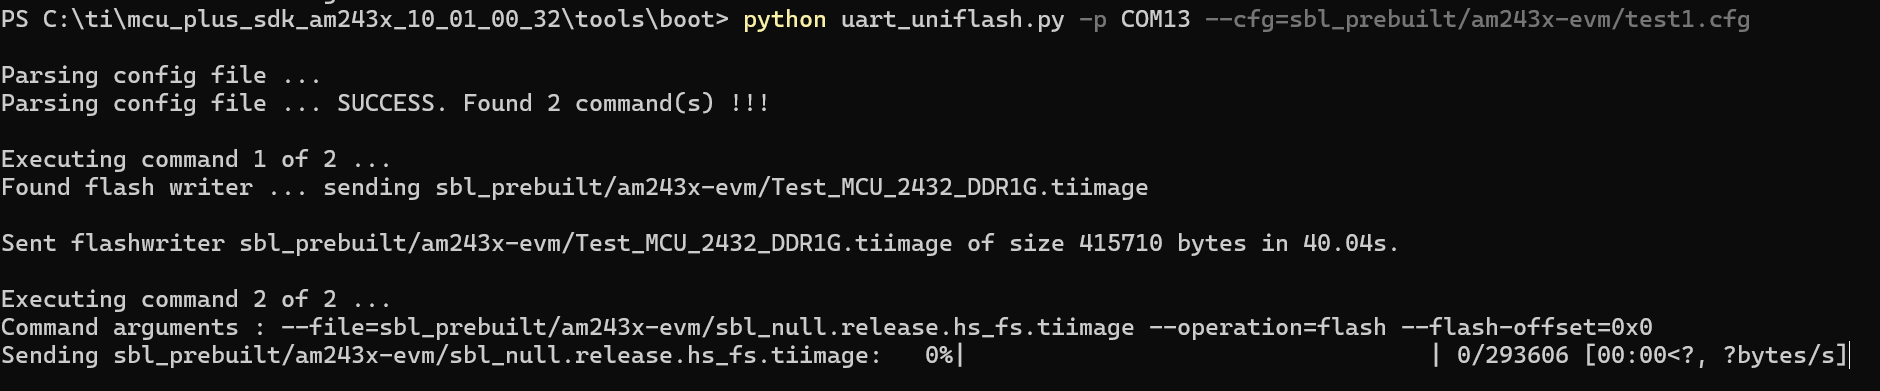
      If I stuck here, does it meaning my Test_MCU_2432_DDR1G.tiimage did not execute?

      This image is got form sbl_uart_uniflash_am243x-evm_r5fss0-0_nortos_ti-arm-clang which I modified MPU_ARMv7->CONFIG_MPU_REGION4 0x80000000 from 2GB to 1GB in the Sysconfig.

    Thanks 

    Chunyang

  • Hi,

    Thank you for waiting.

    From the above steps, I am hoping that you did not built the AM243-LP application as mentioned in STEP 1, but you built it for AM243-EVM.

    • Make sure to perform the uart unigflash step via the Python command and then when it gets stuck at Step 2 which is SBL Null.debug.tiimage(hs fs image)
    • Then, open CCS and connect to the R5F0_0 core and you will see that the flow is stuck at loop_forever().

    After you connect to  the R5 Core, I would need you to click on load symbols and give the path to the .out generated which would be sbl_uart_uniflash tiiimage .out but the HS FS one.

    Is it the HS FS image or the GP one to confirm that please refer the following FAQ: https://e2e.ti.com/support/processors-group/processors/f/processors-forum/1228618/faq-am6xx-how-to-check-if-device-type-is-hs-se-hs-fs-or-gp

    Looking forward to your response.

    Regards,

    Vaibhav

  • Hi Vaibhav,

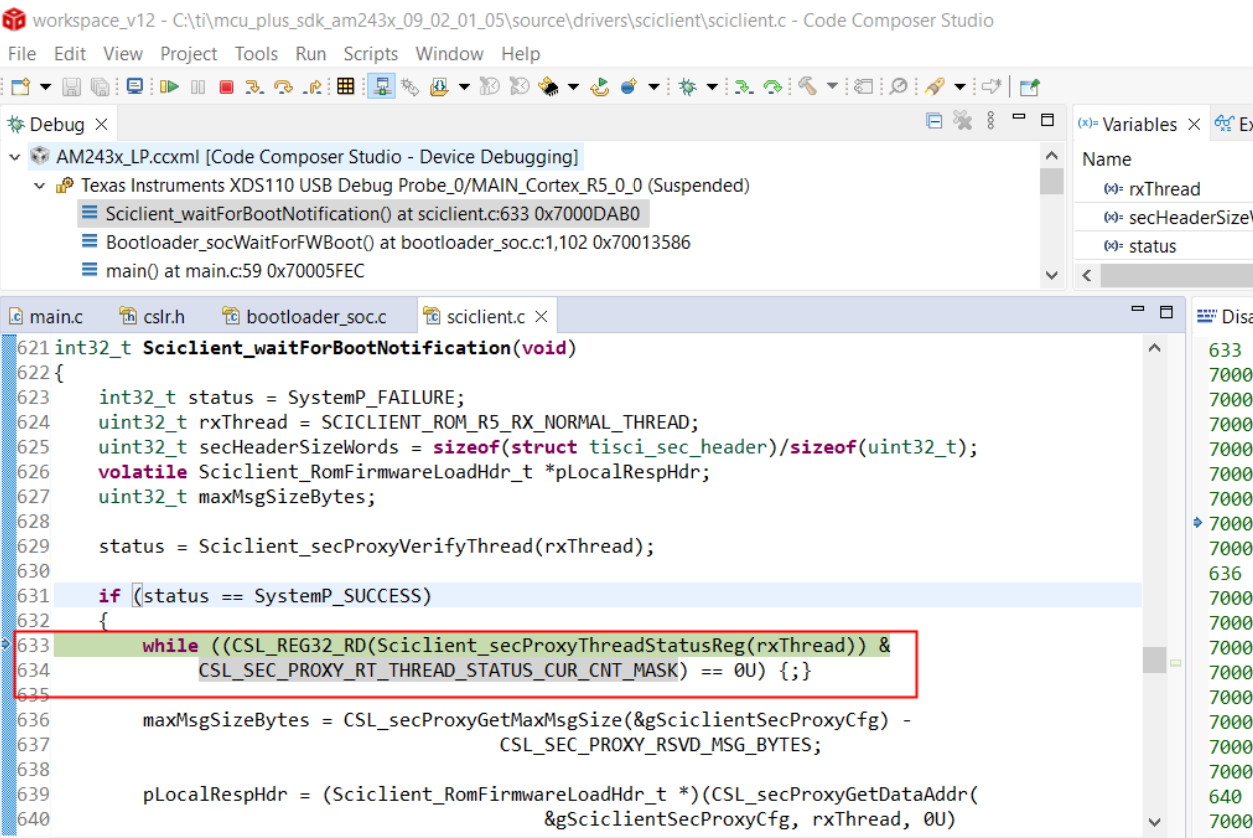
    Follow your instruction, I can run this  sbl_uart_uniflash project, and the the result just as the Customer's in the following post. 

    https://e2e.ti.com/support/microcontrollers/arm-based-microcontrollers-group/arm-based-microcontrollers/f/arm-based-microcontrollers-forum/1487991/am2432-uart-flash-soc-initialization-binary-failed-on-lp-am243-evm/5744361?tisearch=e2e-sitesearch&keymatch=AM2432%2525252520Uart%2525252520download#5744361

    We stuck the same line of the sciclient.c

    And I followed your guidance of this linke https://e2e.ti.com/support/processors-group/processors/f/processors-forum/1329012/am6442-sbl-is-blocked-in-an-loop-of-bootloader_socwaitforfwboot/5057360#5057360

     I send this sbl_null.debug.hs_fs.tiimage twice to my board, then I got this SBL executed.

    But it seems that the SBL didn't store in my flash. As I change the boot mode to XSPI and reboot my board, there is nothing be printed.

    So, with UART mode after I send the SBL twice I can debug by JTAG, but with XSPI mode I cannot debug by Jtag.

    It seems my OSPI flash cannot work for SBL, but we have verified my OSPI flash is all right by runing OSPI Flash Diag demo.

    Does the difference between AM2434 and AM2432 matter this?

    Please guide me to boot up from my OSPI flash.

    BR,

    Thanks

  • Hi,

    Thanks for waiting.

    So, with UART mode after I send the SBL twice I can debug by JTAG, but with XSPI mode I cannot debug by Jtag.

    The first method is supposed to work, for the second one it will not. You have to be still in UART bootmode and then you should be able to debug.

    Did you get a chance to look at this as well?

    Regards,

    Vaibhav

  • Hi Vaibhav,

      I have checked my AM2432. It is HS-FS, not GP.

      Yes, now we could debug our board with CCS, both by Uart mode or SD mode(solved by my colleague, only run SBL not App, by now).

      But for the product, We need ues XSPI(OSPI) mode to boot the board from Flash.

      Looking forward to your guidance.

    BR,

    Chunyang

  • Hi Vaibhav,

      Now I can load SBL and Imag to my board by Uart and Python, with the following project. I change the EMMC-> Card Type to No Device (As there is no EMMC in my board). I use this sbl_uart_uniflash.Debug.hs_fs.tiimage to load the SBL successfully.

      Project: -- sbl_uart_uniflash_am243x-evm_r5fss0-0_nortos_ti-arm-clang

    Then I want to load SBL by Jtag, with the same way above, I  I change the EMMC-> Card Type to No Device, in the following project.

    Project: -- flasher_jtag_uniflash_am243x-evm_r5fss0-0_nortos_ti-arm-clang

    But with this flasher_jtag_uniflash_am243x-evm_r5fss0-0_nortos_ti-arm-clang.out, I can not load successfully.

    Can you tell why, and How can modify this project to just Jtag flasher?

    BR

    Chunyang  

  •   Now I can load SBL and Imag to my board by Uart and Python, with the following project. I change the EMMC-> Card Type to No Device (As there is no EMMC in my board). I use this sbl_uart_uniflash.Debug.hs_fs.tiimage to load the SBL successfully.

      Project: -- sbl_uart_uniflash_am243x-evm_r5fss0-0_nortos_ti-arm-clang

    I am assuming for this you ran the python uart_uniflash.py command 

    But for the other one:

    Project: -- flasher_jtag_uniflash_am243x-evm_r5fss0-0_nortos_ti-arm-clang

    But with this flasher_jtag_uniflash_am243x-evm_r5fss0-0_nortos_ti-arm-clang.out, I can not load successfully.

    Can you tell why, and How can modify this project to just Jtag flasher?

    How do you work with this? How are you flashing via JTAG? Any specific command which you are using.

    Regards,

    Vaibhav

  • Hi Vaibhav,

        I solved my issue.

        For the above,  I am using UniFlash 8.7.0 tool which can use the image or .out file as the flasher.

        Just remove the eMMC in the uniflash project, then the flasher can use for my board.

    Thanks,

    Chunyang