This thread has been locked.

If you have a related question, please click the "Ask a related question" button in the top right corner. The newly created question will be automatically linked to this question.

CCS/EK-TM4C123GXL: Boostxl-k350qvg-s1 not displaying.

Part Number: EK-TM4C123GXL
Other Parts Discussed in Thread: BOOSTXL-K350QVG-S1, , CODECOMPOSER, ENERGIA, C2000WARE

Tool/software: Code Composer Studio

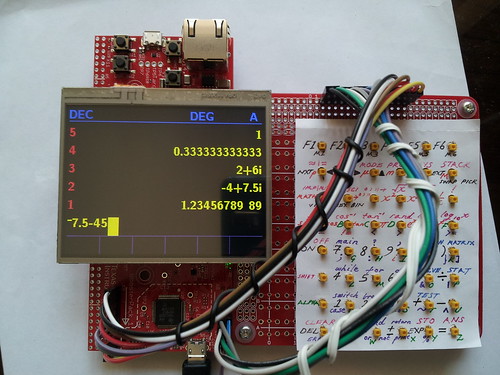
I am having trouble getting the BOOSTXL-K350QVG-S1 booster pack to work with the EK-TM4C123GXL Tiva C Launchpad. I am trying to run the demo code provided with the TM4C123G_LaunchPad Workshop, Lab 10 using Code Composer Studio 8. After changing the Path and Build variables to reflect the version of TivaWare I have (2.1.4.128) I was able to compile the grlib_demo and it appears to upload properly. Unfortunately, the lcd screen shows no signs of life. I see that this issue has been discussed in the E2E support form; In 2015 Paulo Costa reported the same problem I see.

In July 2016, Lucian Romonti ascribes this problem to the LCD not being reset and I have been trying to get this working following his recommendations. He reports that the reset pin is controlled by PD7, which is locked to use as a GPIO. I do not see any reference to PD7 in the CodeComposer lab. The Kentec320x240c16_ssd219_8bit.c code is where I would expect to see it (perhaps I am wrong about this). What I do see are several lines of code referring to LCD_RST_PERIPH, LCD_RST_BASE and LCD_RST_PIN that have been commented out (begins line 142. Line 419, 431, 443, 479). I un-commented these, compiled and loaded the code. Still nothing. I notice that the LCD_RST_PERIPH was listed as L4. What is that? Changed to D7, still nothing. I added code provided by Romonti right after enabling reset (line 482) that was supposed to enable use of the D7 pin:

HWREG(GPIO_PORTD_BASE + GPIO_O_LOCK) = (GPIO_LOCK_KEY);
HWREG(GPIO_PORTD_BASE + GPIO_O_CR) |= 0x80;
HWREG(GPIO_PORTD_BASE + GPIO_O_AFSEL) &= ~0x80;
HWREG(GPIO_PORTD_BASE + GPIO_O_DEN) |= 0x80;
HWREG(GPIO_PORTD_BASE + GPIO_O_LOCK) = 0;

Again, nothing. Changed rst pin back to L4, still nothing.

Any help would be appreciated.

Thanks,

Jack

  • Greetings,

    Feel your pain - yet 'pain reduction' often is 'speeded & eased' by further detail.    As one w/'much' past display experience might you 'better define' what is meant by, 'Not displaying?' 

    The improper handling of the Display's Reset Pin must rise to, 'Prime Suspect.'    The display's data manual should 'clearly describe the (necessary) treatment of Display Reset.   Employing the MCU's (default) 'NMI' pin as 'Reset' - would not have been my choice.   You 'must' confirm your ability to control 'PD7" - via an Led, Scope or DMM - as the Reset (usually) must be briefly asserted - and then ordered, 'Out of Reset.'    (Being 'stuck' in reset would completely explain the condition of 'No Visible Pixels.')

    It is 'assumed' that your 'LPad' runs correctly when run 'isolated/alone.'    Is that correct?     When 'joined to the Display' - 'Not Displaying' is reported - and (apparently) 'All blame is cast upon the Display.'    May I note  - 'That's not (at least yet) been proven!'   Would it not prove 'wise' to implement a tiny, 'Led Blink' program - which 'continues during your Display Operation' - thus providing (some) evidence of the MCU's proper behavior?    (even when - especially when - joined to the new Display.)    It is entirely possible that the, 'Added Power Demands of the Display' -  caused the power delivered to the MCU to fall from specification!    (over past years - this happened w/sufficient frequency - so as to 'always' warrant concern.)

    I'm uncertain if your TM4C123 was the MCU of choice for that Display Kit.    The TM4C129 (more advanced) MCU has (vastly) different pin-outs - you must insure that the Display Software provided indeed 'mates w/your MCU.'

    I've never used 'Kentec' displays - and as no link was furnished - my diagnosis will be limited.  

    Is the display a TFT (color)?    Has it a backlight - if so - does the backlight illuminate?    Are you able to see even the 'faintest' pixel field?'    That backlight usually requires, 'Upwards of 5VDC - if that IS a requirement - is the 'higher voltage available & successfully routed thru to the display?

    Note too - the Display Assembly may, 'overtax' the 'power delivery' available from your '123 based LPad.'

    If 'NOT' a TFT - there should be a 'Contrast Pot' - & that should be adjusted so that the 'Background Pixel Field' is 'just visible.'    The arrival of 'real & valid data then' will greatly intensify the addressed pixels.

    As I recall (solely from my time on this forum) Kentec devices initially were, 'Parallel Bus Driven' and later switched to 'SPI Driven.'   I believe that proved challenging to many here - you must check & confirm.

    You report, 'Compiling & Uploading' - which 'appeared' proper.     Might you insert a 'Break-Point' just after the Display Code writes an early 'Image or Text' to the Screen - and determine if the breakpoint is reached - and (even, 'if that code's image) arrives'?

    These are - in my belief - 'reasonable, initial display concerns.'   

    Again - encountering difficulty is 'never pleasant' - yet 'Systematic Diagnostics - springing from clear & complete details' - most always enables efficient issue resolution...

  • Unfortunately I do not have access to a  BOOSTXL-K350QVG-S1 booster pack. I will try to find one. I have modified a lab10 project to include the proper reset on GPIO pin D7 and use version 2.1.4.178 of the TivaWare library in the standard installation directory: "C:\ti\TivaWare_C_Series-2.1.4.178". Just import the lab10 project from the attached .zip file:

    /cfs-file/__key/communityserver-discussions-components-files/908/3324.Lab10.zip

    Let me know if this works.

  • Bob Crosby said:
    Let me know if this works.

    I tried the attached example on a EK-TM4C123GXL fitted with a BOOSTXL-K350QVG-S1 but the display was blank. Haven't yet attempted to debug what was causing the display to be blank.

    Fitting the BOOSTXL-K350QVG-S1 to a EK-TM4C129XL and running the grlib_demo from TivaWare 2.1.4.178 worked, so the BOOSTXL-K350QVG-S1 is OK.

  • Hi All,

    Thanks for the input.

    I have not been able to get the CCS demo working, but have had success using Energia. Below is some info on my experience that may help others with this.

    It appears that the libraries required to run the Kentec 350 LCD boosterpack using Energia come with Energia but I did not see any example code. I downloaded the life_Game example written by Rei Vilo. When I tried to run the example, the software did light the backlight but the program did not initially run. This differed from the result with the CCS example, which did not light the backlight. It appears that the Energia demo would not run due to a hardware incompatibility between the TM4C123 LaunchPad and the LCD BoosterPack. To work, the user needs to remove the R10 shunt from the board, as explained at the following url: (https://embeddedcomputing.weebly.com/kentec-35-lcd-spi-with-touch-boosterpack.html). Once the R10 shunt is gone, the Life_Game example did run. I was able to get started writing code in Energia by following the video at https://embeddedcomputing.weebly.com/training-video.html. The video gives a brief intro to writing code for both the lcd and touch screen capabilities of the booster pack.

    I tried loading the CCS example after the R10 shunt was removed, but again, the backlight did not light and there was no indication of life.  I have to conclude that the CCS demo does not work with the TM4C123 launchpad and I have decided to write my application in Energia.

    Thanks again,

    Jack

  • Hi Bob,

    I tried to load your code but I got an error saying that I did not have the correct compiler installed. I tried updating CCS, but somehow it did not help and I was unable to load the project.  As described in an update below, I was able to get the booster pack working with Energia, but only after removing a shunt resistor from the board.  

    Thanks for your help.

    Jack 

  • Hi CB1,

    thanks for your input.

    You made a lot of good suggestions, but I was able to get the booster pack working using Energia after a required hardware modification.  From what I have seen, it does look like the LCD booster pack was developed for the 129 launchpad.

    Best,

    Jack

  • Greetings Jack,

    Most always - the higher the number of, 'Device-Board-MCU Revisions' - the 'grayer' our hair turns.

    W/out ever using that (Lcd Carrying booster pack) - our sense was that the 'newer versions' had switched from 'Parallel Bus' to 'SPI Interface.'    Would you be so good as to identify (your) interface?

    Most always - when a display includes a backlight - it is controlled via a single (MCU) GPIO pin.    Note that the GPIO is 'incapable' (by itself) of properly driving the backlight's circuitry.   In my opinion - that GPIO serving as 'backlight control' - should be set to 'Output' - with the highest current selected.

    My firm & I have 'little doubt' that your display was developed (primarily) for the '129 family MCU.   

    Typically one can 'convert between different MCUs' by:

    • carefully noting (and logging) those MCU pins which interconnect w/the display
      • should the data interface be 'parallel' - all pins must be from the (same) GPIO Port
      • likewise - the command/control signals (i.e. R/W, CS, RD/WR etc.) should also reside upon the same GPIO Port.   (i.e. for programming ease & efficiency.   Note that the data port & control port MUST RESIDE upon different GPIO Ports
    • the initialization of the display - as well as the 'Data & Command Timings' - must be met by the MCU.   As the '129 is 'faster' than the '123 - it is expected that, 'wider signal strobes & delays will naturally result' - when 'code intended for the '129 runs (instead) upon the '123.    
    • Many display controllers (part of the display) provide a 'Busy/Ready' output.   By 'monitoring' this pin - you may insure that your display transactions run at the 'highest potential speed' and that 'busy' properly causes a 'pause' in 'reading or writing.'
    • Systematic Scope Caps - from ALL of the Command/Control Pins & Serial Interface Pins, and 'one' of the parallel bus pins (if that bus is employed) provide a 'baseline' - and that is the 'surest means' to 'migrate the display among different MCUs.    (this achieved - of course - when the display is running & displaying properly...)

    From your writing - my staff & I are 'doubtful' - that (pardon) 'low-energia' will satisfy you - long term.    You may consider 'converting each 'low-e' display function to, 'proper TM4C API Code' - which will nicely enable & enhance your 'expanded mastery of your display & clever presentation of acquired data!'

  • According to https://dev.ti.com/bpchecker/#/ this display and the 123 are fully compatible.

    I really like this display. It works well with the 129 for my hobby calculator project:


    My understanding is that R10 only needs to be removed if you want touch capability. I don't use touch, so I'll try to get it working on the 123 with CCS without removing the resistor. 

    I would like to port my firmware to the C2000 Delfino LaunchPad I just ordered, and I don't think C2000Ware comes with a graphics library for this display (or any other), so this will be good preparation for interfacing the display to the Delfino. 


  • Greetings,

    Thanks for this - might you advise (as your system IS working):

    • is the data interface between MCU & Display 'Parallel Bus or SPI?'
    • while requiring (some) effort - might you provide (especially for the OP - but also for (many) 'interested others'
      • a 'chart' revealing the interconnections between your '129 MCU & Display.   MCU pin #, pin function (GPIO/PWM etc.) and 'mated display connection.'
      • the Display Initialization Code - especially any identification of Version Number

    While 'extra work' - you do 'gain the advantage' that the OP (original poster) will have 'gone before you' - and that 'duality' should raise the odds of  (yours & his) success!

    The cable bundle IS neat - yet we've (long) found that, 'Short & Direct' - especially when/where RF and/or Noise are nearby (note: they are ALWAYS nearby - or will shortly arrive so) - make your system (far) more noise/RF resistant.   

  • Hi CB1,

    The version I have is controlled by SPI.  I understand that the SPI connection is significantly slower than Parallel Bus, and this is a real down side of this controller/booster combination.  I suspect you are correct about expanded mastery, but that is something for the future.

    Best,

    Jack

  • Monsieur Jack,

    Jack Summers11 said:
    but that is something for the future.

    Might you find - as you've already 'landed here' - that (pardon) 'near marginal interest/support' from 'others' - drives you toward 'crutch-free' development?

    The 'future' may arrive, 'far earlier than you expect...'

  • Hello Jack,

    Bob and I were discussing this earlier and I have access to a BOOSTXL-K350QVG-S1 so I went ahead and tested on my end.

    As I loaded up the first example, this was noted in the top of the description of the project:

    //! The use of LCD BoosterPack (BOOSTXL-K350QVG-S1) requires resistors R9 and
    //! R10 to be removed from the EK-TM4C123GXL Launchpad.

    From what I am reading, you have only removed R10.

    Please remove R9 as well and then test the examples once more.

    I ran all four TivaWare examples on my modified EK-TM4C123GXL with the BOOSTXL-K350QVG-S1 and they all ran flawlessly.

  • Hello Ralph,

    Some may believe that the use of 'Bold' and or 'Color' would better 'Highlight' such important info.     It is wondered how (only) one resistor was removed by this poster.

    Note those R9 & R10 components have been (properly) labeled (by some here) as 'Plague-Istors' - having inconvenienced many.    As suggested here (many times) - packing those w/in a small, clear bag (for the (very) few) who (may) seek (long past) compatibility - will prevent issues when the connected pins serve as outputs...

    Standing each up (tombstone style w/one edge soldered) serves to 'notably' confirm that this 'hazard' has been recognized & removed.

    *** Staff just noted our achievement of 112,345 - we may end the 'workday' early - and journey to a nearby, 'floating casino.'     

  • Hello cb1_mobile, 

    It's SPI. I will remove the display from the BoosterPack headers on the board and then reconnect the display to the board using cables, which will help me to identify the connections and compile the chart. 

    I recall seeing the initialisation code in my travels - I'll find it and document it. 

    I'm not sure, but the problems the OP is experiencing may be due to the change from parallel to SPI, as you mentioned. I suspect the library for the 123 has not been updated by TI and is for the discontinued parallel version.  

    cb1_mobile said:

    The cable bundle IS neat - yet we've (long) found that, 'Short & Direct' - especially when/where RF and/or Noise are nearby (note: they are ALWAYS nearby - or will shortly arrive so) - make your system (far) more noise/RF resistant.   

    That explains it! The other day I turned off a light in the room and the calculator changed modes! An electronic engineer colleague is designing a keypad that will plug directly into the second set of BoosterPack headers - hopefully that will help. 

  • Hello Daniel,

    Daniel Milutinovic said:
    I'm not sure, but the problems the OP is experiencing may be due to the change from parallel to SPI, as you mentioned. I suspect the library for the 123 has not been updated by TI and is for the discontinued parallel version.  

    That is not the case, as I mentioned on my prior post, hardware changes are needed. R10 is not the only resistor that needs to be removed. R9 must be removed as well. Once both are removed, the 123 works with the display.

    The driver is a SPI driver, Kentec320x240x16_ssd2119_spi.h.

  • Hi Ralph,

    Where is this text found?  I dont recall seeing it and it did not turn up in a search for R9 in the .c files I have open.

    If this hardware modification is necessary to run the lab, then it should be documented in the workshop workbook.  Searching R9 in the workbook, this term only shows up in the launchpad schematic.

    I will try removing R9 to see what happens tomorrow and will let you know what happens.

    Jack

  • Hello Ralph,

    While it proves 'safest' to 'Pull each Plague-istor' - it is, 'Not guaranteed' that either will 'cause issues.'      As you know - it is ONLY if the 'cross connected' MCU pin(s) are, 'Commanded AWAY from their GPIO INPUT (which IS their default) and configured as 'Outputs' - that 'Issues are enabled.'

    Never having experience w/these boards - my group does not know if the software causes the 'exercise of PD0-PB6 and/or PD1-PB7' - which may enable, 'Output to Output CONFLICT - never good!     (And why - there is 'no good reason' - for those Plague-istors to REMAIN!)

  • Hello Jack,

    I am not familiar with the workshop workbook, that was all put together long before I came to the team (or Bob for that matter) and it is not something we are updating or maintaining. I suspect perhaps this workshop is not pointing you to TivaWare examples where we have this documented. In general you should try and use TivaWare as it has gotten updates to avoid issues like this.

    In any of our TivaWare examples, fontview, grlib_demo, lang_demo, and scribble, there are notes at the front that explain how to use the project and make mention of the resistor removals.

  • Hello cb1,

    Definitely PD1-PB7 are both configured to be used by the example, but also PD0 is configured and used so it seems PB6 is impacting this as well - possibly due to an unused connection on the Kentec display (maybe Kentec BoosterPack is pulling that pin to ground?).

  • HI Ralph,

    I removed R9, opened and loaded the grlib_demo program from tivaware.  Unfortunately, this still gives me a blank, dark screen.  I know it is not a hardware problem because I can write working code in Energia.  Comparing the two Kentec320x240x16_ssd2119_spi.c files (the one in the tivaware and the one from the workshop) show them to be very different.  For example, chip select in tivaWare is on pin A4 while it is A7 from the workshop.  The program compiled and loaded without errors but it does give a warning saying that it was made using a compiler that is not installed on my computer.  Dont know if that had any effect or not.

    Regarding the workshop, I understand that you cannot keep all the material TI puts out up to date.  The workshop labs provide a starting point to figure out how CCS works.  I am a chemist by training and have been trying to teach myself to write code for microcontrollers and have found the learning curve pretty steep.  Without the workshop, I would not have been able to begin working with CCS.  

    Best,

    Jack

  • Hello Jack,

    I sympathise with the difficulty you are experiencing - I'm a hobbyist and found the workshops indispensable. It's a shame TI are not maintaining the workshops. This entire thread could have been avoided if they did.   

    Are you sure the file from the workshop is called "Kentec320x240x16_ssd2119_spi.c"?  

    I had a look at the workshop for the 123 and the file in Lab 10 is for the older display with a parallel interface, as I suspected. It is called "Kentec320x240x16_ssd2119_8bit.c" and the comment at the beginning of the file says "this version is for the 8080-8bit interface". 

    I recall getting the same compiler warning when I was starting out - I think it's because you have been loading projects from the (not updated) workshop. Start a fresh project in CCS - the warning will disappear and the grlib_demo should work. 

    It's interesting that you got things working using Energia without removing R9. Did the Energia sketch include touch capability?

    I've removed the display from the BoosterPack headers on my 129 and reconnected it using cables, and have been working through the display initialisation code (there is a separate initialisation code for touch) to understand what's going on. I'll try it on the 123 soon. 

  • Daniel Milutinovic said:
    It's interesting that you got things working using Energia without removing R9. Did the Energia sketch include touch capability?

    I have been looking at the EK-TM4C123GXL and BOOSTXL-K350QVG-S1 without removing R9 and R10 (since don't currently have the ability to remove surface mount components).

    Of the resistors on the EK-TM4C123GXL:

    - R9 shorts PB6 (not used on the display) and PD0 (used for the display TOUCH_YP).
    - R10 shorts PB7 (used for the display LCD_SDI) and PD1 (used for the display TOUCH_XP).

    Given the above understand that the touch screen won't be usable without removing R10. Initially just tried to comment out the touch screen code from the grlib_demo but just got a white screen (with the backlight turned on).

    From the BOOSTXL-K350QVG-S1 schematic there is a 10nF from each of the touch screen signals to ground. Therefore, even with the code not attempting to use the TMC123 pins for the the touch screen, leaving R10 installed still slows down the edges for the display transmit data due to the 10nF to ground (via the TOUCH_XP signal).

    The grlib_demo configures the SSI2 clock for 10 MHz and leaves the pins at the default 2mA drive strength. By a combination of increasing the PB7 drive strength to 8mA and reducing the SSI2 clock to 1 MHz was able to get the grlib_demo without touch screen support to correctly draw to the BOOSTXL-K350QVG-S1.

    The combinations of settings was trial-and-error, if leave the drive strength at 8mA but try a 2 MHz SSI2 clock the display is not drawn correctly.

    The modified grlib_demo is attached.

    EK-TM4C123GXL_grlib_demo_no_touch_no_resistors_remove.zip

  • Greetings,

    Chester Gillon said:
    don't currently have the ability to remove surface mount components).

    Feel your pain - yet:

    • application of absorbent 'solder wick' (to each end of the Plague-istor)
    • followed by gentle pressure of the solder iron (< 10W, ideally) should 'slide' the smt resistor from the pcb's 'hold'

    Upping the current output of (especially) the SPI Clock is indicated.

    However - running @/around '1MHz SPI' is 'Sure to Annoy' the 'Rapidly Overtaking Turtle Herd'    (famed for over-use of their Halogen Hi-Beams!)

  • Hello Jack,

    Jack Summers11 said:
    I removed R9, opened and loaded the grlib_demo program from tivaware.  Unfortunately, this still gives me a blank, dark screen.

    Which version of TivaWare do you have? 2.1.4.178? Are you sure you got the project for the EK-TM4C123GXL? There are two folders for the Kentac display. You want the ek-tm4c123gxl-boostxl-kentec-s1 folder.

    Jack Summers11 said:
    The program compiled and loaded without errors but it does give a warning saying that it was made using a compiler that is not installed on my computer.  Dont know if that had any effect or not.

    That won't have an effect, it will use a different suitable compiler.

  • I dont know what the final problem was but it is working now.  I opened CCS in a new folder and opened the grlib demo.  Working fine. 

    Thanks to everyone who helped me with this.

    Jack