This thread has been locked.

If you have a related question, please click the "Ask a related question" button in the top right corner. The newly created question will be automatically linked to this question.

EK-TM4C1294XL: sending 1 byte of data between 2 i2c ports

Part Number: EK-TM4C1294XL

Hello. I am doing a university lab project regarding i2c communications. We are not allowed to use any of the build in libraries. We must write everything at the GPIO level using the datasheet. 

I have configured I2C0 as the master and I2C3 as the slave. I am trying to send a single byte of data from 1 to the other, but i am not having any success. Using the built in library, I was able to successfully transmit in loopback mode from the master i2c0 back to itself, but doing things manually is not working.

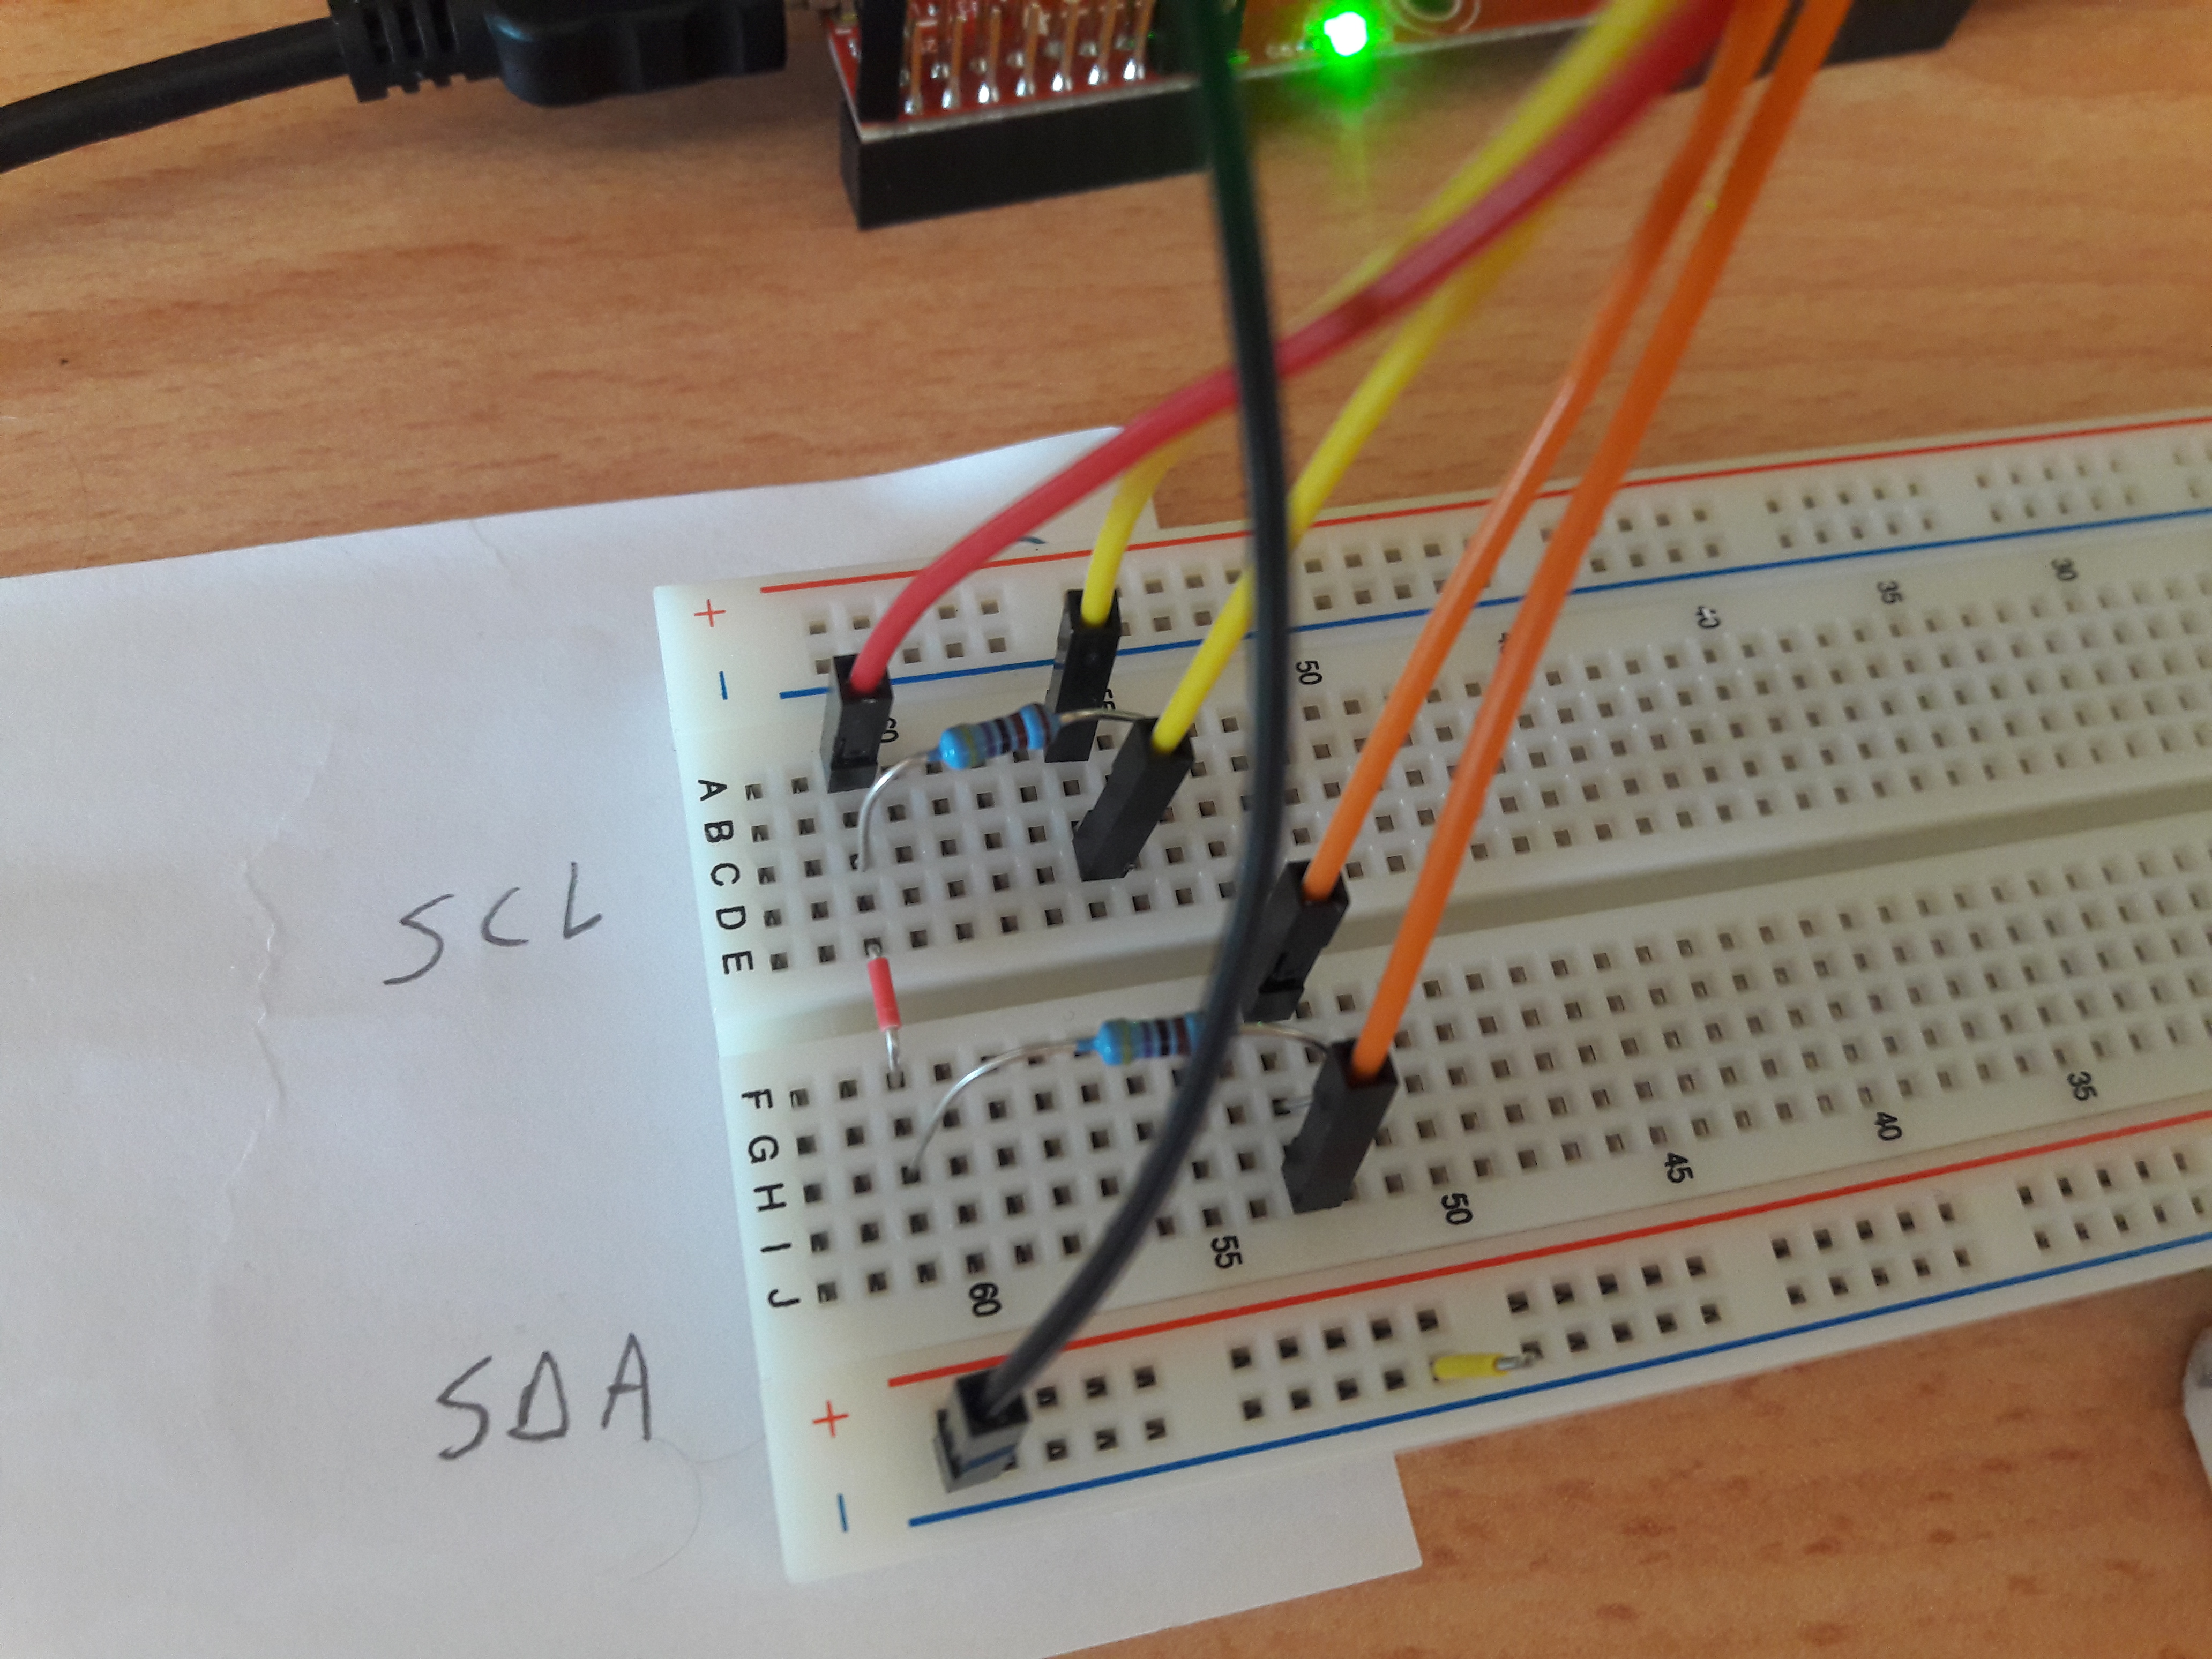
Here is my code configuring the I2C ports. I configured 4 ports, thinking I can communicate between them:

void I2C_Init(void){
  SYSCTL_RCGCI2C_R |= 0x000F;               // activate I2C0, I2C1, I2C2, I2C3
  SYSCTL_RCGCGPIO_R |= 0x0642;              // activate ports B(I2C0), G(I2C1), L(I2C2) K(I2C3)
  while((SYSCTL_PRGPIO_R&0x0642) == 0){};   // ready?

  GPIO_PORTB_AHB_AFSEL_R |= 0x0C;           // 3) enable alt funct on PB2,3
  GPIO_PORTG_AHB_AFSEL_R |= 0x03;           // 3) enable alt funct on PG0,1
  GPIO_PORTL_AFSEL_R |= 0x03;               // 3) enable alt funct on PL0,1
  GPIO_PORTK_AFSEL_R |= 0x30;               // 3) enable alt funct on PK4,5
  GPIO_PORTB_AHB_ODR_R |= 0x08;             // 4) enable open drain on PB3 only
  GPIO_PORTG_AHB_ODR_R |= 0x02;             // 4) enable open drain on PG1 only
  GPIO_PORTL_ODR_R |= 0x02;                 // 4) enable open drain on PL1 only
  GPIO_PORTK_ODR_R |= 0x10;                 // 4) enable open drain on PK4 only
  GPIO_PORTB_AHB_DEN_R |= 0x0C;             // 5) enable digital I/O on PB2,3
  GPIO_PORTG_AHB_DEN_R |= 0x03;             // 5) enable digital I/O on PG0,1
  GPIO_PORTL_DEN_R |= 0x03;                 // 5) enable digital I/O on PL0,1
  GPIO_PORTK_DEN_R |= 0x30;                 // 5) enable digital I/O on PK4,5

  GPIO_PORTB_AHB_PCTL_R |= 0x00003300;      // 6) configure PB2,3 as I2C
  GPIO_PORTG_AHB_PCTL_R |= 0x00000033;      // 6) configure PG0,1 as I2C
  GPIO_PORTL_PCTL_R |= 0x00000033;          // 6) configure PL0,1 as I2C
  GPIO_PORTK_PCTL_R |= 0x00330000;          // 6) configure PK4,5 as I2C
  GPIO_PORTB_AHB_AMSEL_R &= ~0x0C;          // 7) disable analog functionality on PB2,3
  GPIO_PORTG_AHB_AMSEL_R &= ~0x03;          // 7) disable analog functionality on PB2,3
  GPIO_PORTL_AMSEL_R &= ~0x03;              // 7) disable analog functionality on PB2,3
  GPIO_PORTK_AMSEL_R &= ~0x30;              // 7) disable analog functionality on PB2,3
  
  I2C0_MTPR_R = 0x07;                       // 8) configure for 100 kbps clock TPR = 7 for 16MHz clock freq TPR = (SYSCLKFREQ/(20*SCLCLKSPEED))-1 = (16MHz/(20*100K))-1
  I2C3_MTPR_R = 0x07;                       // 8) configure for 100 kbps clock TPR = 7 for 16MHz clock freq TPR = (SYSCLKFREQ/(20*SCLCLKSPEED))-1 = (16MHz/(20*100K))-1
}

Here is my main function:

#define SLAVE_ADDRESS 0x76

void main(void)
{
    uint8_t dataTx;
    uint8_t dataRx;

    InitConsole();
    UARTprintf("Initializing I2C\n");
    I2C_Init();
    UARTprintf("Done initializing!");
    I2C0_MCR_R = 0x10;                  //master function enable for I2C0
    I2C0_MSA_R = SLAVE_ADDRESS>>1;      //set slave address that the master will write to
    I2C3_MCR_R = 0x20;                  //enable i2c3 as slave
    I2C3_SCSR_R = 0x01;                 //enable i2c3 as a slave
    I2C3_SOAR_R = SLAVE_ADDRESS>>1;     //set i2c3 slave address
    dataTx = 0x11;
    UARTprintf("Tranferring from: Master -> Slave\n");


    I2C0_MDR_R = dataTx;                //place data to transmit in the MDR register of the master

    I2C0_MCS_R = 0x07;                  //initialzes transmit of 1 byte of data from master to slave
    while(I2C0_MCS_R & 0x01);           //wait until master bus is no longer busy 
    dataRx=I2C3_SDR_R;                  //read data from the slave data register

    UARTprintf("Received: '%c'\n", dataRx); //print data

    while(1){};

}

I have a couple of problems here.

First, is everything configured correctly? I think my INIT function is correct, but I am more concerned with how I have configured the master and slave. I want I2C0 as master on pins PB2,3 and I2c3 as slave on pins PK4,5.

Second. When I write I2C0_MDR_R = dataTx; the Master data register(MDR) value in the debugger stays the same. It does not update to the value of 00010001, which is what I want to send. Is that normal??

I don't see any error readings in the I2C0MCR register. It becomes 0x01 momentarily and then back to idle state, which is what I expect. 

The output from the console is:

Initializing I2C
Done initializing!
Tranferring from: Master -> Slave
Received: ' '

The data read is always zero, I assume because the master data register always reads 0?? transmission is occurring, but only with a 0 as the load. Any ideas here, or can i provide any more information??

void I2C_Init(void){  SYSCTL_RCGCI2C_R |= 0x000F;               // activate I2C0, I2C1, I2C2, I2C3  SYSCTL_RCGCGPIO_R |= 0x0642;              // activate ports B(I2C0), G(I2C1), L(I2C2) K(I2C3)  while((SYSCTL_PRGPIO_R&0x0642) == 0){};   // ready?
  GPIO_PORTB_AHB_AFSEL_R |= 0x0C;           // 3) enable alt funct on PB2,3  GPIO_PORTG_AHB_AFSEL_R |= 0x03;           // 3) enable alt funct on PG0,1  GPIO_PORTL_AFSEL_R |= 0x03;               // 3) enable alt funct on PL0,1  GPIO_PORTK_AFSEL_R |= 0x30;               // 3) enable alt funct on PK4,5  GPIO_PORTB_AHB_ODR_R |= 0x08;             // 4) enable open drain on PB3 only  GPIO_PORTG_AHB_ODR_R |= 0x02;             // 4) enable open drain on PG1 only  GPIO_PORTL_ODR_R |= 0x02;                 // 4) enable open drain on PL1 only  GPIO_PORTK_ODR_R |= 0x10;                 // 4) enable open drain on PK4 only  GPIO_PORTB_AHB_DEN_R |= 0x0C;             // 5) enable digital I/O on PB2,3  GPIO_PORTG_AHB_DEN_R |= 0x03;             // 5) enable digital I/O on PG0,1  GPIO_PORTL_DEN_R |= 0x03;                 // 5) enable digital I/O on PL0,1  GPIO_PORTK_DEN_R |= 0x30;                 // 5) enable digital I/O on PK4,5
  GPIO_PORTB_AHB_PCTL_R |= 0x00003300;      // 6) configure PB2,3 as I2C  GPIO_PORTG_AHB_PCTL_R |= 0x00000033;      // 6) configure PG0,1 as I2C  GPIO_PORTL_PCTL_R |= 0x00000033;          // 6) configure PL0,1 as I2C  GPIO_PORTK_PCTL_R |= 0x00330000;          // 6) configure PK4,5 as I2C  GPIO_PORTB_AHB_AMSEL_R &= ~0x0C;          // 7) disable analog functionality on PB2,3  GPIO_PORTG_AHB_AMSEL_R &= ~0x03;          // 7) disable analog functionality on PB2,3  GPIO_PORTL_AMSEL_R &= ~0x03;              // 7) disable analog functionality on PB2,3  GPIO_PORTK_AMSEL_R &= ~0x30;              // 7) disable analog functionality on PB2,3  //I2C0_MCR_R = I2C_MCR_MFE;      // 9) master function enable for I2C0  I2C0_MTPR_R = 0x07;                       // 8) configure for 100 kbps clock TPR = 7 for 16MHz clock freq TPR = (SYSCLKFREQ/(20*SCLCLKSPEED))-1 = (16MHz/(20*100K))-1  I2C3_MTPR_R = 0x07;                       // 8) configure for 100 kbps clock TPR = 7 for 16MHz clock freq TPR = (SYSCLKFREQ/(20*SCLCLKSPEED))-1 = (16MHz/(20*100K))-1}

  • Hello Jacob,

    Jacob Seal said:
    I am doing a university lab project regarding i2c communications. We are not allowed to use any of the build in libraries. We must write everything at the GPIO level using the datasheet. 

    Unfortunately we do not support direct register programming for TM4C on the E2E forums as stated on our forum guidelines: https://e2e.ti.com/support/microcontrollers/other/f/908/t/695568

    Jacob Seal said:
    Using the built in library, I was able to successfully transmit in loopback mode from the master i2c0 back to itself, but doing things manually is not working.

    This is a good first step! What I would recommend for you to do from this setup is review how the functions you used to succeed at this actually modify the registers then. For each function call, you can look into how the driverlib code actually manipulates the registers, and based on that, you can build the code for your project.

    I would also strongly recommend to start a bit simpler with your configuration. Rather than four I2C channels, configure only two. This leaves you with less room for error on the configuration itself.

    Also,

    Jacob Seal said:
        I2C3_SCSR_R = 0x01;                 //enable i2c3 as a slave

    The comments here don't make much sense, SCSR should be read only and doesn't have such a configuration inside. Check what you are trying to do carefully here. Maybe this is where an issue lies?

  • Hello Ralph,

    You (just) beat our (thus far) "virus-Free" group to the punch!   (we were responding to US Export Restrictions)

    Ralph Jacobi said:
    I would also strongly recommend to start a bit simpler with your configuration. Rather than four I2C channels, configure only two. This leaves you with less room for error on the configuration itself.

    While (apparently) banned here - staff well notes such advice as, "KISS!"   Adding excess - especially prior to (anything) being "Test/Verified" - makes NO Sense!   (Invites ERROR!)

    Is it not "interesting" that poster is "Not Allowed" to deploy the "Modern, Efficient, Well Investigated API" ... AND that he is additionally (apparently) "Not Allowed" to Seek RESCUE from the ordering party demanding that "old world" (error prone & takes forever) long outmoded method?

    Always the (UNTRUE) claim is made that "Register Manipulation Alone" aids learning - yet if (at all) true - how to explain almost all such users "Crash/Burning" - then winding up (broken & bloodied) here?

    Gaining basic "Register Understanding" can be achieved WHILE EMPLOYING the API - one method does not have to "completely disallow" the other!    

    The "clearly predictable" consequence of such "Archaic Learning" is the dilution of (necessary) Problem Solving Skills (caused inevitably by the "expanse of time" which Register Coding Alone demands) - which will have MAJOR IMPACT upon students' "Gaining & then Maintaining" Technical Employment downstream!

  • Hello Ralph. Thank you for the response. I have taken your advice and used the internal i2c API to configure 2 I2C ports. I want these 2 ports to be able to communicate with each other. Is this possiblle??

    So far, the only successful communications that I can make are with loopback mode so I2C0 is talking to itself. I have created a new program with the built in API. I have begun with the i2c_loopback example provided in the TivaWare download, and I have added another I2C port and modified the code for communication between the 2. I have had a look at each API function and I believe that I understand everything, yet It is still not working.

    Here is the essential portion:

    CONFIGURATION:

    #define SLAVE_ADDRESS 0x76
    
        // The I2C0 and I2C3 peripheral must be enabled before use.
        //
        SysCtlPeripheralEnable(SYSCTL_PERIPH_I2C0);
        SysCtlPeripheralEnable(SYSCTL_PERIPH_I2C3);
    
        
        // For this example I2C0 is used with PortB[3:2].  I2C3 is used with portK[5:4]
        
        
        SysCtlPeripheralEnable(SYSCTL_PERIPH_GPIOB);
        SysCtlPeripheralEnable(SYSCTL_PERIPH_GPIOK);
        
        // Configure the pin muxing for I2C0 functions on port B2 and B3.
        // Also for I2C3 on port K4 and K5
        GPIOPinConfigure(GPIO_PB2_I2C0SCL);
        GPIOPinConfigure(GPIO_PB3_I2C0SDA);
        GPIOPinConfigure(GPIO_PK4_I2C3SCL);
        GPIOPinConfigure(GPIO_PK5_I2C3SDA);
    
        //
        // Select the I2C function for these pins.  This function will also
        // configure the GPIO pins pins for I2C operation, setting them to
        // open-drain operation with weak pull-ups.  
        GPIOPinTypeI2CSCL(GPIO_PORTB_BASE, GPIO_PIN_2);
        GPIOPinTypeI2C(GPIO_PORTB_BASE, GPIO_PIN_3);
        GPIOPinTypeI2CSCL(GPIO_PORTK_BASE, GPIO_PIN_4);
        GPIOPinTypeI2C(GPIO_PORTK_BASE, GPIO_PIN_5);
    
        
        // Enable and initialize the I2C0 master module.  Use the system clock for
        // the I2C0 module.  The last parameter sets the I2C data transfer rate.
        // If false the data rate is set to 100kbps and if true the data rate will
        // be set to 400kbps.  For this example we will use a data rate of 100kbps.
        //
    #if defined(TARGET_IS_TM4C129_RA0) ||                                         \
        defined(TARGET_IS_TM4C129_RA1) ||                                         \
        defined(TARGET_IS_TM4C129_RA2)
        I2CMasterInitExpClk(I2C0_BASE, ui32SysClock, false);
    #else
        I2CMasterInitExpClk(I2C0_BASE, SysCtlClockGet(), false);
    #endif
    
        
        // Set the slave device to SLAVE_ADDRESS.
        //
        I2CSlaveInit(I2C3_BASE, SLAVE_ADDRESS);     //i2cSlaveInit also calls I2CslaveEnable()
    
        //
        // Tell the master module what address it will place on the bus when
        // communicating with the slave.  Set the address to SLAVE_ADDRESS
        // (as set in the slave module).  The receive parameter is set to false
        // which indicates the I2C Master is initiating a writes to the slave.  If
        // true, that would indicate that the I2C Master is initiating reads from
        // the slave.
        //
        I2CMasterSlaveAddrSet(I2C0_BASE, SLAVE_ADDRESS, false);

    Now the reads and writes:

        // Initalize the data to send.
        
        pui32DataTx = 'I';
    
    
        // Initalize the receive buffer.
        
        pui32DataRx = 0;


        // Console message indicating the direction of the data.
        
        UARTprintf("Tranferring from: Master I2C0 -> Slave I2C3\n");
    
        //**************************************************************************
        // Send 1 peice of I2C data from the master to the slave.
        //
    
            //
            // Display the data that the I2C0 master is transferring.
            //
            UARTprintf("  Sending: '%c'  . . .  ", pui32DataTx);
    
            //
            // Place the data to be sent in the data register
            //
            I2CMasterDataPut(I2C0_BASE, pui32DataTx);
    
            //
            // Initiate send of data from the master.
            //
            I2CMasterControl(I2C0_BASE, I2C_MASTER_CMD_SINGLE_SEND);
    
            //
            // Wait until the slave has received and acknowledged the data.
            //
            while(!(I2CSlaveStatus(I2C3_BASE) & I2C_SLAVE_ACT_RREQ)) 
            //************************************************************HANGING UP HERE
            {
            }
    
            // Read the data from the slave.
            
            pui32DataRx = I2CSlaveDataGet(I2C3_BASE);
    
            
            // Wait until master module is done transferring.
            
            while(I2CMasterBusy(I2C0_BASE))
            {
            }
    
            
            // Display the data that the slave has received.
            
            UARTprintf("Received: '%c'\n", pui32DataRx);


    The program is hanging at the while loop indicated in the code comments above.

    The I2C master control status register I2C0_MCS is reading 0X01 and staying that way, indicating the the controller is busy.
    The I2C3_SCSR just stays all 0x00. It never changes to 0x01 indicating new data has been received.
    From here the program does not advance.

    Another concern is that even with this method of using these functions, the MDR always remains 0. Is the data that I am putting in this register not visible in the debugger??

    Is what I am attempting to do impossible or am I really misunderstanding something??

    Do I need any kind of hardware setup for this?? I have connected the SCL and SDA pins from PortB and PortK using jumper wires and that did not change anything. I do not have any other I2C devices to test
    with so my great hope is that I can share messages between 2 internal I2C ports as a first step towards a larger project.
    Thank you for any insights that you may have.

  • The program is hanging at the while loop indicated in the code comments above.


    The I2C master control status register I2C0_MCS is reading 0X01 and staying that way, indicating the the controller is busy.
    The I2C3_SCSR just stays all 0x00. It never changes to 0x01 indicating new data has been received.
    From here the program does not advance.

    Another concern is that even with this method of using these functions, the MDR always remains 0. Is the data that I am putting in this register not visible in the debugger??

    Is what I am attempting to do impossible or am I really misunderstanding something??

    Do I need any kind of hardware setup for this?? I have connected the SCL and SDA pins from PortB and PortK using jumper wires and that did not change anything. I do not have any other I2C devices to test
    with so my great hope is that I can share messages between 2 internal I2C ports as a first step towards a larger project.
    Thank you for any insights that you may have.


  • I don't disagree, but this is what the assignment is...so if I want to pass I just have to do it this way. 

    At this point I would be happy just to have it working at all!

  • Feel your pain - our tech group has (no) problem w/you - yet immense displeasure w/those who so constrict your methods!

    Have you installed "Pull-Up Resistors?"    Values between 4K7-10K should work well - prove always helpful.

    We are not "fans" of loopback - you far better duplicate the "Real World" by interconnecting  2 individual I2C Ports - in their normal mode.   (in some cases - such "loopback" prevents (necessary) signal monitoring - and again is outside normal - I2C Port to Port usage!)

    Have you access to a scope and/or logic analyzer?    Once again - those dictating your methods should have anticipated, "Standard Diagnostic Procedures & Equipment Needs!"    Most any Serial Port Debug proves difficult & time-consuming w/out your ability to "see" the impact of each "Function Call."    My group believes you will optimally benefit from seeing "real signal output" as opposed to "fleeting Register Values!"    (they've not proved too helpful - is that not true?)

    Insure that your interconnects (really) make it to the correct pins & that the pair of external pull-up resistors (to 3V3) are present ... Good Luck.

  • Hello there. Thank you for your continued support here. The university is closed(classes are online now) so I don't have access to ANY hardware or scopes. All the stores are closed so I can't really get resistors either.....I can try online, but the UNI may open again before they even arrive. They sent me home with the eval kit and a UART cable and I have this work to accomplish.

    My main task is actually to write my own I2C driver for the TM4C, so I am trying to get some communication happening by the API so I can analyze what needs to be in my driver. I dont have much time to do it, so I really want to see a successful communication. Just a single transmission is probably enough for me to get started.

    Currently, I have attached I2c0 and I2c3 by just simple jumper wires. PB2 connected with PK4 and PB3 connected with PK5. So, I would just then use a resistor on each pair which is connected to 3v3 to pull up to a proper high value, correct?? I may try a digikey order and see if something can come quickly.

    I also have a USB to I2C converter. It may be easier or more possible for me to just use that and send a message from I2C0 to something like RealTerm. Have you any experience with that?? 

    SO, then my code above looks OK to you? It seems to be a hardware issue?

    Thanks again. 

  • Hello Jacob,

    Jacob Seal said:
    The university is closed(classes are online now) so I don't have access to ANY hardware or scopes. All the stores are closed so I can't really get resistors either..... They sent me home with the eval kit and a UART cable and I have this work to accomplish.

    That seems INCREDIBLY unreasonable. 

    The pull-up resistors are mandatory for I2C. If you cannot get them easily, then you need to tell your professor (and if needed engineering department) that the assignment is impossible to complete without access to proper supplies. Digikey order can be your last resort here but it should not be your responsibility to do so if they assigned you this specific project.

    Conversely though if you chose I2C for this assignment without their direction - you may just want to use SPI instead where you don't need added hardware.

    Also barring students from scopes to do debug for communication interfaces like I2C is not remotely fair. No where in industry will anyone ever expect you to do such a thing. I would raise this complaint too.

    IIRC one option for students is this: https://store.digilentinc.com/analog-discovery-2-100msps-usb-oscilloscope-logic-analyzer-and-variable-power-supply/ - I believe university students get a special price of $99. At least that is what my university used for many years, I don't think they changed so that should be valid.

    Jacob Seal said:
    SO, then my code above looks OK to you? It seems to be a hardware issue?

    I don't think either cb1 or myself has looked at the code in detail. At least not until the known hardware issue is resolved. If it still doesn't work with pullups installed, we can have a closer look then.

  • Thanks Ralph. That scope is amazing! I wish I could have known about that sooner.  At this point it's a last resort, but it's good to know it's there. 3 years ago I would have bought it for sure.

    I just put in an amazon order for a resistor pack assortment that should come on Monday. The UNI will re-imburse that. Of course, everything closed very quickly(with only 4 hours notice) and I appreciate that they are trying to salvage the semester instead of cancelling everything. The doors are closed. Not even professors can get in so there is no way for me to get any more hardware without buying it myself. It's just really made everything a PITA, as you can imagine.

    Anyway, unreasonable expectations are kind of normal to me now. Complaining will not help; although, I appreciate your sympathies.....lol.

    So, once the hardware issue is sorted I will update this post. Hopefully on Monday, but more likely Tuesday.

  • Hello Ralph & (so poorly - uni guided) poster,

    As Vendor Ralph has noted - we've not "deep dived into your code."   And it is gratifying to see the vendor here generally agree w/the apparent "Lack of Care/Concern" evidenced by your instructor!    That's a central concern - rendered vital due to these unexpected health conditions!

    Without a scope or logic analyzer you must become especially resourceful.   My staff (many likely your age or bit older) suggest:

    • both Digikey & Mouser claim they are open/shipping .   Purchase at least 5, 4K7-10K resistors.   (pull-up Rs)
    • additionally purchase 2 Leds (ideally red) & several resistors in the range of 100-270Ω.   (these serve as a crude signal monitor - you must place the resistor between the MCU pin & Led to "limit current")
    • *** you may monitor the output from (both) your I2C Port's SDA & SCL pins [both configured as Open Drain] by connecting each to another MCU GPIO pin - configured as digital input.   Run your I2C at the slowest rate (100KHz) - you must devise code to read your SDA monitored "digital input pin" - immediately after the arrival of the proper SCL clocked edge.   An interrupt works well here - hopefully you are skilled w/those.   (that interrupt will transfer the "just read port pin's value" to sram.)   After the function call executes - you may examine the "10 or so" sram locations - to reveal what has been output via SDA!   (extra credit - after the first of SDA's bit arrival - shift the result 1 position - this will enable you to accumulate up to "32 reads" - w/in ONE SRAM location!)   My group has done this...
    • while many engineering students are (somewhat) "loners" - you should contact fellow students - determine if "they" have (either) Scope and/or component access!

    Is it not "telling" that 2 "School Outsiders" have expended far more time/effort in your behalf - than your hallowed uni?

  • All great ideas! Yes, I am very experienced with interrupts so that configuration should not be an issue. Resistors are coming on Monday. I will see about LED'S as well. I live about 400 miles from my university so I have no other students close to me. 

    """"""Is it not "telling" that 2 "School Outsiders" have expended far more time/effort in your behalf - than your hallowed uni?""""""

    Oh man I have so much to say about that....lol. If you are ever in my neck of the woods I will tell you over a beer or two. Ralph is invited too. 

  • Thank you - appreciated.

    Young staff - motivated by my (rare) "dirty look" (most always I'm the recipient of those) have "Added in highlight to your aid!"    And color coded to further "capture your attention."   Reveals one post back!

    Small Tech firms MUST encourage "Resourcefulness" - as we "Eat only that which we Kill."    (Almost - so long as we "Beat the Stock-Market" - Investors insure our "back-room doors" remain open.)

  • OK gentlemen. I got some resistors in today and I have an update. First, here is my hardware setup with 4.7k resistors. The red cable brings in 3.3V from the board. Yellow line is SCL, Orange is SDA:

    photo

    Now when runnuing the code, I get the master MCS as 0x30, indicating arbitration has been lost! So, that is a change and maybe now points to a software issue.  The code is the same as from a few posts back. I am reading 3.3V with my multimeter over the resistors. 

    Any ideas here? I have been over the code with a fine tooth comb, and I cannot find any mistake as far as I understand the functions. I feel like I am missing something very simple.

  • Greetings,

    Pardon - but the brevity of today's post forces (added) effort upon your "Non-Uni" crack, remote staff!

    Understand vendor agents answer many requests - & my small group "seeks profits" - we assist here "as & when able!"    (thus clarity from those being assisted/guided operates MUCH to your advantage!)

    My group questions:

    • are you employing two separate I2C modules (w/in the same MCU)?
    • are you employing "loopback?"   We prefer that you/others avoid loopback - the signal coupling & presentation to the outside world may not be "normal/customary."
    • have you configured one I2C module (and only one) as the master?    (& the other as slave?)
    • you report "Arbitration Lost" - yet is that not (almost always) confined to "Multi-Master" operation?   You should NOT be starting w/2 Masters.   (huge breach of KISS!)

    While added work for you - if you could properly present your most recent code (i.e. really "checked" code) my group would be saved from "circling back" - and could better devote (further) time & energy to your code...

  • Hello Hello again. I2c0 is configured as master and I2c3 as slave. I am not using loopback mode. Definetely don't have 2 masters. 

    The code is coming in the following post!

    In short, I have been assigned this as a special project by my Uni as part of my program. The university is closed for at least 2 more weeks maybe a month. The assigning professor does not have the equipment at home and he has never used this board before....so he is only of limited help. I have been tasked with figuring it all out and writing a customized I2C driver, which is difficult when I cannot get a simple byte to transfer. I have also remembered that I have an old Arduino nano that I can configure as a slave to try and read the sent byte from the TM4C. But I cannot find the USB cable to program it.....so another Amazon order is forthcoming. 

    But in the mean time, I really think I should be able to get 2 I2C ports on the Tm4c to communicate with one as master and one as slave.

    I am really sorry to keep bugging you, but I have nowhere else to go. I appreciate that you are doing what you can. We are given lots of projects as part of the program, but usually we have the support of the lab at the Uni. 

    Code is coming next:

  • CONFIGURATION:

    #define SLAVE_ADDRESS 0x76
    
        // The I2C0 and I2C3 peripheral must be enabled before use.
        //
        SysCtlPeripheralEnable(SYSCTL_PERIPH_I2C0);
        SysCtlPeripheralEnable(SYSCTL_PERIPH_I2C3);
    
        
        // For this example I2C0 is used with PortB[3:2].  I2C3 is used with portK[5:4]
        
        
        SysCtlPeripheralEnable(SYSCTL_PERIPH_GPIOB);
        SysCtlPeripheralEnable(SYSCTL_PERIPH_GPIOK);
        
        // Configure the pin muxing for I2C0 functions on port B2 and B3.
        // Also for I2C3 on port K4 and K5
        GPIOPinConfigure(GPIO_PB2_I2C0SCL);
        GPIOPinConfigure(GPIO_PB3_I2C0SDA);
        GPIOPinConfigure(GPIO_PK4_I2C3SCL);
        GPIOPinConfigure(GPIO_PK5_I2C3SDA);
    
        //
        // Select the I2C function for these pins.  This function will also
        // configure the GPIO pins pins for I2C operation, setting them to
        // open-drain operation with weak pull-ups.  
        GPIOPinTypeI2CSCL(GPIO_PORTB_BASE, GPIO_PIN_2);
        GPIOPinTypeI2C(GPIO_PORTB_BASE, GPIO_PIN_3);
        GPIOPinTypeI2CSCL(GPIO_PORTK_BASE, GPIO_PIN_4);
        GPIOPinTypeI2C(GPIO_PORTK_BASE, GPIO_PIN_5);
    
        
        // Enable and initialize the I2C0 master module.  Use the system clock for
        // the I2C0 module.  The last parameter sets the I2C data transfer rate.
        // If false the data rate is set to 100kbps and if true the data rate will
        // be set to 400kbps.  For this example we will use a data rate of 100kbps.
        //
    #if defined(TARGET_IS_TM4C129_RA0) ||                                         \
        defined(TARGET_IS_TM4C129_RA1) ||                                         \
        defined(TARGET_IS_TM4C129_RA2)
        I2CMasterInitExpClk(I2C0_BASE, ui32SysClock, false);
    #else
        I2CMasterInitExpClk(I2C0_BASE, SysCtlClockGet(), false);
    #endif
    
        
        // Enable and set the slave device to SLAVE_ADDRESS.
        //
     I2CSlaveEnable(I2C3_BASE);
    I2CSlaveInit(I2C3_BASE, SLAVE_ADDRESS); //i2cSlaveInit also calls I2CslaveEnable() // // Tell the master module what address it will place on the bus when // communicating with the slave. Set the address to SLAVE_ADDRESS // (as set in the slave module). The receive parameter is set to false // which indicates the I2C Master is initiating a writes to the slave. If // true, that would indicate that the I2C Master is initiating reads from // the slave. // I2CMasterSlaveAddrSet(I2C0_BASE, SLAVE_ADDRESS, false);

    Now the reads and writes:

        // Initalize the data to send.
        
        pui32DataTx = 'I';
    
    
        // Initalize the receive buffer.
        
        pui32DataRx = 0;


        // Console message indicating the direction of the data.
        
        UARTprintf("Tranferring from: Master I2C0 -> Slave I2C3\n");
    
        //**************************************************************************
        // Send 1 peice of I2C data from the master to the slave.
        //
    
           
            //
            // Place the data to be sent in the data register
            //
            I2CMasterDataPut(I2C0_BASE, pui32DataTx);
    
            //
            // Initiate send of data from the master.
            //
            I2CMasterControl(I2C0_BASE, I2C_MASTER_CMD_SINGLE_SEND);
    
            //
            // Wait until the slave has received and acknowledged the data.
            //
            while(!(I2CSlaveStatus(I2C3_BASE) & I2C_SLAVE_ACT_RREQ)) 
            //************************************************************HANGING UP HERE
            {
            }
    
            // Read the data from the slave.
            
            pui32DataRx = I2CSlaveDataGet(I2C3_BASE);
    
            
            // Wait until master module is done transferring.
            
            while(I2CMasterBusy(I2C0_BASE))
            {
            }
    
            
            // Display the data that the slave has received.
            
            UARTprintf("Received: '%c'\n", pui32DataRx);
  • Thank you - received - well answered & described.   

    My young staff believes:

    • I2CMasterControl() is the function which actually causes the data transfer via SDA - clocked by SCL
    • your "while(!(I2CSlaveStatus(I2C3_BASE) & I2C_SLAVE_ACT_RREQ))" has captured their attention

    We are reviewing past I2C code (although we use ARM MCUs from 4 different firms - and never use '129 here.)

    They'll be back shortly w/their recommendation...


  • Yes, they are correct about the I2CMasterControlFunction. It sends I believe an 0x07 to the master control register, which enables the the first 3 bits of the master control register. It enables the master and tells it to send a start and stop bit as part of the transaction.This is also the recommended value in the Tm4c documentation. There is a guide there to send a single byte which I followed to write this code.

    the while statement is indicating that the slave has not acknowledged the data, which I cannot understand.

    Thank you again. I hope for a swift and peaceful resolution to this conflict. 

    =). I am 40, BTW.....not a youngster. Not that it matters.

  • Back we are...

    Your code choice complies w/that our group has past used (w/LM3S, LX4F & '123).    Thus the set-up/config of the "Slave I2C Module" rises high upon the suspect list.

    *** Had you noted, " //i2cSlaveInit also calls I2CslaveEnable()"


    Is it proper to "Initialize the Slave PRIOR to Enabling it?"
  • I personally "hate" this forum "code organizer" - beyond my limited abilities.

    You have attempted to initialize the I2C Slave BEFORE Enabling the Slave ... can that be right?   (forum code organizer mangled my clear "Non-Code" cut-paste - forcing this added post.)

  • Eureka ...  (I'd trade you (ages) w/in a second!)

    Just recalled that the TM4C129 - due to its higher speed I2C capability - cannot employ the function you (properly) used!

    Again - you "hang" at, " "while(!(I2CSlaveStatus(I2C3_BASE) & I2C_SLAVE_ACT_RREQ))" 

    Vendor here has created a "contrived" function which "checks twice" - and only then is able to "exit this while loop!"    Pardon our "slowness" - yet the 129 has never interested us (so old, so slow, etc.) and I only recalled out of "Obligation to our few clients who employ it..."

    Use the forum search box - "I2C via TM4C129" - that should link to the "contrived" function....

  • the first thing that happens inside i2cSlaveInit() is a call to i2cSlaveEnable. 

    Originally I had i2cSlaveEnable directly before i2cSLaveInit but I didn't see the point in enabling twice, so I took it out. By my understanding, those calls are both done by simply calling i2cslaveinit. Anyway I tried again with manually calling i2cslaveenable and it didnt change anything. 

  • My staff keyed in upon the comment - which stated that, "INIT was to occur PRIOR to ENABLE!"   (INIT would "call" Enable - that's wrong!)

    You've missed our "latest/greatest" ... Issue Resolving Find!   GREEN STAMP - s'il vous plait.

    Forum Search Box (atop this page) will reveal "Contrived I2C Central" code "fix."

  • I am searching it now. Will update ASAP,

  • RESOLVED RESOLVED RESOLVED!!!!!!

    It actually wasn't THAT line of code, but your search thread also gave me the answer!

    The SYSCTLCLKSET() function actually doesnt work on the 1294....

    So I replaced that and VIOLA! Like magic it all works. It gave no errors or anything. 1.5 weeks of work due to 1 stupid little line of code that is not consistent across devices. Ugggh.

    Thanks for your help really!!!! If you ever come to Munich look me up and the beer and pretzels are on me!!

  • Youth (and beauty) before age!   (Young - mainly gurl staff beat you!)

    When polling for the I2CMasterBusy can you do the following. Basically wait for the Master to get busy and then wait for it to not be busy before doing the next set of transfer.

    while(!I2CMasterBusy(I2C8_BASE));

    while(I2CMasterBusy(I2C8_BASE));    // w/the 129 you need these 2 calls "back to back."

    Forum Search found:

    e2e.ti.com/.../331382

  • Thank you - however kindly do review that which my young staff found & presented.   (it IS possible that both corrections are/were required.)

    Have been to many trade shows in Munchen - always enjoyed it - & while in the U.S. Army (Nuremberg) always loved the towns & people.   Never tired of the Autobahn - and then returned to NYC - & 55MPH - MANY Tickets.   (911 did not react well to US speed limits... Cops rarely accepted that as my defense...)

    Must say - we are shocked that a German Uni. would "so abandon" & under-prepare you & student fellows.

    You are to be commended for "Pushing On" - Do practice KISS - it will "Speed, Ease & Enhance" your efforts.

  • Thanks! I will also implement the other code which you suggested. BUT it will have to be tomorrow. My dog just had a massive siezure and I currently sit at the emergency vet.

    This part of the world is great to live in. Wonderful people and great towns to visit. I normally enjoy these projects but I have to admit that this one was thrown together too quickly due to the corona shut down.

    But maaaaannn it sure feels good that I accomplished something in 1 week that should be done in 15 minutes.....Haha.

    That incompatible code came DIRECTLY from the i2c example programs that come with the Tivaware download for this exact board. Crazy that they don't work and there is not at least a code comment explaining it.

    Take care. I am sure I will talk with you again before this is all over. I have plenty more to do on what is a pretty big project.

  • Hi Jacob,

    Sorry I didn't get back to you sooner, but at least cb1 helped you out (as often is the case... he is quite good at out speeding us 'vendors' :) )

    Jacob Seal said:
    That incompatible code came DIRECTLY from the i2c example programs that come with the Tivaware download for this exact board. Crazy that they don't work and there is not at least a code comment explaining it.

    The I2C code you are referring to is probably from the 'peripherals' folder, right?

    If so, that was actually designed for TM4C123x, but as you identified, it doesn't work well with TM4C129x. I agree it should have been documented better.

    Honestly I am not certain we quite hit the mark on that with this upcoming update, so I don't know if new comments were added in directly into that file BUT... we have a new simple I2C example provided for the EK-TM4C1294XL LaunchPad specifically to show proper I2C operation for it, and that will be the go to reference for starting with I2C moving forward.

    I'll have to check on the peripheral files and submit a feature improvement for future releases if that wasn't addressed there (it mightve been, but I am not certain).

  • Thanks! Yep those are the code examples you are looking for! At least I learned something: When it's not the obvious stuff, dig into the stuff you didn't think it could be.

  • Just an FYI I put this in my code and the system hangs up on it. I removed it again and everything is working normally. The other thread mentions it is only necessary if there is a mismatch in clock speed. I wonder if I don't have that problem anymore since addressing the clock issue so I don't need that code?

    Anyway, I now have sent data from master to slave and back again from slave to master. It all seems to be sorted out. Thank you again gentlemen. 

  • Thank you - you are (beyond) responsive.

    Again - that "back to back" (while loop contrivance) was (& we believe remains) "Vendor recommended."   (for use ONLY w/heralded TM4C129.)

    ARM Cortex M4 MCUs these days reach to & exceed 200MHz while incorporating powerful Graphic Controllers & Camera sub-systems.    (thus our "No use for '129" - especially as it deviates from '123's past - highly successful API.)

    Promised API update appears to have (also) Contracted the Virus - hopefully it will 'recover' - & (maybe) provide a "real fix" for the (long known) "While Loop HANG" exhibited ONLY by the '129!

    Our firm's company "mutt" is an AKC German Shepherd - from Frankfurt stock!    (He's great @ Pick n Place operation - not so much at hand (paw) soldering...)    We hope your dog recovers - best to you & he/she...

  • Thank you very much! I think she is finished but we are gonna give her a few days to see if she improves. I have had her for 15 years and she has had a good life. We lost her sister last year. We also have a German Short-haired Pointer who is now 5 years old. Great dog! Smarter than me unfortunately. They all 3 traveled over with us from the USA.....that was an adventure. 

    One more general question. When using the CCS debugger to view register values, I can only find ports A through F. Whats up with that?? Am I not able to take a look at the values of port K in the debugger register view??? I searched the forums but I could not find a similar question. I can start a new thread if it's better, but I figure why clog up the forum with what is probably a dumb question. 

  • Hi Jacob,

    SO sorry to hear about your dog though it definitely sounds like she had a great and well traveled life.

    We actually prefer new threads for very different topics. Allows other users to better find issues when searching like you attempted to. Also it may require a different team to look into. Please make a new thread, thanks!

  • Thank you - appears that the "Dog-Human" bond was & is strong - beneficial to (both) man & beast...   Our shepherd is also (way) smarter than me - (never/ever "misses" a semi-colon!)   [or a meal...]

    As we employ ARM MCUs from many - our clients & investors would never allow any IDE other than "Vendor Agnostic."   Our choice is the "far more mature & capable" IDE from IAR - available w/Dongles enabling "multiple seats."   In this manner - we move quickly, easily, and UNIFORMLY between different vendors' ARM MCUs.   (including M0, M0+, M3 (past resident here) M4 & M7!)   Both clients & investors believe that "One & Only One MCU Source" proves "sub-optimal" - even if Free - especially if Free!

    Thus - my group is unable to assist w/your "invisible" Port.   In general -

    • has the mystery/hiding Port been properly enabled? 
    • Have you "properly told the IDE which device you are using?"
    • If vendor agents don't arrive (to your rescue) perhaps a quick post in the (ugh) CCS forum helps...

    Very "Long Shot" ... might your IDE be in TM4C123 mode - which does not include Port K?   Staff does recall "reading about" this issue (here) - but we had (no real) interest...