This thread has been locked.

If you have a related question, please click the "Ask a related question" button in the top right corner. The newly created question will be automatically linked to this question.

DRV8316C: Integration with DRV8316xEVM

Part Number: DRV8316C
Other Parts Discussed in Thread: DRV8316,

Hi,

Could you clarify the process to convert from DRV8316REVM [with DRV8316R motor driver IC] to DRV8316CTEVM [with DRV8316CT motor driver IC]?

My understanding is that we should follow this procedure:

  • Remove the existing (default) DRV8316R motor driver IC
  • Install the new (ordered: awaiting delivery) DRV8316CT motor driver IC
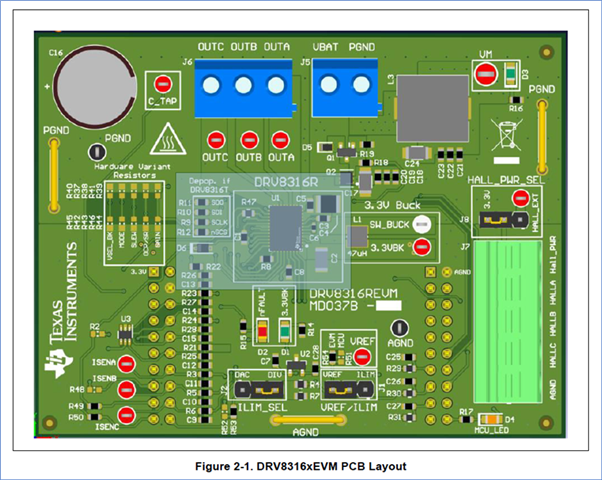
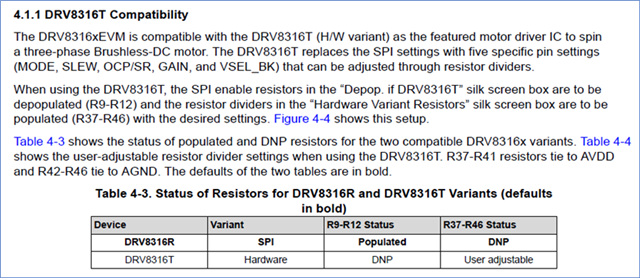
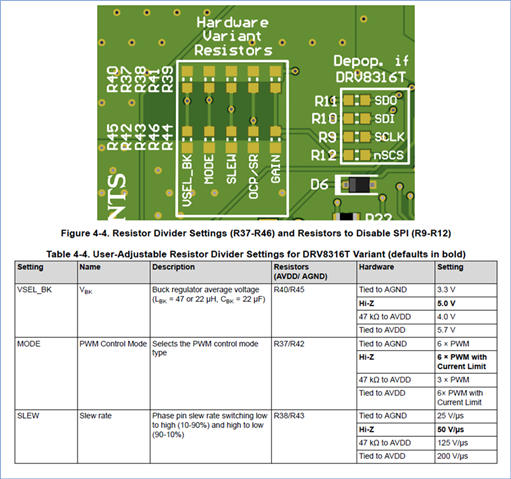
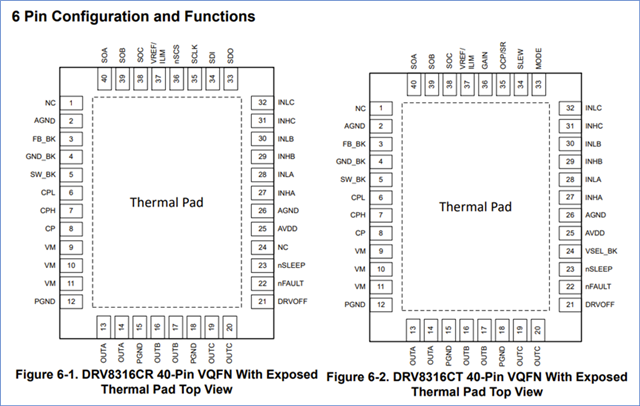
  • Remove R9, R10, R11, R12 [resistors]
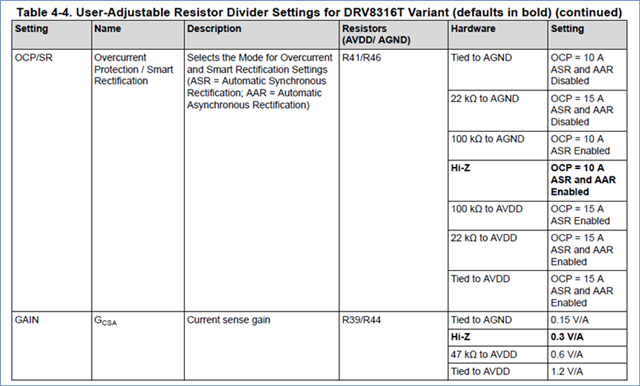
  • For our application, tie to AGND (not exactly sure how) R40 / R45 (VBK = 3.3 V) and R37 / R42 (PWM Mode = 6x)

  • Hi Eric,

    I think the schematic of the EVM might help you answer your questions

    you can find the Hardware files on ti.com: https://www.ti.com/tool/DRV8316REVM

    Let me know if this answers your question

    Regards,

    Yara

  • I also measured connectivity [and resistance] of the various R37-R45 pads, and it seems that the bottom-most pads associated with R42-R46 are tied to AGND. 

    So, for VBK = 3.3 V and PWM Mode = 6x [for example], jumpers need to installed at R45 and R42 [respectively] – R40 and R37 remain open (i.e., no pad-pad jumper). 

    This is now clear (question resolved), but now need to outsource for rework / reconfiguration as the 40-pin motor driver IC replacement requires specific equipment / tooling.