- Ask a related questionWhat is a related question?A related question is a question created from another question. When the related question is created, it will be automatically linked to the original question.
This thread has been locked.
If you have a related question, please click the "Ask a related question" button in the top right corner. The newly created question will be automatically linked to this question.
Tool/software:
Hi
I successfully built the RF430FRL152H SensorHub Project on the RF430FRLHEVM, but I’m having difficulty accessing the ADC0 value. I also need to read data from a digital sensor that communicates via I2C. I used open-source code from DigiKey (link attached below) to successfully retrieve the ADC0 value, but now I’m looking for a way to achieve the same with the digital sensor.
Digikey code (forum.digikey.com/.../12928)
Hi,
Please follow section 5 in the RF430FRL152HEVM User's Guide for the jumper configuration in order to run the SensorHub demo. In order to run the demo, you would need to:
- Change the jumper setting on the EVM as described in the User's Guide.
- Update the firmware for RF430FRL152H. The firmware can be downloaded from https://www.ti.com/tool/download/SLAC691/01.00.00.0F. The CCS project is called RF430FRL152H_SensorHub_Project.
- download the GUI application for the PC side as noted in the User's Guide.
- you also need the TRF7970ABP + MSP430G2553 which is the reader for which this demo is setup for.
- The firmware running on the reader (TRF7970ABP + MSP430G2553) will retrieve the Sensor Hub measurements and display them through the GUI display. If you don't have the TRF7970ABP + MSP430G2553 but rather a different MCU then you can reference the firmware and port to your MCU host. The firmware for the reader can be downloaded from MSP430G2 LaunchPad TRF7970A BoosterPack Host Control Binary
This application note RF430FRL152H NFC Sensor Tag Application Example With MSP430 Microcontrollers will be also useful.
Hi Charles
Thank you for your response. I’m not concerned with NFC communication right now. What I need is to view the digital sensor's reading as an expression in the CCS debugging window. For reference, DigiKey’s open-source code shows how to save the converted ADC0 value in mV as an expression, and I’m aiming to do something similar for the digital sensor.
Thank you so much for your help.
void main()
{
	WDTCTL = WDTPW + WDTHOLD;                   // Stop watchdog

    // ROM RF13M module setup ** The following three lines are needed for proper RF stack operation
    DS = 1; 									// ROM variable needs to be initialized here
    asm ( " CALL #0x5CDA "); 					// Call ROM function ( Initialize function pointers)
    asm ( " CALL #0x5CAC "); 					// Call ROM function ( Check part configuration)


	initISO15693(CLEAR_BLOCK_LOCKS);
	DeviceInit();

	SD14CTL0 = SD14EN + VIRTGND;
	SD14CTL1 = SD14UNI + SD14INTDLY0;


		while(1)
		{

			SD14CTL0 |= SD14SC;

			__delay_cycles(100);

			ADC_Value= SD14MEM0;


		ADC_Volts = ((ADC_Value >>8) *900)/(16383 >> 8);

			//Enter Low Power mode
			//__bis_SR_register(LPM3_bits + GIE);
		}
}
The sensors on the sensor hub can only be retrieved from the I2C interface. If you have downloaded the https://www.ti.com/tool/download/SLAC691/01.00.00.0F, you will find the RF430FRL152H_SensorHub_Project. Inside the project, refer to the DigitalSensorMeasurement() function. For example, to read the SHT21 temp sensor on SensorHub, DigitalSensorMeasurement() will call SHT_21_I2C_Master_Measurement(TEMP_MEASURE_HOLD_MASTER, temp_data) to read the the temp sensor. To read the humidity sensor, it will call SHT_21_I2C_Master_Measurement(HUMIDITY_HOLD_MEASUREMENT, temp_data). Inside the SHT_21_I2C_Master_Measurement() function, it will send the I2C command to retrieve the respective sensor measurement. Refer to the source code for details.
Thank you Charles. I’ve tried the following steps, and I hope you can help me resolve the issue:
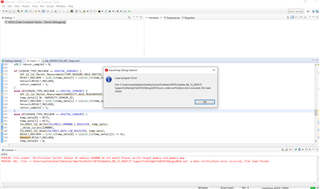
1) The Sensor_hub Project cannot be debugged because it lacks a main function (Pease see the 1st attached screenshot for reference).
2) I tried defining counter1 and counter2 to monitor their values and verify if the code continuously reads sensor data. However, I couldn’t retrieve these values because the suspend and resume options are unavailable (Debug mode isn't active.)(Pease see the 2nd attached screenshot for reference).
3) I found a thread (link attached) that suggested writing 0x39 to memory address 0xF87D to fix the debugging issue, but it didn’t work (Pease see the 3rd attached screenshot for reference). While I can now use the suspend and resume options, the debugging process is still flawed. The two counters remain unchanged (see the Expressions window), indicating they might be set to constant random values during initialization.
1st Screenshot
2nd Screenshot
3rd Screenshot
Thread
I think you need to read the RF430FRL152H Firmware User's Guide. Got to section 6.3 about reading external digital sensor. RF430FRL152H has firmware already stored in the ROM. However, the ROM firmware does not handle reading the external sensors on the Sensor Hub. You will need to add the custom code to read these sensors. This is why I referred you to the https://www.ti.com/tool/download/SLAC691/01.00.00.0F, the RF430FRL152H_SensorHub_Project. Did you read the comment in the source code? See below comments and also the function like SHT_21_I2C_Master_Measurement and also the associated linker command file. The ROM firmware will call your custom function such as SHT_21_I2C_Master_Measurement to read the temp sensor over the I2C interface from the Sensor Hub. The main function is inside the ROM firmware.
/**************************************************************************************************************************************************
* Code Space
***************************************************************************************************************************************************
* Please check the lnk_rf430frl152h_Driver.cmd file to customize how much code space is used for logging("FRAM")
* or for code ("DRIVER_CODE").
* Also for each new function, please use the following line before the function, to put the code in the correct section:
* #pragma CODE_SECTION (MyFunction, ".fram_driver_code") //also change MyFunction to the function name
**************************************************************************************************************************************************/
#pragma CODE_SECTION (SHT_21_I2C_Master_Measurement, ".fram_driver_code") //see .cmd file for details - all new firmware must go into fram_driver_code memory section spacevoid SHT_21_I2C_Master_Measurement(u08_t command, u08_t * rxData){ UCB0CTL1 |= UCSWRST; // Software reset enabled UCB0I2CSA = 0x0040; // I2C slave address of SHT21 //UCBCTL1 &= ~UCSWRST; // exit eusci reset
UCB0CTL1 &= ~UCSWRST; // put eUSCI out of reset mode UCB0CTLW1 = UCASTP_1; UCB0TBCNT = 0x0001; UCB0CTL1 |= UCTXSTT + UCTR; // start i2c write operation while(!(UCB0IFG & UCTXIFG0)); // wait until transmit is needed UCB0TXBUF = command; // send the command while(!(UCB0IFG & UCBCNTIFG)); // wait until the stop counter UCB0CTL1 &= ~UCTR; // read operation UCB0CTL1 |= UCTXSTT; // repeated start while(!(UCB0IFG & UCRXIFG0)); // wait until read data available rxData[0] = UCB0RXBUF; // read the MSB while(!(UCB0IFG & UCRXIFG0)); // wait until more data is available rxData[1] = UCB0RXBUF; // read the LSB UCB0CTLW0 |= UCTXSTP; // send stop after next byte while (!(UCB0IFG & UCRXIFG0)); // wait until more data is available //end of while loop
{ u08_t crc = UCB0RXBUF; // read the crc, currently not checked } while (!(UCB0IFG & UCSTPIFG)); // Ensure stop condition got sent UCB0CTL1 |= UCSWRST; // put I2C in reset mode
return;}
Thank you so much for your response.
I used the Sensor Hub project downloaded from https://www.ti.com/tool/download/SLAC691/01.00.00.0F (the file is attached below), then created a custom function to display the ADC0 value as adc_mV for initial debugging, also modified the cmd file accordingly, resulting in a successful build with no errors (My goal was to display the ADC0 value first, as I expected it to be around 500 mV, providing a reference point to determine whether I'm displaying the correct or incorrect values), as shown here.
/**************************************************************************************************************************************************
*   Code Space
***************************************************************************************************************************************************
*  Please check the lnk_rf430frl152h_Driver.cmd file to customize how much code space is used for logging("FRAM")
*  or for code ("DRIVER_CODE").
*  Also for each new function, please use the following line before the function, to put the code in the correct section:
*  #pragma CODE_SECTION (MyFunction, ".fram_driver_code") //also change MyFunction to the function name
**************************************************************************************************************************************************/

// Custom function to read ADC0 value using the SD14 ADC
#pragma CODE_SECTION(Custom_ADC0_Read, ".fram_driver_code")
void Custom_ADC0_Read(void)
{
    // Initialize SD14 settings
    SD14CTL0 = SD14EN + VIRTGND;         // Enable SD14, use virtual ground
    SD14CTL1 = SD14UNI + SD14INTDLY0;    // Unipolar mode, no delay

    // Start conversion
    SD14CTL0 |= SD14SC;
    while (SD14CTL0 & SD14SC);  // Wait for conversion to complete

    // Convert the SD14 value to mV
    uint16_t raw_value = SD14MEM0; // Read the raw conversion result
    adc0_mV = ((float)raw_value * 1200) / 16383; // Assuming a reference voltage of 1.2V and 14-bit resolution
}

/**************************************************************************************************************************************************
*   DigitalSensorInit
***************************************************************************************************************************************************
Then called this function within the DigitalSensorMeasurement function, as you can see.
#pragma RETAIN (DigitalSensorMeasurement)
#pragma CODE_SECTION (DigitalSensorMeasurement, ".fram_driver_code") //see .cmd file for details - all new firmware must go into fram_driver_code memory section space
u08_t DigitalSensorMeasurement ()
{
    u08_t temp_data[2];
    u08_t sensor_sampled = 0;

    if (SENSOR_TYPE_MAILBOX == DIGITAL_SENSOR1)
    {
        SHT_21_I2C_Master_Measurement(TEMP_MEASURE_HOLD_MASTER, temp_data);
        RESULT_MAILBOX = (u16_t)temp_data[1] + (((u16_t)(temp_data[0])) << 8);
        sensor_sampled = 1;
    }
    else if(SENSOR_TYPE_MAILBOX == DIGITAL_SENSOR2)
    {
        SHT_21_I2C_Master_Measurement(HUMIDITY_HOLD_MEASUREMENT, temp_data);
        temp_data[1] &= ~HUMIDITY_SENSOR_ID;
        RESULT_MAILBOX = (u16_t)temp_data[1] + (((u16_t)(temp_data[0])) << 8);
        sensor_sampled = 1;
    }
    else if(SENSOR_TYPE_MAILBOX == DIGITAL_SENSOR3)
    {
        temp_data[0] = BIT5;
        temp_data[1] = BIT1;
        ISL29023_I2C_Write(ISL29023_COMMAND_I_REGISTER, temp_data);
        __delay_cycles(220000);
        ISL29023_I2C_Read(ISL29023_DATA_LSB_REGISTER, temp_data);
        RESULT_MAILBOX = (u16_t)temp_data[0] + (((u16_t)(temp_data[1])) << 8);
        temp_data[0] = 0;
        temp_data[1] = 0;
        ISL29023_I2C_Write(ISL29023_COMMAND_I_REGISTER, temp_data);
        sensor_sampled = 1;
    }

    Custom_ADC0_Read(); // Call custom function to read ADC0 and store in adc0_mV

    return sensor_sampled;
}

/**************************************************************************************************************************************************
*   SHT_21_I2C_Master_Measurement
***************************************************************************************************************************************************
However, during the debugging process, the adc_mV value appears to be incorrect and seems to be constantly stuck at 31 mV (please refer to the first screenshot). I implemented the code from Digikey that was previously shared in this thread, and it correctly displays the ADC0 values as around 520 mV when exposed to light and 85 mV when the light is reduced by covering the sensor with my hand, accurately reflecting the light sensor’s readings (please refer to the 2nd and 3rd screenshots). Could you please help me figure out what’s going wrong?
Attachments:
-Sensor Hub project (Zip file)
- Sensor Hub modified (main.c)
- Sensor Hub modified (lnk_rf430frl152h_Driver.cmd)
-first screenshot
-2nd screenshot
-3rd screenshot
Thank you
My company blocks us from external share site. You can drag the image/file into the editing window in e2e.
The code you download from Digikey disables the ROM and it runs your custom application entirely off the FRAM with your own main(). In this mode (ROM being disable), The conversion result is saved to address 0x704.
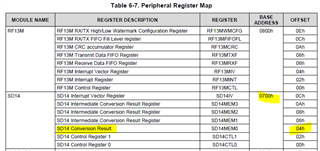
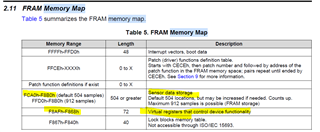
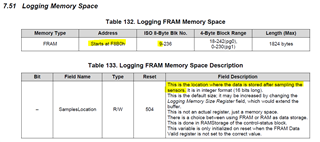
Since you base your project off the example project RF430FRL152H_SensorHub_Project, this project runs the firmware from ROM and branches to your custom functions stored in FRAM. When running from ROM, the ADC result as well as the general configuration of the device is done through the virtual register. In another word, the configuration of ADC0 is done through the virtual registers. Refer to Firmware User's Guide guide. This means the ADC result will be saved to block 9 in FRAM. Block 0-8 are storage for the various virtual registers.
Thank you, I appreciate it.
Do you have any simple code, similar to the Digikey example, for a digital sensor? I'd like to use it as a starting point (allowing me to debug and view the reading values as expressions during the process), as I’m feeling a bit lost after trying multiple approaches without success.
Appreciate your help
Main.c
#include <rf430frl152h.h>
#include <string.h>
#include "types.h"

//*****************************FUNCTION PROTOTYPES********************************/
void DeviceInit(void);
void initISO15693(u16_t parameters );
//********************************************************************************/

//*****************************ADC Variables**************************************/
unsigned int ADC_Value = 0;
volatile float ADC_Volts = 0;
//********************************************************************************/


//*****************************DEFINES *******************************************/
#define CLEAR_BLOCK_LOCKS                            	BIT3
#define FRAM_LOCK_BLOCK_AREA_SIZE  						38
#define FRAM_LOCK_BLOCKS								0xF840  //Address of ISO15693 lock blocks


#define ROM_EUSCI_SUPPORT_ENABLED       BIT2
#define EROM_EUSCI_SUPPORT_DISABLED     0
#define ROM_SENSOR_SUPPORT_ENABLED      BIT7
#define ROM_SENSOR_SUPPORT_DISABLED     0
#define	NFC_BRIDGE_DISABLED 			BIT6
#define	NFC_BRIDGE_ENABLED  			0
#define	EIGHT_BYTE_BLOCK    			BIT0
#define	FOUR_BYTE_BLOCK     			0
#define	FIRST_ISO_PAGE      			BIT1
#define	SECOND_ISO_PAGE     			0

/* Firmware System Control Byte
 *
 *     Bit 0: 	ISOBlockSize				0 - 4 byte,		1 - 8 byte
 *     Bit 1:	Page						0 - page 1, 	1 - page 0 (Effective only for 4-byte block mode)
 *     Bit 2: 	ROMEUSCISupportEnabled		0 - disabled, 	1 - enabled (Forced to 0 on RF430FRL153H)
 *     Bit 3-5: ReservedISO
 *     Bit 6: 	NFCBridgeDisable  			0 - enabled, 	1 - disabled (see note below)
 *     Bit 7:   ROMSensorSupportEnable		0 - disabled, 	1 - enabled (Forced to 0 on RF430FRL154H)
 *
 *     NFC bridge is recommended to be disabled in this project.  Unexpected behaviour can occur,
 *     trying to use it, due to the configuration being setup here.
 *
 *     If eUSCI host controller portion is needed along with the RF functionality, the default project
 *     must be used.  That is NFC cannot be supported in that application (because the I2C/SPI host controller
 *     control registers are in the same place that the NFC file needs to be).  However the rest of the FRAM
 *     memory can be used for storing and reading using ISO15693.
 */
#define FIRMWARE_CONTROL_ADDRESS 	0xF867
#pragma RETAIN(Firmware_System_Control_Byte);
#pragma location = FIRMWARE_CONTROL_ADDRESS
const u08_t Firmware_System_Control_Byte = ROM_SENSOR_SUPPORT_DISABLED + EROM_EUSCI_SUPPORT_DISABLED + NFC_BRIDGE_DISABLED + FOUR_BYTE_BLOCK + FIRST_ISO_PAGE; //0x7F,		// this value sets the firmware system control register

// ROM variables - DO NOT CHANGE !!!
// Declared to protect from use by compiler
/********************************************/
#pragma RETAIN(DS)
#pragma location = 0x1C00
u08_t DS;
#pragma RETAIN(RF)
#pragma location = 0x1C6A
const u08_t RF;
#pragma RETAIN(NRX)
#pragma location = 0x1CA4 //rx
const u08_t NRX[34];
#pragma RETAIN(NTX)
#pragma location = 0x1CC6 //tx
const u08_t NTX[33];
#pragma RETAIN(EL)
#pragma location = 0x1CF2
const u08_t EL;
#pragma RETAIN(PF)
#pragma location = 0x1C0A
const u16_t PF[48];
/********************************************/

#define NDEF_START_ADDRESS	0xF868
#pragma RETAIN(NFC_NDEF_Message);
#pragma location = NDEF_START_ADDRESS;																	// the location of the address
const u08_t NFC_NDEF_Message[21] = {
		// Most of the Android applications will not recognize this message as NDEF at this point, due to the
		// tag not being registered with Android NFC stack.  However ISO15693 RFID communication is supported.
		// Block 0
		0xE1, 		// NDEF Magic Number
		0x40, 		// Version Number, read/write access conditions
		0xF2,//F3*4/8 = 0x79  //0x7E,		// 1008 bytes / 8 = 126 blocks
		0x00,//extended memory //0x00,		// does not support read multiple blocks (limited to only 3 blocks)

		// Block 1
		0x03,		// NDEF Message present
		0x0B,		// Length , 11 bytes
		0xD1,		// Record header
		0x01,		// type length

		// Block 2
		0x07,		// Payload length
		0x55,		// Record Type U (URI)
		0x01, 		// URI header identifier
		0x74,		// 't'

		// Block 3
		0x69,		// 'i'
		0x2E,		// '.'
		0x63,		// 'c'
		0x6F,		// 'o'

		// Block 4
		0x6D,		// 'm'
		0xFE,		// TLV terminator
		0x00,		// Empty don't care
		0x00,		// Empty don't care
};

/*********************** SUMMARY **************************************************************************************************
 * This project only utilizes the RF stack (ISO15693) on the ROM of the RF430FRL15xH. This setup allows the user to make a
 * custom application that is run from FRAM.  Only the RF13M vector that runs the RF stack needs to be pointing to its
 * ROM location.
 */

/**************************************************************************************************************************************************
*   Main
***************************************************************************************************************************************************
*
* Brief :
*
* Param[in] :   None
*
*
* Param[out]:   None
*
* Return :
*
**************************************************************************************************************************************************/

void main()
{
	WDTCTL = WDTPW + WDTHOLD;                   // Stop watchdog

    // ROM RF13M module setup ** The following three lines are needed for proper RF stack operation
    DS = 1; 									// ROM variable needs to be initialized here
    asm ( " CALL #0x5CDA "); 					// Call ROM function ( Initialize function pointers)
    asm ( " CALL #0x5CAC "); 					// Call ROM function ( Check part configuration)


	initISO15693(CLEAR_BLOCK_LOCKS);
	DeviceInit();

	SD14CTL0 = SD14EN + VIRTGND;
	SD14CTL1 = SD14UNI + SD14INTDLY0;


		while(1)
		{

			SD14CTL0 |= SD14SC;

			__delay_cycles(100);

			ADC_Value= SD14MEM0;


		ADC_Volts = ((ADC_Value >>8) *900)/(16383 >> 8);

			//Enter Low Power mode
			//__bis_SR_register(LPM3_bits + GIE);
		}
}


/**************************************************************************************************************************************************
*  DeviceInit
***************************************************************************************************************************************************
*
* Brief : Initialize the clock system and other settings
*         Patchable function
*
* Param[in] :   parameters:  has these independent options
*                            INITIALIZE_DEVICE_CLOCK_SYSTEM - initializes the clock system
*                            POPULATE_INTERRUPT_VECTOR_IN_INITIALIZATION - populate the default interrupt vectors and recalculate their CRC
*
* Param[out]:  None
*
* Return  None
*
* Patchable :   Yes
**************************************************************************************************************************************************/
void DeviceInit(void)
{
	P1SEL0 = 0xF0; //keep JTAG
	P1SEL1 = 0xF0; //keep JTAG
    P1DIR &= ~0xEF;
    P1REN = 0;

    CCSCTL0 = CCSKEY;                        // Unlock CCS

    CCSCTL1 = 0;                             // do not half the clock speed
    CCSCTL4 = SELA_1 + SELM_0 + SELS_0;      // Select VLO for ACLK and select HFCLK/DCO for MCLK, and SMCLK
    CCSCTL5 = DIVA_2 + DIVM_1 + DIVS_1;      // Set the Dividers for ACLK (4), MCLK, and SMCLK to 1
    CCSCTL6 = XTOFF;                         // Turns of the crystal if it is not being used
    CCSCTL8 = ACLKREQEN + MCLKREQEN + SMCLKREQEN; //disable clocks if they are not being used

    CCSCTL0_H |= 0xFF;                       // Lock CCS

  return;
}

/**************************************************************************************************************************************************
*  initISO15693
***************************************************************************************************************************************************
*
* Brief : Initializes the RF Stack
*
* Param[in] :   parameter - the configuration to setup the ISO15693 (option to clear the lock blocks)
*
* Param[out]:   None
*
* Return        None
**************************************************************************************************************************************************/
void initISO15693(u16_t parameters )
{

  // enable interrupts  ** Do not change the following two lines, needed for proper RF stack operatoin
  RF13MCTL |= RF13MTXEN + RF13MRXEN + RF13MRFTOEN; 	// set up rx and tx functionality on RF13M module
  RF13MINT |= RF13MRXIE + RX13MRFTOIE;  			// enable interrupts on RX and on timeout and over and under flow checking

  if (parameters & CLEAR_BLOCK_LOCKS )
  {
    //initializeBlockLocks();   //inline function
    memset ((u08_t *) FRAM_LOCK_BLOCKS, 0xFF, FRAM_LOCK_BLOCK_AREA_SIZE);     //block is locked with a zero bit, clears FRAM and RAM lock blocks
  }
}


//#pragma vector = RFPMM_VECTOR
//__interrupt void RFPMM_ISR(void)
//{
//}
//
//#pragma vector = PORT1_VECTOR
//__interrupt void PORT1_ISR(void)
//{
//}
//
//#pragma vector = SD_ADC_VECTOR
//__interrupt void SD_ADC_ISR(void)
//{
//}
//
//#pragma vector = USCI_B0_VECTOR
//__interrupt void USCI_B0_ISR(void)
//{
//}
//#pragma CODE_SECTION(RF13M_ISR, ".fram_driver_code")  // comment this line for using ROM's RF13M ISR, uncomment next one, see .cmd file for details
#pragma CODE_SECTION(RF13M_ISR, ".rf13m_rom_isr") 		// comment this line for creating a custom RF13M ISR that will exist in FRAM, bypassing ROM's, uncomment previous
#pragma vector = RF13M_VECTOR
__interrupt void RF13M_ISR(void)
{
	// Right now this vector is pointing to the ROMs firmware location that runs the RF stack.
    // Entering code here will, without changing the CODE_SECTION lines
	// above, will cause an error.
    // Changing the code section above will cause the ROM RF stack to be bypassed.  New handler will need to be created.
}

//#pragma vector = WDT_VECTOR
//__interrupt void WDT_ISR(void)
//{
//}
//
//#pragma vector = TIMER0_A1_VECTOR
//__interrupt void TimerA1_ISR(void)
//{
//}
//
//#pragma vector = TIMER0_A0_VECTOR
//__interrupt void TimerA0_ISR(void)
//{
//}
//
//#pragma vector = UNMI_VECTOR
//__interrupt void UNMI_ISR(void)
//{
//}
//
//#pragma vector = SYSNMI_VECTOR
//__interrupt void SysNMI_ISR(void)
//{
//}
lnk_rf430frl152h_NFC_Only.cmd
MEMORY
{
    SFR                     : origin = 0x0000, length = 0x0010
    PERIPHERALS_8BIT        : origin = 0x0010, length = 0x00F0
    PERIPHERALS_16BIT       : origin = 0x0100, length = 0x0100
    RAM                     : origin = 0x1C00, length = 0x1000

    //ROM ISRs, starting points, length not correct
    RF13M_ROM_ISR			: origin = 0x54D0, length = 0x0002

    //FRAM                    : origin = 0xF840, length = 0x0790
    FRAM                    : origin = 0xF868, length = 0x0468
    FRAM_CODE               : origin = 0xFCD0, length = 0x0300  // code area, can be increased /  decreased with FRAM, FRAM + FRAM_CODE = 0x768
    JTAGSIGNATURE           : origin = 0xFFD0, length = 0x0004, fill = 0xFFFF
    BSLSIGNATURE            : origin = 0xFFD4, length = 0x0004, fill = 0xFFFF
    INT00                   : origin = 0xFFE0, length = 0x0002
    INT01                   : origin = 0xFFE2, length = 0x0002
    INT02                   : origin = 0xFFE4, length = 0x0002
    INT03                   : origin = 0xFFE6, length = 0x0002
    INT04                   : origin = 0xFFE8, length = 0x0002
    INT05                   : origin = 0xFFEA, length = 0x0002
    INT06                   : origin = 0xFFEC, length = 0x0002
    INT07                   : origin = 0xFFEE, length = 0x0002
    INT08                   : origin = 0xFFF0, length = 0x0002
    INT09                   : origin = 0xFFF2, length = 0x0002
    INT10                   : origin = 0xFFF4, length = 0x0002
    INT11                   : origin = 0xFFF6, length = 0x0002
    INT12                   : origin = 0xFFF8, length = 0x0002
    INT13                   : origin = 0xFFFA, length = 0x0002
    INT14                   : origin = 0xFFFC, length = 0x0002
    RESET                   : origin = 0xFFFE, length = 0x0002
}

/****************************************************************************/
/* Specify the sections allocation into memory                              */
/****************************************************************************/

SECTIONS
{
    GROUP(ALL_FRAM)
    {
       GROUP(READ_WRITE_MEMORY)
       {
          .TI.persistent : {}                /* For #pragma persistent            */
          .cio        : {}                   /* C I/O buffer                      */
          .sysmem     : {}                   /* Dynamic memory allocation area    */
       }

       GROUP(READ_ONLY_MEMORY)
       {
          .cinit      : {}                   /* Initialization tables             */
          .pinit      : {}                   /* C++ constructor tables            */
          .init_array : {}                   /* C++ constructor tables            */
          .mspabi.exidx : {}                 /* C++ constructor tables            */
          .mspabi.extab : {}                 /* C++ constructor tables            */
          .const      : {}                   /* Constant data                     */
       }

       GROUP(EXECUTABLE_MEMORY)
       {
          .text       : {}                   /* Code                              */
       }
    } > FRAM_CODE

    .rf13m_rom_isr		: {} > RF13M_ROM_ISR type = DSECT

    .jtagsignature : {} > JTAGSIGNATURE   /* JTAG Signature                    */
    .bslsignature  : {} > BSLSIGNATURE    /* BSL Signature                     */
    .jtagpassword                         /* JTAG Password                     */

    .bss        : {} > RAM                /* Global & static vars              */
    .data       : {} > RAM                /* Global & static vars              */
    .TI.noinit  : {} > RAM                /* For #pragma noinit                */
    .stack      : {} > RAM (HIGH)         /* Software system stack             */

    /* MSP430 Interrupt vectors          */

    .int00       : {}               > INT00
    .int01       : {}               > INT01
    .int02       : {}               > INT02
    .int03       : {}               > INT03
    .int04       : {}               > INT04
    RFPMM        : { * ( .int05 ) } > INT05 type = VECT_INIT
    PORT1        : { * ( .int06 ) } > INT06 type = VECT_INIT
    SD_ADC       : { * ( .int07 ) } > INT07 type = VECT_INIT
    USCI_B0      : { * ( .int08 ) } > INT08 type = VECT_INIT
    ISO          : { * ( .int09 ) } > INT09 type = VECT_INIT
    WDT          : { * ( .int10 ) } > INT10 type = VECT_INIT
    TIMER0_A1    : { * ( .int11 ) } > INT11 type = VECT_INIT
    TIMER0_A0    : { * ( .int12 ) } > INT12 type = VECT_INIT
    UNMI         : { * ( .int13 ) } > INT13 type = VECT_INIT
    SYSNMI       : { * ( .int14 ) } > INT14 type = VECT_INIT
  	.reset       : {}               > RESET  /* MSP430 Reset vector         */
}

/****************************************************************************/
/* Include peripherals memory map                                           */
/****************************************************************************/

-l rf430frl152h.cmd
Do you have any simple code, similar to the Digikey example, for a digital sensor?
The only example for Sensor Hub is the one on the web that I asked you to download. We don't have any other example. You can use the Digikey example and then add the Digital Sensor code from RF430FRL152H_SensorHub_Project. Have you tried that?
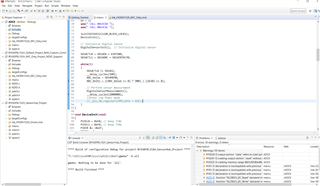
Yes, I did, but I encountered an endless loop of numerous errors, particularly those indicating that the program wouldn't fit into the memory. Fortunately, I successfully addressed these errors, but the load/build process still hasn't been completed.
I read the manual, wrote my own codes, and even used online resources and AI coding assistance, but I haven't had any luck so far. That's why I'm seeking help to get this done. Attached is the code I worked on yesterday. It built successfully with no errors, but the debug process wasn't fully completed.
Could you please take a look and make any adjustments needed to ensure that the digital readings are available during the debugging process?
Modified main.c
#include <rf430frl152h.h>
#include <string.h>
#include "types.h"

//***************************** DEFINES **************************************************/
#define TEMP_MEASURE_HOLD_MASTER    0xE3        // SHT21 Command for temperature measurement
#define HUMIDITY_HOLD_MEASUREMENT   0xE5        // SHT21 Command for humidity measurement
#define MASTER_SLAVE_SELECT         BIT7

#define RESULT_MAILBOX              *((u16_t *)0x1D02)  // Location where digital sensor measurement is stored
#define SENSOR_TYPE_MAILBOX         *((u16_t *)0x1D04)  // ROM code sets this address to the current digital sensor to be sampled
#define HUMIDITY_SENSOR_ID          BIT1         // SHT21 humidity sensor ID bit

#define PORT_I2C_SEL0               P1SEL0
#define PORT_I2C_SEL1               P1SEL1
#define SDA                         BIT0
#define SCL                         BIT1

#define ROM_SENSOR_SUPPORT_DISABLED 0x00
#define EROM_EUSCI_SUPPORT_DISABLED 0x00
#define NFC_BRIDGE_DISABLED         0x40
#define FOUR_BYTE_BLOCK             0x00
#define FIRST_ISO_PAGE              0x02

u08_t DS;
u08_t Sensor1;
u08_t Sensor2;
u08_t Sensor3;

// ROM code sensor definitions
enum Sensors_Types
{
    DIGITAL_SENSOR1 = 0x10,  // Sensor 1
    DIGITAL_SENSOR2 = 0x20,  // Sensor 2
    DIGITAL_SENSOR3 = 0x40   // Sensor 3
};

// ISL29023 register definitions
enum ISL29023_Sensors_Types
{
    ISL29023_COMMAND_I_REGISTER  = 0x00,
    ISL29023_DATA_LSB_REGISTER   = 0x02
};

// Function Prototypes
void DeviceInit(void);
void initISO15693(u16_t parameters);
void DigitalSensorInit(void);
u08_t DigitalSensorMeasurement(void);

// ADC Variables
unsigned int ADC_Value = 0;
volatile float ADC_Volts = 0;

#define CLEAR_BLOCK_LOCKS                            BIT3
#define FRAM_LOCK_BLOCK_AREA_SIZE                   38
#define FRAM_LOCK_BLOCKS                            0xF840  // Address of ISO15693 lock blocks

#define FIRMWARE_CONTROL_ADDRESS    0xF867
#pragma RETAIN(Firmware_System_Control_Byte);
#pragma location = FIRMWARE_CONTROL_ADDRESS
const u08_t Firmware_System_Control_Byte = ROM_SENSOR_SUPPORT_DISABLED + EROM_EUSCI_SUPPORT_DISABLED + NFC_BRIDGE_DISABLED + FOUR_BYTE_BLOCK + FIRST_ISO_PAGE;

void main()
{
    WDTCTL = WDTPW + WDTHOLD; // Stop watchdog

    // ROM RF13M module setup ** The following three lines are needed for proper RF stack operation
    DS = 1;
    asm(" CALL #0x5CDA ");
    asm(" CALL #0x5CAC ");

    initISO15693(CLEAR_BLOCK_LOCKS);
    DeviceInit();

    // Initialize Digital Sensor
    DigitalSensorInit();  // Initialize digital sensor

    SD14CTL0 = SD14EN + VIRTGND;
    SD14CTL1 = SD14UNI + SD14INTDLY0;

    while(1)
    {
        SD14CTL0 |= SD14SC;
        __delay_cycles(100);
        ADC_Value = SD14MEM0;
        ADC_Volts = ((ADC_Value >> 8) * 900) / (16383 >> 8);

        // Perform sensor measurement
        DigitalSensorMeasurement();
        __delay_cycles(1000000);
        //Enter Low Power mode
        //__bis_SR_register(LPM3_bits + GIE);
    }
}

void DeviceInit(void)
{
    P1SEL0 = 0xF0; // Keep JTAG
    P1SEL1 = 0xF0; // Keep JTAG
    P1DIR &= ~0xEF;
    P1REN = 0;

    CCSCTL0 = CCSKEY;                        // Unlock CCS
    CCSCTL1 = 0;                             // Do not half the clock speed
    CCSCTL4 = SELA_1 + SELM_0 + SELS_0;      // Select VLO for ACLK and select HFCLK/DCO for MCLK, and SMCLK
    CCSCTL5 = DIVA_2 + DIVM_1 + DIVS_1;      // Set the Dividers for ACLK (4), MCLK, and SMCLK to 1
    CCSCTL6 = XTOFF;                         // Turns off the crystal if it is not being used
    CCSCTL8 = ACLKREQEN + MCLKREQEN + SMCLKREQEN; // Disable clocks if they are not being used
    CCSCTL0_H |= 0xFF;                       // Lock CCS
    return;
}

void initISO15693(u16_t parameters)
{
    // Enable interrupts ** Do not change the following two lines, needed for proper RF stack operation
    RF13MCTL |= RF13MTXEN + RF13MRXEN + RF13MRFTOEN;    // Set up RX and TX functionality on RF13M module
    RF13MINT |= RF13MRXIE + RX13MRFTOIE;                // Enable interrupts on RX and on timeout and over and under flow checking

    if (parameters & CLEAR_BLOCK_LOCKS)
    {
        memset((u08_t *)FRAM_LOCK_BLOCKS, 0xFF, FRAM_LOCK_BLOCK_AREA_SIZE); // Block is locked with a zero bit, clears FRAM and RAM lock blocks
    }
}

/**************************************************************************************************************************************************
*   DigitalSensorInit
***************************************************************************************************************************************************
* Initializes the RF430's eUSCI into master mode, for use with sampling digital sensors.
**************************************************************************************************************************************************/
#pragma RETAIN (DigitalSensorInit)
#pragma CODE_SECTION (DigitalSensorInit, ".fram_driver_code")
void DigitalSensorInit()
{
    P1OUT = 0x00; // Reduce power consumption on RF430FRL152H EVM

    P1DIR &= ~MASTER_SLAVE_SELECT; // Check if digital sensor mode is selected
    if (P1IN & MASTER_SLAVE_SELECT) {
        return;
    }

    // Configure P1.0 and P1.1 pins for I2C mode
    PORT_I2C_SEL0 |= SCL + SDA;
    PORT_I2C_SEL1 &= ~(SCL + SDA);

    // Configure eUSCI for I2C
    UCB0CTL1 |= UCSWRST;
    UCB0CTLW0 |= UCMODE_3  + UCMST + UCSYNC + UCTR;
    UCB0CTLW0 |= UCSSEL_2;
    UCB0BRW = 10;
    UCB0I2CSA = 0x0040;                             // Set slave address, e.g., for SHT21 initially
    UCB0CTL1  &= ~UCSWRST;
}

/**************************************************************************************************************************************************
*   DigitalSensorMeasurement
***************************************************************************************************************************************************
* Samples the requested digital sensor and stores the result in RESULT_MAILBOX.
**************************************************************************************************************************************************/
#pragma RETAIN (DigitalSensorMeasurement)
#pragma CODE_SECTION (DigitalSensorMeasurement, ".fram_driver_code")
u08_t DigitalSensorMeasurement()
{
    u08_t temp_data[2];
    u08_t sensor_sampled = 0;

    if (SENSOR_TYPE_MAILBOX == DIGITAL_SENSOR1) {
        SHT_21_I2C_Master_Measurement(TEMP_MEASURE_HOLD_MASTER, temp_data);
        RESULT_MAILBOX = (u16_t)temp_data[1] + (((u16_t)(temp_data[0])) << 8);
        Sensor1=RESULT_MAILBOX;
        sensor_sampled = 1;
    }
    else if(SENSOR_TYPE_MAILBOX == DIGITAL_SENSOR2) {
        SHT_21_I2C_Master_Measurement(HUMIDITY_HOLD_MEASUREMENT, temp_data);
        temp_data[1] &= ~HUMIDITY_SENSOR_ID;
        RESULT_MAILBOX = (u16_t)temp_data[1] + (((u16_t)(temp_data[0])) << 8);
        Sensor2=RESULT_MAILBOX;
        sensor_sampled = 1;
    }
    else if(SENSOR_TYPE_MAILBOX == DIGITAL_SENSOR3) {
        temp_data[0] = BIT5;
        temp_data[1] = BIT1;
        ISL29023_I2C_Write(ISL29023_COMMAND_I_REGISTER, temp_data);
        __delay_cycles(220000);
        ISL29023_I2C_Read(ISL29023_DATA_LSB_REGISTER, temp_data);
        RESULT_MAILBOX = (u16_t)temp_data[0] + (((u16_t)(temp_data[1])) << 8);
        Sensor3=RESULT_MAILBOX;
        temp_data[0] = 0;
        temp_data[1] = 0;
        ISL29023_I2C_Write(ISL29023_COMMAND_I_REGISTER, temp_data);
        sensor_sampled = 1;
    }
    return sensor_sampled;
}

/**************************************************************************************************************************************************
*   SHT_21_I2C_Master_Measurement
***************************************************************************************************************************************************
* Performs a measurement, temperature or humidity, and returns the result.
**************************************************************************************************************************************************/
#pragma CODE_SECTION (SHT_21_I2C_Master_Measurement, ".fram_driver_code")
void SHT_21_I2C_Master_Measurement(u08_t command, u08_t * rxData)
{
    UCB0CTL1 |= UCSWRST;
    UCB0I2CSA  = 0x0040;
    UCB0CTL1  &= ~UCSWRST;
    UCB0CTLW1 = UCASTP_1;
    UCB0TBCNT = 0x0001;
    UCB0CTL1 |= UCTXSTT + UCTR;
    while(!(UCB0IFG & UCTXIFG0));
    UCB0TXBUF = command;
    while(!(UCB0IFG & UCBCNTIFG));
    UCB0CTL1 &= ~UCTR;
    UCB0CTL1 |= UCTXSTT;
    while(!(UCB0IFG & UCRXIFG0));
    rxData[0] = UCB0RXBUF;
    while(!(UCB0IFG & UCRXIFG0));
    rxData[1] = UCB0RXBUF;
    UCB0CTLW0 |= UCTXSTP;
    while (!(UCB0IFG & UCRXIFG0));
    u08_t crc = UCB0RXBUF;
    while (!(UCB0IFG & UCSTPIFG));
    UCB0CTL1  |= UCSWRST;
}

/**************************************************************************************************************************************************
*   ISL29023_I2C_Read
***************************************************************************************************************************************************
* Reads data from the ISL29023 sensor via I2C.
**************************************************************************************************************************************************/
#pragma CODE_SECTION (ISL29023_I2C_Read, ".fram_driver_code")
void ISL29023_I2C_Read(u08_t command, u08_t * rxData)
{
    UCB0CTL1 |= UCSWRST;
    UCB0I2CSA  = 0x0044;
    UCB0CTLW1 = UCASTP_1;
    UCB0TBCNT = 0x0001;

    UCB0CTL1  &= ~UCSWRST;
    UCB0CTL1 |= UCTXSTT + UCTR;
    while(!(UCB0IFG & UCTXIFG0));
    UCB0TXBUF = command;
    while(!(UCB0IFG & UCBCNTIFG));
    UCB0CTL1 &= ~UCTR;
    UCB0CTL1 |= UCTXSTT;
    while(!(UCB0IFG & UCRXIFG0));
    rxData[0] = UCB0RXBUF;
    UCB0CTLW0 |= UCTXSTP;
    while(!(UCB0IFG & UCRXIFG0));
    rxData[1] = UCB0RXBUF;
    while (!(UCB0IFG & UCSTPIFG));
    UCB0CTL1  |= UCSWRST;
}

/**************************************************************************************************************************************************
*   ISL29023_I2C_Write
***************************************************************************************************************************************************
* Writes data to the ISL29023 sensor via I2C.
**************************************************************************************************************************************************/
#pragma CODE_SECTION (ISL29023_I2C_Write, ".fram_driver_code")
void ISL29023_I2C_Write(u08_t command, u08_t * rxData)
{
    UCB0CTL1 |= UCSWRST;
    UCB0I2CSA  = 0x0044;
    UCB0CTLW1 = UCASTP_1;
    UCB0TBCNT = 0x0003;

    UCB0CTL1  &= ~UCSWRST;
    UCB0CTL1 |= UCTXSTT + UCTR;
    while(!(UCB0IFG & UCTXIFG0));
    UCB0TXBUF = command;
    while(!(UCB0IFG & UCTXIFG0));
    UCB0TXBUF = rxData[0];
    while(!(UCB0IFG & UCTXIFG0));
    UCB0TXBUF = rxData[1];
    while (!(UCB0IFG & UCBCNTIFG));
    UCB0CTL1 |= UCTXSTP;
    while (!(UCB0IFG & UCSTPIFG));
    UCB0CTL1  |= UCSWRST;
}
Modified lnk_rf430frl152h_NFC_Only.cmd
MEMORY
{
    SFR                     : origin = 0x0000, length = 0x0010
    PERIPHERALS_8BIT        : origin = 0x0010, length = 0x00F0
    PERIPHERALS_16BIT       : origin = 0x0100, length = 0x0100
    RAM                     : origin = 0x1C00, length = 0x1000

    // ROM ISRs, starting points, lengths not correct, needed to force correct compilation
    RFPMM_ROM_ISR			: origin = 0x5BB8, length = 0x0002
    PORT1_ROM_ISR			: origin = 0x59C0, length = 0x0002
    SD_14_ROM_ISR			: origin = 0x5A06, length = 0x0002
    USCI_B0_ROM_ISR			: origin = 0x488A, length = 0x0002
    RF13M_ROM_ISR			: origin = 0x54D0, length = 0x0002
    WDT_ROM_ISR				: origin = 0x5E48, length = 0x0002
    TIMER_A1_ROM_ISR		: origin = 0x5E2A, length = 0x0002
    TIMER_A0_ROM_ISR		: origin = 0x4E76, length = 0x0002
    UNMI_ROM_ISR			: origin = 0x5E42, length = 0x0002
    SYSNMI_ROM_ISR			: origin = 0x5E44, length = 0x0002
    RESET_ROM_ISR			: origin = 0x5012, length = 0x0002

    // Code area, can be increased/decreased
    // FRAM + DRIVER_CODE lengths must equal 0x768 (with FRAM starting at 0xF868)
    // Two sections together in the range of 0xF868-0xFFCF
    FRAM                    : origin = 0xF868, length = 0x00D8	// FRAM sensor data logging space, ends at 0xF93F
    DRIVER_CODE             : origin = 0xF940, length = 0x0690  // Drive FRAM code space, ends at 0xFFCF

    JTAGSIGNATURE           : origin = 0xFFD0, length = 0x0004, fill = 0xFFFF
    BSLSIGNATURE            : origin = 0xFFD4, length = 0x0004, fill = 0xFFFF

    INT00                   : origin = 0xFFE0, length = 0x0002
    INT01                   : origin = 0xFFE2, length = 0x0002
    INT02                   : origin = 0xFFE4, length = 0x0002
    INT03                   : origin = 0xFFE6, length = 0x0002
    INT04                   : origin = 0xFFE8, length = 0x0002
    INT05                   : origin = 0xFFEA, length = 0x0002
    INT06                   : origin = 0xFFEC, length = 0x0002
    INT07                   : origin = 0xFFEE, length = 0x0002
    INT08                   : origin = 0xFFF0, length = 0x0002
    INT09                   : origin = 0xFFF2, length = 0x0002
    INT10                   : origin = 0xFFF4, length = 0x0002
    INT11                   : origin = 0xFFF6, length = 0x0002
    INT12                   : origin = 0xFFF8, length = 0x0002
    INT13                   : origin = 0xFFFA, length = 0x0002
    INT14                   : origin = 0xFFFC, length = 0x0002
    RESET                   : origin = 0xFFFE, length = 0x0002
}

/****************************************************************************/
/* Specify the sections allocation into memory                              */
/****************************************************************************/

SECTIONS
{
    GROUP(ALL_FRAM)
    {
       GROUP(READ_WRITE_MEMORY)
       {
          .TI.persistent : {}                /* For #pragma persistent            */
          .cio        : {}                   /* C I/O buffer                      */
          .sysmem     : {}                   /* Dynamic memory allocation area    */
       }

       GROUP(READ_ONLY_MEMORY)
       {
          .cinit      : {}                   /* Initialization tables             */
          .pinit      : {}                   /* C++ constructor tables            */
          .init_array : {}                   /* C++ constructor tables            */
          .mspabi.exidx : {}                 /* C++ constructor tables            */
          .mspabi.extab : {}                 /* C++ constructor tables            */
          .const      : {}                   /* Constant data                     */
       }

       GROUP(EXECUTABLE_MEMORY)
       {
          .text       : {}                   /* Code                              */
       }
    } > DRIVER_CODE

	//ROM ISRs
    .rfpmm_rom_isr		: {} > RFPMM_ROM_ISR type = DSECT
    .port1_rom_isr		: {} > PORT1_ROM_ISR type = DSECT
    .sd_14_rom_isr		: {} > SD_14_ROM_ISR type = DSECT
    .usci_b0_rom_isr	: {} > USCI_B0_ROM_ISR type = DSECT
    .rf13m_rom_isr		: {} > RF13M_ROM_ISR type = DSECT
    .wdt_rom_isr		: {} > WDT_ROM_ISR	type = DSECT
    .timer_a1_rom_isr	: {} > TIMER_A1_ROM_ISR type = DSECT
    .timer_a0_rom_isr 	: {} > TIMER_A0_ROM_ISR type = DSECT
    .unmi_rom_isr 		: {} > UNMI_ROM_ISR type = DSECT
    .sysnmi_rom_isr		: {} > SYSNMI_ROM_ISR type = DSECT
    .reset_rom_isr		: {} > RESET_ROM_ISR type = DSECT

    .fram_driver_code   : {} > DRIVER_CODE

    .jtagsignature : {} > JTAGSIGNATURE   /* JTAG Signature                    */
    .bslsignature  : {} > BSLSIGNATURE    /* BSL Signature                     */
    .jtagpassword                         /* JTAG Password                     */

    .bss        : {} > RAM                /* Global & static vars              */
    .data       : {} > RAM                /* Global & static vars              */
    .TI.noinit  : {} > RAM                /* For #pragma noinit                */
    .stack      : {} > RAM (HIGH)         /* Software system stack             */

    /* MSP430 Interrupt vectors          */

    .int00       : {}               > INT00
    .int01       : {}               > INT01
    .int02       : {}               > INT02
    .int03       : {}               > INT03
    .int04       : {}               > INT04
    RFPMM        : { * ( .int05 ) } > INT05 type = VECT_INIT
    PORT1        : { * ( .int06 ) } > INT06 type = VECT_INIT
    SD_ADC       : { * ( .int07 ) } > INT07 type = VECT_INIT
    USCI_B0      : { * ( .int08 ) } > INT08 type = VECT_INIT
    ISO          : { * ( .int09 ) } > INT09 type = VECT_INIT
    WDT          : { * ( .int10 ) } > INT10 type = VECT_INIT
    TIMER0_A1    : { * ( .int11 ) } > INT11 type = VECT_INIT
    TIMER0_A0    : { * ( .int12 ) } > INT12 type = VECT_INIT
    UNMI         : { * ( .int13 ) } > INT13 type = VECT_INIT
    SYSNMI       : { * ( .int14 ) } > INT14 type = VECT_INIT
    RESET        : {}               > RESET  /* MSP430 Reset vector         */
}

/****************************************************************************/
/* Include peripherals memory map                                           */
/****************************************************************************/

-l rf430frl152h.cmd
Here is a few feedback.
First, when you purchase RF430FRL152HEVM, it is preprogrammed with code in FRAM to support Sensor Hub. As explained in the past, the ROM firmware will jump to the Sensor Hub code stored in the FRAM.
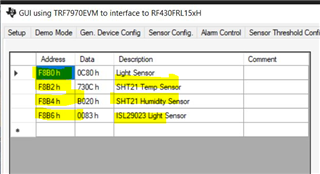
Second, you could have overwritten FRAM with other examples downloaded from Digikey and that is fine. If you reload the RF430FRL152H_SensorHub_Project again, it reverts back to the same firmware that was originally shipped. This is evident when I try to use the TRF7970A reader and the GUI to access the digital sensors BoosterPack that is plugged on top of the RF430FRL152HEVM. See below screenshot. As you can see the three digital sensors are saved to the respective locations.
I also enable ADC0 on the EVM for light sensor measurement which is saved to 0xF8B0.
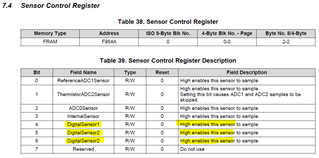
To use the stock example, you would need to enable them through the virtual registers.
Of course, you could use your own Digikey example to do the same. I just don't know what is actually wrong with it. Since your example completely disable the ROM, there is no need to use pragma to force your custom functions to a specific address using the .frame_driver_code. You should be able to use your original .cmd file. You also don't need the RESULT_MAILBOX. This is a mailbox for exchanging data between the ROM and FRAM.
I strongly suggest you add a little of bit at a time. For example, do just ADC0 measurement. Next, modify your code to do ADC0 measurement and one digital sensor measurement. If you get what you want, add another digital sensor. Don't put every measurement like ADC0/1/2 plus three digital sensors on the SensorHub all at the same time. You will save yourself time to diagnose the problem doing one step at a time.
Hi Charles,
Thanks for the suggestion. I modified the code to read just one digital sensor measurement. The build process was completed successfully, and the debugging process is working—I can see the expression values and use resume/pause to step through the code. However, the code is getting stuck at the line "while(!(UCB0IFG & UCRXIFG0)); // Wait for the RX buffer to be ready". I’ve checked the hardware connections—3.3V and GND are properly connected, and I’ve tried different pull-up resistors (initially 4.7K for both SDA and SCL, then changed to 2.2K for both). Additionally, I verified the connection and the functionality of the digital sensor (MS5637) with an Arduino Uno. Below is the modified code along with the updated linker file. Could you please take a look?
Thank you
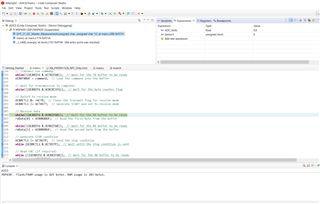
Modified Main.c code
/*
 * main.c
 *
 * RF430FRL152H NFC Only Example Project
 *
 * Copyright (C) 2014 Texas Instruments Incorporated - http://www.ti.com/
 *
 *
 *  Redistribution and use in source and binary forms, with or without
 *  modification, are permitted provided that the following conditions
 *  are met:
 *
 *    Redistributions of source code must retain the above copyright
 *    notice, this list of conditions and the following disclaimer.
 *
 *    Redistributions in binary form must reproduce the above copyright
 *    notice, this list of conditions and the following disclaimer in the
 *    documentation and/or other materials provided with the
 *    distribution.
 *
 *    Neither the name of Texas Instruments Incorporated nor the names of
 *    its contributors may be used to endorse or promote products derived
 *    from this software without specific prior written permission.
 *
 *  THIS SOFTWARE IS PROVIDED BY THE COPYRIGHT HOLDERS AND CONTRIBUTORS
 *  "AS IS" AND ANY EXPRESS OR IMPLIED WARRANTIES, INCLUDING, BUT NOT
 *  LIMITED TO, THE IMPLIED WARRANTIES OF MERCHANTABILITY AND FITNESS FOR
 *  A PARTICULAR PURPOSE ARE DISCLAIMED. IN NO EVENT SHALL THE COPYRIGHT
 *  OWNER OR CONTRIBUTORS BE LIABLE FOR ANY DIRECT, INDIRECT, INCIDENTAL,
 *  SPECIAL, EXEMPLARY, OR CONSEQUENTIAL DAMAGES (INCLUDING, BUT NOT
 *  LIMITED TO, PROCUREMENT OF SUBSTITUTE GOODS OR SERVICES; LOSS OF USE,
 *  DATA, OR PROFITS; OR BUSINESS INTERRUPTION) HOWEVER CAUSED AND ON ANY
 *  THEORY OF LIABILITY, WHETHER IN CONTRACT, STRICT LIABILITY, OR TORT
 *  (INCLUDING NEGLIGENCE OR OTHERWISE) ARISING IN ANY WAY OUT OF THE USE
 *  OF THIS SOFTWARE, EVEN IF ADVISED OF THE POSSIBILITY OF SUCH DAMAGE.
 *
*/

#include <rf430frl152h.h>
#include <string.h>
#include "types.h"
#include "main.h"

//*****************************FUNCTION PROTOTYPES********************************/
void DeviceInit(void);
void initISO15693(u16_t parameters );
//********************************************************************************/

//*****************************ADC Variables**************************************/
unsigned int ADC_Value = 0;
volatile float ADC_Volts = 0;
u16_t Sensor1=0;
//********************************************************************************/


//*****************************DEFINES *******************************************/
#define CLEAR_BLOCK_LOCKS                               BIT3
#define FRAM_LOCK_BLOCK_AREA_SIZE                       38
#define FRAM_LOCK_BLOCKS                                0xF840  //Address of ISO15693 lock blocks


#define ROM_EUSCI_SUPPORT_ENABLED       BIT2
#define EROM_EUSCI_SUPPORT_DISABLED     0
#define ROM_SENSOR_SUPPORT_ENABLED      BIT7
#define ROM_SENSOR_SUPPORT_DISABLED     0
#define NFC_BRIDGE_DISABLED             BIT6
#define NFC_BRIDGE_ENABLED              0
#define EIGHT_BYTE_BLOCK                BIT0
#define FOUR_BYTE_BLOCK                 0
#define FIRST_ISO_PAGE                  BIT1
#define SECOND_ISO_PAGE                 0
#define TEMP_MEASURE_HOLD_MASTER    0xE3        // SHT21 Command for temperature measurement
/* Firmware System Control Byte
 *
 *     Bit 0:   ISOBlockSize                0 - 4 byte,     1 - 8 byte
 *     Bit 1:   Page                        0 - page 1,     1 - page 0 (Effective only for 4-byte block mode)
 *     Bit 2:   ROMEUSCISupportEnabled      0 - disabled,   1 - enabled (Forced to 0 on RF430FRL153H)
 *     Bit 3-5: ReservedISO
 *     Bit 6:   NFCBridgeDisable            0 - enabled,    1 - disabled (see note below)
 *     Bit 7:   ROMSensorSupportEnable      0 - disabled,   1 - enabled (Forced to 0 on RF430FRL154H)
 *
 *     NFC bridge is recommended to be disabled in this project.  Unexpected behaviour can occur,
 *     trying to use it, due to the configuration being setup here.
 *
 *     If eUSCI host controller portion is needed along with the RF functionality, the default project
 *     must be used.  That is NFC cannot be supported in that application (because the I2C/SPI host controller
 *     control registers are in the same place that the NFC file needs to be).  However the rest of the FRAM
 *     memory can be used for storing and reading using ISO15693.
 */
#define FIRMWARE_CONTROL_ADDRESS    0xF867
#pragma RETAIN(Firmware_System_Control_Byte);
#pragma location = FIRMWARE_CONTROL_ADDRESS
const u08_t Firmware_System_Control_Byte = ROM_SENSOR_SUPPORT_DISABLED + EROM_EUSCI_SUPPORT_DISABLED + NFC_BRIDGE_DISABLED + FOUR_BYTE_BLOCK + FIRST_ISO_PAGE; //0x7F,      // this value sets the firmware system control register

// ROM variables - DO NOT CHANGE !!!
// Declared to protect from use by compiler
/********************************************/
#pragma RETAIN(DS)
#pragma location = 0x1C00
u08_t DS;
#pragma RETAIN(RF)
#pragma location = 0x1C6A
const u08_t RF;
#pragma RETAIN(NRX)
#pragma location = 0x1CA4 //rx
const u08_t NRX[34];
#pragma RETAIN(NTX)
#pragma location = 0x1CC6 //tx
const u08_t NTX[33];
#pragma RETAIN(EL)
#pragma location = 0x1CF2
const u08_t EL;
#pragma RETAIN(PF)
#pragma location = 0x1C0A
const u16_t PF[48];
/********************************************/

#define NDEF_START_ADDRESS  0xF868

/*********************** SUMMARY **************************************************************************************************
 * This project only utilizes the RF stack (ISO15693) on the ROM of the RF430FRL15xH. This setup allows the user to make a
 * custom application that is run from FRAM.  Only the RF13M vector that runs the RF stack needs to be pointing to its
 * ROM location.
 */

/**************************************************************************************************************************************************
*   Main
***************************************************************************************************************************************************
*
* Brief :
*
* Param[in] :   None
*
*
* Param[out]:   None
*
* Return :
*
**************************************************************************************************************************************************/

void main()
{
    WDTCTL = WDTPW + WDTHOLD;                   // Stop watchdog

    // ROM RF13M module setup ** The following three lines are needed for proper RF stack operation
    DS = 1;                                     // ROM variable needs to be initialized here
    asm ( " CALL #0x5CDA ");                    // Call ROM function ( Initialize function pointers)
    asm ( " CALL #0x5CAC ");                    // Call ROM function ( Check part configuration)


    initISO15693(CLEAR_BLOCK_LOCKS);
    DeviceInit();
    DigitalSensorInit();

//    SD14CTL0 = SD14EN + VIRTGND;
  //  SD14CTL1 = SD14UNI + SD14INTDLY0;
    u08_t temp_data[2];
    u08_t sensor_sampled = 0;


//    if (SENSOR_TYPE_MAILBOX == DIGITAL_SENSOR1) {
//        SHT_21_I2C_Master_Measurement(TEMP_MEASURE_HOLD_MASTER, temp_data);
//        RESULT_MAILBOX = (u16_t)temp_data[1] + (((u16_t)(temp_data[0])) << 8);
//        Sensor1=RESULT_MAILBOX;
//        sensor_sampled = 1;

        while(1)
        {

            //SD14CTL0 |= SD14SC;

            __delay_cycles(100);
            SHT_21_I2C_Master_Measurement(TEMP_MEASURE_HOLD_MASTER, temp_data);
            Sensor1= (u16_t)temp_data[1] + (((u16_t)(temp_data[0])) << 8);
            //ADC_Value= SD14MEM0;


        //ADC_Volts = ((ADC_Value >>8) *900)/(16383 >> 8);

            //Enter Low Power mode
            //__bis_SR_register(LPM3_bits + GIE);
        }
}

void SHT_21_I2C_Master_Measurement(u08_t command, u08_t * rxData)
{
    UCB0CTL1 |= UCSWRST;  // Enable software reset
    UCB0I2CSA  = 0x76;    // Set the slave address for the sensor
    UCB0CTL1  &= ~UCSWRST;  // Release the software reset
    UCB0CTLW1 = UCASTP_2;  // Set automatic stop mode after receiving the last byte
    UCB0TBCNT = 0x0001;    // Number of bytes to be transmitted (1 byte command)
    UCB0CTL1 |= UCTXSTT + UCTR;  // Generate START and set to transmit mode

    // Transmit the command
    while(!(UCB0IFG & UCTXIFG0));  // Wait for the TX buffer to be ready
    UCB0TXBUF = command;  // Load the command into the buffer

    // Wait for transmission to complete
    while(!(UCB0IFG & UCBCNTIFG));  // Wait for the byte counter flag

    // Switch to receive mode
    UCB0CTL1 &= ~UCTR;  // Clear the transmit flag for receive mode
    UCB0CTL1 |= UCTXSTT;  // Generate START and set to receive mode

    // Receive data
    while(!(UCB0IFG & UCRXIFG0));  // Wait for the RX buffer to be ready
    rxData[0] = UCB0RXBUF;  // Read the first byte from the buffer

    while(!(UCB0IFG & UCRXIFG0));  // Wait for the RX buffer to be ready
    rxData[1] = UCB0RXBUF;  // Read the second byte from the buffer

    // Generate STOP condition
    UCB0CTL1 |= UCTXSTP;  // Send the stop condition
    while (UCB0CTL1 & UCTXSTP);  // Wait until the stop condition is sent

    // Read CRC (if required)
    while (!(UCB0IFG & UCRXIFG0));  // Wait for the RX buffer to be ready
    u08_t crc = UCB0RXBUF;  // Read the CRC byte

    // Reset I2C module
    UCB0CTL1 |= UCSWRST;
}


/**************************************************************************************************************************************************
*  DeviceInit
***************************************************************************************************************************************************
*
* Brief : Initialize the clock system and other settings
*         Patchable function
*
* Param[in] :   parameters:  has these independent options
*                            INITIALIZE_DEVICE_CLOCK_SYSTEM - initializes the clock system
*                            POPULATE_INTERRUPT_VECTOR_IN_INITIALIZATION - populate the default interrupt vectors and recalculate their CRC
*
* Param[out]:  None
*
* Return  None
*
* Patchable :   Yes
**************************************************************************************************************************************************/
void DeviceInit(void)
{
    P1SEL0 = 0xF0; //keep JTAG
    P1SEL1 = 0xF0; //keep JTAG
    P1DIR &= ~0xEF;
    P1REN = 0;

    CCSCTL0 = CCSKEY;                        // Unlock CCS

    CCSCTL1 = 0;                             // do not half the clock speed
    CCSCTL4 = SELA_1 + SELM_0 + SELS_0;      // Select VLO for ACLK and select HFCLK/DCO for MCLK, and SMCLK
    CCSCTL5 = DIVA_2 + DIVM_1 + DIVS_1;      // Set the Dividers for ACLK (4), MCLK, and SMCLK to 1
    CCSCTL6 = XTOFF;                         // Turns of the crystal if it is not being used
    CCSCTL8 = ACLKREQEN + MCLKREQEN + SMCLKREQEN; //disable clocks if they are not being used

    CCSCTL0_H |= 0xFF;                       // Lock CCS

  return;
}

void DigitalSensorInit()
{
    //ROM sets P1OUT = 0x0F, this then consumes some current
    P1OUT = 0x00; // needed to reduce power consumption on RF430FRL152H EVM, since P1.3 is connected to a 2.2K Ohm resistor on the EVM to ground

    P1DIR &= ~MASTER_SLAVE_SELECT; // check if digital sensor mode is selected
    if (P1IN & MASTER_SLAVE_SELECT)
    {
        //P1DIR &= ~MASTER_SLAVE_SELECT;  //host controller mode selected, exit
        return;
    }

    /* For custom digital sensor initialization, keep the previous code as is and change the following as needed.*/

    // Configure P1.0 and P1.1 pins for I2C mode
      PORT_I2C_SEL0 |= SCL + SDA;
      PORT_I2C_SEL1 &= ~(SCL + SDA);

      // configure eUSCI for I2C
            UCB0CTL1 |= UCSWRST;                   // Software reset enabled
           UCB0CTLW0 |= UCMODE_3  + UCMST + UCSYNC + UCTR;     // I2C mode, Master mode, sync, transmitter
            UCB0CTLW0 |= UCSSEL_2;                              // select SMCLK at 2MHz
            UCB0BRW = 20;                                       // 2Mhz / 10 = 200kHz
            UCB0I2CSA = 0x76;                                 // slave address of SHT21, initially
            UCB0CTL1  &= ~UCSWRST;                              // exit reset mode

    return;
}


/**************************************************************************************************************************************************
*  initISO15693
***************************************************************************************************************************************************
*
* Brief : Initializes the RF Stack
*
* Param[in] :   parameter - the configuration to setup the ISO15693 (option to clear the lock blocks)
*
* Param[out]:   None
*
* Return        None
**************************************************************************************************************************************************/
void initISO15693(u16_t parameters )
{

  // enable interrupts  ** Do not change the following two lines, needed for proper RF stack operatoin
  RF13MCTL |= RF13MTXEN + RF13MRXEN + RF13MRFTOEN;  // set up rx and tx functionality on RF13M module
  RF13MINT |= RF13MRXIE + RX13MRFTOIE;              // enable interrupts on RX and on timeout and over and under flow checking

  if (parameters & CLEAR_BLOCK_LOCKS )
  {
    //initializeBlockLocks();   //inline function
    memset ((u08_t *) FRAM_LOCK_BLOCKS, 0xFF, FRAM_LOCK_BLOCK_AREA_SIZE);     //block is locked with a zero bit, clears FRAM and RAM lock blocks
  }
}


//#pragma vector = RFPMM_VECTOR
//__interrupt void RFPMM_ISR(void)
//{
//}
//
//#pragma vector = PORT1_VECTOR
//__interrupt void PORT1_ISR(void)
//{
//}
//
//#pragma vector = SD_ADC_VECTOR
//__interrupt void SD_ADC_ISR(void)
//{
//}
//
//#pragma vector = USCI_B0_VECTOR
//__interrupt void USCI_B0_ISR(void)
//{
//}
//#pragma CODE_SECTION(RF13M_ISR, ".fram_driver_code")  // comment this line for using ROM's RF13M ISR, uncomment next one, see .cmd file for details
#pragma CODE_SECTION(RF13M_ISR, ".rf13m_rom_isr")       // comment this line for creating a custom RF13M ISR that will exist in FRAM, bypassing ROM's, uncomment previous
#pragma vector = RF13M_VECTOR
__interrupt void RF13M_ISR(void)
{
    // Right now this vector is pointing to the ROMs firmware location that runs the RF stack.
    // Entering code here will, without changing the CODE_SECTION lines
    // above, will cause an error.
    // Changing the code section above will cause the ROM RF stack to be bypassed.  New handler will need to be created.
}

//#pragma vector = WDT_VECTOR
//__interrupt void WDT_ISR(void)
//{
//}
//
//#pragma vector = TIMER0_A1_VECTOR
//__interrupt void TimerA1_ISR(void)
//{
//}
//
//#pragma vector = TIMER0_A0_VECTOR
//__interrupt void TimerA0_ISR(void)
//{
//}
//
//#pragma vector = UNMI_VECTOR
//__interrupt void UNMI_ISR(void)
//{
//}
//
//#pragma vector = SYSNMI_VECTOR
//__interrupt void SysNMI_ISR(void)
//{
//}
Modified lnk_rf430frl152h_NFC_Only.cmd
/* ============================================================================ */
/* Copyright (c) 2014, Texas Instruments Incorporated                           */
/*  All rights reserved.                                                        */
/*                                                                              */
/*  Redistribution and use in source and binary forms, with or without          */
/*  modification, are permitted provided that the following conditions          */
/*  are met:                                                                    */
/*                                                                              */
/*  *  Redistributions of source code must retain the above copyright           */
/*     notice, this list of conditions and the following disclaimer.            */
/*                                                                              */
/*  *  Redistributions in binary form must reproduce the above copyright        */
/*     notice, this list of conditions and the following disclaimer in the      */
/*     documentation and/or other materials provided with the distribution.     */
/*                                                                              */
/*  *  Neither the name of Texas Instruments Incorporated nor the names of      */
/*     its contributors may be used to endorse or promote products derived      */
/*     from this software without specific prior written permission.            */
/*                                                                              */
/*  THIS SOFTWARE IS PROVIDED BY THE COPYRIGHT HOLDERS AND CONTRIBUTORS "AS IS" */
/*  AND ANY EXPRESS OR IMPLIED WARRANTIES, INCLUDING, BUT NOT LIMITED TO,       */
/*  THE IMPLIED WARRANTIES OF MERCHANTABILITY AND FITNESS FOR A PARTICULAR      */
/*  PURPOSE ARE DISCLAIMED. IN NO EVENT SHALL THE COPYRIGHT OWNER OR            */
/*  CONTRIBUTORS BE LIABLE FOR ANY DIRECT, INDIRECT, INCIDENTAL, SPECIAL,       */
/*  EXEMPLARY, OR CONSEQUENTIAL DAMAGES (INCLUDING, BUT NOT LIMITED TO,         */
/*  PROCUREMENT OF SUBSTITUTE GOODS OR SERVICES; LOSS OF USE, DATA, OR PROFITS; */
/*  OR BUSINESS INTERRUPTION) HOWEVER CAUSED AND ON ANY THEORY OF LIABILITY,    */
/*  WHETHER IN CONTRACT, STRICT LIABILITY, OR TORT (INCLUDING NEGLIGENCE OR     */
/*  OTHERWISE) ARISING IN ANY WAY OUT OF THE USE OF THIS SOFTWARE,              */
/*  EVEN IF ADVISED OF THE POSSIBILITY OF SUCH DAMAGE.                          */
/* ============================================================================ */

/******************************************************************************/
/* lnk_rf430frl152h.cmd - LINKER COMMAND FILE FOR LINKING RF430FRL152H PROGRAMS     */
/*                                                                            */
/*   Usage:  lnk430 <obj files...>    -o <out file> -m <map file> lnk.cmd     */
/*           cl430  <src files...> -z -o <out file> -m <map file> lnk.cmd     */
/*                                                                            */
/*----------------------------------------------------------------------------*/
/* These linker options are for command line linking only.  For IDE linking,  */
/* you should set your linker options in Project Properties                   */
/* -c                                               LINK USING C CONVENTIONS  */
/* -stack  0x0100                                   SOFTWARE STACK SIZE       */
/* -heap   0x0100                                   HEAP AREA SIZE            */
/*                                                                            */
/*----------------------------------------------------------------------------*/
/* Version: 1.154    (Beta-Build-Tag: #0011)                                  */
/*----------------------------------------------------------------------------*/

/****************************************************************************/
/* Specify the system memory map                                            */
/****************************************************************************/

MEMORY
{
    SFR                     : origin = 0x0000, length = 0x0010
    PERIPHERALS_8BIT        : origin = 0x0010, length = 0x00F0
    PERIPHERALS_16BIT       : origin = 0x0100, length = 0x0100
    RAM                     : origin = 0x1C00, length = 0x1000

    //ROM ISRs, starting points, length not correct
    RF13M_ROM_ISR			: origin = 0x54D0, length = 0x0002

    //FRAM                    : origin = 0xF840, length = 0x0790
    FRAM                    : origin = 0xF868, length = 0x0400
    FRAM_CODE               : origin = 0xFC68, length = 0x0368  // code area, can be increased /  decreased with FRAM, FRAM + FRAM_CODE = 0x768
    JTAGSIGNATURE           : origin = 0xFFD0, length = 0x0004, fill = 0xFFFF
    BSLSIGNATURE            : origin = 0xFFD4, length = 0x0004, fill = 0xFFFF
    INT00                   : origin = 0xFFE0, length = 0x0002
    INT01                   : origin = 0xFFE2, length = 0x0002
    INT02                   : origin = 0xFFE4, length = 0x0002
    INT03                   : origin = 0xFFE6, length = 0x0002
    INT04                   : origin = 0xFFE8, length = 0x0002
    INT05                   : origin = 0xFFEA, length = 0x0002
    INT06                   : origin = 0xFFEC, length = 0x0002
    INT07                   : origin = 0xFFEE, length = 0x0002
    INT08                   : origin = 0xFFF0, length = 0x0002
    INT09                   : origin = 0xFFF2, length = 0x0002
    INT10                   : origin = 0xFFF4, length = 0x0002
    INT11                   : origin = 0xFFF6, length = 0x0002
    INT12                   : origin = 0xFFF8, length = 0x0002
    INT13                   : origin = 0xFFFA, length = 0x0002
    INT14                   : origin = 0xFFFC, length = 0x0002
    RESET                   : origin = 0xFFFE, length = 0x0002
}

/****************************************************************************/
/* Specify the sections allocation into memory                              */
/****************************************************************************/

SECTIONS
{
    GROUP(ALL_FRAM)
    {
       GROUP(READ_WRITE_MEMORY)
       {
          .TI.persistent : {}                /* For #pragma persistent            */
          .cio        : {}                   /* C I/O buffer                      */
          .sysmem     : {}                   /* Dynamic memory allocation area    */
       }

       GROUP(READ_ONLY_MEMORY)
       {
          .cinit      : {}                   /* Initialization tables             */
          .pinit      : {}                   /* C++ constructor tables            */
          .init_array : {}                   /* C++ constructor tables            */
          .mspabi.exidx : {}                 /* C++ constructor tables            */
          .mspabi.extab : {}                 /* C++ constructor tables            */
          .const      : {}                   /* Constant data                     */
       }

       GROUP(EXECUTABLE_MEMORY)
       {
          .text       : {}                   /* Code                              */
       }
    } > FRAM_CODE

    .rf13m_rom_isr		: {} > RF13M_ROM_ISR type = DSECT

    .jtagsignature : {} > JTAGSIGNATURE   /* JTAG Signature                    */
    .bslsignature  : {} > BSLSIGNATURE    /* BSL Signature                     */
    .jtagpassword                         /* JTAG Password                     */

    .bss        : {} > RAM                /* Global & static vars              */
    .data       : {} > RAM                /* Global & static vars              */
    .TI.noinit  : {} > RAM                /* For #pragma noinit                */
    .stack      : {} > RAM (HIGH)         /* Software system stack             */

    /* MSP430 Interrupt vectors          */

    .int00       : {}               > INT00
    .int01       : {}               > INT01
    .int02       : {}               > INT02
    .int03       : {}               > INT03
    .int04       : {}               > INT04
    RFPMM        : { * ( .int05 ) } > INT05 type = VECT_INIT
    PORT1        : { * ( .int06 ) } > INT06 type = VECT_INIT
    SD_ADC       : { * ( .int07 ) } > INT07 type = VECT_INIT
    USCI_B0      : { * ( .int08 ) } > INT08 type = VECT_INIT
    ISO          : { * ( .int09 ) } > INT09 type = VECT_INIT
    WDT          : { * ( .int10 ) } > INT10 type = VECT_INIT
    TIMER0_A1    : { * ( .int11 ) } > INT11 type = VECT_INIT
    TIMER0_A0    : { * ( .int12 ) } > INT12 type = VECT_INIT
    UNMI         : { * ( .int13 ) } > INT13 type = VECT_INIT
    SYSNMI       : { * ( .int14 ) } > INT14 type = VECT_INIT
  	.reset       : {}               > RESET  /* MSP430 Reset vector         */
}

/****************************************************************************/
/* Include peripherals memory map                                           */
/****************************************************************************/

-l rf430frl152h.cmd
However, the code is getting stuck at the line "while(!(UCB0IFG & UCRXIFG0)); // Wait for the RX buffer to be ready"
Can you use a logic analyzer or a scope to capture the waveform on the I2C bus. This will greatly help in debugging. You want to find out if you have provided a correct command on the bus. If you are stuck on UCB0IFG, this means no data has been replied by the slave device. One thing that caught my attention is the slave address you use is 0x76. You wrote UCB0I2CSA = 0x76; // Set the slave address for the sensor. The SH21 has the address equal to 0x40. The stock example also uses 0x40 for the slave address.
Thanks for your feedback. I measured the waveform using an available oscilloscope, but it seems to be showing noise. According to the MS5637 datasheet, the slave address is 1110110x. I tried changing it to 0x40, but the code got stuck at the line before the while(!(UCB0IFG & UCRXIFG0)); // Wait for the RX buffer to be ready. It seems that 0x76 works as the correct slave address. Could you please help me troubleshoot why no data is being shown?
Thank you,
Calibrator signal with an adjusted probe
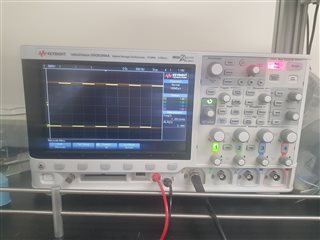
SDA
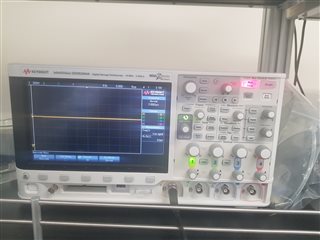
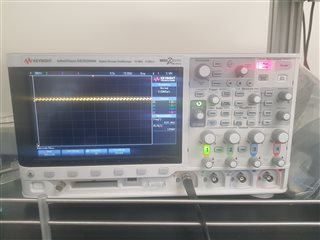
SCL
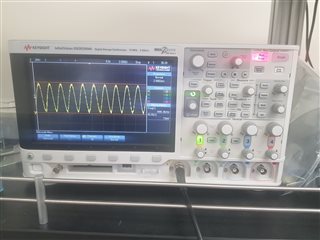
I2C Address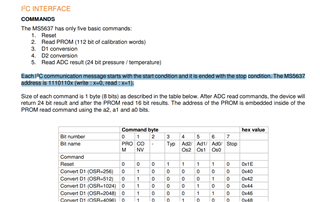
I thought you were using the Sensor Hub BoosterPack. Looks like you are using a different I2C device.
Is the first waveform showing SCL during command write, or data read? I can't tell.
I suppose you make the connections between your device and the EVM for the below terminals on the connectors, right?
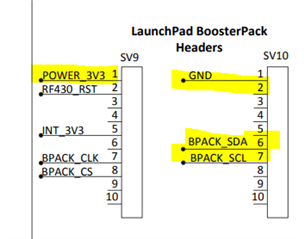
Yes, my bad. I'm using the MS5637 digital pressure sensor (datasheet and Arduino code attached). I assumed that all I2C digital sensors follow the same general connection and coding principles with just minor variations. I used the connections you mentioned: 3.3V, GND, SDA, and SCL.
The scope images show the square calibrator wave of the adjusted probe (not connected to SDA or SCL). Then, there are two images side by side of the SDA signal (with the right side magnified to show the waveform) followed by the SCL signal.
The SCL waveform shows the read data because the code gets stuck after switching to receive mode . Was my assumption incorrect? If so, could you please guide me on how to correctly retrieve the pressure value from this sensor?
Datasheet
ENG_DS_MS5637-02BA03_B5 (3).pdf
Arduino Code
MS5637_Arduino_Library-master.zip
Just following up—please take a look at the attached scope images.
1- RF430FRL152hevm + MS5637(I2C connection)-> Yellow signal is SCL, Green signal is SDA-> code stuck at "while(!(UCB0IFG & UCRXIFG0)); // Wait for the RX buffer to be ready".
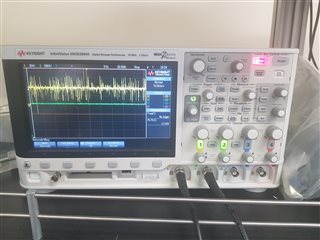
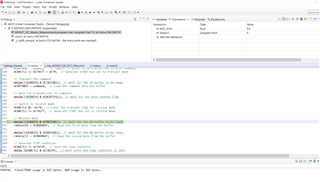
2-Arduino Uno +MS5637(I2C connection)-> Yellow signal is SCL, Green signal is SDA
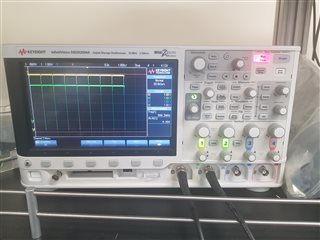
...
I'm not familiar with your MS5637 device. You are calling SHT_21_I2C_Master_Measurement(TEMP_MEASURE_HOLD_MASTER, temp_data) where TEMP_MEASURE_HOLD_MASTER is equal to 0xE3. This is a command for the SH21 device. Are you sure your MS5637 also takes this same command? What is the command sequence for MS5637 to read its sensor? You need to follow the MS5637 datasheet on how to read its sensor?
2-Arduino Uno +MS5637(I2C connection)-> Yellow signal is SCL, Green signal is SDA
This Arduino waveform also has no transactions unless you zoom-out too much. I can't tell what it is. It is just showing some blips.