This thread has been locked.

If you have a related question, please click the "Ask a related question" button in the top right corner. The newly created question will be automatically linked to this question.

CC2651R3: Using the Serial Bootloader from Linux

Part Number: CC2651R3
Other Parts Discussed in Thread: UNIFLASH, LAUNCHXL-CC26X2R1

What is the best way to use the serial boot loader from a program running on a Raspberry Pi?

Here are the three options I'm looking at:

1.) Use the library that comes with the example program referenced by the app note SWRA466D.

  • This is a windows program and would need to be ported to the RPi.

2.) The program cc13xx-sbl.

  • Where can I find this program and documentation for it?
  • Will it work with the CC2651R3?

3.) Uniflash

  • I have succeeded in using the bootloader with the Flash Programmer 2 application.
  • I tried using the same hex I generated for Flash Programmer 2 with Uniflash v7.2 and this failed.
  • Would you expect that the same hex file format should work with both of these tools?
  • If I could get this working then maybe Uniflash could be used from Linux as another option.
  • It would need to be able to be called from another program.

Any suggestions?

  • Hello ZIJWS,

    The cc13xx-sbl project is packaged with the TI-15.4-STACK-GATEWAY-LINUX-SDK and you should find some documentation in its download package.  Slightly relevant E2E thread linked.  It works for CC13X2 and CC26X2 devices but honestly I do not know anyone who has confirmed the CC2651R3 device.  How are you using Uniflash and what error do you get when programming with the hex image fails?

    Regards,
    Ryan

  • Uniflash steps leading to failure (using the LaunchXL-CC26x2R1 as a target):

    1. Launch Uniflash
    2. Select CC2652R1F (BOOTLOADER) in the New Configuration - Choose Your Device.
    3. Select the Start button
    4. Browse to and select hex image file (note this same file works when used with Flash Programmer 2, it is an intel format hex file).
    5. Under Settings & Utilities, set the following:
      1. COM port: set as appropriate for dev board User UART.
      2. Protocol: UART
      3. Communication Bridge UART: XDS Application UART 
      4. UART Speed: 115200
    6. Select the Verbose button on the console
    7. Physically activate the bootloader backdoor and press the reset button.
    8. Select the Load Image button.

    It seems to work at first:

    [6/2/2022, 3:31:25 PM] [INFO] Cortex_M3_0: CC2652R1F(Bootloader)
    [6/2/2022, 3:31:25 PM] [INFO] Cortex_M3_0: {55} {55}
    [6/2/2022, 3:31:25 PM] [INFO] Cortex_M3_0: [00] [CC]
    [6/2/2022, 3:31:25 PM] [INFO] Cortex_M3_0: Auto baud detection is successful!
    [6/2/2022, 3:31:25 PM] [INFO] Cortex_M3_0: {03} {20} {20}
    [6/2/2022, 3:31:25 PM] [INFO] Cortex_M3_0: [00] [CC]
    [6/2/2022, 3:31:25 PM] [INFO] Cortex_M3_0: Ping command is successfully received by target!
    [6/2/2022, 3:31:25 PM] [INFO] Cortex_M3_0: {07} {26} {26} {00} {00} {00} {00}
    [6/2/2022, 3:31:25 PM] [INFO] Cortex_M3_0: [00] [CC]
    [6/2/2022, 3:31:25 PM] [INFO] Cortex_M3_0: {03} {23} {23}
    [6/2/2022, 3:31:25 PM] [INFO] Cortex_M3_0: [00] [CC] [03] [40] [40]
    [6/2/2022, 3:31:25 PM] [INFO] Cortex_M3_0: Erase sector on address :0x0 is succesful!
    [6/2/2022, 3:31:25 PM] [INFO] Cortex_M3_0: {00} {CC}
    [6/2/2022, 3:31:25 PM] [INFO] Cortex_M3_0: {07} {86} {26} {00} {00} {60} {00}
    [6/2/2022, 3:31:25 PM] [INFO] Cortex_M3_0: [00] [CC]
    [6/2/2022, 3:31:25 PM] [INFO] Cortex_M3_0: {03} {23} {23}
    [6/2/2022, 3:31:25 PM] [INFO] Cortex_M3_0: [00] [CC] [03] [40] [40]
    [6/2/2022, 3:31:25 PM] [INFO] Cortex_M3_0: Erase sector on address :0x6000 is succesful!
    [6/2/2022, 3:31:25 PM] [INFO] Cortex_M3_0: {00} {CC}
    [6/2/2022, 3:31:25 PM] [INFO] Cortex_M3_0: {07} {8B} {26} {00} {05} {60} {00}
    [6/2/2022, 3:31:25 PM] [INFO] Cortex_M3_0: [00] [CC]
    [6/2/2022, 3:31:25 PM] [INFO] Cortex_M3_0: {03} {23} {23}
    [6/2/2022, 3:31:25 PM] [INFO] Cortex_M3_0: [00] [CC] [03] [40] [40]
    [6/2/2022, 3:31:25 PM] [INFO] Cortex_M3_0: Erase sector on address :0x56000 is succesful!
    [6/2/2022, 3:31:25 PM] [INFO] Cortex_M3_0: {00} {CC}
    [6/2/2022, 3:31:25 PM] [INFO] Cortex_M3_0: Erasing memory time elapsed: 0.03803s
    [6/2/2022, 3:31:25 PM] [INFO] Cortex_M3_0: {0B} {7E} {21} {00} {00} {00} {00} {00} {00} {5F} {FE}

    ...

    After a bunch of data packets, it fails with the following errors:

    [6/2/2022, 3:31:28 PM] [INFO] Cortex_M3_0: [00] [CC]
    [6/2/2022, 3:31:28 PM] [INFO] Cortex_M3_0: {03} {23} {23}
    [6/2/2022, 3:31:28 PM] [INFO] Cortex_M3_0: [00] [CC] [03] [44] [44]
    [6/2/2022, 3:31:28 PM] [ERROR] Cortex_M3_0: [ERROR_MESSAGE]Send command to address: 0x0 with programming size : 0x82 is failed! Status: [ERROR_MESSAGE]Failing erasing or programming operation!
    [6/2/2022, 3:31:28 PM] [ERROR] Cortex_M3_0: [ERROR_MESSAGE]Programming is failed!
    [6/2/2022, 3:31:29 PM] [INFO] Cortex_M3_0: {0B} {D0} {21} {00} {00} {60} {00} {00} {00} {03} {4C}
    [6/2/2022, 3:31:29 PM] [INFO] Cortex_M3_0: [FF] [FF]
    [6/2/2022, 3:31:29 PM] [ERROR] Cortex_M3_0: [ERROR_MESSAGE]Programming is failed!
    [6/2/2022, 3:31:29 PM] [ERROR] Cortex_M3_0: [ERROR_MESSAGE]File format is not supported!

  • The log proves that you are able to enter bootloader mode on the device, however it appears that the Uniflash tool is having trouble with the file format.  I'm experiencing similar issues which is unexpected since hex and txt files should be supported according to the QSG and slau799.  What version of Uniflash are you testing with?  I will contact the tool developers to determine whether they are aware of this problem and know of a solution.

    Regards,
    Ryan

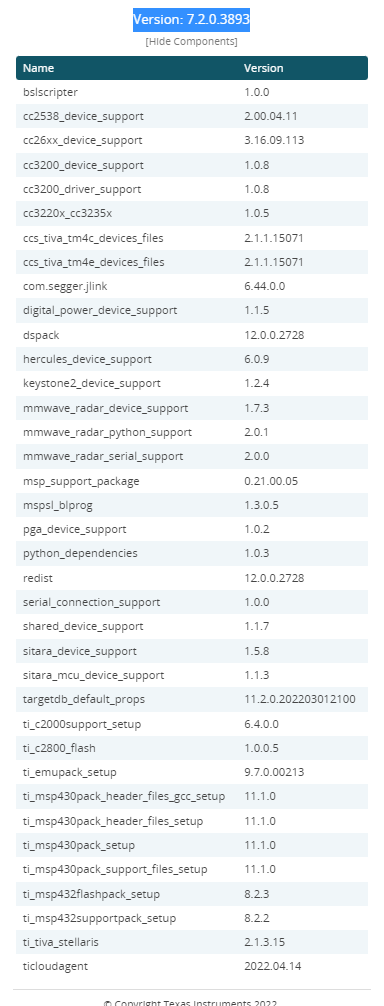
  • The Uniflash version is 7.2.0.3893.

  • Thanks for confirming, meanwhile I recommend that you evaluate another option for accessing the SimpleLink device's bootloader.

    Regards,
    Ryan