This thread has been locked.
If you have a related question, please click the "Ask a related question" button in the top right corner. The newly created question will be automatically linked to this question.
Hi, support team
My customer has the questions as follow:
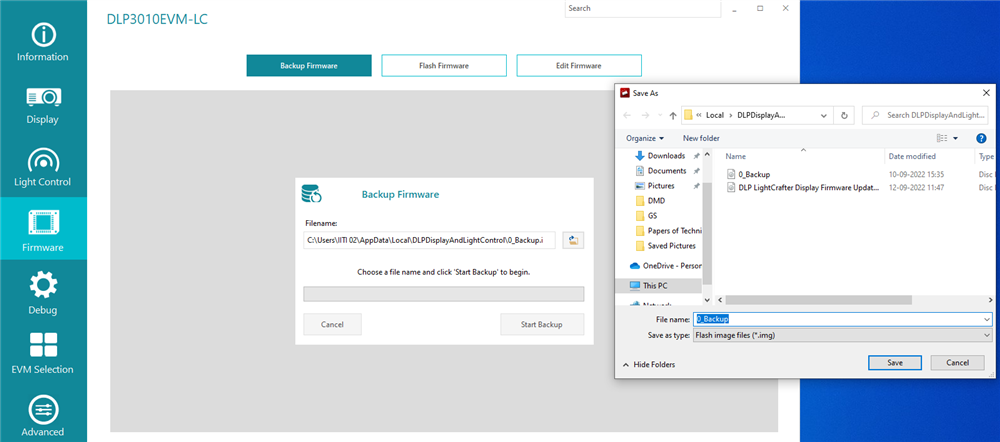
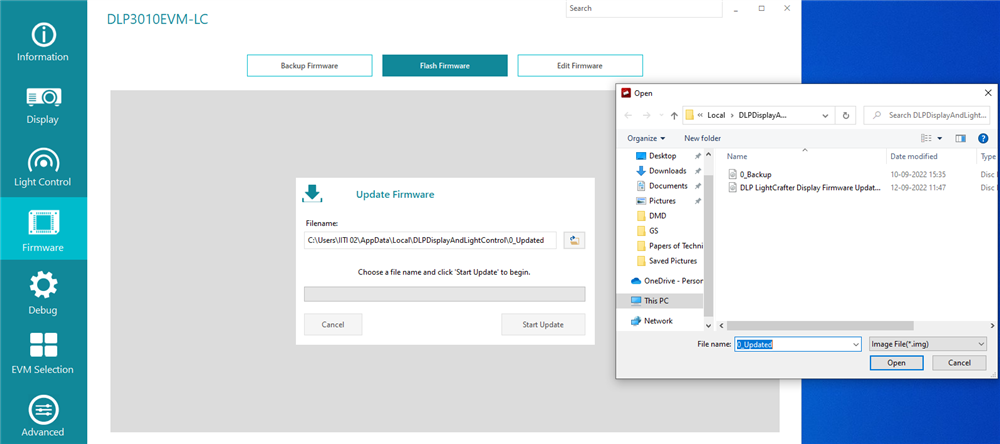
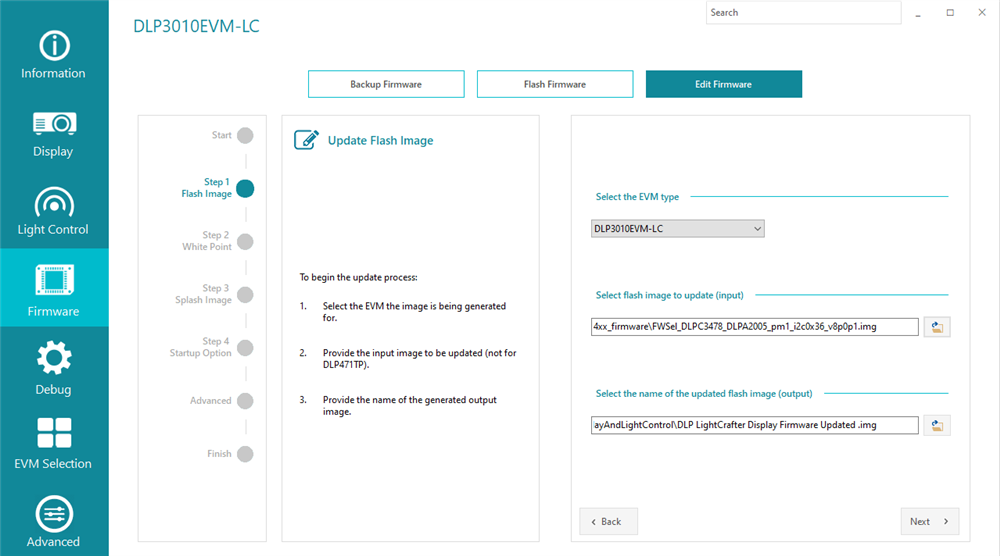
Our research group has purchased DLP3010EVM-LC. We have to add an image to DLP from Windows PC. The GUI has been installed.
1. How can I permanently move that Image to DLP memory?
2. Can I delete the existing images in the DLP memory and replace with my image?
Is it related to the firmware that I have also installed a firmware for DLP3010 ? I don't what is the next step to be done.
Things I've installed is attached herewith.
3. Do you know what are files I need to choose in the following 3 images:
Thanks so much.
Best regards,
Yuki
Hi Yuki,
Welcome back to E2E forum!
For clarify, does the customer want to replace the existing splash image with their image?
If I understand correct, please follow the steps below:
1. It's recommended to backup of the existing firmware before updating a new firmware, just in case you need to go back to the previous firmware. Go to the Backup Firmware page, click the browse button to select the file name and location of the backup flash image file and click the Start Backup button. After a successful backup, the .img file should be saved to the location.
2. Go to Edit Firmware page, click Start. Step1: Select the EVM type: DLP3010EVM-LC (in your case); Select flash image to update (input): can be a exiting .img file; Select the name of the updated flash image (output): giving a name to the new .img file. Step 2: Edit the White Point - RGB Duty cycle if needed. Step 3: click the browse button to select the splash images you would like to insert (need to attention the supported image size). Or you are able to remove the factory default splash images. Step 4: Edit Startup Option if needed. Advanced: follow the instruction to upload Batch files if needed. After finishing editing the new flash image, the GUI would generate the new .img file with the name and location you edit in Step 1.
3. Go to Update Firmware page, click the browse button to select the flash image file you saved in previous step, and then click the Start Update button.
After these steps, the EVM should be able to display the custom Splash image.
For more information about the GUI, please refer to the DLP EVM GUI Tool Users Guide: https://www.ti.com/lit/ug/dlpu112/dlpu112.pdf?ts=1663255532861&ref_url=https%253A%252F%252Fwww.ti.com%252Ftool%252FDLPDLC-GUI
Regards,
Lori
Hi Lori ,
Thanks so much for your professional answer.
My customer has one more question:
"I want another light source(may be a laser, similar to this case : e2e.ti.com/.../dlp3010evm-lc-removing-the-dmd) as input light to the DMD. So can I superimpose the updated splash image like this after removing the DMD?"
Best Regards,
Yuki
Hi Yuki,
Yes, it's possible to use another light source and use GUI to control it. Please follow the instructions mentioned in the thread you linked carefully to avoid DMD damage. We will not able to support the modified EVM if it's damaged.
Thanks,
Lori