A related question is a question created from another question. When the related question is created, it will be automatically linked to the original question.
If you have a related question, please click the "Ask a related question" button in the top right corner. The newly created question will be automatically linked to this question.
[FAQ] RM57L843: Describing step by step procedure to use Ethernet Bootloader in static IP for Hercules device (RM57x)
The first project is ethernet bootloader, and the second project is LED blinky project which will blink two user LED's on launchpad for every one second.
I will explain what are the steps i followed to work with ethernet bootloader, here i performed static IP method instead of using DHCP
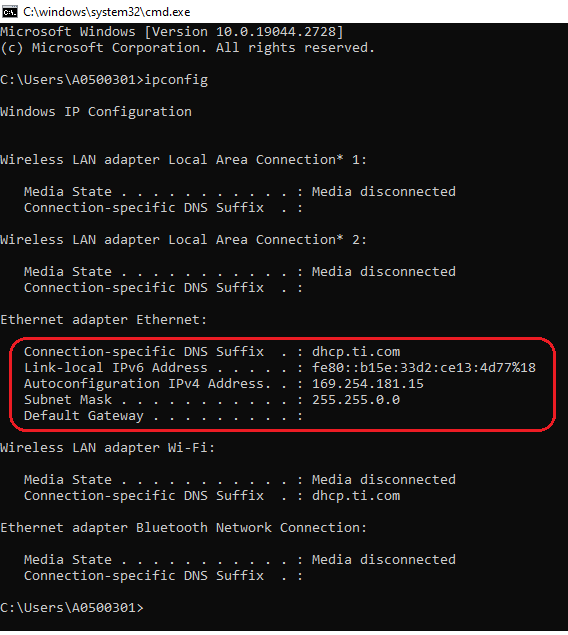
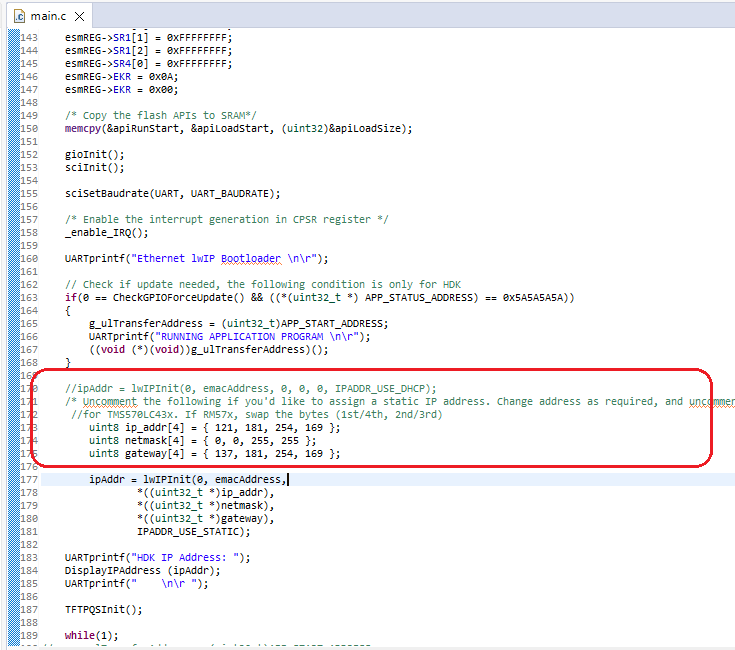
1. First configure proper static ip, subnet mask to the target board based your PC ipconfig
For example
My PC ipconfig is here.
So, i configured my target PC static ip, subnet mask as follow.
2. Now build the ethernet bootloader code and program it into the Target board. Once programming is successful connect a ethernet cable between your PC and target board.
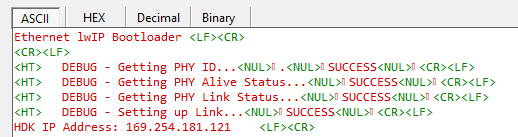
3. Now reset the board then you should get below data in serial port.
Note: Here serial configuration is, baud rate-19200, stop bits-2 and No parity
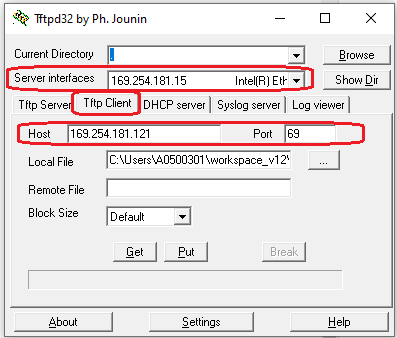
4. So static ip got assigned to the board, now open Tftpd32 tool to program the application through ethernet bootloader.
5. Do below configuration in Tftpd32 tool
At server interface, select your PC ip address. And select Tftp client menu, also give target ip at Host field and give port number as 69.
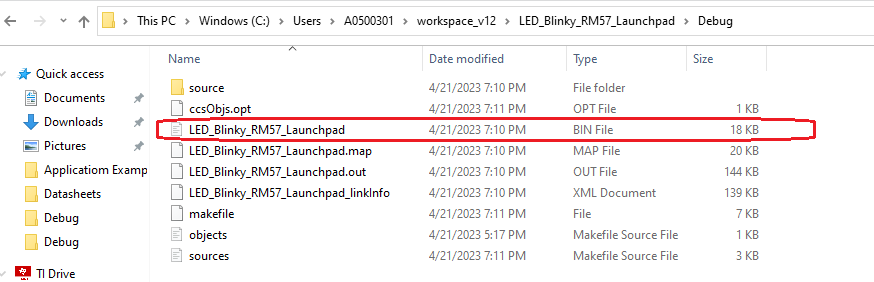
6. Once you did the proper configuration in Tftpd32 tool now select binary file path at local file field
This should be the binary file of the application you want to program through ethernet. In this case the binary file i provided in example application.
7. Once you select the binary file now you can click on "put" option to send binary file over ethernet.
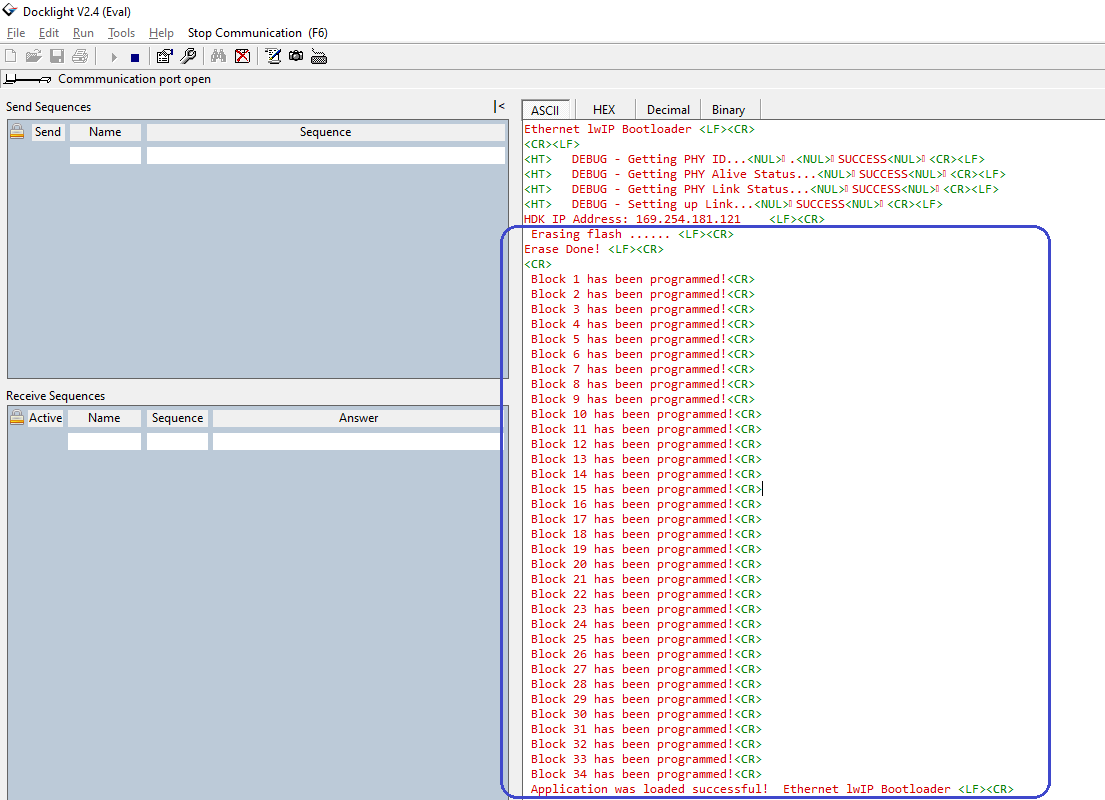
8. Now you can see the target board programming steps through serial port as below
It will erase the necessary sectors in the flash to program the application and it program the flash in blocks wise.
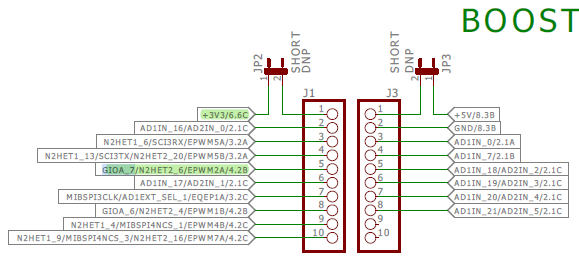
9. Once programming the application, now make sure to connect GIO_A7 to the 3.3v
As i am using launchpad i shorted J1 connector 1st and 5th pin.
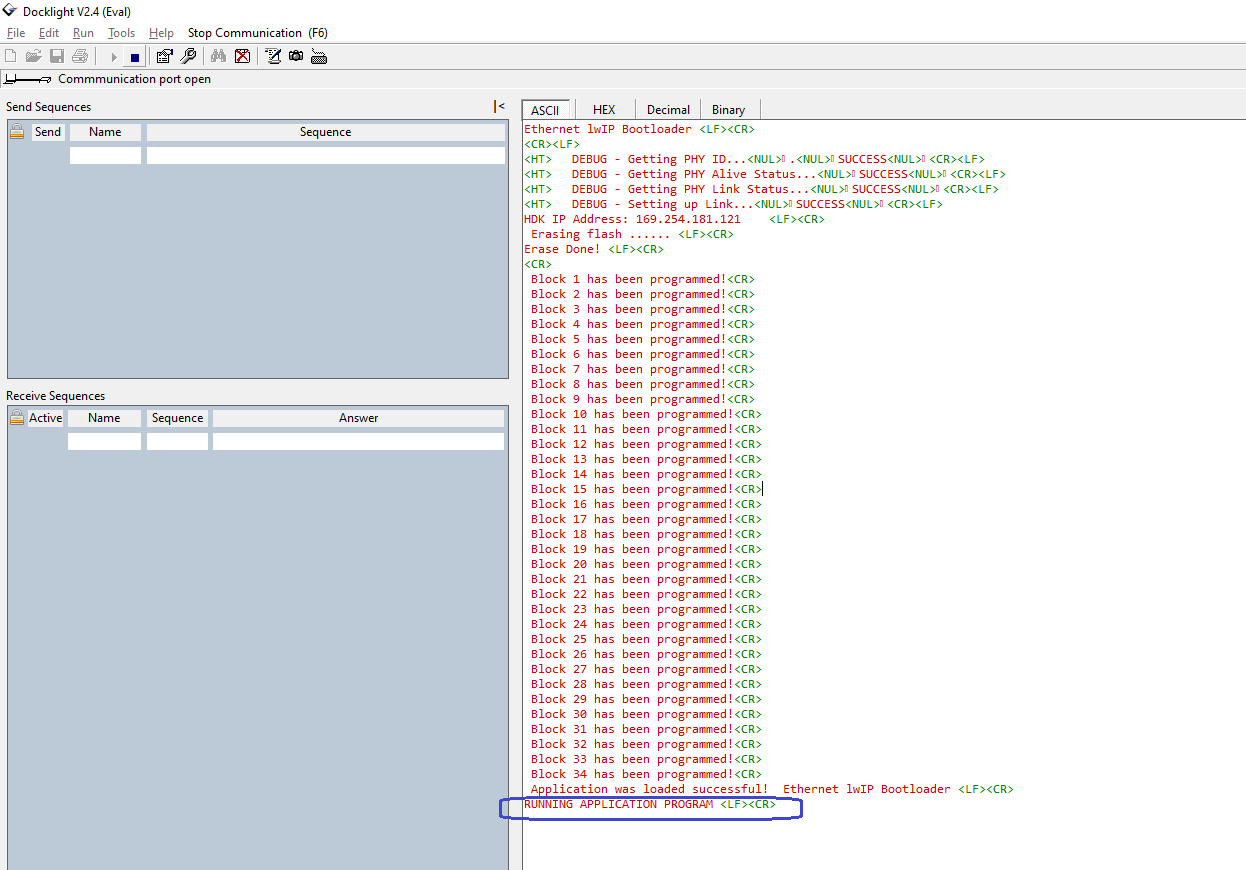
10. Once you short GIO_A7 to the 3.3v then now reset the board to run application code by ethernet bootloader
And user LED's should blink on launchpad.
Here i used static IP right, if you want you can connect PC and target board to the router and assign dynamic IP's and can perform the step 3 onwards.