This thread has been locked.

If you have a related question, please click the "Ask a related question" button in the top right corner. The newly created question will be automatically linked to this question.

DLPDLCR230NPEVM: Init_Parallel_Mode Displays Black Screen

Part Number: DLPDLCR230NPEVM

Hello,

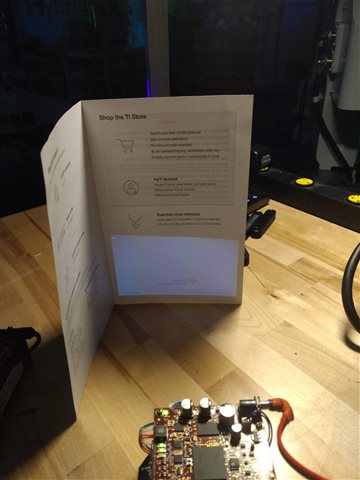
I have recently been trying to use the the DLPDLCR230NPEVM. When I run the python script init_parallel mode, I get a black screen with a single dot in the upper left hand corner. I am NOT running my PI in headless mode. I have configured my raspberry pi setup + DLP accordingly and tried the following:

1.) I used the provided TI config with the minimum frame rate settings

2.) I have installed WiringPI + enabled i2c on my raspberry pi. I'm relatively confident that the i2c.py script has been modified to reflect the respective /dev/i2c-**

3.) I have disabled screen blanking on my raspberry pi

4.) I have reflashed the firmware and img on the dlp controller + fpga

5.) I can cycle through all the test pattern images in the sample scripts provided

6.) I've messed around a little with the GPIO drive strength, however I do not think that is the issue?

7.) Ive tried specifying my export DISPLAY=:0. This did not change the behavior

I've taken a break from using this product for about a year, have come back to using it, and have both a newer + an older DLPDLCR230NPEVM. I had previously gotten the older DLP to work, but with a new set of Raspberry Pi's I am unable to get them to work... I've attached an image of the behavior. Any help or ideas is appreciated...

Thanks,

Tadek

  • Hello Tadek, 

    Welcome back to the E2E forum. Thank you for your continued business!

    Is the single white dot seen only when running the init_parallel mode script? Do all other python scripts produce the expected output?

    Best,

    Maxine

  • Maxine,

    The other python scripts do work as expected (albeit without being able to revert back to the Raspberry PI display). The white dot only appears when running Init_Parallel_Mode.py. I have additionally attached the output of the status python script to this post.

    Thanks,

    Tadek

  • Hello Tadek,

    What edits, if any, were made to the TI config file? A change to the frame rate can cause the visual artifact that you're seeing. 

    I ask that you try running your system at each of the standard frame rates, 58Hz-61Hz, with an unedited config file and the appropriate drive strengths. Are your results the same? Refer the DLPC230NP EVM User's Guide, section 9 for details.

    Best,

    Maxine

  • Maxine,

    I used the config file provided by TI in the python support code. For verification I have attached it to this message. I have tried changing the GPIO drive strengths and the timings. Neither worked, and the results are the same.

    3005.config.txt
    # For more options and information see
    # http://rpf.io/configtxt
    # Some settings may impact device functionality. See link above for details
    
    # #########################################
    # DO NOT MODIFY THE LINES BELOW THIS POINT
    # #########################################
    
    # uncomment if you get no picture on HDMI for a default "safe" mode
    #hdmi_safe=1
    
    # uncomment this if your display has a black border of unused pixels visible
    # and your display can output without overscan
    disable_overscan=1
    
    # uncomment the following to adjust overscan. Use positive numbers if console
    # goes off screen, and negative if there is too much border
    #overscan_left=16
    #overscan_right=16
    #overscan_top=16
    #overscan_bottom=16
    
    # uncomment to force a console size. By default it will be display's size minus
    # overscan.
    #framebuffer_width=1280
    #framebuffer_height=720
    
    # uncomment if hdmi display is not detected and composite is being output
    hdmi_force_hotplug=1
    
    # uncomment to force a specific HDMI mode (this will force VGA)
    hdmi_group=2
    hdmi_mode=82
    
    # uncomment to force a HDMI mode rather than DVI. This can make audio work in
    # DMT (computer monitor) modes
    #hdmi_drive=2
    
    # uncomment to increase signal to HDMI, if you have interference, blanking, or
    # no display
    config_hdmi_boost=4
    
    # uncomment for composite PAL
    #sdtv_mode=2
    
    #uncomment to overclock the arm. 700 MHz is the default.
    #arm_freq=800
    
    # Additional overlays and parameters are documented /boot/overlays/README
    
    # Enable audio (loads snd_bcm2835)
    dtparam=audio=on
    
    # Uncomment this to enable infrared communication.
    #dtoverlay=gpio-ir,gpio_pin=17
    #dtoverlay=gpio-ir-tx,gpio_pin=18
    
    # #########################################
    # DO NOT MODIFY THE LINES ABOVE THIS POINT
    # #########################################
    
    # Uncomment some or all of these to enable the optional hardware interfaces
    #dtparam=i2c_arm=on
    #dtparam=i2s=on
    dtparam=spi=on
    
    # Configure Raspberry PI for SSH over USB
    dtoverlay=dwc2
    
    # Configure I2C on GPIO Pins #22 and #23
    dtoverlay=i2c-gpio,i2c-gpio_sda=23,i2c_gpio_scl=22,i2c_gpio_delay_us=2
    
    # Configure DPI on GPIO Pins #0 through #21
    gpio=0=op
    gpio=0=pn
    gpio=1-27=ip
    gpio=1-27=pn
    
    
    # Enable DPI18 Overlay
    enable_dpi_lcd=1
    display_default_lcd=1
    dpi_group=2
    dpi_mode=87
    
    # Configure DPI Video Timings
    # RGB 666 CFG 1 (MODE 5)
    dpi_output_format=458773 
    
    # 58 Hz Timings (Low-End Spec)
    # Works at GPIO DRIVE 5-7
    hdmi_timings=1920 0 20 10 10 1080 0 10 10 10 0 0 0 61 0 125000000 3
    
    # NOTE: GPIO PINS #24 - #27 ARE DRIVEN SEPARATELY BY WiringPi SOFTWARE
    
    [pi4]
    # Enable DRM VC4 V3D driver on top of the dispmanx display stack
    #dtoverlay=vc4-fkms-v3d
    #max_framebuffers=2
    
    [all]
    #dtoverlay=vc4-fkms-v3d
    

    Thanks,

    Tadek

  • Hello Tadek,

    It is possible that this new system requires a different set-up process. Please follow along with this set-up guide and then run the script again.

    Best,

    Maxine

  • Maxine,

    I have fixed the issue. I reverted back to a legacy version of raspbian. The new versions of raspbian do NOT work (I am not sure why -maybe because wiringpi is no longer supported/maintained??). Please update the documentation to reflect the necessary dependencies.

    Tadek

  • Tadek,

    Thank you very much for the information. We will denote this in our documentation going forwards.

    Best,

    Maxine